Showing posts with label Bon Appetit. Show all posts

Monday, December 27, 2010

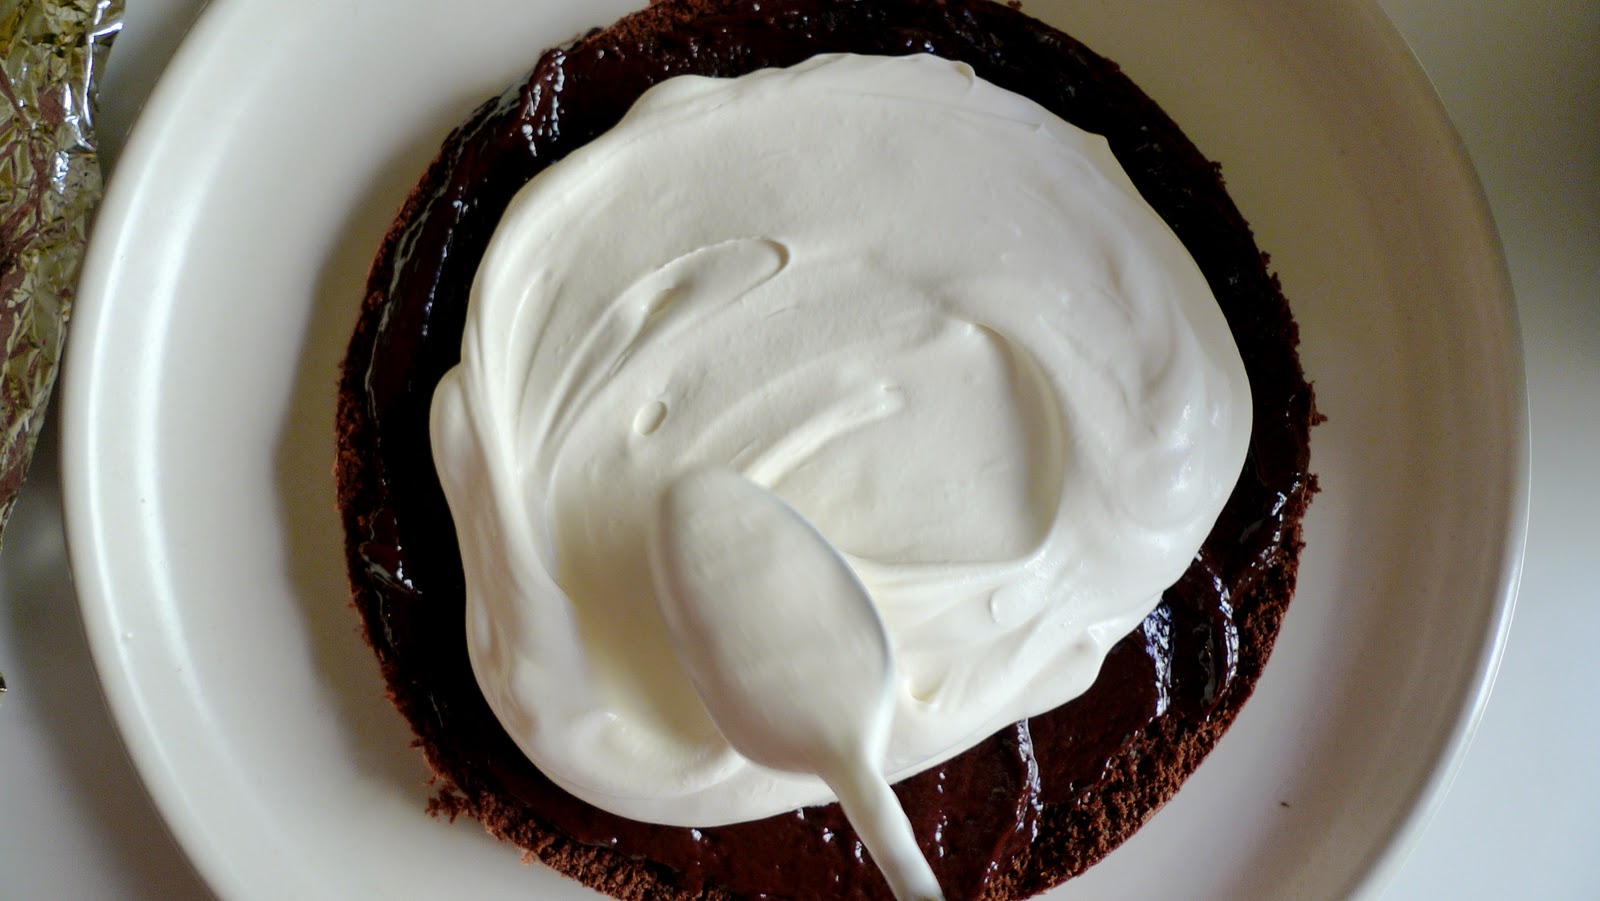
Take Two: Devil's Food Layer Cake with Peppermint Frosting

Matt is Jewish and as recently as last year asked, "Christmas is always the third Thursday of December, right?" With questions like these, I feel a special obligation to share my Christmas traditions with him while at the same time, with our jobs keeping us from traveling home for the holidays, a certain freedom to drop the ones I never liked in the first placelike everyone disbanding into separate rooms moments after the presents were opened and the (perhaps somewhat related) complete absence of champagne or mulled cider or holiday cocktails of any kind.

And so, with some traditions stricken from the record, I realized that we had space to create some new ones of our very own. For example, last year, with my brother visiting from North Carolina, we thought it might be fun for each person to contribute one dish to Christmas dinner. And so, Christmas dinner became a small, three-dish potluck, or as Matt referred to it, "a weird hodge podge of foods." Needless to say, it didn't stick. So, this year, we decided to go back to something we tried out two years ago and have been thinking about ever since.

Bon Appetit's version:

our 2008 version:

our 2010 version:
Truth is, I've been thinking about remaking a lot of the early appetempts. Some of them are just plain jenkyOrange Polenta Cake, Mushroom Turnover, just to name a few. I'd like to think that for those early posts, the blog and I were still finding our voice and aesthetic. But there was one attempt that cast a large shadow over the others. It was the very first one, the first fail, the impossible cake that birthed Bon Appetempt. If I was going to move forward, I knew I'd have to deal with the past, and that meant retrying my hand at the Devil's Food Layer Cake with Peppermint Frosting.

Though the above slice looks a little anemic and isn't standing upright as we hoped (Wasn't gonna happen.), the cake as a whole survived. Even after we sliced it. (See below.)
Over the past two years, I had really built up the challenge that was this mega-cake. But on Christmas Eve, as I finally rolled up my sleeves and began the two-day process, I kept thinking of the advice Anne Lamott's father gave to her brother in her book, Bird by Bird. The title comes from an anecdote Lamott tells about her ten-year-old brother who had had three months to put together a massive book report on birds, but had only just begun working on it the day before it was due. He was frantic and stressed. And her dad's advice? "Just take it bird by bird."

After all, I was reminded, I had bird-by-birded this thing two years ago when I knew nothing about making cakes. And two years later, the behemoth came together quite nicely—the only real failing arriving when trying to plate the perfect slice for the photo. (It should be noted that the cake is enormous. It weighs about 15 lbs and is roughly the size of a microwave oven.)

Time will tell, but I have a feeling this tradition will stick. It's a major crowd-pleaser and putting it together is the sort of undertaking one looks forward to exactly once a year.

p.s. My Christmas iPad from Matt came in handy.
Happy Holidays! See you in the new year!

Recipe via Bon Appetit:

ingredients:
cake
2 2/3 cups all purpose flour
1 tablespoon baking powder
1 teaspoon baking soda
1 teaspoon salt
2 1/4 cups sugar
1 cup (2 sticks) unsalted butter, room temperature
3 large eggs
1 large egg yolk
1 1/4 cups unsweetened cocoa powder, sifted
2 cups ice water

Dark chocolate ganache
1 1/3 cups heavy whipping cream
2 tablespoons light corn syrup
14 ounces bittersweet chocolate, chopped

white chocolate cream

12 ounces high-quality white chocolate (such as Lindt or Perugina), finely chopped
3 cups chilled heavy whipping cream, divided
1 1/2 teaspoons pure peppermint extract

peppermint frosting
2 1/4 cups sugar
1/2 cup water
3 large egg whites
1 tablespoon light corn syrup
1/2 teaspoon pure peppermint extract
Bittersweet chocolate curls

Preparation

Cake

Position rack in center of oven; preheat to 350°F. Butter two 9-inch-diameter cake pans with 2-inch-high sides. Dust pans with flour; tap out excess. Whisk first 4 ingredients in medium bowl to blend. Using electric mixer, beat sugar and butter in large bowl until well blended. Beat in eggs 1 at a time, beating well after each addition. Beat in yolk. Add cocoa and beat until well blended. Add flour mixture in 3 additions alternately with ice water in 2 additions, beginning and ending with flour mixture and beating until just blended and smooth after each addition. Divide batter between prepared pans; smooth tops.

Bake cakes until tester inserted into center comes out clean, about 40 minutes. Cool cakes in pans on racks 15 minutes. Invert cakes onto racks and cool completely. DO AHEAD Can be made 1 day ahead. Wrap in foil; store at room temperature.

Dark chocolate ganache
Bring cream and corn syrup to simmer in medium saucepan. Remove from heat; add chocolate and whisk until melted and smooth. Transfer to small bowl. Chill until firm enough to spread, about 1 hour. DO AHEAD Can be made 1 day ahead. Before using, let stand at room temperature until soft enough to spread, about 30 minutes.
White chocolate cream
Place white chocolate in large heatproof bowl. Bring 1 cup cream to simmer in saucepan. Pour hot cream over white chocolate. Let stand 1 minute; whisk until smooth. Whisk in extract. Cover; chill until mixture thickens and is cold, at least 4 hours. DO AHEAD Can be made 1 day ahead. Chill.

Add 2 cups chilled cream to white chocolate cream and beat until smooth and peaks form. DO AHEAD Can be made 3 hours ahead. Cover and chill. Rewhisk to thicken, if necessary, before using.

Using long serrated knife, cut each cake horizontally in half. Place 1 cake layer on platter, cut side up. Spread 1/3 of dark chocolate ganache over cake. Spoon 2 cups white chocolate cream in dollops over cake; spread evenly to edges. Top with second cake layer, cut side down; spread 1/3 of ganache over, then 2 cups white chocolate cream. Repeat with third cake layer, cut side up, remaining ganache, and remaining cream. Cover with fourth cake layer, cut side down. Chill while preparing frosting.
Peppermint frosting
Combine sugar, 1/2 cup water, egg whites, and corn syrup in large bowl of heavy-duty stand mixer. Whisk by hand to blend well. Set bowl with mixture over saucepan of gently simmering water; whisk constantly with hand whisk until mixture resembles marshmallow creme and ribbons form when whisk is lifted, 8 to 9 minutes. Whisk in peppermint extract. Remove bowl from over water and attach bowl to heavy-duty stand mixer fitted with whisk attachment. Beat on high speed until mixture is barely warm to touch and very thick, 7 to 8 minutes.

Using offset spatula and working quickly, spread frosting over top and sides of cake. Sprinkle chocolate curls over top and sides. DO AHEAD Can be made 1 day ahead. Cover with cake dome; chill.

Sunday, November 28, 2010

Giving Thanks: Golden Brown Butter and Pecan Praline Tart

It's the season of giving thanks, and truth be told, I'm feeling quite grateful for many things, one of which is you, my fair Bon Appetempt reader! All morning, I'd been searching for a funny, non-cheesy way to tell you this, but was coming up blank. It was a seriously gorgeous November day in Los Angeles—crisp-aired, chilly but sunny—and so I decided to take a break and go for a walk around my neighborhood, hoping this might help inspire. And about fifteen minutes in, I came across this strange contraption:
Do you see what's happening here? It's a tree being very much supported by a metallic, yellow arm a.k.a. the West Hollywood Street Maintenance. It's like a crutch for the tree. Plus, they literally moved the sidewalk to go around the OUTSIDE of the tree, and then gave it a nice yellow crutch just because.

Enter West Hollywood Street Maintenance metaphor:
No, I didn't knock down the one orange and white striped stand thing just to make fun of my lovely mother for not reading the blog. It was way down (much like my parents' readership) when I happened upon it.

OK, now. Moving on to Thanksgiving!

If ever there was an exact opposite of Marilyn's liver-y stuffing, it was this pecan tart. Instead of laborious egg peeling, vegetable chopping and liver boiling, there was a press-in crust, pecans, and some butter-browning. Instead of the appetite-crushing wet dog smell, the apartment filled with the warmth of toasted pecans and melted butter. And no tart pan? No problem. I used the springform one I acquired for the Ina Garten cheesecake attempt. Also, I couldn't find the golden syrup the recipe called for, but substituted (the ever present) corn syrup without issue.

Bon Appetit's version:

Jeanne Kelley / Recipe creator's version

our version:
By the way, many thanks to Jeanne Kelley, who I ran into the day after I'd made Marilyn's stuffing and who must have seen the disappointment in my face when I described the dish to her because as I went on to explain I was looking for a good pecan pie recipe, she mentioned this one. She could tell I needed an unfussy success, something that would inevitably deliver. And well, just look at that tart.
While making the pie, I also recommend fixing yourself a virgin (or otherwise) Bloody Mary with the brine left over from McClure's Spicy Picklespictured above on the left. That's the brown butter on the right. (Don't drink that.)

Thanksgiving dinner was very special. We spent it with some of our very talented and culinary-minded friends whose guest attempt is soon to come(!).
Food, friends, (football?), fizzy wine, and a fire equaled one of my favorite Thanksgivings to date. So many thank yous to everyone!

Recipe via Bon Appetit
Ingredients
crust
3/4 cup (1 1/2 sticks) unsalted butter
1 1/4 cups unbleached all purpose flour
1/4 cup (packed) golden brown sugar
1/2 teaspoon salt

filling
1 large egg
1/2 cup (packed) golden brown sugar
1/2 cup golden syrup (such as Lyle's Golden Syrup)
1/4 cup heavy whipping cream
1/4 teaspoon salt
1 cup coarsely chopped pecans, toasted

special equipment
9-inch tart pan with removable bottom (Bon Appetempt note: Don't sweat it if you don't have one. The removable bottom and tart-shape are are mainly for the presentation factor.)

The Technique: Press-In Crust
A press-in crust eliminates the (sometimes tricky) steps of rolling out the dough and transferring it to the tart pan. Instead of rolling, just combine the crust ingredients and press the sandy, crumbly mixture onto the tart pan. Start in the middle and work outward, or—if you're concerned about running out of crust as you go up the sides—start with the edges and work inward. That way, you'll have plenty of dough to form edges of uniform thickness for a pretty presentation.

Ingredient info
Look for golden syrup at some supermarkets and at specialty foods stores.

Preparation
crust
Cook 3/4 cup butter in heavy small saucepan over medium heat until butter turns golden brown (nut-colored), watching carefully to prevent burning, about 4 minutes. Remove from heat. Pour melted brown butter into 1-cup glass measuring cup. Let melted butter stand until barely warm, 15 to 20 minutes.

Meanwhile, position rack in center of oven and preheat to 375°F. Butter bottom and sides of 9-inch-diameter tart pan with removable bottom. Whisk flour, brown sugar, and salt in medium bowl to blend. Add 1/2 cup of barely warm melted brown butter and stir with fork until moist dough forms (mixture will resemble wet sand). Transfer dough to prepared tart pan. Using fingertips, press dough firmly and evenly onto bottom and up sides of pan (dough will look glossy). Let crust rest 5 to 10 minutes at room temperature. Bake crust until set and just golden brown, 15 to 18 minutes.

Filling
Meanwhile, whisk egg and brown sugar in medium bowl until well blended. Whisk in golden syrup, whipping cream, and salt. Stir in remaining melted brown butter, leaving most of darkened solids behind in bottom of measuring cup. Stir in pecans. Pour filling into warm crust, distributing pecans evenly.

Bake tart until filling is browned and slightly puffed and set at edges (center will still move slightly when pan is gently shaken), 25 to 27 minutes. Cool tart completely in pan on rack (center of filling will set as tart cools). DO AHEAD: Can be made 1 day ahead. Cover loosely and store at room temperature.

Sunday, September 5, 2010

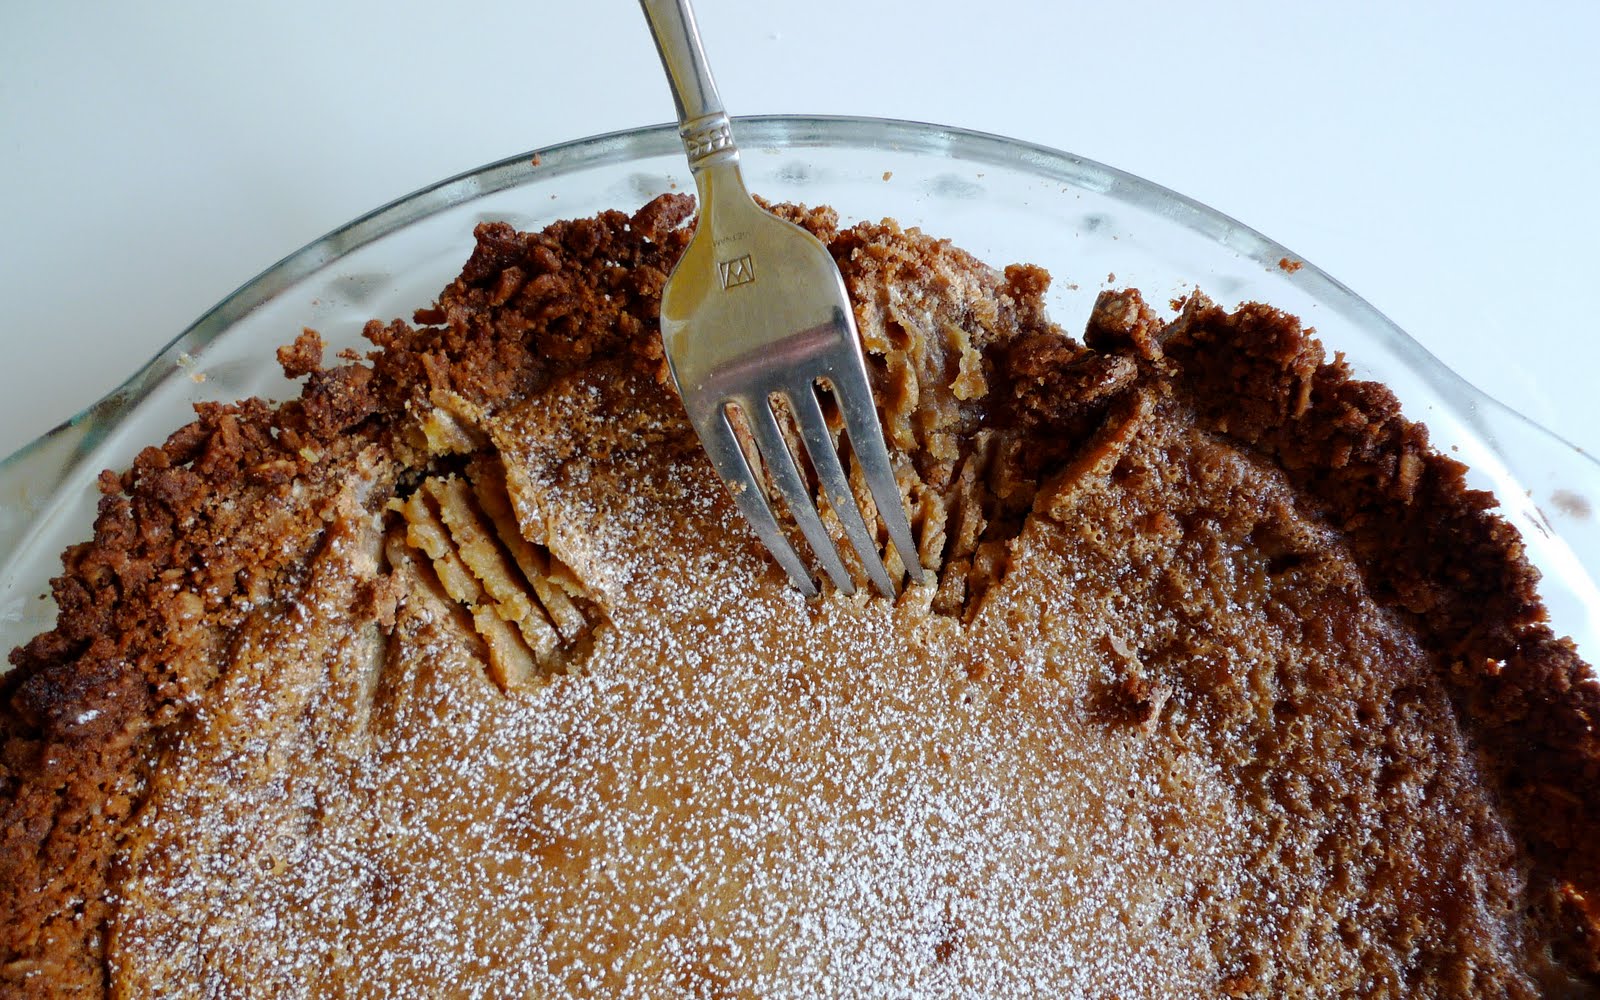
Crack Pie

Remember when we made Momofuku's shrimp and grits? The our version photo is still Matt's screensaver. So you can imagine our excitement when this month's Bon Appetit arrived in our mailbox with a feature story on Momofuku's pastry chef, Christina Tosi. The Chocolate Malt Cake looked insane, but Matt was pushing hard to make the Crack Pie, so hard in fact, that he offered to make it. So this one is brought to us by Matthew.

photo in magazine by Christopher Griffith

our version:
I must say that I really loved the food styling by Bon Appetit on this one. They've made the pie look kind of mangled and roughed up, as if the pie were saying: Hi. I'm CRACK PIE. I'm not the prettiest dessert you're ever going to make. But you know what? I'm good. Real good. AND I've got fork marks all up in me.

The good news is that making crack pie is fairly simple. The bad news is that it requires about 24 hours to make. So no fix can be immediately satisfied when cooking up some crack [pie].

Step one: Make a giant oatmeal cookie.
Step two: After cookie has baked and cooled, destroy it. While doing this, Matt turned to me and said: "I've destroyed something beautiful." Luckily, the crumbled remains of the giant, oatmeal cookie are repurposed into something equally beautiful—amazing pie crust.
Step three: Make the filling.
I actually think a key component to enjoying this is having someone else to make it for you. Let's just say the mere sight of how much sugar and butter goes into crack pie is enough to to start ruining the enjoyment of eating it later.

The pie comes out of the oven golden brown and bubbling. It smells amazing. The only problem is, once again, you cannot eat it right away. The final step has you cooling the pie overnight. (Why are you denying us hot/room-temp crack pie, Christina Tosi??)
The following afternoon:
Crack pie is good. Very good. Borderline amazing, and according to Matt, it's his new "favorite dessert of all time." It tastes a lot like pecan pie minus the pecans with a little of the St. Louis Gooey Butter Cake mixed in. The only problem with this dessert is the self loathing that comes with eating as much of it as we did over a three day period. My recommendation is to make this when entertaining, or even better, when you're going to a friend's for dinner so that you can leave the pie there with them. Kind of like what you do with crack cocaine. JUST kidding. Don't do drugs, people. Make pie.

p.s. Thanks, MATT!

RECIPE via Bon Appetit

Oat Cookie Crust
Nonstick vegetable oil spray
9 tablespoons (1 stick plus 1 tablespoon) unsalted butter, room temperature, divided
5 1/2 tablespoons (packed) golden brown sugar, divided
2 tablespoons sugar
1 large egg
3/4 cup plus 2 tablespoons old-fashioned oats
1/2 cup all purpose flour
1/8 teaspoon baking powder
1/8 teaspoon baking soda
1/4 teaspoon (generous) salt

Filling
3/4 cup sugar
1/2 cup (packed) golden brown sugar
1 tablespoon nonfat dry milk powder
1/4 teaspoon salt
1/2 cup (1 stick) unsalted butter, melted, cooled slightly
6 1/2 tablespoons heavy whipping cream
4 large egg yolks
1 teaspoon vanilla extract
Powdered sugar (for dusting)

Preparation

Oat Cookie Crust
Preheat oven to 350°F. Line 13x9x2-inch metal baking pan with parchment paper; coat with nonstick spray. Combine 6 tablespoons butter, 4 tablespoons brown sugar, and 2 tablespoons sugar in medium bowl. Using electric mixer, beat mixture until light and fluffy, occasionally scraping down sides of bowl, about 2 minutes. Add egg; beat until pale and fluffy. Add oats, flour, baking powder, baking soda, and salt and beat until well blended, about 1 minute. Turn oat mixture out onto prepared baking pan; press out evenly to edges of pan. Bake until light golden on top, 17 to 18 minutes. Transfer baking pan to rack and cool cookie completely.

Using hands, crumble oat cookie into large bowl; add 3 tablespoons butter and 1 1/2 tablespoons brown sugar. Rub in with fingertips until mixture is moist enough to stick together. Transfer cookie crust mixture to 9-inch-diameter glass pie dish. Using fingers, press mixture evenly onto bottom and up sides of pie dish. Place pie dish with crust on rimmed baking sheet.

Filling
Position rack in center of oven and preheat to 350°F. Whisk both sugars, milk powder, and salt in medium bowl to blend. Add melted butter and whisk until blended. Add cream, then egg yolks and vanilla and whisk until well blended. Pour filling into crust. Bake pie 30 minutes (filling may begin to bubble). Reduce oven temperature to 325°F. Continue to bake pie until filling is brown in spots and set around edges but center still moves slightly when pie dish is gently shaken, about 20 minutes longer. Cool pie 2 hours in pie dish on rack. Chill uncovered overnight. DO AHEAD Can be made 2 days ahead. Cover; keep chilled.

Sift powdered sugar lightly over top of pie. Cut pie into wedges and serve cold.

Monday, May 10, 2010

Going Korean Part 2: Korean Rice Bowl / The Bibimbap

Lately I've found myself taking on way too many things. This usually leads to feelings of regret, specifically because I'm not doing any of them as well as I could if I'd only been more singularly focused. Because of this, and a few other reasons, namely Matt's and my two-year anniversary, we are skipping town, going off the grid, and heading to Desert Hot Springs. We cannot wait. No TV, no emails, and no phone. Just desert, hot springs, books, food and one movie we are probably the last people in the world not to have seen yet and are undoubtedly committing multiple cinema crimes given that we'll have to watch it on a laptop.

Bon Appetit's version:
photograph by Jose Picayo

our version:

Do you know how many of these Vivenne/ingredient photos Matt takes that don't make the blog? So many. I don't know why Mugi Miso made the cut except for the fact that Matt and I've been asking each other all week where I / he put the Mugi Miso as we need it stat. (It's never not in the refrigerator.)
Do you guys remember the Mugi Miso? Well, the recipe didn't call for it. What it did call for was Korean hot pepper paste (kochujang). I couldn't find this at the grocery store, but according to the recipe, this paste is just a mixture of miso and hot chilies. I knew we had Sambal Oelek, which is essentially just straight chilies. SO, I thought if I mixed the two, I'd basically get Korean hot pepper paste. (On the left below is the Mugi Miso and on the right is the Sambal Oelek.)
I think it worked. Not having recently tried the real thing, it's pretty hard to say, but our makeshift mixture tasted umami-ish with heat.

Luckily with food, when you take on too many things, it's still usually edible. So yes, I slightly overcooked the steak and the kimchee was excruciatingly hot. However, the egg was perfectly runny and the asparagus nice and al dente, and all in all, I loved this meal. Even more so, I loved the eggs and rice I made the following day with the leftover rice and sesame salt.

As for Matt and me and the desert? We leave tomorrow morning. Now let's see if I can finish some of the things I've started--like maybe all of these half-read books I loved the beginning of so much?
For bibimbap recipe, click HERE.

Sunday, March 28, 2010

bon appetit's leek and ginger matzo balls in lemongrass consommé

"I feel that I have done everything, absolutely everything wrong, but perhaps something nice will happen anyway." —Jane Bowles


Thank you, Ms. Bowles, author of the lesser known classic Two Serious Ladies for summing up my approach to cooking so succinctly. And thank you to my former professor for sharing the quote in the first place. As you can all see, it's a real gem.

This week, the something nice that I was hoping would happen was some Passover-appropriate matzo ball soup. This version from this month's Bon Appetit with the lemongrass broth looked especially appropriate since Los Angeles has been experiencing some springtime weather that might be described as summerish.


Photograph by Patricia Heal

Bon Appetempt's version:
(Matt usually does the final photo and is supremely embarrassed by this one. So the balls are out of the broth? Sheesh. At least I got the chives in the spoon.)


Hey now, so whaddya say we get started by buying more chicken than you've ever even thought to buy in your entire life? Two whole, four pound, broken-down chickens went into this broth. And just when I thought I was getting to the point where I had a pretty sweet collection of pots and pans, this recipe comes in and proves that I am still apparently lacking. Our biggest pot didn't come close to holding all the veggies, chicken and 18 cups of water called for. But since we were going to boil the broth down to 8 cups anyway, I thought it would still be OK. (See above quote.)
Also, multiple grocery-store trips still left me without lemongrass. We added cilantro thinking that it, combined with the ginger and lemon, would still give us a nice refreshing if not lemongrass-like taste to the broth. (Again, see above quote.)

Enter schmaltz and our homemade schmaltz rink. Buying all that chicken, cooking it, and pulling off all the meat from the bones (to save for other purposes as this recipe doesn't call for it) to make the homemade broth is, yes, a bit labor intensive, however, how else are you going to ensure quality chicken fat? Alsoo, for some reason, it just seems wrong to purchase chicken fat, doesn't it?
Clearly, the little lemur was a bit freaked by the tiny horse who also showed up on the rink to do some schmaltz-skating.
I assumed that after the broth-making, the rest of the soup would come together in no time. Because of this assumption, Matt and I ate dinner around 10:30pm tonight. I didn't read the recipe all the way through, which clearly states that the raw matzos need to chill in the fridge for at least four hours. Why? I don't know. And then, they need to simmer in hot water for another hour and ten minutes. So, word to the wise, make your matzo ball mix in the morning.
Pulling off the lid of the pan of those simmering, fluffy, plumped-up matzo balls an hour and ten minutes later is well worth the wait. The apartment smelled ultra cozy. And the soup was great--very much like the classic matzo ball soup with a little bit more tang from the subtle hints of lemon juice and ginger. I'm really curious about how it would've tasted if only I could have procured the lemongrass. But I guess there's always next time?
Looks like some of that chicken made its way back into the recipe anyway... Happy Passover!! Next year in Isreal!

Friday, March 26, 2010

Bloody Mary Test Kitchen

This week has been what I like to call Bon Appetempt-lite. As ambitious as I want to be, I sometimes have to hold back and make a couple of Blood Marys, even when what I really want to do is make homemade kombucha. (This will still happen. It just has to wait until after Easter/Passover-related attempts have come and gone—the latest Martha Stewart Living is staring at me, goading me on, as I type.)

Bon Appetit's version:
Photograph by Mitchell Feinberg
our version:
Why don't those glasses have shadows, you may be wondering. Well, we actually took this picture in space so there wouldn't be any shadows. OK?

So let's embark on a Bloody Mary journey, shall we? Up first is Bon Appetit's curry-spiced version.
Bon Appetit's take on the Bloody Mary steers away from spicy heat-wise, which is usually how I like my Bloody Marys, in favor of curry spice. The rest of the ingredients are pretty standard. And while it made for a beautiful beverage, I ultimately wanted something spicier.
So we made a Bloody Mary. BFD, right? Well, we haven't gone totally lame on you guys. Remember when I said that Matt went wild at Surfas the other week when we bought that springform pan and cheese-making stuff? Well, we also bought these kind of crazy-expensive pickles, which funnily enough are featured in the Martha Stewart Living that keeps staring at me as I type this. (Martha, you must chill.)
But, how does this relate to this Bloody Mary post? Well, when you spend twelve dollars on pickles, you kind of need them to be more than just pickles, and lo and behold, these were. See, we accidentally got the spicy variety of McClure's pickles and after checking out their website, we discovered that the leftover brine can be used as a Bloody Mary mix. Simply fill the pickleless jar of the vinegary, pepper-laden brine with tomato juice, shake and enjoy.
I have to say, as tasty as the curry-spiced Mary was, the McClure one was one of the best I've ever had. You have to like a spicy Bloody Mary though. I mean, this drink is spiiicy, like I sort of felt like my stomach was going to die, but in a good way.

Curry-Spiced Bloody Mary via Bon Appetit:
(makes 8)

10 cups tomato juice (preferably organic)
1 2/3 cups vodka
1/2 cup fresh lemon juice
1/2 cup fresh lime juice
1/4 cup balsamic vinegar
2 tablespoons plus 2 teaspoons Madras curry powder
2 teaspoons (or more) fine sea salt
1 teaspoon freshly ground black pepper
Crushed ice
Celery sticks (for garnish)

Preparation
Combine first 6 ingredients in large pitcher. Whisk in 2 teaspoons sea salt and pepper. Season with more salt, if desired. Cover; chill. DO AHEAD Can be made 8 hours ahead. Keep chilled. Whisk before serving.

Fill tall glasses with ice. Pour in Bloody Mary mixture. Garnish with celery sticks.