Showing posts with label Saveur. Show all posts

Sunday, July 24, 2011

St. Michaels, Maryland: Part 1

In terms of feeling better about life in general, let's face it, vacation works. So much so that I’d like to shoot a commercial for it. It'd be like one of those psuedo-spiritual, super general ads you watch and aren’t sure what’s being pitched until the very end when white letters appear over a calm scene and spell out Nike. Or Cotton. Or Cialis. But at the end of my commercial, that word would be vacation.
This vacation began with a wedding. These guys below? Why, they're the Manhattan boys, of course, pictured clutching their signature drink, The Manhattan.
The following morning it was onward and eastward to St. Michaels, Maryland where we would be staying for the week in a beautiful house sitting on a 160 acre farm on the Chesapeake Bay.
(This is what humidity looks like.)

When the owner of the house stopped by to show us how to use the fairly intense stereo system, he told us that he'd built the house so that the front faced the bay. Matt took the below photo from a kayak-in-motion. The place could probably be described as pretty, no?
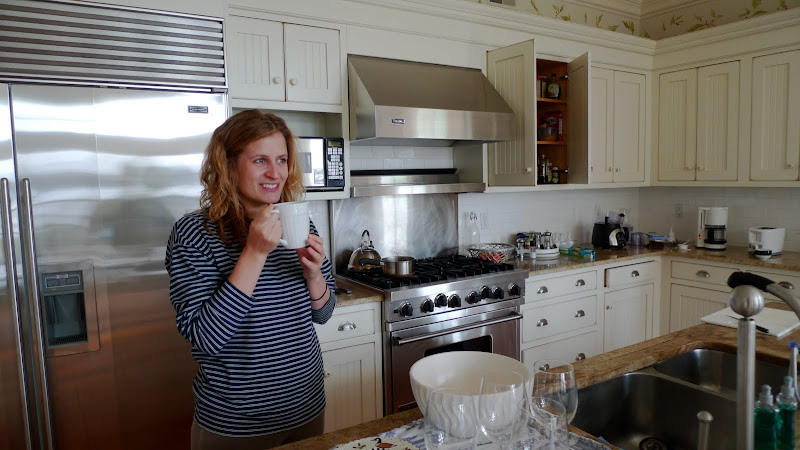
Being on the Chesapeake, I had major designs on a crab-related attempt. In fact, that's what I'm thinking about here in my temporary Ina Garten-esque kitchen. So when the owner also told us about the crab pots at the end of our dock, Matt and my heads nearly exploded. You have what now? Tell us more. This sounds like a job for the Manhattan boys. Do you have bitters and a jigger of vermouth?
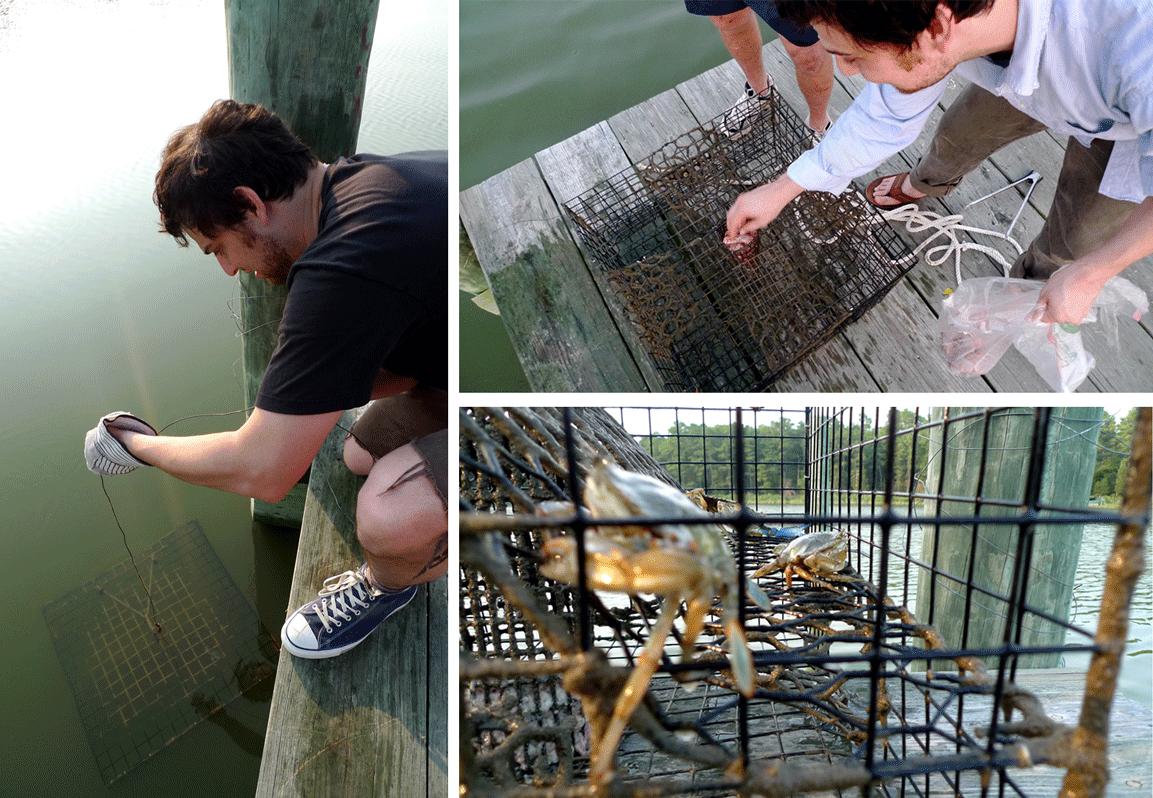
We quickly learned the ropes of dockside crabbing. Step 1: Purchase chicken necks. Step 2: Fill the pots with our newly acquired chicken necks. Step 3: Give the pots an overnight soak. Step 4: Check the pots early in the morning for terrapins. If you see a terrapin, set it free. No questions asked. Step 5: If you see crabs, grab them with gloved hands and put them in a green bucket, filled with bay water. Also, by no means kick in more than two pots—each dock is allowed two, any more and the professional crabbers will come by and cut your ropes!
This next part was the trickiest. We had to kill them. David Foster Wallace's essay, "Consider the Lobster" immediately came to mind. Namely, the part where he asks: "Is it all right to boil a sentient creature alive just for our gustatory pleasure?" Well, having been firmly faced with this task for the first time in my life, I can tell you that it certainly didn't feel all right, which is strange for any number of reasons, but particularly so considering that just the other week I basked in the retelling of the deliciousness of linguine and clams—fundamental to which, is the killing of live clams.

A few pages later, however, Foster Wallace offers this: "The whole animal-cruelty-and-eating issue is not just complex, it's also uncomfortable. It is, at any rate, uncomfortable for me, and for just about everyone I know who enjoys a variety of foods and yet does not want to see herself as cruel or unfeeling. As far as I can tell, my own main way of dealing with this conflict has been to avoid thinking about the whole unpleasant thing." And see, that's the problem with a live crab or lobster. The fact that they are moving and you are the one that is going to stop them from moving ever again makes this notion of you as a cruel or unfeeling person unavoidable. But if we want to eat them, we should, at least in some circumstances, be able to deal with this unpleasantness. Otherwise, we shouldn't be eating them at all, right?

In the end, we killed them. They didn't move around for long. And yes, they were delicious. And yes, it feels wrong to say that. However, I feel I've made some awkward strides in the never-ending journey of understanding the food I eat and where it comes from and tried my best to honor the lives of those blue crabs. Now, can we please talk about the corn? Oh, the corn! The Mexican-style roasted corn! I loved it so much.


There were so many reasons to love this corn. For starters, there was no moral dilemma tied to it. Secondly, it was covered in mayonnaise and topped with cheese, cilantro, chile powder, and lime juice. It was both indulgent and fresh-tasting at the same time, and our amazingly cute nephew, Henry, unexpectedly boasted a perfect toe point during the grilling process.
So much more to come. Stay tuned for St. Michaels, Maryland: Part 2!

Mexican-Style Roasted Corn via Saveur
serves 4

4 large ears corn, with husks still attached
1/2 cup mayonnaise
1 1/2 cups crumbled cotija cheese (We substituted shredded cheddar.)
4 tbsp. minced fresh cilantro
4 tsp. ancho chile powder
Kosher salt and freshly ground black
pepper, to taste
1 lime, cut into four wedges

1. Working with one ear of corn at a time, peel back the husks to expose the kernels, leaving husks attached at the base; remove the silk threads and tie husks together with kitchen twine around base of cob to form a handle. Repeat with remaining ears. (We didn't do this step and it turned out all right.) Transfer corn to a large bowl or pot of water and let soak for 30 minutes. FYI: this includes the husks! (We only soaked the corn and the husks kept catching fire on the grill.)

2. Build a medium-hot fire in a charcoal grill or heat a gas grill over medium-high heat. Transfer corn to grill; cook, turning occasionally, until charred and cooked through, about 20 minutes. Remove corn from grill and brush with mayonnaise. Place cheese on a plate and roll each ear of corn in cheese to coat. Sprinkle corn evenly with some of the cilantro, chile powder, and salt and pepper, pressing the corn so that seasonings and cheese will adhere to the mayonnaise. Serve with lime wedges.

Thursday, July 14, 2011

Bon Appetempt on Saveur's Sites We Love!


I'm interrupting the Robyn love-fest with a bit of exciting news: Saveur has included this little space as a site they love in part of an ongoing series aptly titled Sites We Love. It's a great series that has profiled some of my favorite food bloggers. Please check out my interview HERE! But first, let me thank you... Thank you so very much for the recent and not so recent outpouring of love and support! Also thank you to the online team at Saveur. They are seriously the best when it comes to recognizing us bloggers.

p.s. Saveur needed a bio photo. Here are two that Matt and I found that didn't quite make the cut.
By the way, who's that woman on the super serious headphone tour?
Oh, it's my mom.

Sunday, May 22, 2011

Strawberry Cake & A Big Fat Thank You

Dear Readers, Friends, and Dogs who can read: I'm going to tell you a story about a little cake that tasted like a strawberry Scooter Crunch ice cream bar. (So far I am the only person I know who remembers enjoying Scooter Crunches as a child.) The cake came to me from the pages of Saveur and there was something about it that spoke to me. It called for red dye and strawberry extract, two elements that people might snub their noses at, but I was so drawn to the below photo that the recipe could have called for a cup of hydrogenated soybean oil and a dash of MSG and I still would've made it.
 photo by Todd Coleman

I just love how it's kind of sphere-shaped and how the two layers are so fat and outlined in a coat of darker crust. I also love the jagged cuts, the paper plate, and what looks to be a plastic lid or tray or frisbee that it's sitting on. It looks delicious, fun, approachable, and unreal all at the same time. 

After two trips to two grocery stores and no strawberry extract, I sally-forthed. The extract was for the icing layer anyway, which I wasn't even going to tackle until the following night. In 24 hours, surely, I could find some strawberry extract.
I didn't. And as much as I would love to blame someone for this extract shortage, I have only myself. I simply couldn't make another grocery trip. And so, just like Kristen Wiig's character drives right by that cop (over and over again) in Bridesmaids, I drove right by two grocery stores on my way home from work. Besides, I knew I had fresh strawberries at home. Couldn't I just mash some of those up and use them?
My favorite part of this whole cake was what happened when Matt found it fully assembled and sitting in our refrigerator in the cake carrier. "Wait. What's our cake doing in the cake carrier?" It had been a busy week and I guess I'd forgotten to tell him that I was taking it to a dinner with my lady friends. It was a double blow. Not only did he realize that he was on his own for dinner (hardly very young-wife of me), but I was taking the cake with me too.

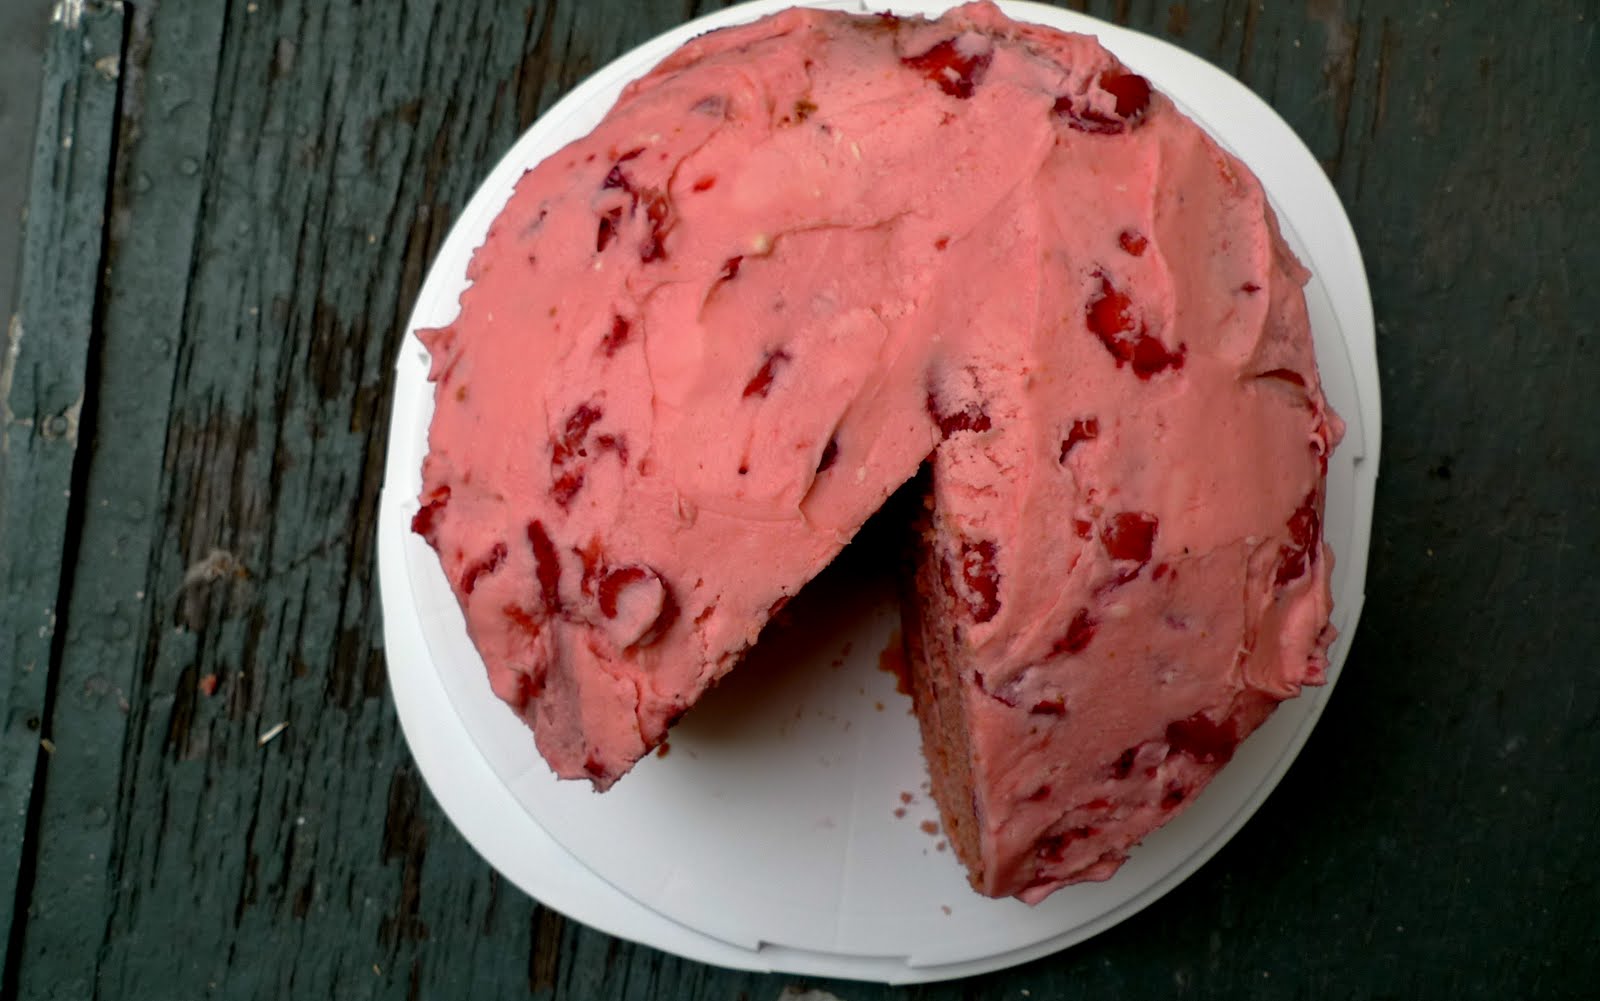
And so, that's how I ended up arriving to dinner with the below, what I call the Pac-Man presentation. 
Luckily, the cake was so delicious no one cared that Matt had scored first dibs at home hours earlier. And, if you'd like to see a photo of the cake fully intact with strawberry extract as it was intended to be, hop over to Lottie + Doof. He knocked it out of the park. 
And while I'm directing you to other sites, did you guys see this, or that badge my site is now wearing over towards the right of the screen? I won Saveur's Best Culinary Essay! Many many many thanks to everyone who voted for "In The Kitchen With Grandma" and to Saveur for recognizing all of the amazing blogs that create such great, thoughtful content week after week.

Strawberry Cake via Saveur (with a Bon-Appetempt option)
serves 12

16 tbsp. unsalted butter, softened, plus more for greasing pans
3 cups flour, plus more for pans
1 tbsp. baking powder
1/2 tsp. kosher salt
1 cup milk
1/2 cup seedless strawberry jam
3 tbsp. red food coloring (optional)
2 cups sugar
1 cup canola oil
1 tsp. vanilla extract
3 eggs
8 oz. cream cheese, softened
1 1-lb. box confectioners' sugar, sifted
1 tsp. strawberry extract (or, for the extract-challenged, 1/4 cup mashed fresh strawberries?)

Heat oven to 350°. Grease and flour two 9″ round cake pans; set aside. Whisk together flour, baking powder, and salt in a medium bowl; set aside. Whisk together milk, jam, and 2 tbsp. food coloring in a small bowl; set aside. Beat together sugar, oil, vanilla, and eggs in a mixer on medium-high speed until pale and smooth, 2–3 minutes. In 3 additions, alternately add dry and wet ingredients to sugar mixture, beginning and ending with dry; mix until combined. Divide batter between prepared pans and smooth tops; bake until a toothpick inserted in the middle of cakes comes out clean, about 40 minutes. Let cool 15 minutes, unmold, then cool completely.

In a large bowl, beat butter and cream cheese on high speed of a mixer until smooth and fluffy, 1–2 minutes. Add remaining food coloring, confectioners' sugar, and strawberry extract; beat until smooth. Place one cake upside down on a cake stand, and spread a healthy amount of frosting over top. Cover with second cake, top side up; frost top and sides of cakes with remaining frosting; refrigerate for 1 hour before serving. Serve at room temperature.

Wednesday, April 27, 2011

Saveur's Best Food Blog Awards Nomination!


I have some good news! Bon Appetempt has been nominated under the "Best Culinary Essay" category in Saveur's Best Food Blog Awards! So, first off: I want to say thank you for those who nominated the essay! Thank you very very much! Secondly, I'd like to report that Grandma has read the essay, which I printed out and mailed to her, and she has since written me a letter in which the topic comes up, eventually. Three paragraphs in, she finally says: "I enjoyed the Blog [sic]. I would be interested in the response the readers had." Awwwwwww. Those are high praises from my grandma!

And so before I ask for your vote, I thought now would be as perfect a time as any to post what I find to be a fairly hilarious video of the Kitchen Visit with Grandma in progress. Allow me to set the clip up for you: We are making pizzelles. My mom and I begin pressing the dough in the duo of pizzelle presses set up in the dining room—Mom has brought her press over today to help, but as you will see, it's a little rusty and needs a bit of, well, tweaking. Meanwhile, I am chasing the perfect pizzelle, which to me means one that is the exact size of the mold, but on my path to this perfect pizzelledom, I’m losing some dough that’s popping out of the sides of the press. Grandma disagrees with this method as it is "wasting" dough. Well, you'll see:

Anyway, if you feel so inclined: Vote for the essay here! You have to sign up, but it's painless and easy(!). Thank you! Thank you! Thank you!

Sunday, March 20, 2011

Classic Meatballs

I have so many things to tell you about these meatballs. Starting with: Vegan-say-what? It seems like just yesterday we were putting dry, hard pieces of mochi on our waffle iron and waiting with confused anticipation for it to turn into something resembling a waffle. Clearly, with the title of this post, those days are gone. And not that I had to be convinced or persuaded in any real way, but it should be noted that meatballs were Matt's pick. He had had a particularly rough week at work, and so I gave him carte blanche in picking out the next attempt. I handed him a giant stack of food magazines and loved watching what happened next: He poured over each magazine, flipping down page corner after page corner and then, just to leave no stone unturned, he went through our cookbooks as well, eventually arriving at three different recipes for meatballs: Ina Garten's, Gourmet's (from a 2008 issue), and Saveur's. Saveur won out in the end. Why? Just look at this picture (of a photography by Todd Coleman).

our version:
This marks the third recipe from the issue's collection of 25 Greatest Meals Ever. First, we tried Richard Rodriguez's refried beans with chorizo, which I never posted but still might. Second was the vegetarian chili that saved the writer Suketu Mehta's life. Which brings us to number three, Dana Bowen's greatest meal: classic meatballs.
Meatballs are another one of those timeless foods that every once in a while Matt craves and that I've somehow gone my entire life without making. Speaking of my whole life, while making these meatballs, I was reminded of a test in third grade, which began with bolded directions: Read all directions before beginning. Being a particularly competitive third grader who liked to finish tests first, I skimmed the directions and began doing what the first one told me to do: Underline the nouns. No problem there. The next direction told me to circle the verbs. I know I’m only a third grader, but is it too much to ask for a c-h-a-l-l-e-n-g-e? Verbs circled. What’s next?

So, with all of my burgeoning neurotic tendencies, I completed all directives only to come to the last one: Ignore all above directions. Needless to say, it was a tough lesson. Yet one that didn’t stick with me.

See, as previously mentioned, this meal was for Matt, and Matt requested an early “Meatball Sunday!” dinner. I told him no problem. Let's skip lunch and eat at four. Only, I must have skimmed over the part about chilling the meat mixture for an hour. "Dinner at five?" Then, when I came to mixing in the ricotta, I saw what else I skipped over: 2⁄3 cup ricotta, drained in a strainer for two hours. Needless to say, my ricotta was drained for exactly four minutes, and by drained, I mean, set upon a mesh strainer for four minutes without releasing a single drop of liquid.
Fortunately, I don’t think these mistakes affected the taste at all. Unfortunately, I think they may have affected the texture a bit. The non-drained ricotta and rushed chilling time in the refrigerator equaled a looser raw meatball, and I believe this is what caused a few of them to fall apart during the browning process, and which impeded some of them from reaching a full-level of browning, which I believe would have led to a more discernible difference in the outside texture and inside texture of the finished meatballs. Know what I mean?

I don't think that all meatball recipes call for braising them in red sauce, but I think they probably should. After all the hard work of gathering, chopping, mixing and molding the ingredients into the shape of large golf balls and browning these in hot olive oil, it was a relief to add some red wine, tomato puree, and beef broth and allow yourself to forget about them for an hour and a half. Of course, you can't really forget about them because your entire apartment now smells like delicious meat and marinara sauce.
As the meatballs braised, I reread what Bowen had to say about them. Just why were they her greatest meal ever again? Well, part of it was that they were left on her "porch in a Farberware pot with a loaf of Italian bread and a note that said: 'Figured you wouldn't have time to cook.'" She and her husband had just moved and the meatballs were a gift from their new neighbors. I looked up from the magazine and told Matt what I'd just read. "Wouldn't that be so nice? To leave some of these on someone's doorstep?" We had just watched Client 9 and Inside Job on back-to-back nights and my thoughts on humanity were bleak. This is what the world needed more of—people giving away their home-cooked meatballs! I began to picture it. We didn't know anyone who had just moved but any one of our friends would appreciate some home-cooked meatballs on their doorstep. We could swing by the store on the way and get a nice fresh French loaf too. But before I could go any further with this plan, Matt, looking visibly shaken, spoke up. "These are our meatballs.” I didn't fight him on it. After all, this happened (Meatballs à la Band-Aid?):


Plus, I had promised him meatballs at four, and their ETA was now looking to be about six.

After some clean-up, we ate at six thirty. Not so bad? Right in time for the previously recorded episode of Kourtney and Kim Take New York. What? It’s hilarious and I just couldn’t watch one more documentary featuring that old guy from AIG. Anyway, I'm pleased to report that the homemade meatballs were utterly spectacular and even better the second day.

Classic Meatballs via Saveur
serves 4-6
10 oz. ground beef chuck or veal
10 oz. ground pork shoulder
2 oz. minced pork fat or unsmoked bacon
2 oz. prosciutto, minced
1 1⁄4 cups loosely packed flat-leaf parsley leaves, minced, plus more for garnish
2 tsp. dried oregano
1 1⁄2 tsp. fennel seeds
1 tsp. crushed red chile flakes
1⁄2 tsp. ground cumin
1⁄4 tsp. ground allspice
7 slices white bread, finely ground in a food processor
Kosher salt and freshly ground black pepper, to taste
2⁄3 cup ricotta, drained in a strainer for 2 hours
2 tbsp. milk
3 eggs, lightly beaten
6 tbsp. extra-virgin olive oil, plus
more for greasing
1⁄4 cup dry red wine
4 cups canned tomato purée
1 cup beef or veal stock or water
Grated Parmesan, for garnish

1. In a large bowl, combine beef, pork, pork fat, prosciutto, parsley, oregano, fennel seeds, chile flakes, cumin, allspice, and bread crumbs and season generously with salt and pepper. Using your fingers, mix ingredients until combined; set aside. In a medium bowl, whisk together ricotta, milk, and eggs; add to meat mixture and gently mix until incorporated. Chill for 1 hour. 

2. Heat oven to 300°. Grease 2 rimmed baking sheets with oil and set aside. Using a 2-oz. ice cream scoop, portion mixture, roll into meatballs with your hands, and transfer to greased baking sheets. Heat 3 tbsp. oil in a 3-qt. high-sided skillet over medium-high heat. Add half the meatballs; cook, turning occasionally, until browned, about 10 minutes. Transfer meatballs to a plate; wipe out skillet. Repeat with remaining oil and meatballs. Return reserved meatballs to skillet along with any juices from the plate. Add wine; increase heat to high and cook for 2 minutes. Stir in tomatoes and beef stock, bring to a boil, and tightly cover skillet. Transfer to oven; bake until meatballs are tender and have absorbed some of the sauce, about 
1 1⁄2 hours. To serve, transfer meatballs to a platter; spoon over sauce. Sprinkle with Parmesan and parsley. Serve with bread or spaghetti, if you like.


Wednesday, December 1, 2010

Guest Attempt: Saveur's Chocolate Caramel Tart

I am so very excited about this guest attempt by my friend, Sara. Her now unavailable photography blog was one of the first blogs I followed with true anticipation. I would go to it daily, always saddened/annoyed if there wasn't a new post. This combined with the fact that I've had so many delicious meals at her house with her and her amazing family, I knew she'd put together a fabulous guest attempt. Uhm, I was right...

I'm calling this Saveur's Chocolate Caramel Tart, but in reality just as much credit is due to Lottie and Doof, whose adaptation of the Claudia Fleming original recipe factored into my execution heavily as well. In fact, once I knew that both recipes existed there was no way I could follow just one exclusively...the desire to pick and choose the better/easier/more novice-baker-friendly steps was just too great. So instead I read through both at length, plus the reader comments attached, and only then began my foray into something that I really, really do not do: baking.

I like to think this meticulousness is part of my charm. And maybe it is, except if you're my younger sister Grace, who called me last week to report that her ex-boyfriend had "finally realized what his problem with [me] was." Go ahead, read that again. Her ex-boyfriend. Called from ex-dom because he had an epiphany about what was wrong with ME. (Ok, in reality, they talk frequently and I guess this somehow came up in the course of a normal conversation?) Anyway. The charge: I am too good at everything.

In reality, I am not good at everything—far, far from it in fact. But what I am is driven. Detail-oriented. Willing to read the directions. Basically willing to work hard to look like I'm good at things. And I guess that, according to my sister, it often works. But one place where all those skills really don't hold up is in the kitchen, where spontaneity and intuitiveness account for more success than an alphabetized spice rack. And because of this, my sister is, and has always been, the better cook.

Maybe it's the impending holidays, or maybe it's that I just listened to this piece on NPR, or maybe it's the fact that I'm about to welcome my second child any day now...but I've been thinking a lot about siblings lately. So when Amelia asked me to write up a guest attempt on this tart, and my sister decided to copy me again make the same one on the same day, I had Grace document her process as well so we could see what happened.

* * *

It's afternoon in California, and I've organized my ingredients and done my prep work. One hour later at my Dad's house in New Mexico, Grace opens a bottle of wine and gets to work as well.

My phone rings almost immediately.

"Uh, do you have a fluted tart pan with removable bottom?"

"Yeah, I bought mine this morning." (after visiting no less than 3 different stores)

Grace mutters some expletives.

"You don't have one? Didn't you read the recipe?"

"...No?? I just read the list of ingredients."

She must hear me smirking through the phone.

"You're totally going to write about how you're a super organized jerk and I didn't read the recipe, aren't you?"

Oh little sister...how well you know me.

Saveur's version:
photo: Andre Baranowski

my version:

Grace's version:

This recipe starts off with making the crust. Having only made a pie crust once before in my life, when I was 12 and probably not alone in the kitchen (although that pie did place in the Martha's Vineyard Fair pie contest—yes, seriously), I am already out of my comfort zone.


Still, judging from the substance I lick off my beaters, things are A-ok.

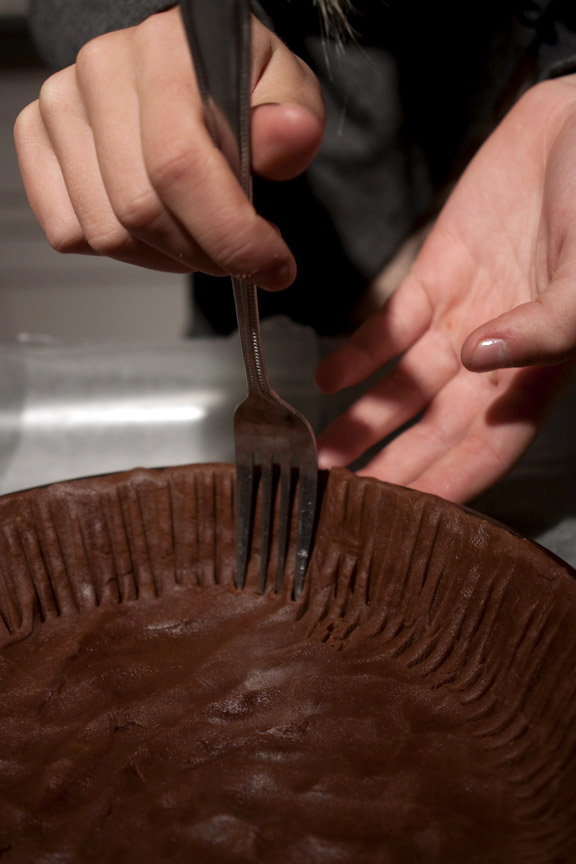
However, now comes the part where the recipe wants you to "press dough evenly into bottom and sides of pan." Like, with my fingers? Am I missing something?

I consult the Lottie and Doof recipe, see that they want you to chill it, roll it, chill it, and then use pie weights (pie weights??) and decide to take the finger approach. The result is slightly...lumpy.

I am a bit worried until Grace calls again and tells me she has done the same thing. Score!
She also tells me that pie weights are just dried beans. Who knew??

I stick my crust in the oven, clean the entire kitchen, and read through the caramel portion of both recipes to refresh my memory. Grace sticks her crust in the oven and starts making the caramel, still reading the recipe for the first time as she goes.

My phone rings again.

"I need a candy thermometer for this??!"

Luckily, you don't, at least according to the Lottie and Doof recipe (or the reader comments on the Saveur recipe) so she does it by eye instead.
I, on the other hand, do not.
Did I mention I'm about to have a baby ANY DAY NOW?

Did I also mention that caramel is a seriously dangerous substance? Poetically, Grace and I burn the same exact finger during this step. Her battle wound is much more impressive than mine:

I pour my caramel into the crust, put the tart in the fridge to chill overnight, and collapse on the couch to watch a movie and knit. Grace pours her caramel into the crust, puts the tart in the fridge to chill overnight, and finishes her bottle of wine while perusing Facebook.

By morning, it's ganache time.
All goes well until I start pouring mine and realize that the tart is so cold and I'm pouring with so much care and so little speed that it's hardening faster than it can spread.
I use a spatula to avert the crisis but the result is again slightly...lumpy.

Grace calls and reports that hers is smooth and perfect.
Having seen the photos, I think this was actually a case of what's called differing standards.

I put my tart in the fridge to chill again, wash the dishes, and set the table before our guests arrive. Grace puts her tart in the fridge to chill again, re-bandages her blistery finger, and opens another bottle of wine.
Yes, I'm wearing velour pants. That's what happens when you're 9 months pregnant and it's Thanksgiving, people.
And yes, my sister is totally gorgeous. And probably has never worn velour pants in her life.

In closing, I would say I was mostly happy with the outcome of all this culinary sibling rivalry. I felt like my crust was maybe a bit thick (pie weights/dried beans next time?) and that the chocolate ganache could have been a thinner and smoother layer as well. All the chocolate was a bit overwhelming for me when I wanted the caramel to be the star. However, I am not really a chocolate person.

Grace thought her tart was perfect...she decidedly is a chocolate person though.

But then, you could have guessed that by now, couldn't you?

Recipe via Saveur:
FOR THE CRUST:
1 1⁄2 cups flour
1⁄4 cup plus 1 tbsp. dutch-process unsweetened
cocoa powder
1⁄4 tsp. kosher salt
10 tbsp. unsalted butter, cubed and softened
1⁄2 cup plus 2 tbsp. confectioners' sugar
2 egg yolks, preferably at room temperature
1⁄2 tsp. vanilla extract

FOR THE CARAMEL
1 1⁄2 cups sugar
3 tbsp. light corn syrup
1⁄4 tsp. kosher salt
6 tbsp. unsalted butter
6 tbsp. heavy cream
1 tbsp. crème fraîche

FOR THE GANACHE
1⁄2 cup heavy cream
4 oz. bittersweet chocolate, finely chopped
Gray sea salt for garnish

1. Make the crust: Heat oven to 350˚. Combine flour, cocoa powder, and salt in a medium bowl and set aside. Using a handheld mixer, cream the butter and sugar in a large bowl until mixture is pale and fluffy; mix in yolks and vanilla. Mix in dry ingredients. Transfer dough to a 9" fluted tart pan with a removable bottom and press dough evenly into bottom and sides of pan. Refrigerate for 30 minutes. Prick the tart shell all over with a fork and bake until cooked through, about 20 minutes. Transfer to a rack and let cool.

2. Make the caramel: In a 1-qt. saucepan, whisk together sugar, corn syrup, salt, and 6 tbsp. water and bring to a boil. Cook, without stirring, until a candy thermometer inserted into the syrup reads 340°. Remove pan from heat and whisk in butter, cream, and crème fraîche (the mixture will bubble up) until smooth. Pour caramel into cooled tart shell and let cool slightly; refrigerate until firm, 4–5 hours.

3. Make the ganache: Bring cream to a boil in a 1-qt. saucepan over medium heat. Put chocolate into a medium bowl and pour in hot cream; let sit for 1 minute, then stir slowly with a rubber spatula until smooth. Pour ganache evenly over tart and refrigerate until set, 4–5 hours. Sprinkle tart with sea salt, slice, and serve chilled.
SERVES 8