Showing posts with label partial success. Show all posts

Wednesday, March 9, 2011

Jamie Oliver's Pizza Dough

At the end of my yoga class, the teacher often urges us students to try to take the quiet we’ve manifested in class along with us for the rest of the day. On the drive home from Big Sur, I have this notion very much in mind—to take the unhurried, relaxed, you're-OK feeling so visceral in Big Sur along with me to Los Angeles for one more day. And I decide baking bread will help me do this, any manner of bread that isn’t too complicated. I just want the simple pleasure of it, the simple yet semi-miraculous feeling of pulling the dish towel off the bowl to reveal risen, puffed-up dough. In short, it is going to be therapeutic.

But first, I need a recipe. Something simple, I remind myself in the morning. Oh, but wouldn't it be nice if the bread were an integral part of dinner so that my therapeutic bread-making experience could also provide real sustenance? Oh, and could I choose the recipe and write down the ingredients before my 8:30am meeting, which is right next door to the grocery store so I won't have to make a separate trip to the store later?

But I can't find a recipe beforehand, and so it's not until midway through class when I remember a recent post from The Wednesday Chef for Jamie Oliver's pizza dough. It's an Aha! moment for sure because apart from it being a recipe fit for dinner, the other main aspect I remember is how simple it sounded. Only, after the meeting, I can't access the Internet to check the ingredients list as I do not have a smart phone. No, my phone, according to my boss's 13-year-old daughter, is the same one her younger sister has. ("High five!")

I refuse to go home for the Internet just to leave again. So, I call Matt at work and ask, "Can you do a quick Google search for me right now?" He says it's not a good time and that he'll call me back a bit later. I say, "But I'm at Trader Joe's and it'll just take a second and I'm trying to take the quiet manifested in Big Sur along with me for one more day!" He obliges. (Thank you, Matt!) I collect my ingredients.

I have some work to do from home, but set 3pm as the time to start my therapy session/ pizza dough-making. Of course, the whole time I'm working I'm also aware that the pizza-making/therapy session could be a post for this blog. Why not? Well, for starters, it's Tuesday, and Tuesdays at 4:30pm is one of my favorite yoga classes that I can never make when physically at work, which if I go to is going to rush the therapy of it all. That's OK, I decide. I can do it all. I'll make the dough, which will make me feel grounded and connected; then, clean up everything, let the dough rise while I'm at yoga, come back home and finish it off in a jiffy. (This is the kind of optimistic thinking that leads to using words like jiffy.) Matt will come home from work and I will be this shining example of the working and working-out woman who has juggled it all (sans child).

Of course, all the while, the sun is setting, and as I have learned time and time again, my photography skills tend to really come undone without natural light. But with little rationale, I convince myself that it's practically spring, that the sun is setting later and later, and that I can make it back before the sun really sets.

This is kind of crazy, but do you know what happened? The sun did set. 

My version:
What was I thinking? That the sun was going to hang out in the sky a little bit longer while I lay in Savasana, which I toyed with the idea of skipping so as to get ten more minutes of sunlight, but ultimately couldn't because Savasana (where you lie on your back with your arms relaxed by your side and legs flopped toward the floor and your eyes closed) is by far, my favorite part of class. 

I guess what I'm trying to say is: sometimes I ask too much of food. It can't be my scheduled therapy session and my fuel and a way to show my husband I love him and a beautifully-photographed blog post all in one.
"A delicious sort of shiver ran through Lyle. What I wanted to happen is happening, he thought. For a moment he felt the rest of his life unfurling like that, ordained and golden, as effortless as falling, but the sense of falling reawakened the terror with which he normally regarded the future." - Peter Cameron's The Weekend

I brought this beautiful novel on our recent trip to Big Sur and in retrospect, find it funny that I underlined and dog-eared the page of the above few sentences. My quiet intentions fell apart in an instant outside the world of vacation.
And though, perhaps not as restorative as it could've been, the pizza dough made for a delicious, satisfying dinner that really did come together in a jiffy. And if you haven't already, I highly recommend reading Luisa's post for the version minus the frazzle and multitude of expectations, and plus her beautiful photos and really simple instructions on what to do for sauce and toppings.

Luisa of The Wednesday Chef's version:
 photo by Luisa Weiss

Jamie Oliver's Pizza Dough via The Wednesday Chef
Makes enough for one half-sheet pan (if you like a thicker-crusted pizza) or two half sheet pans if you like your pizza thin as can be).

3 1/2 cups (1 lb) all-purpose flour (if you can find it, use Italian "00" flour)
1 1/2 to 2 teaspoons fine sea salt (you might find you need more)
1 packet (1/4 ounce) active dry yeast or 7 grams instant yeast (for those of you in Germany, this is one of those Trockenhefe packets)
1 1/2 teaspoons raw or regular sugar
2 tablespoons olive oil
1 1/4 cups lukewarm water
1. Put the flour into a large bowl and make a well in the middle. In a large measuring cup, mix the yeast, sugar and olive oil into the water and leave for a few minutes, then pour into the well. Using a fork, bring the flour in gradually from the sides and swirl it into the liquid. Sprinkle in the salt. Keep mixing, drawing larger amounts of flour in, and when it all starts to come together, work the rest of the flour in with your clean, flour-dusted hands. Knead until you have a smooth, springy dough.
2. Wash out your bowl, dry it and oil it lightly. Place the ball of dough in the bowl and turn to coat it with oil. Cover the bowl with a damp cloth and place in a warm room or an oven (not turned on) for about an hour. The dough will have doubled in size.
3. Now put the dough on a flour-dusted surface and gently deflate it with your hands - this is called punching down the dough. You can either use it immediately, or keep it, wrapped in plastic wrap, in the fridge (or freezer) until required. If using right away, simply pat out to the size of your half-sheet pan or divide in half and roll out to cover two pans. You can also divide the dough into little balls for individual  pizzas - this amount of dough is enough to make about three to four medium pizzas.
4. Timing-wise, it's a good idea to roll the pizzas out about 15 to 20 minutes before you want to cook them. Then simply top them with your heart's desire and bake them in a very hot, preheated oven (turn your oven as high as it will go) for about 10 minutes for the thicker pizza and less for the thinner ones, until crisp and bubbling.

Monday, November 8, 2010

"Greatest Meal Ever": Vegetarian Chili

One of the only things I enjoy more than a good meal or recipe is a good story. I found both in this past month's Saveur, which included 25 mini essays of famous people in food and writing describing their "greatest meals ever." It's a superb issue with a lot of wonderful stories, but for me, a few favorites quickly emerged. The first one, "Open House," by Gabrielle Hamilton, is about a Sunday lunch that Hamilton planned à la those held by her Italian mother-in-law. She had a menu ready, guests were invited, "Except that somehow my husband and I fell into one of those massive, lacerating, deep and dark martial blowouts that you never forget for as long as you live." A recipe comes attached to each essay and this one looks truly amazing: Brown Butter pasta topped with pine nuts and fried eggs. It's on my to-do list, but until then, check it out and read the essay here.

The other essay, "Fire in my Belly," by Suketu Mehta was one of those that the moment I finished reading, I needed to discuss. This discussion was quickly followed by an urge to make the dish that the story hinges on, an extremely spicy, vegetarian chili. [Extreme sidebar information: I didn't see the recipe or even a photograph of the dish on the essay's adjacent page, and without this, my little millennial/short-attention-spanned brain skipped the next logical steps and immediately Googled the author, found his website, and sent him an email saying something like: "I loved your essay! Where can I find the recipe?" Mr. Mehta was kind enough to reply with a nice message and a link to the Saveur site where it had been conspicuously sitting all along. I also then found it in the magazine a few pages back. My bad, but goes to show you how crazy/cool/weird the Internet can be. No?]

Though only one magazine-page long, this mini essay spends almost the entire first half setting up the author's affinity for chiles, spicy food, and in particular, his vegetarian chili, which he makes with the spiciest chile on planet urf, the naga jolokia. Do you know about the Scoville scale? It's basically how us humans measure the spiciness of chili peppers. Mehta explains: "A jalapeño has about 8,000 [Scoville units], a habanero, half a million. The naga jolokia, meanwhile, explodes with over a million Scoville units." You must read the story yourself to know what I'm talking about when I say that Mehta's vegetarian chili sounds frighteningly spicy, as in, this chili could hurt you in a very harmful way.

Saveur's version:
Photo: Todd Coleman
 
our version:

So what did I do? I completely wussed out. Even though I love spicy food, the story made me believe I couldn't handle this chile's level of spiciness. This combined with Saveur's tips on Taming the Heat in Chiles caused me to use three habaneros instead of the naga scaryokias. But guess what? All of this taming and fear of chiles led to one major letdown. My chili was hardly spicy at all.
It was, however, super flavorful. These dried chipotles and lone ancho chile really added a nice depth of flavor.
Speaking of depth of flavor, you keep adding things to this chili, almost as if in layers, which made for a really satisfying if not a bit labor-intensive cooking experience.
And while this may not have been my greatest meal ever, as far as vegetarian chili's go, this one definitely ranks up there with the greatest. However, next time, I'll be sure to stay strong and try the naga jolokia or at the very very least, use extra habaneros sliced in half. The three above were simply cut open, and with a pot of chili this big, it's just not enough heat, particularly when you are expecting to Scoville yourself to death.

Vegetarian Chili via Saveur
12 oz. dried dark kidney beans, soaked overnight
12 oz. dried pinto beans, soaked overnight
Kosher salt, to taste
1⁄4 cup extra-virgin olive oil
12 cloves garlic, minced
3 dried chipotle chiles
2 bay leaves
2 large white onions, chopped
1 dried ancho chile
8 oz. button mushrooms, quartered
6 medium tomatoes, chopped
1 1⁄2 cups canned hominy, drained
1⁄2 cup tomato paste
2 tbsp. red wine vinegar
2 tsp. fresh thyme leaves
1 tsp. dried oregano
1 tsp. ground cumin
8 sun-dried tomatoes, chopped
3–6 naga jolokia or habanero chiles, 

slit lengthwise down one side
Freshly ground black pepper, to taste
Sour cream, minced cilantro, 

and minced red onion

1. Put kidney beans and pinto beans into a large pot and cover with 3" water; bring to a boil, reduce heat to medium-low, and simmer, stirring occasionally, until beans are tender, about 1 hour. Season with salt; set pot aside.

2. Heat oil in a 6-qt. pot over medium-high heat. Add garlic, chipotle chiles, bay leaves, onions, and ancho chile and cook, stirring often, until onions are golden, 12–15 minutes. Add mushrooms and cook, stirring often, until tender, about 8 minutes. Add tomatoes and cook, stirring, until they release their juices, about 5 minutes. Stir in reserved beans and their cooking liquid, along with hominy, tomato paste, vinegar, thyme, oregano, cumin, sun-dried tomatoes, and habaneros and season with salt and pepper. Reduce heat to medium-low and simmer, stirring occasionally, until chili thickens and flavors meld, about 1 hour. Serve chili topped with sour cream, cilantro, and red onions.

Sunday, July 18, 2010

striped ice cream cake

You know it's hot when... you are washing the dishes and the water coming out of the faucet starts looking really really inviting. I kept leaning my head in toward the cold stream until finally I had completely dunked my head in the icy bliss. It was everything I thought it would be. And I'm planning on doing it again when I tackle the next round of dishes.

Just when I think I've shaken Martha Stewart, in she comes again with another beautiful, layered dessert begging for someone to recreate. This time it was her striped ice cream cake. It seemed doable. It seemed to be Martha Stewart in appearance alone, or like Martha Stewart meets Sandra Lee Semi-Homemadeonce I read through the recipe, I realized that it called for already-made, store-bought sorbet and vanilla ice cream. The only thing homemade was the angel food cake layer. I thought: This is Martha's way of reaching out to the masses, to people like me. This is something I can do, I thought. I was wrong—sort of.


Martha Stewart Living's version:

our version:
Yet again, I am reminded: there is simply no room for error when it comes to execution in Martha's recipes/crafts/lifestyle. My jam layer should've been thicker. Instead of peach sorbet, I thought lemon would be nice, but the lemon sorbet was white, not yellow and so looked too much like the vanilla ice cream. Also, my layers aren't even close to even.

What I did have going for me? Little plastic animal figurines. Is this normal baking/cooking behavior to want to stage animal figurines on different food surfaces?
Back to food:
True, as far as Martha-Stewart desserts go, this one was relatively simple. However, it requires a night of staying on task. At the time that this raspberry layer was slathered on, it was well into hour 5 and around 8pm at night. The last layer of sorbet couldn't go on for another 2 hours and then the whole thing needed to freeze overnight. Just something to keep in mind if you want to try it out yourself.

All the time it took behind us, the cake is a perfect dessert for these hot summer nights we've been having here in Los Angeles. I personally love the combo of sorbet and vanilla ice cream—very creamsicle like and very refreshing.

In closing: doesn't this end piece look like half of a sandwich? Or, if you're an east-coaster like me, a hoagie?

striped ice cream cake via Martha Stewart Living:

Before layering the ice cream and sorbets, beat them (separately) with a mixer until softened. They'll be easier to spread. 

angel food sheet cake (recipe follows)
1 cup blueberry jam
2 pints vanilla ice cream, softened
2 pints raspberry sorbet, softened
1 pint peach sorbet, softened

1. Line a 9-by-13 inch baking dish with plastic wrap. Place half the baked angel food cake in bottom of dish. Spread jam over top. Spread ice cream over top of jam. Freeze until firm, about 1 hour.
2. Spread raspberry sorbet over ice cream layer. Freeze until firm, about 2 hours. Spread peach sorbet over raspberry layer; top with remaining angel food cake. Wrap in plastic wrap; freeze overnight.
3. Remove plastic from top of cake, and turn out cake onto a cutting board; unwrap and trim edges. Slice cake, and serve immediately.

angel food sheet cake
vegetable oil cooking spray
12 large egg whites, room temperature
1/2 teaspoon cream of tartar
1 1/4 cups superfine sugar
1 cup all-purpose flour
salt

1. Preheat oven to 350. Coat a 13-by-17-inch rimmed baking sheet with cooking spray, and line with parchment. Coat parchment with spray.
2. Whisk whites and cream of tartar with a mixer on medium speed until soft peaks form. Slowly add 3/4 cup sugar, and whisk until thick and glossy, about 3 minutes.
3. Sift remaining 1/2 cup sugar, the flour, and a pinch of salt over egg-white mixture, and fold gently until just combined, being careful not to deflate whites. Spread batter evenly onto prepared baking sheet. Bake until golden and set, about 20 minutes. 
4. Let cool completely in sheet on a wire rack. (Cake should pull away from sides  easily.) Slide cake out from sheet, right side up; cut in half cross-wise to form two 8 1/2-by-13-inch pieces. Carefully remove parchment from cake.

Monday, May 17, 2010

Third Time's a Dud: Tortilla Soup with Pasilla Chilies, Fresh Cheese, and Avocado

Dear Sirs and Madams:
Sometimes I ask questions like: Has anyone seen my Mugi Miso? Or why won't my mom read my blog? Or, what's up with that (with the word that linking to a weird video)? And while all are very good questions, they are basically joke questions. Well, I have real questions this time--questions that I would love to get some real answers to. See, normally the pattern with Bon Appetempt is that we make something for the first time, we either succeed or fail, learn something about ourselves, post it and move on. But this post actually marks the third time we've attempted this recipe, and each time has birthed totally different results. We made the soup late at night the first time and as such, the photos were bad bad bad, but the soup was so good that we thought we would just make it again and get some better photos. Easy, right? Well, this second time the pictures weren't much better but the soup was bad. Same recipe, same process, opposite results. We were confused. We went for it a third time. How did we fare? Not so great.


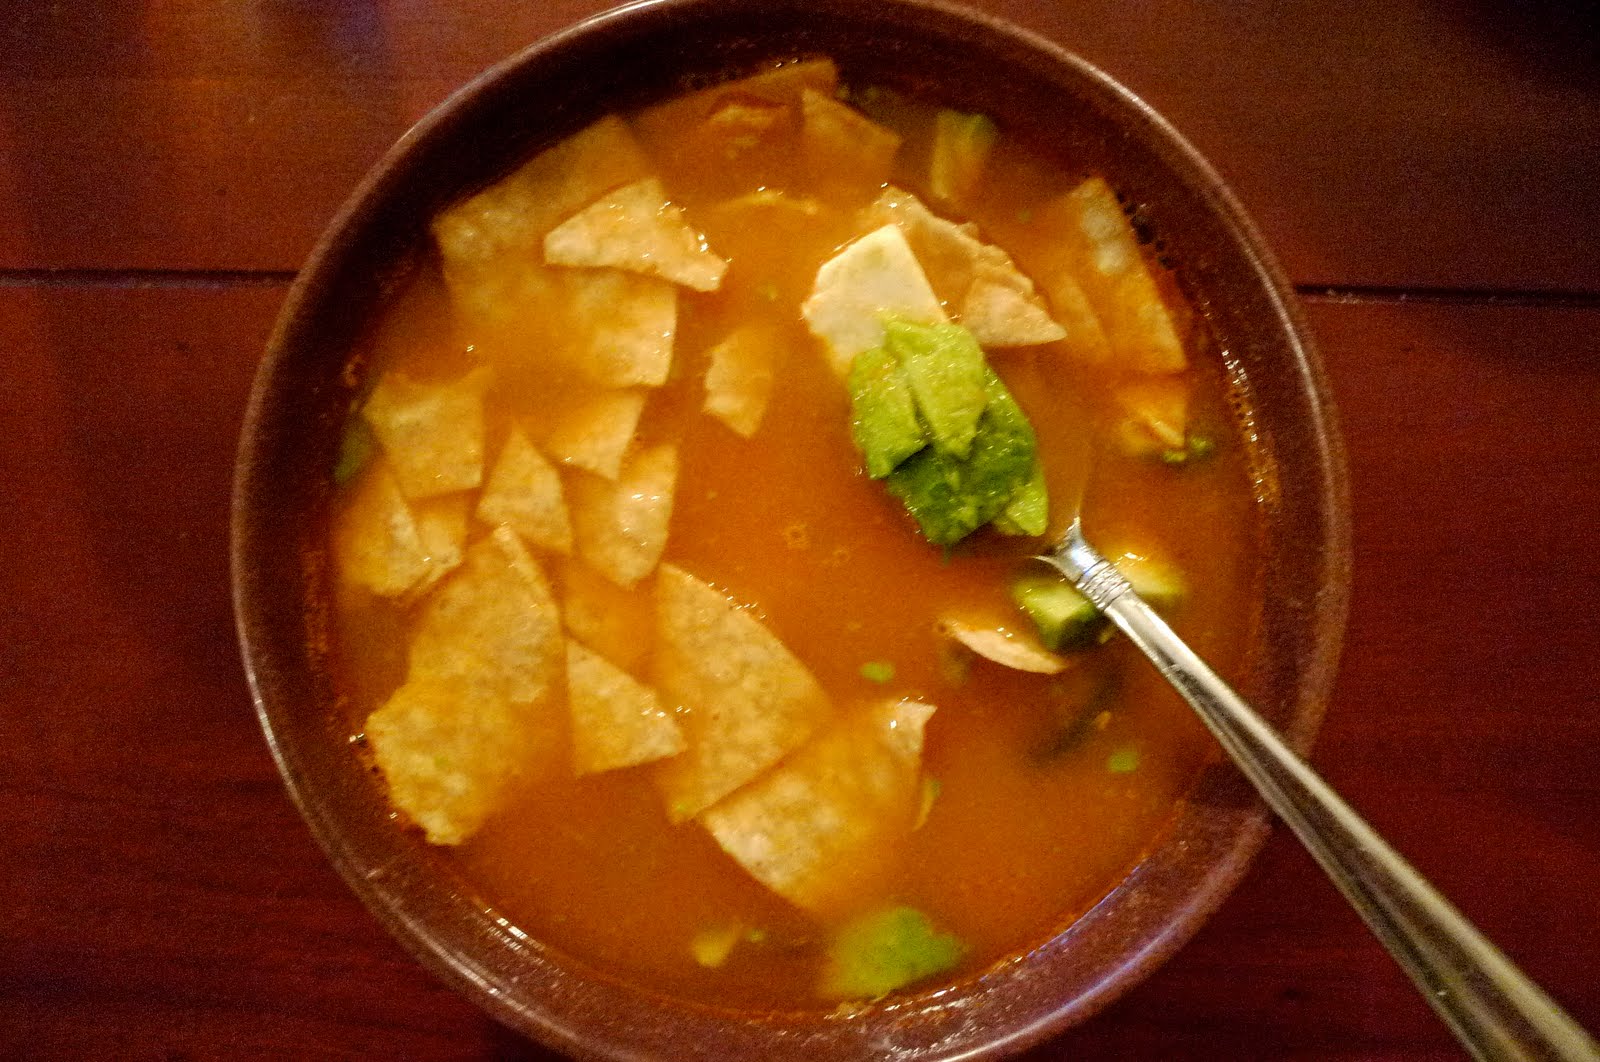
our (third) version:
The recipe, as written in the book, calls for "2 pasilla chilies." The first time we made this, I purchased what I believed were 2 pasilla chilies. They looked like fresh, green peppers.

[Major sidebar for fans of Rick Bayless: Did you know that he is extremely active on Twitter? I wasn't sure if I could seed and stem the peppers sans gloves so I asked the question via Twitter and Mr. Bayless responded via direct message, almost instantly! He wrote: "Yes, but most people use latex gloves." Thanks, Mr. Bayless and thanks, technology!]

But then after chopping the peppers (with gloves), I realized fresh peppers made absolutely no sense in the context of the recipe as I was supposed to, "Add the chili pieces to the hot pan. Turn quickly as they fry, toast, and release a delicious aroma, about 30 seconds in all." Toast fresh peppers in 30 seconds? So confusing. Now, after a touch of research, I think that pasillas are dried peppers and fresh "pasillas" are a different thing entirely? Question 1: is this right? Lots of contradictory information floating out there on the Internet. Most seem to say it's the U.S. version of the poblano, some say pasillas are by definition dried (but don't tell that to Whole Foods) while others claim pasillas are really found only in Mexico. Anyone wanna chime in/sound off on pepper stuff? I am legitimately interested.

Back to the first time attempt: we continued on with the soup anyway and it was delicious. (See fresh peppers below.)
The second time we made it, we assumed it would be even better since we had learned our lesson and this time, bought dried pasillas.

We were wrong. This time, the broth seemed way too thin and kind of one-dimensional if not flavorless. And then we must have toasted the pasillas for too long because they tasted equal parts bitter and spicy.

Scared by the massive fail of this second attempt, we went against the recipe and back to using fresh pasillas for the third try, but we still couldn't capture the glory of that first try. The third one was average at best, and what is possibly worse is that I have no logical explanations. Each time, we opted out of frying our own tortilla chips and used the same chicken broth. So, how could they be that different?

Will we continue to chase the memory of that first soup and make this again? You bet. Also, Matt and I had an amazing midweek anniversary trip to Desert Hot Springs.

For recipe, click HERE.

Saturday, August 15, 2009

An Homage to Mad Men: Gourmet's Rumaki

In honor of the third season premiere of Mad Men, I decided to make the mock-Polynesian hors d'oeuvre Rumaki, which Betty Draper serves up in Season 2. And while there are new school versions with shrimp or dates, I wanted to do Betty proud and make the classic recipe with (vegetarians, be warned) chicken livers.

Gourmet's version:

our version:

The first part of the recipe threw me a little: Put on your fave house dress, light a cigarette, and try not to let the Cuban missile crisis spoil your evening.
Check out the price of the liver. 52 cents! Whaa? Is it 1962?? Did I just become the Time Traveler's wife? And if so, did my husband just bring me back reasonably-priced chicken livers?
The next step was to make a simple marinade: soy sauce, ginger, brown sugar, and curry powder.

I felt like Anthony Bourdain buying liver at the meat counter. "Give me the best organs you've got. Yeah, I'm making chicken liver. Whatever."

But, once I had the burgundy sac-like organs on the cutting board, I completely lost my edge. There were these white connective tissues (not pictured) that I just couldn't handle. Thus, I called in Matt to slice the liver into 1/2 inch pieces.Matt finished cutting, examined the brownish red liver-sludge covering his hands and left the room, saying and I quote: "I'm going to go wash my hands for forever."

Here's the slug, errr, I mean, marinated liver and water chestnut getting wrapped in bacon.

I usually avoid recipes that involve broiling because I've used the broiler exactly zero times before but, this recipe called for broiling. So, I broiled... and all of the toothpicks caught on fire. It was like a broiling birthday cake in there.
I guess I should have turned them on their side? (Note the fiery toothpick.)

As for the taste? Matt tried one first and absolutely hated it, feeling that the liver taste was overpowering. After his visceral reaction, I was worried that I might have a major Rumaki fail on my hands. But then I went in for one and thought they tasted fine, mostly like bacon and water chestnuts. Our friends reaction was mixed, though all were eaten. Would I make them again? Not unless the Drapers were coming over.

See you tomorrow, Bets!

RUMAKI (via Gourmet/Epicurious)
  • 1/4 lb chicken livers, trimmed and rinsed
  • 1/4 cup soy sauce
  • 1 tablespoon finely grated peeled fresh ginger
  • 2 tablespoons packed light brown sugar
  • 1/2 teaspoon curry powder
  • 12 canned water chestnuts, drained and halved horizontally
  • 8 bacon slices (1/2 pound), cut crosswise into thirds
  • Special equipment: 24 wooden toothpicks
Cut chicken livers into 24 (roughly 1/2-inch) pieces. Stir together soy sauce, ginger, brown sugar, and curry powder. Add livers and water chestnuts and toss to coat. Marinate, covered and chilled, 1 hour.
While livers marinate, soak toothpicks in cold water 1 hour. Drain well.
Preheat broiler.
Remove livers and chestnuts from marinade and discard marinade. Place 1 piece of bacon on a work surface and put 1 piece of liver and 1 chestnut in center. Wrap bacon around liver and chestnut and secure with a toothpick. Make 23 more rumaki in same manner.
Broil rumaki on rack of a broiler pan 2 inches from heat, turning once, until bacon is crisp and livers are cooked but still slightly pink inside (unwrap 1 to check for doneness), 5 to 6 minutes. Serve immediately.

Saturday, August 1, 2009

Gnocchi with Fresh Tomatoes, Green Olives and Smoked Mozzarella from Mario Batali's 327 Simple Italian Recipes to Cook at Home

I feel like the word simple in reference to recipes has gone the way of other misused words like peruse and the non-existent but commonly heard irregardless. The recipes in this book are many things, but simple they are not.

This one, in particular, was a doozy. Like the other recipes in Batali's book, it didn't post an "active time" and/or "total time," but I'm going to start posting these on the blog, because one should know what one is getting him or herself into when they roll up their sleeves and begin to tackle a recipe. And you can rest assured I'll tell you the true active time, including clean up and dishwashing, not the jenky, low-ball time all the magazines tell you. ("Easy Peazy Mushroom Risotto in 12 Minutes!" Yeah. Right.)


Batali's version: (recipe at bottom of post)
Stated active time: ? but, simple

our version:
active time: 2.5 hours
total time: 3 & change hours

OK. So, three plus hours reduced to one sentence: this was a massive gnocchi fail turned into a success by persistence and will power. Also, it should be noted that the we here is pretty much Matt and his mom as I was out for the count with a stomach virus.

And so we began with boiling 3 pounds(!) of potatoes.

Mario wanted us to put the potatoes through a vegetable mill, but we didn't have one, so we bon appetempted it and subbed the mill for the food processor.* Then, we covered it with flour and the one egg it called for, only, after kneading for about 5 minutes, it wasn't turning into a dough-like substance.

We added more flour and an extra egg, but still couldn't get the consistency into anything that would roll out into ropes. At this point, Matt and his mom were going back and forth saying: "We've got a failure on our hands!" & "Batali doesn't know what he's talking about. Three pounds of potatoes? To make four servings?! Since when is 3/4 lb a serving of pasta?" & "This recipe is wrong. Dead WRONG."

*later research would reveal that pureeing the potatoes in a food processor was a gigantic mistake. Shoulda used a grater or sprung for the vegetable mill, but we did NOT want the potatoes silky smooth; we needed them to be rougher and chunkier. Our bad.

With the dough runny and sticky we were frustrated, but also convinced that we were still working with the right ingredients and that there was an off, off chance this thing might still sort of work out.

So, we began tossing the weird potato goo in the boiling water spoonful by spoonful.

For real, what is simple about this?? We lost another sponge to the clean-up.

What came out didn't look like gnocchi, but we cut it up in pieces to make it look like the real thing.
Here's the real thing now.
Sort of looks like chunky, weird dumplings/noodles.

With the hard part finally complete. We were able to move forward with the sauce.

The recipe didn't call for basil, but we were leaving for vacation and had so much from our baby potted herb garden, and since this is the first edible thing I've ever grown, I wanted to share it here. Hope that's OK with you, mario batali. Wouldn't want to jenk-up your recipe by adding some fresh basil, MARIO. MARIOOOOOO! WHY WOULD YOU CALL THIS SIMPLE??
All right, so truth be told, the sauce was pretty easy.

Oh and the now traditional shot of one of our parents enjoying the fruits of our labor. Open wide! Speaking of Matt's parents: thank you for making this post pasta-ble!!

Also, since this came from a book not so easily linkable. Here it is below. And if you do try it, remember, no food processor for the potatoes. Just a grater or a ricer or a vegetable mill. OK? OK.

RECIPE:

1 pound plum tomatoes
6 tablespoons extra-virgin olive oil
2 cloves garlic, thinly sliced
1/2 cup green olives, such as Picholine, pitted
1 basic gnocchi (see recipe below)
4 ounces smoked fresh mozzarella, cut into 1/4-inch cubes
2 tablespoons fresh marjoram leaves
Salt and freshly ground black pepper

Bring 6 quarts of water to a boil in a large pot, and add 2 tablespoons salt.
Meanwhile, core the tomatoes and chop them into 1/4-inch cubes, reserving all the juices.
In a 10- to 12-inch sauté pan, heat the olive oil over medium-high heat until smoking. Add the garlic and cook until light golden brown, about 30 seconds. Add the tomatoes and their juices and cook until softened, about 2 minutes. Add the olives and remove from the heat.
Drop the gnocchi into the boiling water and cook until they float to the surface, about 3 minutes. Drain.
Carefully add the gnocchi to the pan with the tomato mixture. Return to the heat and toss gently until bubbling. Add the mozzarella and marjoram and season with salt and pepper. Transfer to a warmed serving dish. Serve immediately.
Basic Gnocchi
3 pounds russet potatoes
1 teaspoon kosher salt
2 cups all-purpose flour
1/2 cup canola oil
1 extra-large egg

Put the potatoes in a large pot, add water to cover, and bring to a boil. Reduce heat and cook at a low boil until potatoes are tender, about 45 minutes; drain.
While they are still warm, peel the potatoes, then pass them through a vegetable mill onto a clean work surface.
Bring 6 quarts of water to a boil in a large pot, and add 1 tablespoon salt. Set up an ice bath nearby. Make a well in the center of the potatoes, and sprinkle them all over with the flour. Break the egg into the center of the well, add the salt, and, using a fork, blend the egg and salt together. Using the fork, begin to incorporate the flour and potatoes as if you were making pasta. Once the dough begins to come together, begin kneading it gently until it forms a ball. Knead gently for another 4 minutes, or until the dough is dry to the touch.
Divide the dough into 6 balls. Roll one ball into a rope 3/4 inch in diameter, and cut it into 1-inch pieces. Roll each piece down the back of a fork to create the characteristic ridges. Drop the gnocchi into the boiling water and cook until they float to the surface, about 1 minute. Use a slotted spoon to transfer the gnocchi to the ice bath. Repeat with the remaining dough, replenishing the ice as necessary.
When all the gnocchi have been cooked and cooled in the ice bath, drain them and transfer to a bowl. Toss with the oil. The gnocchi can be stored, covered, in the refrigerator for up to 48 hours.
From Molto Italiano by Mario Batali

Saturday, July 25, 2009

Lucques' Yellow Tomato Gazpacho

It's been hot and breezeless here in los angeles, and since I'm not into air conditioning, it's been a pretty sweaty week as well. I was coping OK until I made a frozen pizza for lunch and thought I was going to melt off the face of the erf. It didn't show signs of cooling down anytime soon, and I began dreading my next attempt.

"What am I going to maaaaaake? I don't waaaant to coooook anything."
To which Matt would say, "Can I turn on the air conditioning?"

So I was ecstatic to discover this no-cook / heatwave-approved attempt in Suzanne Goin's, Sunday Suppers at Lucques. If you live in los angeles, no doubt you've heard of Lucques, AOC or Tavern. But all you really need to know is that this cookbook is swarming with painstakingly difficult recipes, except this one that Goin calls "foolproof." Yeah, Suzanne? I'll see about that.

Sunday Suppers' version:

our version:
(Yeah. Ours is a little chunkier, but we'll get to that later.)

This recipe is all about the produce. Starting with some amazing yellow heirloom tomatoes.
A jalapeño and orange pepper.
Next we had to blanch the tomatoes, which means you try to make the tomatoes look like Blanche from The Golden Girls. We achieved this by dropping them in boiling water for thirty seconds (making them nice and hot) and then into an ice bath to cool off from all that promiscuity.

Here they are demoralized.

After chopping the supporting veggies, we threw everything in a bowl in preparation for blending.

And that's where the foolproof recipe turned on us--the blender was leaking. And when actually blending, the minimal leak turned into a flowing river of yellow gazpacho, so once things looked just crushed and mixed together, we stopped blending.
(This picture isn't worth a thousand words. It became a much bigger mess, I swear.)

The recipe called for straining, but because we had to pull it early, when we tried passing it through the strainer, we basically had no soup left. So we put everything in the bowl and embraced its chunkiness.

Personally, I think I would prefer it chunky, of course I haven't tried the Lucques-perfect strained version, but despite the blender malfunction, the end product was totally delicious, and after chilling it for an hour, it was incredibly refreshing. So maybe it is foolproof?

Oh, there I am, after eating a big bowl of soup. Ooops, cat's out of the bag. Gatsby here. Really is foolproof. byyyeeeeeee!