Showing posts with label Breakfast Recipes. Show all posts

Sunday, June 12, 2011

Eggless Blueberry Pancakes for 1 in 10 Minutes

I am married to a guy who doesn't like pancakes. Atleast, he thought so until I made these perfect pancakes and that kinda sorta turned him around but not completely. But I knew for a fact that if I added a fruit to the pancakes, he is not going to touch them so I devised this recipe meant for one - just me! Its also eggless because I didn't have any eggs at home. Sometimes, necessity creates masterpieces.

Eggless Blueberry Pancakes Recipe

Well, I know these pancakes are not really the Brad Pitt of pancakes but they come together in 10 mins, and are eggless. So, stop being shallow. After all, the rustic look is in these days. The more dilapidated-looking the plywood for for your food photo base, the better. Haven't you noticed?

Eggless Blueberry Pancakes Recipe

Btw, you do need some maple syrup to serve these up because they aren't super sweet on their own. Of course, you can add more sugar to the batter but why would you. Pour on the maple syrup (or the ones that masquerade as maple syrup, your choice). I got the real deal in US this time and its worth every gram of the weight I had to lug back.

Eggless Blueberry Pancakes Recipe
Prep + Cooking : 10 mins
Serves: 1 (about 3 medium-sized pancakes)

Ingredients:
1/3 cup plain flour
1/3 tsp baking powder
A pinch of baking soda
1 tbsp sugar (adjust to taste)
A pinch of salt
2 tsp olive oil
1/3 cup + 2 tbsp milk
1/4 cup blueberries (fresh or frozen)
2 tbsp butter to spread on pancakes while cooking

How I Made It:

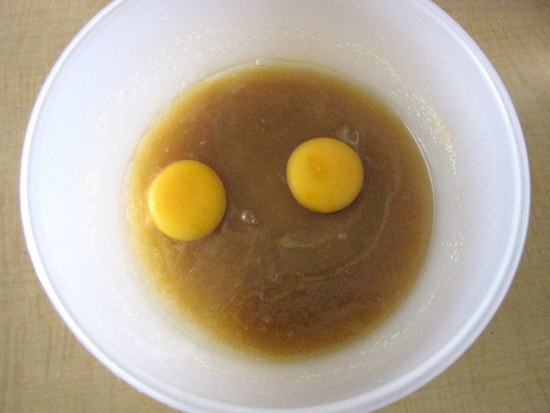
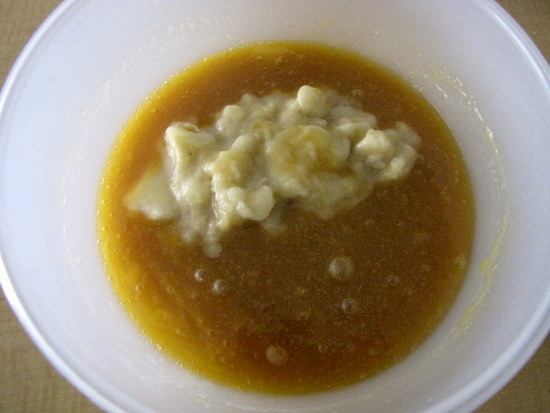
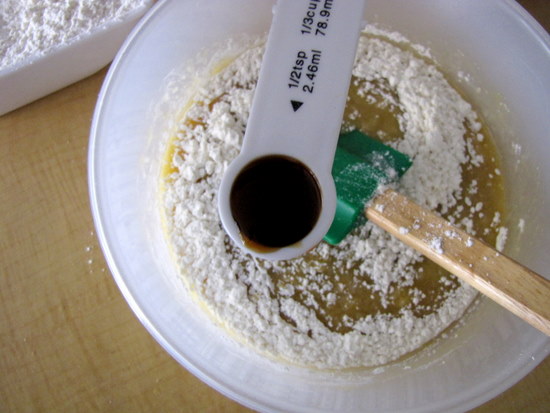
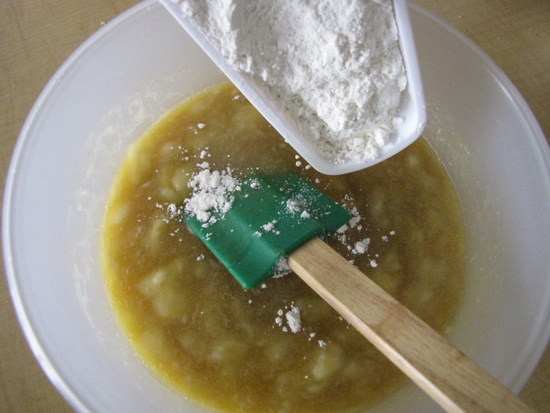
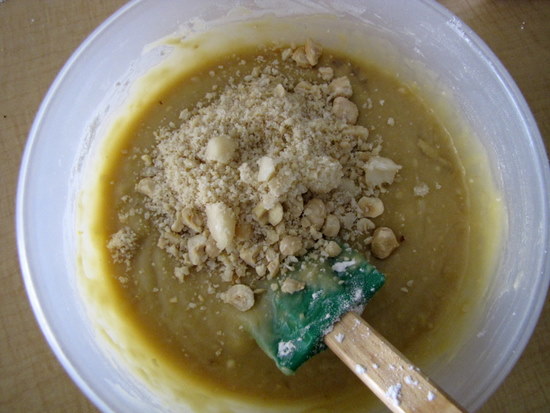
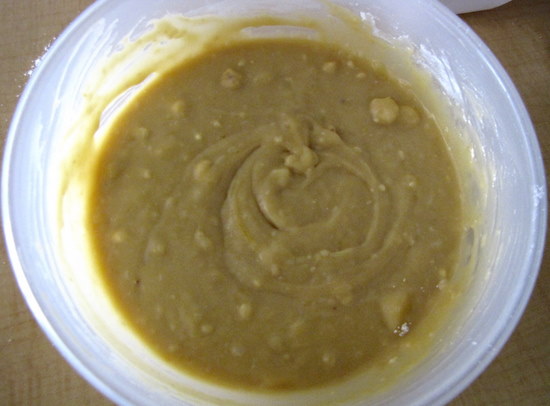
1. Mix all ingredients together (except for the butter).

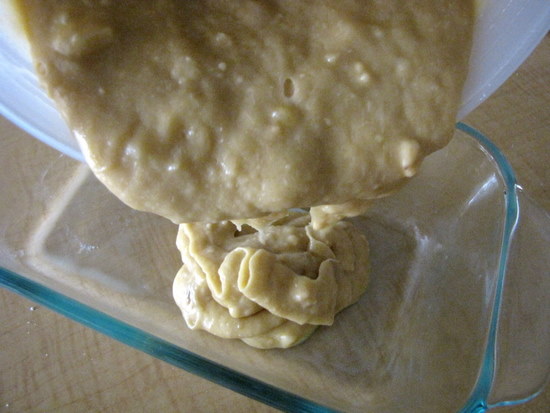
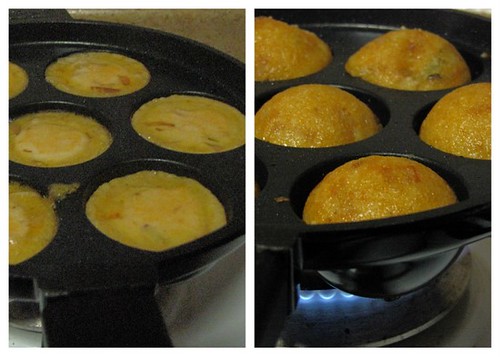
2. Heat a pan or griddle and spread some butter on it. Pour about 1/3rd of the batter into the centre of the pan and let it spread naturally. Keep the fire on low.

3. When small bubbles start to appear on the pancake surface, drop some blueberries on the pancake. I used about 5-6 per pancake. Flip over gently. Don't press down hard on the pancake, otherwise the blueberries will burst and create a mess. Handle very gently and always keep on low flame, otherwise the edges will burn like one of my pancakes did.

4. Cook for another minure or two and transfer to a plate.

Eggless Blueberry Pancakes Recipe

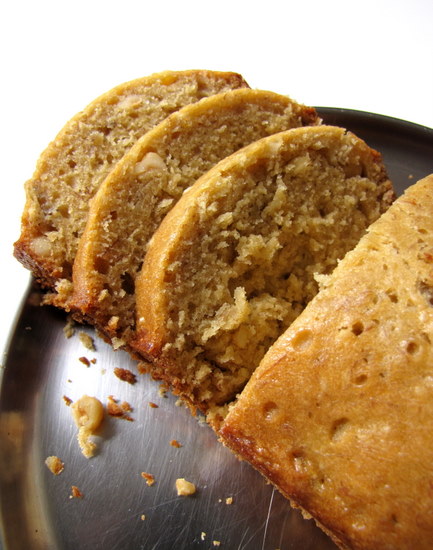
Eat warm with a generous drizzle of maple syrup and be glad you don't need to share!

Wednesday, May 4, 2011

Veg Dalia (Broken Wheat) Upma Recipe

This is one of those recipes I can't believe I haven't posted yet. Its true that I mostly make it for dinner and I do prefer dalia upma over rava upma anyday!

vegetable dalia broken wheat upma recipe

This is one of those healthy dishes that don't taste healthy, atleast to me. Its delicious piping hot with some steaming sambar and chutney. I didn't grow up eating this but I definitely make sure we have this for dinner atleast once every 2 weeks. Its perfect for weeknights if you use frozen cut vegetables to jazz it up. 

vegetable dalia broken wheat upma recipe

Vegetable Dalia (Broken Wheat) Upma Recipe
Source: Amma
Total cooking time: 25-30 mins
Serves: 2

Ingredients:
1.5 cups broken wheat or dalia
3 cups water
1 tbsp oil
1/4 tsp mustard seeds
1 small onion, finely chopped
1/2 cup mixed vegetables (I use frozen peas, corn, carrots and French beans)
1 tsp powdered ginger or 1/2" grated fresh ginger
2-3 green chillies
Salt to taste

How I Made It:

1. Heat oil in a pan and add the mustard seeds. When they pop, add the onions and green chillies and saute until the onions turn transparent (about 2-3 mins). 

2. Add the ginger powder or grated ginger, whichever you are using, and fry for another 20 seconds. Next, add the vegetables and 3 cups water. Bring to boil and cook closed until the vegetables are soft (about 5-6 mins). 

3. Add salt and the broken wheat in a slow trickle, stirring as you do this. Once you have added all the broken wheat, there should be enough water to cover it completely. If not, add more. Stir frequently and cook until all the water has been absorbed and the upma comes together, soft and fluffy. Pop some of the wheat in your mouth to see if its soft. If not, add more water and keep stirring until its fully done. Also adjust salt at this stage. 

vegetable dalia broken wheat upma recipe

Serve hot with sambar and/or chutney. 

Sunday, April 17, 2011

Rava Idli Recipe

When MTR does such a great job of producing a great instant rava idli mix, you may ask why I even bother with a from-scratch rava idli recipe. 

south indian rava idli recipe

Well, SJ did it *points fingers* so I wanted to as well. Plus, I had some eno salt in the house and decided that rava idli would be easier than making dhokla from scratch, or something.  

Rava Idli Recipe - From Scratch
Adapted from here
Makes about 10-12 idlis

Ingredients:
1 cup sooji / rava / fine semolina
1/2 tsp mustard seeds
1 tsp channa dal
1 tbsp chopped cashews
1/4 tsp hing
2 tbsp oil
2.5 cups curd / plain yogurt
1 tsp Eno fruit salt (secret ingredient for spongy rava idlis)
A handful finely chopped coriander leaves
Salt to taste

How I Made It:

1. Heat oil in a pan and add the mustard seeds and chana dal.

2. Once the mustard seeds pop and the chana dal starts turning golden brown, add the hing and cashews. Fry until the cashews start turning golden brown.

3. Now add the rava and fry till it turns golden brown (a lot of golden-brown-turning needs to happen in this recipe), approximately 5-7 mins.  Add salt (regular, not eno), mix well, and let it cool.

4. Then add 1 cup of curds to the dry mixture and mix well. Let it rest covered for 10 mins. Add the rest of the curds and mix well ( it should be little thicker than idli batter). Add the Eno fruit salt and mix well. Ladle the batter into idli moulds. Steam in an idli maker or pressure cooker for 10-12 mins (without weight). Allow it to cool and unmould.

south indian rava idli recipe

The best combination for rava idli is onion-tomato chutney but I didn't have the patience for that so served with regular coconut chutney.

PS: Excuse the picture quality. This was dinner on Saturday and I didn't have the patience to set up the light box. 

Wednesday, January 5, 2011

New Year Morning Waffles Recipe

Most of you may already know this if you are in my Facebook list but here's the formal announcement - I bought a KitchenAid! It may not be a big deal to some but I had been wanting one for ages now and kept pushing back because of lack of counter space in my previous apartment kitchen and, its pretty expensive here in Singapore. Anyway, things worked out, we moved, and now I own one!

DSC_0585-2

I wanted to use it the first day of the year (don't ask me why!) and decided to make waffle batter in it. Waffles are one of my favourite foods of all time and I have owned a waffle iron for a while but don't make it as often as I'd like.

I should though. In fact, I should make waffles for dinner, that's what I should do.

Basic Easy Waffles Recipe
Adapted from 3 Many Cooks
Makes 6

Ingredients:
1 egg, separated
1 cup buttermilk (I used 1/2 cup homemade yogurt mixed with 1/2 cup water)
1 cup plain flour
2 tbsp sugar (adjust to taste or omit completely)
1/2 tbsp baking powder
1/2 tsp baking soda
1/2 tsp salt
2 tbsp cooking oil (I used olive oil)

How I Made It:

1. You don't need a stand mixer for this but if you do, just dunk in the following ingredients and mix it up on speed 2 for 1-2 mins. If you don't, just do the same with your hand whisk in a bowl. First add the flour and sugar..

DSC_0525-2

2. Followed by the buttermilk..

DSC_0526-2

3. Egg yolk..

DSC_0530-2

4. Baking powder and baking soda..

DSC_0531-2

5. Salt..

DSC_0533-2

6. And oil..

DSC_0534-2

7. Mix mix mix for about 2 mins or so on low speed. Then set aside.

DSC_0540-2

8. Now you need to beat the egg whites until stiff. I used my hand-held whisk for this.

DSC_0545-2

9. Whip well until soft peaks form on the top of the beaten egg whites.

DSC_0552-2

10. Add to the batter you've prepared and fold in gently without over-mixing.

DSC_0553-2

11. Heat your waffle iron until smoking hot.

DSC_0556-2

12. Add about 1/4 to 1/2 cup batter to the iron depending on the size of your iron. Remove when golden brown all over - mine took about 3 mins.

DSC_0565-2

I know there are 12 steps up there for a simple waffle recipe but its because I took very detailed pictures to show the steps. Its really a very easy and yummy breakfast to make so go ahead, buy that waffle iron if you don't have one already (Huge thanks to Darsh for lugging mine all the way from the US) Even if you use it only once or twice a month like I do, its still worth it.

DSC_0576-2

It was too early in the morning so I slightly burnt my waffles. But you still think I'm a decent cook right? Thanks! I knew confessing to you all would be totally safe :) Serve with a dusting of icing sugar or maple syrup to camouflage the burnt parts ;)

Now why don't you go check out my Project 365 site if you have a minute?

Sunday, December 12, 2010

Semiya / Vermicelli Upma Recipe

As I've mention before in my rava upma recipe post, we usually have breakfast food for dinner. Rice is made generally only on weekends and so, its a constant challenge to come up with quick, variety food over weeknights.

DSC_0901

Semiya or vermicelli upma is not a new recipe, but something we have atleast twice a month. I make this often enough but only on weeknights so have never taken pics for the blog. Now that the new camera has hit the scenes, I had to try some night shots. These are the first of many posts, hopefully. I haven't done much editing except to add some highlights and the watermark.

DSC_0893

Roasting the semiya or vermicelli before adding it to the upma enhances the taste and makes sure it doesn't end up in a sticky clump, so don't miss this step.

DSC_0899

I always store a bag of mixed frozen vegetables in the freezer for precisely this purpose - upma and pulao gets done so much quicker and no messy chopping and washing and peeling necessary!

Semiya / Vermicelli Upma Recipe
Serves: 2-3

Ingredients:
2 cups vermicelli
3 cups water
1 small red onion, chopped
3/4 to 1 cup chopped vegetables of choice (carrots, peas, beans, corn, potatoe, etc)
2-3 green chillies, slit (I used dry red chillies since I didn't have any)
1" piece of ginger, grated
1 tbsp oil
1/4 tsp mustard seeds
1/4 tsp Bengal gram / kadala paruppu
A few curry leaves (optional)
Chopped coriander leaves for garnish (optional)

How I Made It:

1. Roast the vermicelli in a dry skillet or pan until golden brown. This will take about 4-5 mins but keep an eye on it and stir frequently otherwise they will brown on one side only or even burn. Set aside when done.

2. Heat oil in the same pan and add mustard seeds, curry leaves, Bengal gram and green chillies. When the mustard seeds pop, add the chopped onion. When it becomes transparent, add the ginger and the vegetables. Mix well until well coated and cook covered on sim for 6-8 mins until the vegetables are soft. Sprinkle some water if necessary.

3. Once the vegetables are cooked, add the water with some salt and bring to boil. Once the water comes to a rolling boil, dunk in the roasted vermicelli stirring continuously so that it doesn't clump. Let it cook in the open pan until the vermicelli has cooked all over and there's no water left. Usually a vermicelli : water ratio of 1 : 1.5 works well for me.

4. Garnish and serve hot with chutney.

DSC_0921
Vermicelli Upma and Coriander Chutney with a twist

Wednesday, August 11, 2010

No-Fail Basic Pancakes Recipe

Pancakes may seem like the easiest things to make but from experience, I can tell you that.. its not! Sometimes, my pancake batter is too thick, or too egg-y (bleghh), or too thin.. and then the pancakes are not perfect.

Considering that I dive into the pancakes tray whenever I have breakfast buffet in a hotel, AND considering I have this here food blog and stuff, it would be ridiculous if I didn't have a decent (and easy) pancake recipe to share.

I knew "this is it" when I saw this post on Cheesecake for all. And I was right. Sometimes you know these things you know.

Basic Mini Pancakes Recipe

Basic Pancakes Recipe
Makes 12-14 mini pancakes


Ingredients:
1 cup all-purpose flour
1 tbsp white sugar
1 tsp baking powder
1/2 teaspoon baking soda
1/4 teaspoon salt
1 cup milk
1 egg
2 tablespoons oil + extra for greasing the tawa/griddle

How I Made It:

1. Beat together - egg, milk and oil.

2. In a separate bowl, combine-  flour, sugar, baking powder, baking soda and salt. Make a well in the centre and pour in the egg mixture.

3. Beat lightly until smooth (meaning, no lumps).

4. Pour about 2 tbsp of batter on a hot and lightly oiled griddle and let it spread naturally. After a minute, flip to the other side. Both sides should be golden brown so adjust heat accordingly as you cook them.

Easy Basic Pancakes Recipe

Serve warm with a dollop of butter or maple syrup or both.

Monday, March 29, 2010

Sharjah Shake: Step by Step Recipe

Sharjah shakes were all the rage when I was in college. Although it feels like just yesterday that I was in college, sadly, its been a while.

That's the time when milk shake parlors sprang up all over town and people of all ages dropped by for a quick relief from the heat and humidity that's almost always present in Kerala.

Amma and I have shared countless number of sharjah shakes in these parlors during our almost-everyday town visits, leaving with a full stomach and numb tongues. Ah, the good old days.

As if having a Sharjah shake almost every time we stepped out of the house wasn't enough, we used to make it at home too. "Packet milk" was bought and chilled especially for this purpose as the milk we used normally came from a neighbour with a cow (this milk was boiled in a milk cooker, cream extracted and stored away for churning butter that would later be made into ghee.. phew!)

Back to Sharjah Shake. Here's how we used to make it. I am sure there are countless variations out there trying to mimic the milk shake parlour versions. This is ours and its very flexible.

Sharjah Shake Recipe
Serves 2

1. Chop up one ripe banana straight into your blender.


2. Throw in 4-5 whole raw cashewnuts or almonds.


3. Add 1 tbsp bournvita / maltova / chocolate horlicks / ovaltine to this. We have tried even regular horlicks and that tastes good too.


4. Top up with about 2 cups frozen chunks of milk. I used chilled milk here because I was having this for breakfast. To get the authentic milk shake parlour version, freeze milk (in ice trays if you can) and break it up with a strong knife into chunks and then add it in. This will give a crushed ice texture to the drink. Also, using whole milk will enhance the taste (but of course!).


5. Pour and... go on! Bottoms Up!


Note:

Adding sugar is optional since the chocolate drink powder and banana will lend some sweetness to the drink. You can add one date or 2tsp honey if you like the flavour. We usually stick with sugar if needed but taste first.

This goes to the "Serve me Some…Juices, Shakes, Smoothies" event at Cook Curry Nook.

Sunday, November 15, 2009

Banana Bread Step-by-Step Recipe

What's all the fuss about, you ask? Well, you have to try it to know why. I still don't know why this is called 'bread' instead of cake but I do know that its actually somewhere in between and tastes awesome toasted.

This is also a fool-proof recipe. Really. Just throw some things together in a bowl, whisk it and bake it to get this awesome loaf full of a yummy banana flavour.

We rarely buy more than 4 bananas at at a time so mine is a one banana banana bread recipe. Is that too many bananas in one sentence yet? ;)
Here's some of the star cast. A banana (because this is a one banana banana bread recipe, remember? Ok, I'll stop!), 2 eggs, nuts - walnuts being the most popular but I added what I had in hand, a handful of hazelnuts and a couple of macademia nuts which somehow made their way into my pantry and I have no idea from where.

Step one - mash the banana up. I used a masher because something about getting squishy banana pieces on my fingers turns me off.

Next, whisk together 1/2 cup butter at room temperature (ignore that I melted it, I always do that 'cuz I forget to put the butter out but please don't be like me) and 3/4 cup sugar. I used brown sugar but white is ideal.

Once the sugar has completed blended in with the butter, thrown in 2 eggs. You don't have to beat anything to death or make things fluffy, just combining well will do. So combine the eggs well.

Now throw in the mashed banana. Since that's not a very pretty picture, I am going to quickly move on.

Before you add the flour, thrown in 1/2 tsp of vanilla extract. I spent a bomb on my vanilla extract, the more authentic (and so more expensive) stuff actually tastes infinitely better, so you should go crazy and do the same.

Now, add 1 cup all purpose flour / maida and a pinch of salt. Some recipes call for baking powder. I didn't add any and it still came out nice and fluffy so stay with me here, ok? Combine the flour well into the mixture. Again, no excessive beating please.

The final addition - about 3/4 cup of roughly chopped nuts. I gave them a couple of twists in my mixer so they are all of different sizes but that's ok. Its banana bread, anything goes. By the way, nuts are optional.

Combine combine combine.

Pour into a greased loaf pan.

Bake in a 350F/180C pre-heated oven for about 40-50 mins, until a skewer inserted into the loaf comes out clean.
Let it sit in the loaf pan and cool completely. Then transfer to a plate/cake board and cut into 1"thick slices. Why 1"? Because I say so!

One banana banana breads are very photogenic so go ahead and take some nice shots. Actually, any banana bread should be photogenic so don't get discouraged by the one-banana theory.

Thanks for enduring my craziness. Now, here's the recipe all in one place.
One Banana Banana Bread Recipe
Makes one medium-sized loaf
Source - took bits and pieces from countless banana bread recipes

What I Used:

1 ripe banana
1/2 cup butter
3/4 cup sugar, I may add slightly less next time
2 eggs
1 cup all-purpose flour/maida
1/2-3/4 cup nuts of your choice
1/2 tsp vanilla extract
A pinch of salt

How I Made It:

1. Mash the banana well and set aside.

2. Cream the butter and sugar together until soft and the sugar has blended well. Add the eggs and beat more until well combined.

3. Add the mashed banana and mix well. Then add the vanilla extract and mix again.

4. Next, add the flour and a pinch of salt. Combine without beating, to form the dough without any lumps.

5. Transfer to a greased loaf pan and bake in a pre-heated oven at 350F/180C for 40-50 mins until a skewer inserted into the loaf comes out clean.

6. Cool completely before cutting into slices.
You can freeze banana bread for up to a month. Just leave it in the fridge overnight to defrost. Also tastes great toasted, with a pat of butter.

Monday, October 19, 2009

Masala Kuzhi Paniyaram Recipe

I thought I had posted this recipe yesterday but looks like I was dreaming while working - again! Anyway, here it is, my quick fix masala paniyaram recipe that gets made each time I have leftover dosa maavu. Originally part of the Chettinad Cuisine, its quick to prepare, easy and a very nice snack for evening tiffin. I love Chettinad recipes! Their love for food shows in their recipes, I feel.
You will need a paniyaram chatti/aebleskiver pan to make this, unfortunately, so if you don't have one yet, please do something to fix the situation ASAP.

Masala Kuzhi Paniyaram Recipe
Preparation time: 15 mins

What I Used:

Dosa/idli batter - 3 cups
Onion - 1, minced
Green chillies - 2, sliced round
Halved urad dal/split black gram/ulutham paruppu/uzhunnu parippu - 1 tsp
Red chilli powder - 1 pinch (I add it for the colour)
Hing/asafoetida/kaayam - a generous pinch
Greated coconut - 1 tbsp (optional)
Curry leaves - a few, torn into small pieces (optional)
Salt - to taste
Oil - 2 to 3 tbsp

How I Made It:

1. Mix all ingredients except oil into the dosa batter.

2. Heat the paniyaram chatti and add 3-4 drops oil into each hole. Once it heats, add spoonfuls of batter into each hole until its more than 3/4th full. Let it cook until the bottom is browned and crisp.

3. Turn over and cook the other side. Make sure that the stove is at medium-low so that the inside also gets cooked without burning the outside.

4. Once both sides are brown and crisp, drain on a kitchen napkin.

Serve hot with chutney and hot tea/coffee.