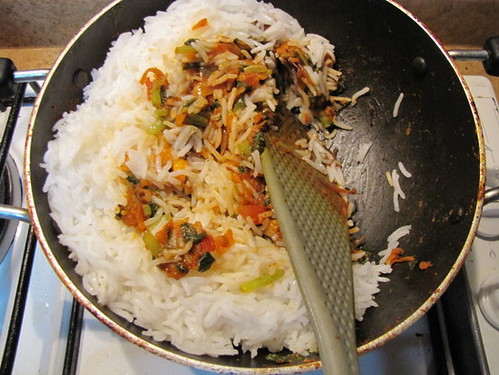
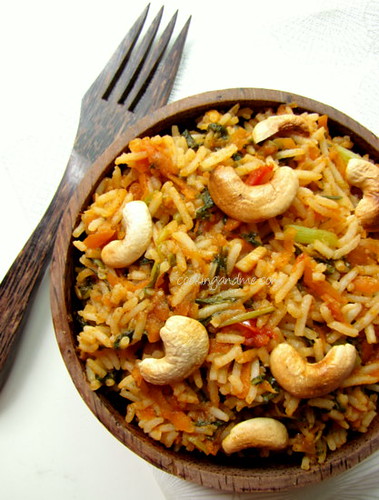
Showing posts with label Rice. Show all posts

Thursday, February 17, 2011

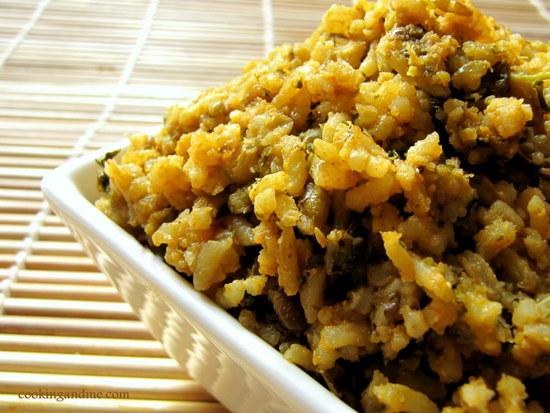
Super Quick Cauliflower / Gobi Biryani Recipe

Yes, I totally made this recipe up. There's no such thing as a Cauliflower Biriyani. No, you are right, cauliflower does get added on to vegetable biriyani occasionally there's no biriyani that's exclusively dedicated to cauliflower.

gobi biryani recipe

I am also going to say this up front before you read through the whole recipe and get disappointed. You need Biryani Masala to make this recipe. Its not one of those grind-your-spices-fresh type of recipe because that would make this a non super quick dish, and today we are all about super quick.

Its also a prerequisite to like cauliflower inorder to enjoy this dish.

gobi biryani recipe

Gobi / Cauliflower Biryani Recipe
Serves 3

Ingredients:
1.5 cups basmati rice (or any long-grained rice)
1 large onion + 2 green chillies, ground to a paste
1 large tomato, pureed
A handful of green peas (fresh or frozen)
1 medium sized cauliflower, washed and cut into florets (around 4 cups)
1 tbsp ghee (or oil)
Fresh chopped coriander leaves for garnish (optional)

The Masala
1/2 tsp jeera / cumin
1 tsp dhania / coriander powder
A pinch of turmeric
1 tsp ginger garlic paste
1 heaping tbsp of biryani masala
Salt to taste

How I Made It:

1. Cook the basmati rice in 5 cups of boiling, slightly salted water until cooked but still firm. Set aside.

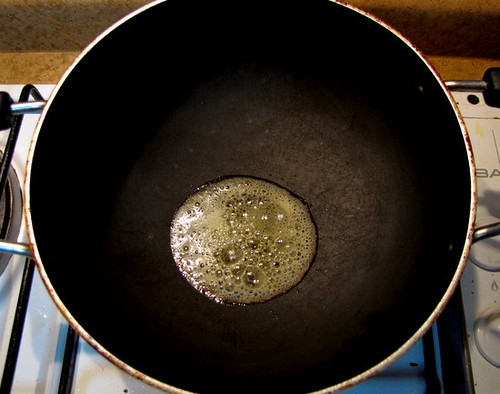
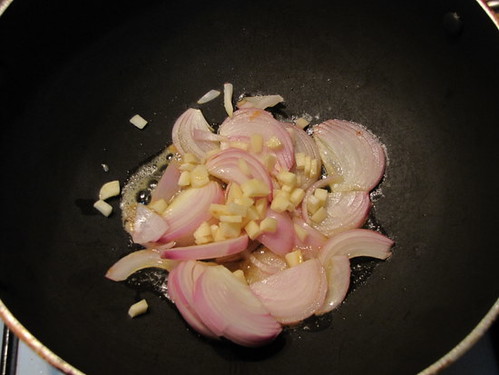
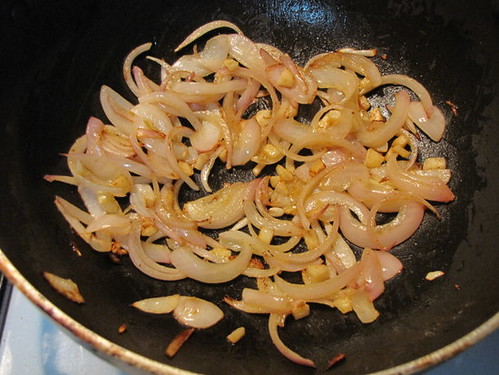
2. Heat the ghee in a pan and add the onion-green chilly paste. You can also slice the onions and chillies and add it that way but I felt like grinding it so I did. Fry the onion paste for about 2 mins. It will start losing moisture and get thicker.

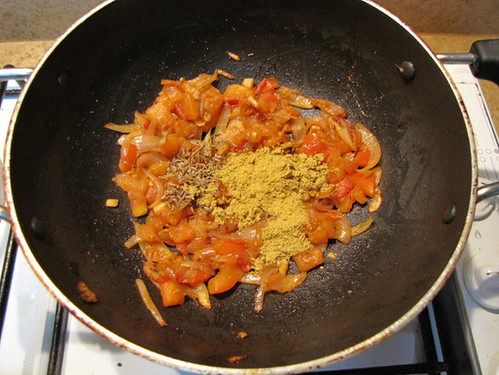
3. At this stage, add all the masala ingredients in the order given. Fry well for about a minute till it starts smelling gooood.

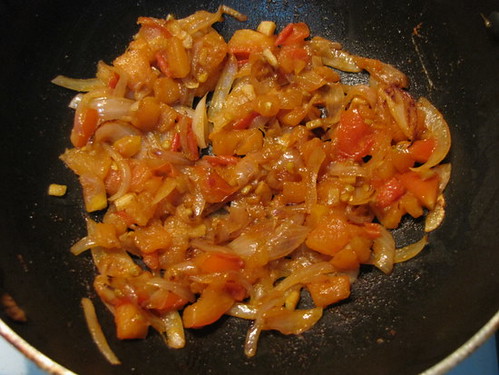
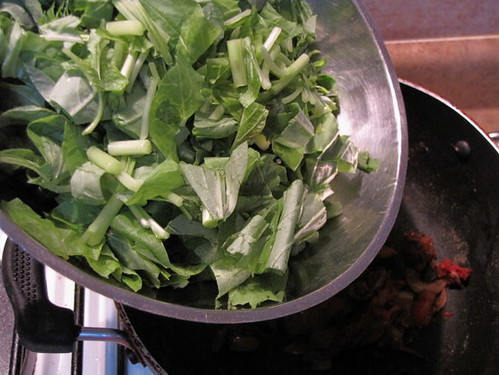
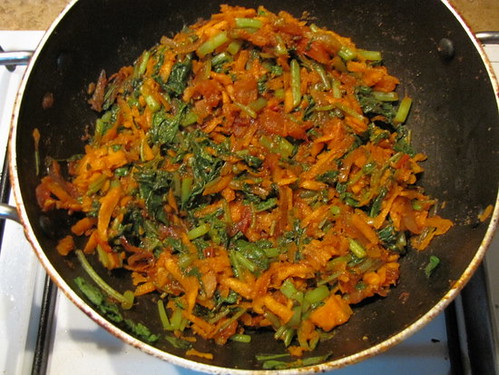
4. Add the tomato puree, peas and cut cauliflower florets. Give it a good mix and cook closed on low fire until the cauliflower is cooked soft, yet retains its shape (about 5-7 mins). You can sprinkle some water if you feel the mixture is getting too dry.

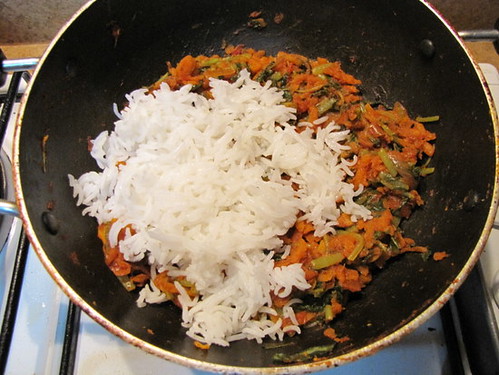
5. Once done, check salt and then mix in the cooked rice gently until well combined. Garnish with chopped coriander leaves and serve with any raita and papad.


The preparation time for this biriyani is significantly less because you are not pounding any masala last minute. Depending on what biriyani masala you use, you will get a distinct flavour each time - I love that variety!

Monday, September 27, 2010

Super Easy Thai Coconut Rice

I live fried rice as a quick and easy answer the question of what is for dinner. This dish is nothing fancy, for sure, but it tastes great and the kids love it. You can use chickpeas, tofu, or seitan in place of the Tofurky--it's just what I had on hand. Try to pick a veggie mix with some great colour that can contrast the yellow rice. I really don't put a lot of curry paste in because I enjoy the creamy mellowness of the coconut milk and tumeric.

INGREDIENTS
- 2 tbsp oil
- 1 large sweet onion, halved and thinly sliced
- 2 garlic cloves, minced
- 2 tbsp lemongrass paste
- yellow or red curry paste to taste
- 4 cups cold cooked rice
- 1/4 to 1/2 cup coconut milk
- 1/2 tsp tumeric
- 1 tbsp hoisin sauce
- 1 pkg Tofurky lunch meat, cut into strips
- 3 cups frozen veggies (some Asian mix), thawed
- salt to taste

METHOD
1. Heat wok over med-hi heat, then swirl oil in. Add onions and stir fry for 2-3 mins, until golden and softened. Add garlic and stry fry 30 seconds. Then add lemongrass paste and curry paste and mix well.
2. Add rice and fry for a few mins, turning to coat the rice well. Add coconut milk, tumeric, and hoisin, and lower heat to medium, mixing well. Add more coconut milk of mixture is too dry.
3. Add Tofurky and veggies and heat through. Season with salt and serve.

Sunday, September 19, 2010

Shamshad's Chicken Biriyani / Biryani Recipe

What better way to get back fully after a lazy break from blogging? Make someone else do the work. So here's a mild yet yummy and super easy Chicken Biriyani recipe shared by my friend Shamshad. She was very apologetic about the pictures but I have to say she did a mighty good job.

Thanks Sham!

Sham's Chicken Biryani

Chicken Biriyani Recipe
Adapted from Awesome Cuisine
Serves 4-6

Ingredients:
Basmati rice -  4 cups (soaked in water for 1 hour)
Chicken pieces - 1 kg
Onions - 3 large
Ginger garlic paste - 2 tbsp
Green chilies - 5 (or as per your requirement)
Pepper powder - to taste
Coriander powder - 3 tbsp
Garam masala - 1 tbsp
Cardamom - 4
Cinnamon - a 1" piece
Cloves - 4
Salt to taste

To Marinate
Pepper powder -to taste
Coriander powder - 3 tbsp
Garam masala - 1/4 tsp
Salt to taste

For Seasoning
Ghee - 2 tbsp
Cashew nuts - 15 or so
Raisins - 10 or so
1 large onion

Method:

1. Chicken
Wash Chicken pieces. Marinate for atleast an hour with coriander powder, pepper powder, garam masala powder and salt.
Semi fry chicken pieces in a pan with little oil.

Heat oil and add onions and the ginger garlic paste. When it turns brown, add green chilies (cut into small pieces). Add coriander powder, pepper powder, garam masala powder and salt.

When it is done, add chicken pieces. Keep it for 5-10 mts till it is half cooked. In between you can turn the pieces so that it is heated equally.

Cook in pressure cooker with about 1/2 cup water. Normally 4 whistles.

Biriyani Rice
Put 2tsp ghee in the pan used to fry the chicken. Add cardamom+cloves+cinnamon.
After 2 mins, add the soaked rice. Stir well for 5 mins, else it will stick to the pan. Add the rest of the main ingredients and cook in a pressure cooker with 6 cups water (the ratio of rice:water should be 1:1.5) - normally 3 whistles for basmati rice.

Once done, mix the cooked rice and chicken.

Seasoning
Put ghee in a pan. Add onion (cut lengthwise very thin), cashew nuts and raisins. When it turns light
brown, remove and garnish the biriyani


Sham's Chicken Biryani

Serve hot with papad and raita.

Friday, August 6, 2010

Mushroom Biryani / Biriyani Recipe

With all that talk of non vegetarian biryanis yesterday, I simply had to share the Mushroom Biryani I tried a couple of weekends back. I usually follow a pretty standard recipe when I make biryani but I opted to make this one a bit more spicy and tomato-ey than usual. We loved it and I am making some more for a potluck tomorrow.

Mushroom Biryani

Mushroom Biryani
Serves: 2-4

Ingredients:
2 cups cooked basmati rice
1 cup chopped button mushrooms
1 large onion, sliced long
2 large tomatoes, pureed
1 tsp tomato paste (or tomato ketchup)
1/2 tsp turmeric powder
1/2 tsp red chilli powder (or to taste)
1 tsp garam masala / biryani masala
1 tbsp oil
1 tbsp butter / ghee (or another tbsp of oil)
Salt to taste

To Grind Together:
1 onion
5 green chillies
1" piece of ginger
4-5 garlic cloves
1" piece of cinnamon
3 cloves
3 cardamom pods
A few stalks of coriander leaves (optional)

For Garnish:
1 large onion, sliced long and fried golden brown
A handful of tasted cashewnuts
Chopped coriander leaves

How I Made It:

1. Heat oil and ghee and throw in the onions. When they are golden brown, add the ground masala paste. Don't worry if some of the spices are not ground fine. Mix well until nicely fried, for about 2-3 mins. Then add the chopped mushrooms.

2. The mushrooms will give out some water, so cook until the mushrooms are soft and the water has all evaporated. Then add the chilli powder, turmeric, garam / biryani masala and fry for a minute. After this, add the pureed tomato and tomato paste / ketchup. Stir well and cook well until all the ingredients come together. No need to add water at any stage. Add salt.

3. Gently mix in the cooked basmati rice and garnish with the fried onions, cashewnuts and coriander leaves.

Mushroom Biryani II

Serve hot with raita.

Wednesday, August 4, 2010

Non Vegetarian Biryani / Biriyani Recipes

If you've been reading me for over a year, you may probably remember this nifty little website that TH and I put together. Although I don't talk about The Recipe Diary much, its very much active with new, awesome recipes getting added on every day.

I get quite a few pings and emails asking me for non vegetarian / chicken / mutton / fish biryani recipes. I don't cook non vegetarian food anymore but that shouldn't come in the way because The Recipe Diary definitely has a good collection of non veg biryani recipes that are tried and tasted and uploaded by expert cooks.

Here are the top 5 non vegetarian biryani recipes from the site.

1. Thalapakattu Biryani by Jay
2. Chicken Biryani by Prasu
3. Ambur Mutton Biriyani by Ashwini
4. Bombay Biriyani by Dolon
5. Shrimp Biriyani by Ramya

If you feel you have a great non vegetarian biryani recipe to contribute, even if its on the list above because we all have our own versions, please enter your recipe on this page and let me know you did.

Also, if you try any of the above recipes, do leave a word here, I am sure the contributors would love to hear your feedback :)

Wednesday, July 21, 2010

Top 5 Easy Rice Recipes on Edible Garden

Its all about eating less carbs or no carbs now, I get it. So I want to apologize for shoving these 5 rice recipes in your face but these are the most popular (pageviews popularity from Google Analytics) on Edible Garden and I wanted to list them out for you, just in case.


3. Coriander Rice / Kothamalli Sadam (I have received 17 emails to date from people who tried and loved this recipe)


4. Mint Rice / Pudina Pulao (great way to use up some pudina leaves lying around)


5. Ellu Sadam (I love the flavour 'cuz I love sesame seeds!)


What's your favourite rice recipe? Do you like it plain or spiced up?

Tuesday, July 20, 2010

Aloo Capsicum Pulao / Potato Capsicum Pulao Recipe

A quick rice recipe from Mallika Badrinath's 100 Rice Delights. The addition of capsicum gives the rice dish a very different flavour - we loved it!

Please excuse the very mediocre picture
Potato Capsicum Pulao
Serves: 2

Ingredients:
1 cup basmati rice
1 large potato or 2 medium to small ones
1 large capsicum, diced
2 medium-sized onions, diced
1 cup pureed tomato (about 2 tomatoes)
1 cup water
1/4 tsp garam masala
1 tbsp ghee (or oil)
Salt to taste

Grind together without water:
3 tbsp grated coconut
5 dry red chillies
1 small onion (or 6 shallots)
1 tbsp roasted channa dal / Bengal gram
2 flakes garlic
1 tsp coriander seeds (or 1 tsp coriander powder)
1 medium-sized tomato

How I Made It:

1. Soak rice for 30 mins. Pressure cook the potatoes for 1 whistle, peel, and set aside. 

2. Heat ghee or oil in the pressure cooker pan and fry the garam masala for 10 seconds. Then add the onions and fry until pink and transparent. 

3. Next add the capsicum and fry until it becomes soft. Add peeled, cubed potatoes and the ground coconut paste. Fry for about 2-3 mins and then add the pureed tomato and water. Add salt and bring to boil. 

4. Add rice to the boiling mixture, mix well and close the lid. Pressure cook for 2 whistles (about 5-6 mins). 

Serve hot garnished with chopped coriander or mint leaves. 

----------------------

On another note, TH has started to write on his most favourite sport and a huge passion of this - Tennis! There will be articles and most importantly, live ball by ball updates (like Cricinfo, but for tennis) when there's a match going on. Do pass on to your tennis-loving friends and family - The Chair Umpire

Saturday, June 12, 2010

Broccoli Risotto

For some odd reason I had a hankering for risotto the other day. So I made some. Maybe it's because I have not had risotto for a while, maybe it was the broccoli, or maybe it was the nooch, but I totally loved this dish and could not get enough. It could also be the fact that I made my own veggie broth. Usually I just use water, thinking, "Hey, I'm cooking with veggies so it'll turn into veggie broth on its own. Right?" I did not make a real production of it, just 7 cups of water, a diced onion, carrot, celery stalk and leaves, and some parsley boiled for 30 mins. Easy. And totally worth it.

INGREDIENTS
- 7 cups veggie broth, warm
- 1/2 cup white wine
- 1 tbsp olive oil
- 1 tbsp margarine
- 1 large shallot, diced
- 1 clove garlic, minced
- 1/2 tsp salt
- freshly ground pepper
- 2 cups arborio rice
- 2 cups small broccoli florets (or just chopped)
- 1/4 cup nutritional yeast (or more to taste)
- 2 tbsp margarine

METHOD
1. Heat large saucepan over med-hi heat. Add oil and margarine and saute shallots and garlic for a few mins, until soft but not brown.
2. Add rice and cook, stirring constantly, for a few mins until it gets that translucent look. Add salt and pepper, then about 1/2 cup of broth. Bring to bubbling, stirring, until reduced. Then add wine and repeat.
3. Keep adding broth and stirring, letting to reduce each time (the whole process is going to take about 20 minutes). You will probably want to reduce the heat to medium.
4. When you are down to your last cup and a half or so of broth (about 5-8 minutes from being done), add the broccoli. They key is to have small florets so they cook quickly. Keep adding broth as per usual, until rice is tender and broccoli is cooked. You may not use all the broth.
5. Remove from heat and stir in nooch and margarine. Adjust salt and pepper to taste. Serve.

Sunday, May 30, 2010

Green Curry Summer Rolls

Last week we had a bit of an early heat wave so I was looking for a nice cool dish that didn't involve a lot of cooking. Although the boys totally hated these, Vegan Mom and I loved them. The crunch of the lettuce contrasts the vermicelli and rice paper, while the punch of heat from the curry paste is cooled by the cucumber. Yum. Not a real recipe, but here is the stuff I put in mine. Adjust amounts according to how many rolls you want to make.

INGREDIENTS
- steamed broccoli (crisp and bright green, not mushy. Once the broccoli is cooked, plunge it into ice water to stop it from cooking)
- thinly sliced lettuce (romaine, or other)
- cooked rice vermicelli, cut into about 3" pieces, tossed with soy sauce and green curry paste (to taste)
- thinly sliced shallots
- thinly sliced cucumber
- finely chopped cilantro (or sliced basil, Thai or otherwise)
- rice paper
- dipping sauce

METHOD
1. Soak rice paper in warm water as per directions, fill with ingredients, roll like a burrito. Serve with dipping sauce.

Thursday, March 25, 2010

Sakkarai Pongal / Chakkara Pongal Recipe

We don't celebrate pongal. Which explains why I am posting this traditional pongal festival recipe in March. I mean, how off the mark can you get? About 2 months, that's how much.

But like I said, we don't celebrate pongal, and by that I mean my family. TH's family definitely does, but nothing elaborate like at my sister's place. Mostly it involves making pongal of the savory kind and this sweet version, sakkarai pongal.

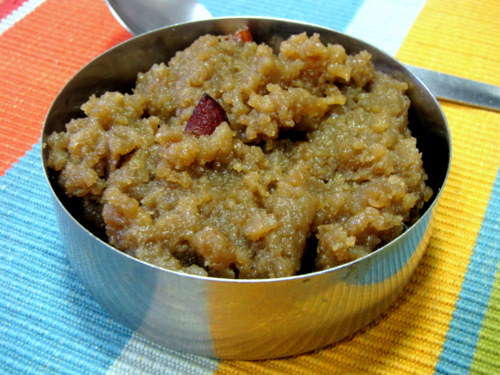
My mom makes it as and when she feels like.  Usually, when we need a quick dessert for guests, sakkarai pongal gets made. Admittedly, its not my favourite sweet but recently. I had this tremendous craving that was quite inexplicable so I made a teeny weeny bit (TH hates it) and had it all by myself at around 10pm in the night, which explains the very not-nice picture.


It came out pretty nice though. I'd never realised sakkarai pongal was this easy to make!

Sakkarai / Chakkara Pongal Recipe
Recipe source: scribbled on a piece of paper that was lying around in an old diary. 
Amma's recipe, I'd guess

What I Used:

1 cup raw rice
1/4 cup moong dal / cherupayar
3/4 cup grated jaggery / vellam / sharkkara (this is on the sweeter side so adjust to taste)
1 cup full fat milk + 1/2 cup water (or 1.5 cups low fat milk)
A few cashewnuts (I used almonds)
A few raisins (if you like them, I added very few)
2 tbsp + 1 tbsp ghee
3 cardamom pods, crushed well
A pinch of nutmeg (optional, I didn't add this)

How I Made It:

1. Traditionally, the rice and dal is simmered in the milk until soft but who has that kind of time these days? Definitely not me. So bring out your pressure cooker if you are anything like me. Wash the rice and dal together. Add the milk + water and pressure cook for 3-4 whistles. We want this nice and mushy.

2. Meanwhile, heat 2 tbsp ghee and roast the cashewnuts / almonds and the raisins until golden brown (the raisins will become plump). Remove from fire and sprinkle cardamom powder and nutmeg, if using, on top. Give it a mix and set aside.

3. Once the pressure leaves the cooker, while still hot, mix in the grated jaggery, roasted almonds and raisins. If the pongal is too thick, add some boiled milk by the tablespoons. If the mixture is too loose, keep on a low fire and mix continuously until desired consistency is achieved.

4. Mix in one more tbsp of ghee and serve warm. I also like it cold from the fridge the next day.

PS: I have a feeling amma adds coconut to this, let me check with her.

PPS: The reason why my sakkarai pongal is a darker shade of brown than what you may have seen is, I used the super unrefined dark brown jaggery from Kerala. Its also unsalted so I mixed in a pinch of salt with the mixture but since you'd all be mostly likely using the salted version, don't bother. The colour of your sakkarai pongal may be lighter but don't worry. Will taste yummy!
Tuesday, January 12, 2010

Ellu Sadam / Sesame Rice Recipe

I love sesame seeds. Whenever a recipe calls for 1 tsp of it, I dunk in 1 tbsp. The same goes for coriander powder but that's a totally different topic that should be discussed in a different context. For now, let's stick to sesame seeds rice.

I am a huge sucker for variety rice. I am very South Indian like that I guess. But this is one recipe I had never heard of until I was gifted Chandra Padmanabhan's 'Southern Spice'.

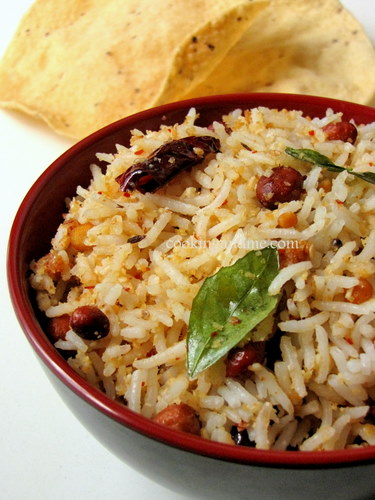
In ingenious and I am still wondering why it took me this long to finally get to it.

Its great to pack for a trip and tastes best at room temperature with some raita. Now, how many South Indian Variety Rice recipes can you say this for?

Ellu Sadam / Sesame Rice Recipe
Source: Southern Spice by Chandra Padmanabhan

What I Used:

1 cup cooked rice

For the Spice Powder:

1/2 cup white sesame seeds / til / ellu
2 tbsp grated coconut
4 dry red chillies
1 tsp oil

For Tempering:

2 tbsp gingelly oil / nallennai
1 tsp mustard seeds
3 tbsp shelled peanuts
1/2 tsp cumin seeds / jeera
2 dry red chillies, halved
1 tsp urad dal / ulutham paruppu
1 tsp channa dal / kadala paruppu
A few curry leaves

How I Made It:

1. Dry roast the sesame seeds and grated coconut separately in a pan until nicely browned. Add oil for spice powder and lightly fry the red chillies, taking care not to burn them. Cool, grind to a fine powder and set aside.

2. Heat oil for tempering and add the roasted peanuts. When almost fried and brown, add the rest of the ingredients. When the mustard seeds pop and the dals turn golden, remove from heat.

3. Stir in the rice and the spice powder. Serve at room temperature with raita.

This goes to Priya's Cooking With Sesame Seeds Event.

Thursday, January 7, 2010

Khichri

If the Google is to be believed, khichri means a hash of rice and legumes. I thought this would be a nice change from the dal recipe I keep making again and again (it's awesome, to be sure, but it's time for some change). This is really comfort food--mellow, warm, easy to chew, and nourishing. It does not make for the greatest picture, but don't let that stop you from making this amazing dish.

INGREDIENTS
- 1 sweet onion
- 2 cloves garlic, chopped
- 1 cup basmati rice
- 5 cups water (more if needed)
- 2 tsp salt (or to taste)
- 1 cup red lentils
- 3 tbsp margarine
- 2 shallots, thinly sliced
- 2 tsp garam masala
- 1/4 cup chopped cilantro

METHOD
Preheat oven to 300 degrees
1. Get water boiling in an ovenproof pan with a lid. Rinse rice and put in boiling water with onions, garlic, and salt. Reduce heat and simmer on low, uncovered, for 20 mins.
2. Rinse red lentils and add to pan. Cover and simmer for 15 mins.
3. By now the rice and lentils will be mostly cooked and getting fairly dry. If too dry, mix in some more water, then place in the oven. Bake for 20-30 mins, until fully cooked.
4. Heat margarine in a small pan over medium heat and fry sliced shallots for 5-7 mins, until golden. Add in garam masala, then gently stir into khrichi along with the cilantro. Add water, if needed, to reach desired consistency. It can be more dry like a biryani, or wetter like a porridge. Season to taste and serve.

Tuesday, January 5, 2010

Indian Lentil and Rice Pancakes

I decided it was time to break out of my Indian food rut and explore some new recipes. I have been wanting to try this recipe for a while but have never had my act together enough to plan two days in advance. These are actually really easy to make, but you need to plan ahead. I guess this is also the first gluten-free bread(like) recipe I have posted on this site, so huzzah for me! These are thick and durable enough to be used to scoop up food or sauce from your plate. They are a nice change from naan bread and have a wonderful flavour despite the simple seasoning.

INGREDIENTS
Makes 10 pancakes
- 3/4 cup basmati rice
- 1/4 cup red lentils
- 1 cup warm water
- 1/2 tsp salt (or to taste)
- 1/2 tsp tumeric
- 1/2 tsp freshly ground pepper
- 2 tbsp chopped cilantro

METHOD
1. Place rice, lentils and water in a juice pitcher. Cover and let sit overnight.
2. Drain water off (reserve) and blend rice and lentils with an immersion blender. Then, blend water back into the lentils/rice until smooth. Cover and let ferment in a warm place for 24 hours. (Or, you can soak everything in a bowl, and blend in a food processor. I find the first method easier and less messy).
3. Heat a non-stick frying pan (like a well-seasoned cast iron pan) over medium heat. Mix salt, tumeric, pepper, and cilantro into the batter. The original recipe called for 1 tsp of salt, but I found that to be far too much.
4. Brush the pan with oil, and pour a scant 1/4 cup of batter on the pan. Spread/thin out batter with the back of a spoon (you can make 3 pancakes at once, depending on the size of your pan). Cook for 1-2 mins, until dry around the edges, flip, and cook another min or so. Keep cooked pancakes wrapped in a towel while you cook the others. Serve at once.

Sunday, November 15, 2009

Thai Fried Rice

I can't remember how many times I tried to make fried rice back when I started cooking on my own before I learned that cold rice is the key to keep in from sticking together into one lump. It was a great day. Fried rice is a great way to use up extra rice, but I usually try to make a few extra cups so I can make fried rice on Asian night. This recipe has wonderful flavour, and the key is the coconut. Make sure you toast it but don't burn it.

INGREDIENTS
- 1/2 cup raw cashews
- 2/3 cup unsweetened coconut
- 2 tbsp oil
- 2 garlic cloves, minced
- 1/2 tsp red curry paste (or more to taste)
- 4 cups cooked jasmine rice, cold
- 1 tbsp brown sugar
- 2 tbsp soy sauce
- 2 tbsp sweet chili sauce
- 1 tbsp rice vinegar
- 1 cup frozen French cut green beans, thawed
- 2 baby bok choy, thinly sliced
- 3 green onions, sliced
- 1 vegan omelet, rolled and sliced (optional)
- juice of 1 lime


METHOD
1. Heat a wok over medium heat. Dry fry the cashews and coconut, stirring constantly, for a minute or so, until lightly golden and fragrant. Set aside.
2. Increase heat to med-hi and add oil. Stir fry garlic for 30 seconds, until lightly golden, then add in curry paste and rice and fry for a few mins, until heated through.
3. Add brown sugar, sauces, and vinegar and mix well. Add in beans and bok choy and fry until bok choy is wilted but still nice and green. Add in onions, coconut, and cashews and cook for a few mins more.
4. Mix in omelet slices and lime juice and serve.

Wednesday, November 11, 2009

Palak Khichdi / Spinach Khichdi Recipe

This is another recipe from Geeta Perima of the instant sambar powder recipe fame. A lot of you wrote in saying you tried it and loved it for its simplicity. This is another nice dish that she had made us for dinner on the night we landed. Paired with some mildly sweet Gujarati Khadi and potato chips, this made for an amazing dinner.


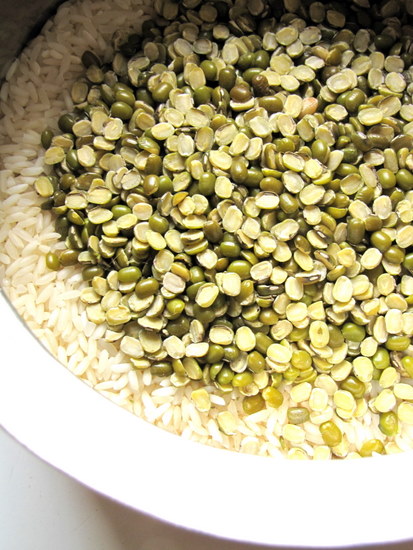
You'll need some good quality halved green gram and normal rice that you use every day. I bought this green dal from Bombay and it was so fresh and shiny and dirt-free!

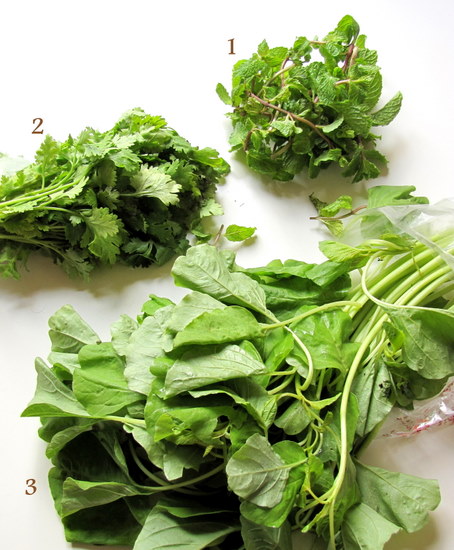
You'll also need three kinds of greens for the recipe:

1. Green spinach or palak
2. Fresh coriander leaves/cilantro or kothmeer/kothamalli/malliyila
3. Mint leaves/pudina.

I got all three bunches fresh from Little India, especially to make this dish myself :)

You will also need to grind up some stuff. This is the essence of the recipe so, read on.

Palak Khichdi Recipe
Source: Geetha Perima
Serves: 2 to 3

What I Used:

2 cups rice
1 cup halved green dal (always use 2:1 ratio for rice:dal)
1 bunch green spinach, chopped fine
1 large onion, chopped
1 tsp jeera/cumin
1/4 tsp turmeric powder
1/2 tsp red chilli powder
1/2 tsp garam masala or goda masala
1 tsp ghee (optional)
1 tbsp oil
Salt to taste

To grind:

1 cup loosely packed fresh coriander leaves
1/2 cup loosely packed mint leaves
2 green chillies, or to taste
A 1" piece of ginger
4 cloves of garlic
2 tomatoes
5-6 pearl onions/shallots

How I Made It:

1. Wash and soak the dal and rice together for 30 mins.

2. Grind all the ingredients under the 'to grind' list adding no water.

3. Heat the oil in a pressure cooker pan and add the jeera. When it splutters, add the chopped onion. Fry until golden brown. Then add the chopped spinach and stir until soft and wilted.

4. To this, add the ground paste and mix well with salt, turmeric, red chilli powder and garam masala. Let it cook for a min.

5. Now add the soaked rice and dal. Add 4 cups water. Cook for 4-5 whistles in the pressure cooker. If you are using a normal pan, make sure you cook covered until the rice and dal is cooked thoroughly.

6. While hot, mix in 1 tsp ghee and serve.
Best served with Gujarati Khadi. I had made some but the pictures turned out really (really really) bad so will post the next time I make it.

This hot dish of palak khichdi goes to MLLA 17 hosted by Sra, a brainchild of Susan. Where would we be without legumes, eh? :)

Oh and also, the winner of the Bath and Body Works Body Lotion has been picked. In fact, I knew last Sunday itself but forgot to announce, shame on me! Click here to find out.

Monday, October 19, 2009

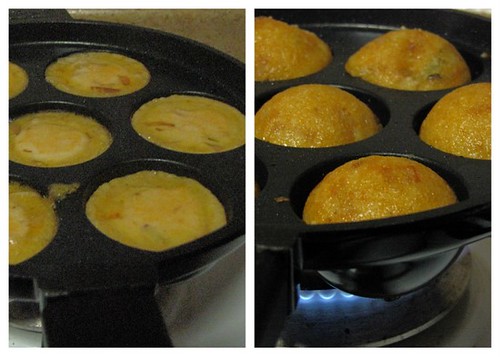
Masala Kuzhi Paniyaram Recipe

I thought I had posted this recipe yesterday but looks like I was dreaming while working - again! Anyway, here it is, my quick fix masala paniyaram recipe that gets made each time I have leftover dosa maavu. Originally part of the Chettinad Cuisine, its quick to prepare, easy and a very nice snack for evening tiffin. I love Chettinad recipes! Their love for food shows in their recipes, I feel.
You will need a paniyaram chatti/aebleskiver pan to make this, unfortunately, so if you don't have one yet, please do something to fix the situation ASAP.

Masala Kuzhi Paniyaram Recipe
Preparation time: 15 mins

What I Used:

Dosa/idli batter - 3 cups
Onion - 1, minced
Green chillies - 2, sliced round
Halved urad dal/split black gram/ulutham paruppu/uzhunnu parippu - 1 tsp
Red chilli powder - 1 pinch (I add it for the colour)
Hing/asafoetida/kaayam - a generous pinch
Greated coconut - 1 tbsp (optional)
Curry leaves - a few, torn into small pieces (optional)
Salt - to taste
Oil - 2 to 3 tbsp

How I Made It:

1. Mix all ingredients except oil into the dosa batter.

2. Heat the paniyaram chatti and add 3-4 drops oil into each hole. Once it heats, add spoonfuls of batter into each hole until its more than 3/4th full. Let it cook until the bottom is browned and crisp.

3. Turn over and cook the other side. Make sure that the stove is at medium-low so that the inside also gets cooked without burning the outside.

4. Once both sides are brown and crisp, drain on a kitchen napkin.

Serve hot with chutney and hot tea/coffee.

Thursday, September 10, 2009

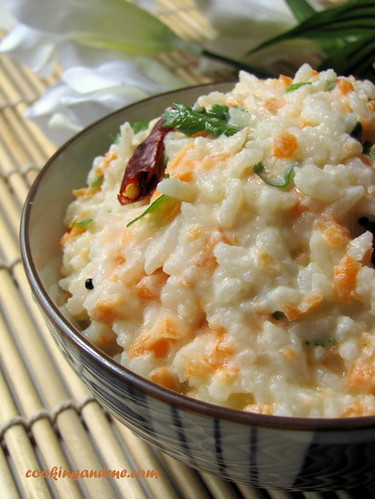
Fortified Curd Rice Recipe

The most striking thing about being married to a Tamil Brahmin is the addition of curd rice to my daily diet. TH cannot do without at least a spoonful of curd rice at the end of each meal, if we are having rice and curry. He is not very particular about rasam and is fine if I make only one kozhambu and two side dishes but curd is not subject to compromises, ever!

So I always have a good amount of curd in the fridge and proceed to make the next bowl if the current one is depleting. This is extra-advantageous after a long day at work and neither of us feel up to cooking or going out for dinner.

I don't find just curd and rice with pickles a justifiable meal because I feel it doesn't have even nutrition, comforting as it is. So I have a 'fortified' version adding as much vegetables as can be eaten raw.


Here's my standard version that I stick to more or less each time we have only curd rice for dinner.

Fortified Curd Rice
Serves: 2
Preparation time: 15 mins

What I Used:
4 cups cooked rice
1 cup thick curd / plain yogurt
Half cup or so water
1 grated carrot
1/4 cup grated cucumber
1/2 tsp grated ginger
A bunch of fresh coriander leaves, chopped fine
A pinch of salt

For tempering:
2 tsp oil
1/4 tsp mustard seeds
1/4 tsp urad dal / ulutham paruppu
A pinch of hing / asafoetida / perungaayam
2 red chillies, torn into small pieces

How I Made It:

1. Mash the rice with a potato masher. Add the curd and water and mix well.
2. To this, add the chopped coriander and grated vegetables and mix well.
3. Heat oil in a pan and add the ingredients for tempering. When the mustard seeds pop, remove from fire and add to the rice. Mix well with salt.

If the consistency is too thick, add some more water / curd. If you keep this for long, the rice will absorb the water and make it thick, so adjust accordingly.


Isn't this so much nicer and prettier than normal boring curd rice? ;)

Tuesday, August 25, 2009

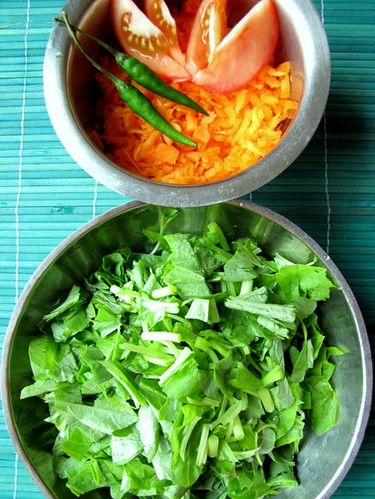
Tomato Spinach Pulao - Step by Step Recipe

Whenever I post step-by-step recipes for baking, most of you love it, try it and give me your thoughts. I have been itching to do the same for normal recipes too, but the only reason stopping me was the poor lighting in my kitchen. After many months of giving myself this excuse, I decided to go ahead and do it anyway.

Because of this, you will see pictures with different lighting in this post, so bear with me. Hopefully you find it useful (not the lighting, the recipe!)

After all that talk, I'm hungry. Let's have a nice bowl of hot tomato spinach pulao, shall we? If you want to skip the pictures and yada-yada, scroll to the end of this post for the recipe in one place.

Ok. First, chop 4 cups of green spinach, 2 tomatoes and grate 1 carrot and set aside (ignore the green chillies, we don't need them, unless you want to use them and reduce the amount of red chilly powder in the recipe).


Heat 1 tbsp oil in a kadai.


Add 1 sliced onion and 3 cloves of chopped garlic to this.


Fry until the onions turn transparent and brown slightly.


Time to bring out the 2 chopped tomatoes. Add these to the fried onions.


Cook well until the tomatoes have wilted and turned soft.


To this, add 1 tbsp coriander powder and 1 tsp jeera. Mix well.

Time to spice things up a bit. Bring out your red chilly powder and add about 2 tsp of that. Go on, dare yourself and add another tsp if you wish ;)


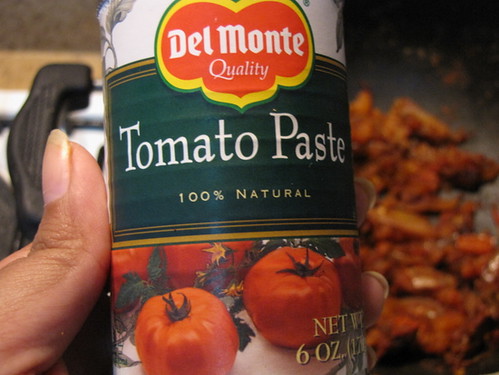
We've already added 2 tomatoes but since this is tomato spinach pulao, we will need a more dense tomato flavour. Canned tomato paste works best.


Add 1 tbsp of that and mix well. If you don't want to use the paste, add 1 more large tomato in the first step.


To this, add the chopped spinach and..


.. grated carrot and mix well.


Close the kadai and let it cook on medium-low fire for about 10 mins. Don't add any water, the spinach will give out its own water while cooking making the mixture soft.


Open kadai carefully after 10 mins and add salt.


Add about 3 cups cooked rice to this mixture. I used basmati rice but any rice will do, even warmed leftover rice.


Gently fold from one side so that the rice isn't mashed up too much.


Garnish with some roasted cashwes and serve hot. I roasted the cashewnuts in the microwave on medium power for a minute. Saves time and oil.

Here's the pulao recipe again, all in one place.
Tomato Spinach Pulao
Serves: 3 to 4

What I Used:

3 cups cooked rice
4 cups chopped green spinach
1 grated carrot
2 chopped tomatoes
1 tbsp tomato paste (or add another tomato)
1 sliced onion
3 cloves chopped garlic
1 tbsp coriander powder / malli podi / dania powder
1 tsp jeera / jeerakam / cumin seeds
2 tsp red chilly powder
1 tbsb oil
Roasted cashewnuts to garnish (optional)
Salt to taste

How I Made It:

1. Heat oil and fry the onions and garlic for 3 mins. Add the tomatoes to this and cook well until soft and mashed.

2. Add the coriander powder, jeera and red chilly powder. Mix well and fry for 2 mins. Add tomato paste to this, if using, and mix well.

3. Add chopped spinach and grated carrot. Close and cook for 10 mins until soft.

4. Add salt and cooked rice to this. Fold gently and serve after 3o mins, garnished with roasted cashewnuts.

Wednesday, August 5, 2009

Thai Fried Rice Recipe

I try recipes from The Recipe Diary on and off because, really, there are some awesome submissions in there. This was one such recipe that I bookmarked as soon as I saw it and realised there's a reason why people have rated it excellent.

I have made this twice already with every intention to make it again when we have company. Its a great recipe you can use to show off because its not a run-of-the-mill ordinary fried rice recipe that I usually use. Thanks Sree, for a lovely recipe that's surely a keeper.

Vegetarian Thai Fried Rice

For Recipe, click HERE.

Also, if you'd like to join me in my b'day month fun giveaway, please check out this post. You can never have enough of The Body Shop products, now, can you?