Showing posts with label Tamil Recipes. Show all posts

Monday, August 8, 2011

Baby Brinjal and Peanut Masala Recipe

I love adding peanuts to stir-fried masala recipes like you would for variety rice recipes like lemon rice and puliogare. The usual suspect that always needs to share the limelight with peanuts is okra. Any time okra masala is made, in go a handful of peanuts.

baby brinjal peanut masala

The other day I got some gorgeous baby brinjals (new-born, even) and had to make something non-fussy and flavourful. Although vatha kozhambu was on the cards, that didn't end up happening so I adapted a quick dry masala recipe for the baby brinjal and peanuts to have a go at each other. I think they like each other. This is a no-onion, no-garlic recipe.

baby brinjal peanut masala

Baby Brinjal and Peanut Masala Recipe 
Serves: 2 

Ingredients:
8-10 baby brinjal
1/2 cup raw unsalted peanuts
1 tbsp coriander powder
1 tsp jeera / cumin seeds
1/4 tsp freshly cracked pepper
A generous pinch of hing / asafoetida
A pinch of turmeric powder
1/4 tsp red chilli powder
A few curry leaves
2 tbsp oil
1/4 tsp mustard seeds
A small piece of tamarind or 1/2 tsp tamarind paste
Salt to taste

How I Made It: 

1. Cut baby brinjal into thin long pieces. I cut each small brinjal into 8 long pieces, lengthwise.

2. Heat oil and add the mustard seeds. When they pop, add the jeera and curry leaves. Once the jeera sizzles and turns a darker share of brown, add the hing and fry for 5 seconds.

3. Now throw in the cut brinjal pieces and the peanuts. Mix well until well coated in the oil. Reduce flame and cook partially covered until the brinjal is soft yet cooked and the peanuts are sufficiently roasted. This should take about 12-15 mins. Sprinkle water if necessary but don't add too much.

4. Now add the turmeric, red chilli powder, coriander powder and the tamarind and mix well until well combined. Cook for another 3-4 mins, add salt, and remove from fire. Serve hot with steamed rice and any curry of choice.

baby brinjal peanut masala

Monday, May 16, 2011

Crispy Fried Karela / Bitter Gourd / Pavakka Recipe

I can't believe I am posting a bitter gourd recipe. TH and I avoid the vegetable like a plague and although those small, very green, very bitter variety is available here in Singapore, I hardly ever give it a second glance. In Kerala, bitter gourd, or pavakka, is fatter, a very light green, and significantly less bitter than the darker green ones we see everywhere else.

fried bitter gourd / pavakka / karela.jpg

But I've never seen bitter gourd like this before. It was white and very chubby. These are from Taiwan and they were so cute that I had to pick them up, even if its pavakka and TH was gasping at the idea!

fried bitter gourd / pavakka / karela.jpg

I used the same strategy on this bitter gourd that I do on another vegetable that we don't like much - okra. I fried it. It was delicious and for once I didn't mind the bitterness, although TH still didn't have more than one spoon.

fried bitter gourd / pavakka / karela.jpg

Crispy Fried Bitter Gourd
Serves 2
Adapted from the Colocasia Fry Recipe

Ingredients:
1 medium-sized bitter gourd, cut into thin 2" pieces
1/2 tsp salt
3-4 tbsp rice flour
1/2 tsp red chilli powder
A generous pinch of hing/asafoetida/perungayam
1/4 tsp turmeric powder
1/2 tsp garam masala
1/4 tsp pepper powder
Oil for deep frying

How I Made It:

1. Rub salt into the cut bitter gourd pieces and set aside for an hour. Once the hour is up, squeeze all moisture from the bitter gourd pieces and transfer to another bowl.

2. Add rest of the ingredients to the pieces and stir well to dredge. There should be enough rice flour to coat all the pieces well (not too thickly) so if you feel you need more, adjust the quantity. The initial salt you added should be enough but add more to taste if you feel you require it.

3. Let the dredged bitter gourd pieces rest for 15 mins or so while you heat up the oil to deep fry. Fry in batches until dark brown and cooked through. Drain on kitchen towels. Its important that you make sure the pieces are thin, otherwise the inside won't be cooked.

fried bitter gourd / pavakka / karela.jpg

Serve hot with rice, rasam, and vadaam.

Sunday, April 17, 2011

Rava Idli Recipe

When MTR does such a great job of producing a great instant rava idli mix, you may ask why I even bother with a from-scratch rava idli recipe. 

south indian rava idli recipe

Well, SJ did it *points fingers* so I wanted to as well. Plus, I had some eno salt in the house and decided that rava idli would be easier than making dhokla from scratch, or something.  

Rava Idli Recipe - From Scratch
Adapted from here
Makes about 10-12 idlis

Ingredients:
1 cup sooji / rava / fine semolina
1/2 tsp mustard seeds
1 tsp channa dal
1 tbsp chopped cashews
1/4 tsp hing
2 tbsp oil
2.5 cups curd / plain yogurt
1 tsp Eno fruit salt (secret ingredient for spongy rava idlis)
A handful finely chopped coriander leaves
Salt to taste

How I Made It:

1. Heat oil in a pan and add the mustard seeds and chana dal.

2. Once the mustard seeds pop and the chana dal starts turning golden brown, add the hing and cashews. Fry until the cashews start turning golden brown.

3. Now add the rava and fry till it turns golden brown (a lot of golden-brown-turning needs to happen in this recipe), approximately 5-7 mins.  Add salt (regular, not eno), mix well, and let it cool.

4. Then add 1 cup of curds to the dry mixture and mix well. Let it rest covered for 10 mins. Add the rest of the curds and mix well ( it should be little thicker than idli batter). Add the Eno fruit salt and mix well. Ladle the batter into idli moulds. Steam in an idli maker or pressure cooker for 10-12 mins (without weight). Allow it to cool and unmould.

south indian rava idli recipe

The best combination for rava idli is onion-tomato chutney but I didn't have the patience for that so served with regular coconut chutney.

PS: Excuse the picture quality. This was dinner on Saturday and I didn't have the patience to set up the light box. 

Wednesday, April 13, 2011

Chow Chow Kootu Recipe

No kootu I've ever made has looked this pretty. The mom-in-law made this the day after they landed in Singapore earlier last month. Thank God I had some chow chow languishing in the fridge. Sometimes, letting vegetables stay in there results in good things - like this kootu. 

DSC_3295

 Chow Chow Kootu

Ingredients

  • 1 chow chow cut into small cubes
  • 1/2 cup channa dal / Bengal gram / kadala paruppu

  • Grind Together:
  • 1/2 cup grated coconut
  • A pinch of turmeric
  • 1 tsp jeera / cumin seeds
  • 1/2 tsp red chilli powder
  • 1 green chilli (optional)
  • Salt to taste

  • For Tempering:
  • 2 tsp (coconut) oil
  • 1/4 tsp mustard seeds
  • 1/2 tsp urad dal (optional)
  • A generous pinch of hing / asafoetida
  • A few curry leaves

Instructions

  1. Wash the Bengal gram and add to the cut, cleaned chow chow. Add 4 cups water and cook on a low open flame until the chow chow is cooked soft and the Bengal gram is cooked yet firm (about 15-20 mins). Add salt and turmeric.
  2. Grind the ingredients in the list well with a bit of added water and add to the cooked chow chow mixture. Mix well and simmer until all extra water is absorbed and the mixture takes a thick consistency.
  3. Heat oil for tempering and add ingredients in the order given. Once the mustard seeds pop and the urad dal turns brown, dunk everything into the kootu mixture and mix well. Adjust salt. Serve hot with rice and kozhambu of choice.
Yield: Serves 4
Prep Time: 00:10
Cook time: 00:30

DSC_3311

Notes: 

- If the kootu is too watery even after simmering for a while, mix 1 tsp rice flour with some water and add to the mixture. Bring to light boil and the mixture should get thicker. 

- Another alternative is to drain the water once the chow chow and channa dal have cooked. I don't prefer this method too much because of the loss of nutrients through the water. 

Tuesday, March 29, 2011

South Indian Dahi Vada / Thayir Vadai / Curd Vada Recipe

I was terribly jet-lagged all of last week. I couldn't keep my eyes open beyond 8pm and was up and about by 4:30 which is super duper rare for me because I am just not a morning person. I have to say I secretly enjoyed my energy at 5 in the morning the past few days. 

DSC_4308

On Saturday morning, I had this weird craving for medhu vada / uzhunnu vada. I have made this in the past so you can find the medhu vada recipe here

A few differences this time while making medhu vada: 

- I made the batter in my Ultra wet grinder and this makes all the difference in your  medhu vada. I was amazed how crisp the vadas were outside and soft inside. I was also able to get the doughnut shape (although not perfect), you just need to resist the temptation to add too much water to the urad dal while its grinding. This is harder to control in a mixie I guess. 

- I added whole peppercorn like the ones you get in restaurants. TH doesn't like biting into them but I didn't have an option because we were out of green chillies. I also added ginger more liberally than last time. 

DSC_4189

Perfect, pillowy, and soft. 

But today's recipe is all about dunking these deep fried awesomes into a bowl of flavoured curd, letting them soak for a while and then sinking your teeth in the resulting goodness. We did this with the few remaining vadas and actually enjoyed it more than the vadas by themselves. 

South Indian Thayir Vadai Recipe
Serves 2

Ingredients:
1 cup thick curd
1/4 cup water
Chopped coriander leaves
1/2 tsp paprika or Kashmiri red chilli powder
1/2 tsp roasted jeera powder
Salt to taste

How I Made It:

1. Dunk the vadas into a bowl of warm water, soak for 10 seconds, take them out and squeeze out the excess water. This will ensure that the vadas are softer once soaked in the curd. 

2. Beat the curd with some water, the jeera powder, and salt. Add the vadas in and leave in the fridge for atleast 4 hours or overnight. 

3. Before serving, garnish with some chopped coriander leaves and chilli powder / paprika. Kara boondi also makes an excellent garnish but sadly, I didn't have any. 

DSC_4334

Notes:

1. The Dahi Vada made in Northern parts of India is slightly different from this. The spices used to flavour the dahi are different and they usually serve it with dates chutney and mint chutney, the same kinds used for chaat. That tastes great, but is different from this.

2. In some versions, ground coconut is added to the curd. Although I was tempted to try this, I didn't have any coconut in the fridge (remember, I was away for 3 weeks!). Maybe next time. 

Monday, March 21, 2011

Simple Indian Potato / Aloo Roast Recipe

Confession: The Husband doesn't cook often or even at all, but he makes the best basic potato roast ever. I didn't mention this to him the first few times he made this but when I once asked him what he adds to it, he was like "are you asking me for my secret recipe so you can put it in your blog??" Ahem. Maybe.

Indian Potato Roast Recipe

So here it is. Its simple of course, the man doesn't believe in complicating food, especially when he is cooking! But you will love this. It gets done in 12-15 mins and is such a comfort food that when I was down with fever last month, TH made this and rasam for me after he got back from work! Ah.. yum.

Basic Indian Potato Roast Recipe
Serves: 2

Ingredients:
2 medium-sized russet potatoes
1 medium-sized onion
1/4 tsp mustard seeds/kaduku
1 tsp red chilli powder
1 tsp coriander powder/malli podi/dhania podi
1/4 tsp turmeric powder
1/2 tsp or 2 flakes minced garlic 
1 tbsp oil
Salt to taste

How its made:

1. Cut the potatoes into small cubes. Chop the onions into similar-sized pieces as the potato. 

2. Heat oil in a pan and add the mustard seeds. When they pop, add the chopped onions and saute until lightly browned. 

3. Add the coriander powder, chilli powder, turmeric powder and garlic and fry for a minute. Add the potatoes, mix well and sprinkle some water. 

4. Cook partially closed until the potatoes are cooked and soft. Add salt. Make sure you mix every 2-3 mins to distribute the heat and avoid the potatoes from burning from the bottom. 

Indian Potato Roast Recipe

Serve hot with steamed rice and rasam

My Notes:

1. TH doesn't like jeera much so he doesn't add it. If you feel the recipe is incomplete without it, then you should add them in. 

2. I've tried squeezing half a lemon over this when its still hot but didn't like the taste much. It still rocks the plain way that TH makes it. 

Sunday, February 13, 2011

Mint / Pudina Coconut Chutney Recipe

I bought a mint plant the other day and its growing like a wild bush in its small pot. To use up some of the fresh and insanely flavourful leaves, I made a mint coconut chutney to go with wheat dosas

DSC_1023
Yes, they are over-exposed, but too lazy to edit much :D
Its incredibly simple and takes all of 10 mins to whip up. That's my kind of dinner, any day night!

mint chutney 3

Mint / Pudina Coconut Chutney
Serves 2

Ingredients:
1 cup fresh grated coconut (not desiccated)
1/2 cup loosely packed fresh mint leaves
2 shallots
A tiny piece of ginger
A tiny piece of tamarind
2 green chillies (adjust to taste)
Salt to taste

To make chutney - grind all ingredients with very little water. Serve immediately with dosa, or even rice. This goes really well with the slightly dense and bland wheat dosa.
mint chutney 2

All pictures in this post taken in the home made light box for food photography.

Sunday, December 12, 2010

Semiya / Vermicelli Upma Recipe

As I've mention before in my rava upma recipe post, we usually have breakfast food for dinner. Rice is made generally only on weekends and so, its a constant challenge to come up with quick, variety food over weeknights.

DSC_0901

Semiya or vermicelli upma is not a new recipe, but something we have atleast twice a month. I make this often enough but only on weeknights so have never taken pics for the blog. Now that the new camera has hit the scenes, I had to try some night shots. These are the first of many posts, hopefully. I haven't done much editing except to add some highlights and the watermark.

DSC_0893

Roasting the semiya or vermicelli before adding it to the upma enhances the taste and makes sure it doesn't end up in a sticky clump, so don't miss this step.

DSC_0899

I always store a bag of mixed frozen vegetables in the freezer for precisely this purpose - upma and pulao gets done so much quicker and no messy chopping and washing and peeling necessary!

Semiya / Vermicelli Upma Recipe
Serves: 2-3

Ingredients:
2 cups vermicelli
3 cups water
1 small red onion, chopped
3/4 to 1 cup chopped vegetables of choice (carrots, peas, beans, corn, potatoe, etc)
2-3 green chillies, slit (I used dry red chillies since I didn't have any)
1" piece of ginger, grated
1 tbsp oil
1/4 tsp mustard seeds
1/4 tsp Bengal gram / kadala paruppu
A few curry leaves (optional)
Chopped coriander leaves for garnish (optional)

How I Made It:

1. Roast the vermicelli in a dry skillet or pan until golden brown. This will take about 4-5 mins but keep an eye on it and stir frequently otherwise they will brown on one side only or even burn. Set aside when done.

2. Heat oil in the same pan and add mustard seeds, curry leaves, Bengal gram and green chillies. When the mustard seeds pop, add the chopped onion. When it becomes transparent, add the ginger and the vegetables. Mix well until well coated and cook covered on sim for 6-8 mins until the vegetables are soft. Sprinkle some water if necessary.

3. Once the vegetables are cooked, add the water with some salt and bring to boil. Once the water comes to a rolling boil, dunk in the roasted vermicelli stirring continuously so that it doesn't clump. Let it cook in the open pan until the vermicelli has cooked all over and there's no water left. Usually a vermicelli : water ratio of 1 : 1.5 works well for me.

4. Garnish and serve hot with chutney.

DSC_0921
Vermicelli Upma and Coriander Chutney with a twist

Monday, October 11, 2010

Asparagus Usili Recipe

TH loves usili. Its one of the first dishes I cooked for him back in the day when we had just started seeing each other. I made it totally 'wrong' - with onions, coconut and garlic - stuff that's not really preferred much in a Brahmin household (expect maybe the coconut).

Asparagus Usili

Of course, you can make Usili with cabbage, capsicum, cluster beans, broad beans and the most popular French beans, so I was tempted to try it with asparagus.

Asparagus Usili Recipe
Serves 2-3  

Asparagus (I used the thinner Thai variety) - 1 cup, cut into 1" pieces and par boiled in boiling water for 3 mins
Toor dal / tuvaram paruppu - 1/2 cup
Channa dal / kadala paruppu  - 1 tbsp
Dried red chillies - 3 to 4
Hing/asafoetida (kayam) - 1/4 tsp
Turmeric powder - a pinch
Oil - 1 tbsp (depends on the method you use to cook the dal)
Salt - to taste 

How I Made It:

1. Wash and soak the toor dal and channa dal (you can put them together) for about 1.5 hours.

2. Once soft, grind this coarsely with red chillies, turmeric, some salt and hing and as little water as possible (Sprinkle a few drops so the mixture comes together a bit).

3. The next step is to cook this dal mixture with the asparagus. Its really that simple. There are different ways to cook the dal.

(a) Microwave it till almost done, stirring every one minute. It will take about 4 minutes for it to be almost cooked.

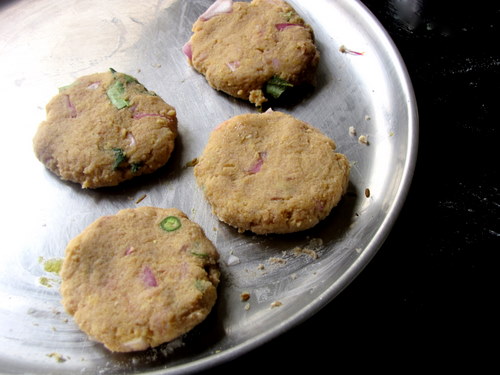
(b) Pat the dal mixture with your hand until you have one thick round roti-like disc and then steam it for 3-4 minutes. This won't work if you added too much water while grinding. Not to worry, either follow step (a) or

(c) Pour copious amounts of oil (you need atleast 3-4 tbsp) into a pan and stir-fry the dal mixture. This will take anywhere between 7-10 minutes and is allegedly the tastiest of them all.

I have tried all three methods and found that the steaming method makes the softest and healthiest usili. The microwave version tends to make it a bit dry but its really not that bad at all. The oil-heavy one is the best of course. It has to be, otherwise it defies the rules of healthy cooking and eating.

4. If you already started out in a pan, then just add the asparagus when the dal is almost done and cook for another 4-5 minutes without adding more oil. If you microwaved or steamed the dal, then heat a pan, add 1 tbsp oil and dump in the dal and asparagus and mix well for about 5 minutes.


Asparagus Usili

Monday, May 17, 2010

Aval / Poha / Flattened Rice Vadai - Quick Vada Recipe - Step by Step

When my family visited in February, amma brought me a huge sack of aval (poha or flattened rice). Well maybe not a huge sack but for someone who cooks for two, it definitely seemed that way. We didn't have any when they were here so I was stuck with a whole lot of aval and a guy who doesn't like aval nanachathu. So what's a girl to do except resort to snack-making and deep frying? 

So here's how you can make a pretty quick avai vadai. Since there's not much soaking and no grinding involved, this is a quick snack that will keep people guessing as to what went into their vada!

Let's start with 1 cup aval / poha

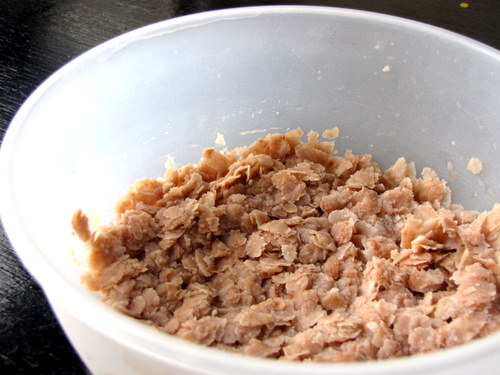
        Soak it in about 1/2 cup water until soft - about 10 mins. 

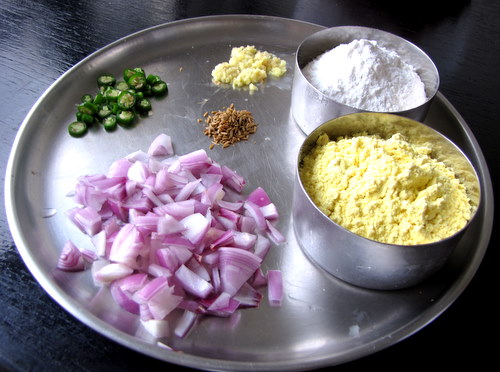
Meanwhile, prepare the other ingredients - 1 small chopped onion, 2 green chillies (adjust to taste), 1/2 tsp jeera, 1 tsp grated ginger, 1-2 tbsp besan / chickpea flour and 1-2 tbsp of rice flour

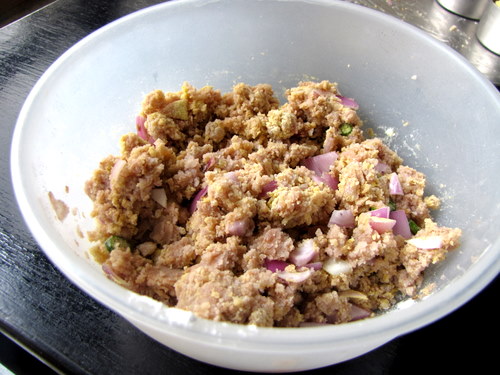
Mix these into the soaked aval along with salt (also add curry leaves and fresh coriander leaves if you have any handy - I only had curry leaves)

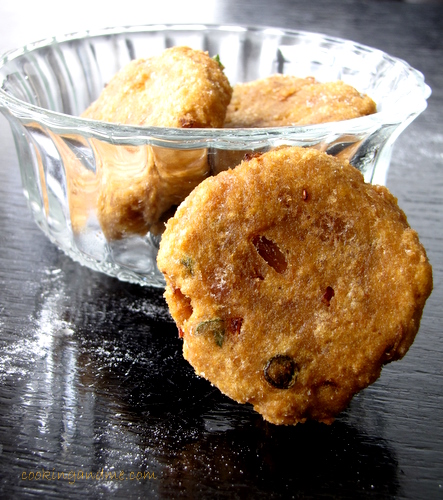
Flatten into small discs that are not too thick. While shaping, if the mixture is too thick, dip fingers into a bowl of water and try to shape. If the mixture is watery, add some besan or rice flour. 

         Deep fry until golden brown. Serve hot with chutney.

       Or dunk them into some tomato rasam like we did! 

Aval Vada Recipe
Makes 7-8 vada

Ingredients:
1 cup aval / poha
1 small onion, chopped
2 green chillies
1/2 tsp jeera
1tsp grated ginger
1-2 tbsp besan (use as required to shape vada)
1-2 tbsp rice flour 
Curry leaves or coriander leaves, chopped
Salt to taste
Oil to deep fry

How I Made It:

1.Soak aval in about 1/2 cup water for 10 mins, until soft. 

2. Add the rest of the ingredients to this and mix well. 

3. Shape into roughly 1/4" thick discs. While shaping, if the mixture is too thick, dip fingers into a bowl of water and try to shape. If the mixture is watery, add some besan or rice flour. 

4. Deep fry until golden brown and serve with chutney or dunk them into some tomato rasam. 

The texture is more smoother and spongier than lentil vadai. We loved it, especially as rasam vadai. The added bonus is, its so quick to make (although I didn't tell TH that or else he would ask for this every weekend!). 

Friday, April 23, 2010

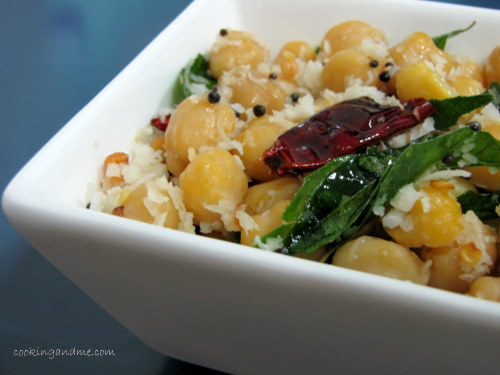
Kadalai Sundal Recipe / Chickpeas Sundal Recipe

This is a Navaratri special recipe. I have never paid much attention to sundal before in my life but one night, I this sudden craving for it, maybe because there was a bowl of soaked and pressure cooked chickpeas in the fridge and I knew this would be done in a jiffy.


Its great as a snack, in addition to being a decent side dish with rice and some gravy. Of course, you can also bookmark it if you are looking for Navaratri Special Recipes.

Sundal Recipe
Serves 2

What I Used:

1 cup chickpeas / kabooli channa, soaked overnight
2 tbsp grated coconut
2 tsp oil
1/4 tsp mustard seeds
1/2 tsp urad dal / ulutham paruppu / husked and split black gram
2-3 dry red chillies
A few curry leaves
Salt to taste

How I Made It:

1. Pressure cook the chickpeas for 3-4 whistles (until its cooked but still holds its shape). 3 whistles is a safer bit although in Singapore I feel pressure cooking takes more time.

2. Heat the oil in a pan and add the mustard seeds. When they start to pop, add the urad dal, red chillies each broken into two and the curry leaves.

3. Once the urad dal turns a golden brown, add the drained chickpeas, coconut and salt. Mix well on medium flame for 3-4 minutes.

4. Serve warm as is or with rice and side dish.

Check out Mochakkottai Sundal Recipe I had posted earlier.

------------------------------------ Note ------------------------------------------

I am reverting to the old template for a while because I am figuring out some technical issues with the new one. A lot of users are not able to reach me through Google Search and I am trying to see if its the issue with the new template or just something else amiss. Will change back in a week's time or so.

Tuesday, April 13, 2010

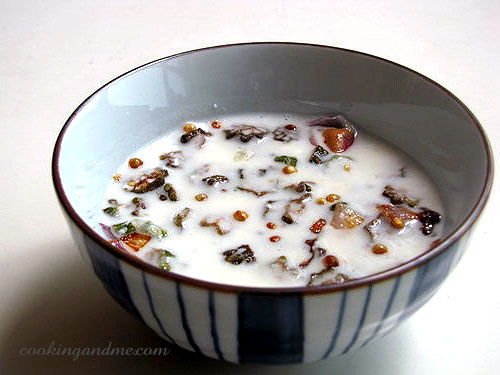
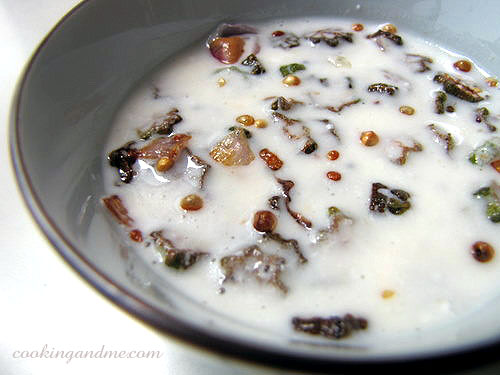
Vendakka Thayir Pachadi / Okra Curd Pachadi Recipe

I had forgotten how easy and quick it is to put together a thayir pachadi and call it a side dish. Now that summer has officially set in in Singapore (its technically summer here throughout the year!), our consumption of buttermilk and curd has gone up significantly - as if TH wasn't guzzling down enough of it already.


Pachadi, especially vendakka pachadi is a very common part of a sadya or wedding meal. Its simplicity balances out the heat of the other curries and side dishes that are seen as more important. I have always had a soft corner for the simple pachadi.

Vendakka Thayir Pachadi
Serves 2

What I Used:

10 vendakka / okra
1 small onion
1 tsp oil
1/4 tsp mustard seeds
1/4 tsp roasted jeera / cumin
1 green chilli (or to taste)
1 cup thick plain yogurt
1/4 to 1/2 cup water
Salt to taste

How I Made It:

1. Cut the okra into thin rounds. Chop the onion finely and the green chilli into small pieces (or crush using a pestle and mortar).


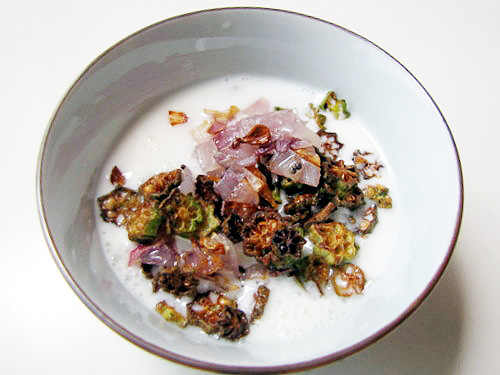
2. Heat oil, add mustard seeds and when they pop, add the onions, green chilli and okra. Fry for 8-10 mins until the onions are golden and the okra is fried and crisp. Drain and leave aside to cool.

3. Beat yogurt with salt and jeera. Dunk in the fried okra mixture and mix well.


Serve with rice and side dish / kozhambu.


This goes to JFI - Wedding Treats hosted by Priya of Akshayapaatram, originally conceived by Indira of Mahanandi.

Wednesday, March 31, 2010

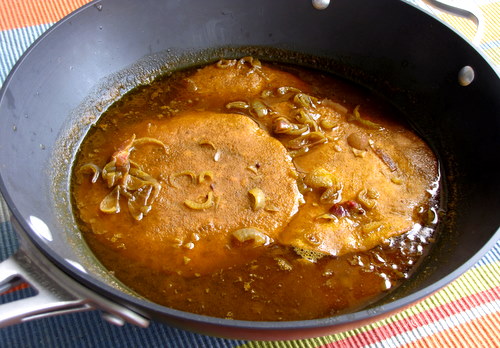
Egg Lentil Omelettes in Gravy / Guddu Thattu Posinti Recipe

I don't know how to name this recipe actually. Its my grandmom's recipe and I am not sure if anyone has eaten this or a variation of this. We call it Guddu Thattu Posinti and its very infrequently made, making it an extra treat. I had a craving for it one day so called up amma, got the recipe and made it immediately.


Note: this is a slightly time consuming recipe to make but totally worth the effort. 

Egg Lentil Omelettes in Gravy / Guddu Thattu Posinti Recipe
Serves 4

What I Used:

For the omelettes:

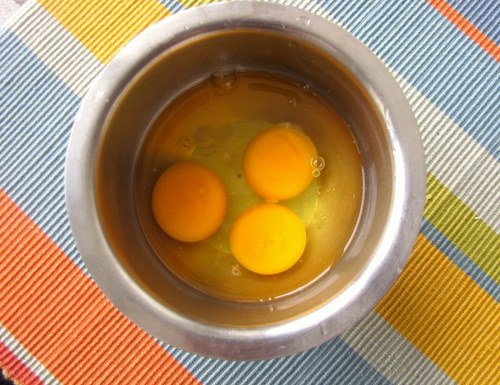
3 eggs
A pinch of salt

To grind to paste:
1/4 cup toor dal, soaked for atleast 2 hours
2-3  green chillies
1" piece of ginger
5-6 shallots / pearl onions


For the gravy:

1 cup tamarind juice (a lime-sized ball of tamarind soaked in water and juice extracted)
Salt to taste

To roast and grind:
1/4 cup grated coconut
1 tbsp channa dal / kadala paruppu
1 tbsp coriander powder / malli podi
1 tsp red chilli powder
A pinch of turmeric powder
1 tsp oil

For tempering:
1/2 tsp mustard seeds / kaduku
6 shallots / pearl onions, sliced thin
A pinch of hing / asafoetida
A few curry leaves
2 red chillies, torn into halves
2 tsp oil

How I Made It:

Let's do the gravy first.

1. Roast and grind all the ingredients under that list. In a pan, add this ground masala along with the tamarind juice and salt. Bring to boil and let it simmer for 5 mins. The gravy shouldnt get too watery nor too thick, the consistency should be thicker than rasam but thinner than kozhambu.

2. Heat oil for tempering and add all the ingredients. When the mustard seeds pop and the shallots turn golden, add to the gravy and set aside.

Now for the omelettes.

3. Grind the ingredients under list for omelettes.


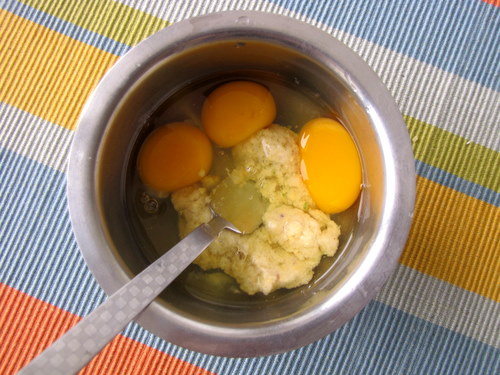
4. Break the eggs into a bowl.


5. Add the ground lentil paste.


6. Beat well for a minute with salt.


7. Make into small omelettes by pouring 2 tbsp of the egg mixture at a time onto a lightly oiled pan.


8. Cook closed to maintain softness.


9. Flip over when one side is browned.


10. You should get about 5-6 omelettes with this quantity of ingredients.


11. Phew, ok last step. Dunk in the omelettes in the prepared gravy and serve after an hour or two with steamed rice.
Thursday, March 25, 2010

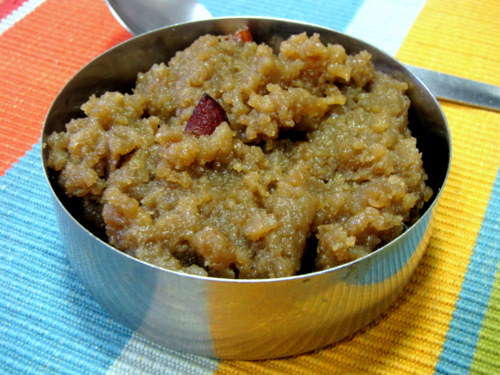
Sakkarai Pongal / Chakkara Pongal Recipe

We don't celebrate pongal. Which explains why I am posting this traditional pongal festival recipe in March. I mean, how off the mark can you get? About 2 months, that's how much.

But like I said, we don't celebrate pongal, and by that I mean my family. TH's family definitely does, but nothing elaborate like at my sister's place. Mostly it involves making pongal of the savory kind and this sweet version, sakkarai pongal.
My mom makes it as and when she feels like.  Usually, when we need a quick dessert for guests, sakkarai pongal gets made. Admittedly, its not my favourite sweet but recently. I had this tremendous craving that was quite inexplicable so I made a teeny weeny bit (TH hates it) and had it all by myself at around 10pm in the night, which explains the very not-nice picture.


It came out pretty nice though. I'd never realised sakkarai pongal was this easy to make!

Sakkarai / Chakkara Pongal Recipe
Recipe source: scribbled on a piece of paper that was lying around in an old diary. 
Amma's recipe, I'd guess

What I Used:

1 cup raw rice
1/4 cup moong dal / cherupayar
3/4 cup grated jaggery / vellam / sharkkara (this is on the sweeter side so adjust to taste)
1 cup full fat milk + 1/2 cup water (or 1.5 cups low fat milk)
A few cashewnuts (I used almonds)
A few raisins (if you like them, I added very few)
2 tbsp + 1 tbsp ghee
3 cardamom pods, crushed well
A pinch of nutmeg (optional, I didn't add this)

How I Made It:

1. Traditionally, the rice and dal is simmered in the milk until soft but who has that kind of time these days? Definitely not me. So bring out your pressure cooker if you are anything like me. Wash the rice and dal together. Add the milk + water and pressure cook for 3-4 whistles. We want this nice and mushy.

2. Meanwhile, heat 2 tbsp ghee and roast the cashewnuts / almonds and the raisins until golden brown (the raisins will become plump). Remove from fire and sprinkle cardamom powder and nutmeg, if using, on top. Give it a mix and set aside.

3. Once the pressure leaves the cooker, while still hot, mix in the grated jaggery, roasted almonds and raisins. If the pongal is too thick, add some boiled milk by the tablespoons. If the mixture is too loose, keep on a low fire and mix continuously until desired consistency is achieved.

4. Mix in one more tbsp of ghee and serve warm. I also like it cold from the fridge the next day.

PS: I have a feeling amma adds coconut to this, let me check with her.

PPS: The reason why my sakkarai pongal is a darker shade of brown than what you may have seen is, I used the super unrefined dark brown jaggery from Kerala. Its also unsalted so I mixed in a pinch of salt with the mixture but since you'd all be mostly likely using the salted version, don't bother. The colour of your sakkarai pongal may be lighter but don't worry. Will taste yummy!

Wednesday, February 10, 2010

Lemon Rasam Recipe

My mom only makes one kind of rasam. Its watery, peppery, has no dal, and is ready in 7 mins flat. After getting married to a Tam Brahm I realized there are close to a gazillion different types of rasam and then some more. If dal or paruppu is added to rasam back home then we explicitly call it paruppu rasam and it resembles sambar, although taste-wise, its quite different.

Anyway, long story short, now I am introduced to the world of rasam where every single variety has a unique taste not just on the ingredients used but also depending on who makes it. Isn't that mindbogglingly amazing? 

Let's just say yes and move on shall we. 

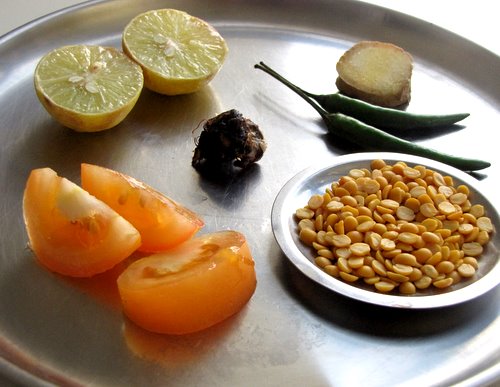
Ingredients for lemon rasam

Lemon rasam is interesting to me for two reasons. Lemon or lime totally rocks. Although I would still choose a molten chocolate cake over a lemon pie for dessert, as a fruit, I respect lemon. It really packs a lot of stuff in its small yellow self. Another reason why this lemon rasam calls out to me is addition of fresh ginger. Gotta love that. 

I have tried this rasam with and without adding cooked toor dal. The lighter version makes for a quick and easy kozhambu on weeknights and the other can be made if you are serving with a light vegetable curry on the side and nothing much else. 


Lemon Rasam Recipe
Source: TH's mom aka repository of unending rasam recipes

What I Used:
1 marble-sized ball of tamarind (remember the lemon will make the rasam more sour)
Half a lemon
1/2 cup cooked and mashed toor dal / thuvaram paruppu / pigeon peas (optional)
1 small tomato, chopped
A 1" piece of ginger, cut into small pieces
2 green chillies, or to taste
2 tsp sambar cum rasam powderA pinch of turmeric powder
Salt to taste

For tempering:
1 tsp ghee or oil
Some mustard seeds
A pinch of asafoetida / hing / perungaayam
Curry leaves
Coriander leaves (for garnish) 

How I Made It:

1. Soak the tamarind in 1 cup warm water for 10 minutes. Kneading with your fingertips, extract juice and discard pulp. 

2. Take the tamarind extract in a bowl and add the chopped tomatoes, dal if using, slit green chillies, ginger, sambar cum rasam powder, turmeric powder and some salt. Bring to boil and simmer on low fire for 10 mins. Mash up the tomato well once its cooked and soft.  

3. Next add another cup of water. Bring to boil. Test salt and tanginess. Remove from fire and while hot, add the juice from half a lemon. 

4. Heat a small kadai and add the ghee or oil for tempering. Add all other ingredients and when the mustard seeds start popping, dunk into the rasam.
Serve hot with white rice and paruppu usili