Showing posts with label Onions. Show all posts

Monday, September 6, 2010

Golden Onion Mushroom Quiche Recipe

This month's 'A Sweet Punch', although not sweet, came out fantastic! This is another one of those why-on-earth-did-I-ever-think-of-making-these kinda recipes.

I would highly recommend this golden onion mushroom quiche recipe to beginner bakers. You know why? Its going to make you feel awesome and so much more confident because its practically no-fail.

Golden Onion Mushroom Quiche Recipe

Golden Onion Mushroom Quiche Recipe
Makes 8 generous wedges and 4 mini quiches

Ingredients

For the pastry:
1 cup + 2tbsp flour (200gm)
100gm unsalted butter, frozen
1/4 tsp baking powder
1 beaten egg
A generous pinch of salt

For the filling:
2 cups chopped mushrooms (I used button mushrooms)
1 large onion, chopped
1/2 cup milk
3/4 cup shredded cheddar cheese
2 beaten eggs
Freshly ground pepper
Salt to taste
1 tbsp oil


How I Made It:

For the pastry:

Golden Onion Mushroom Quiche Recipe

Mix flour, salt and baking powder together. Ideally, you should sieve this. Ideally. Grate the frozen butter and mix it well with fingertips until the mixture resembles coarse sand.

Sidenote: I would recommend grating the butter only if you have someone to outsource the washing of the said grater. If not, just cut the butter into cubes and follow this process.

Golden Onion Mushroom Quiche Recipe

Add the egg and bring the dough together. You can add a few drops of ice cold water if needed at this stage, but I didn't have to. Transfer the dough to a floured surface.

Golden Onion Mushroom Quiche Recipe

Roll it out about 1/2" thick. Its fine even if its not an even circle or whatever. Just make sure the thickness is more or less even all around.

Golden Onion Mushroom Quiche Recipe

Next step is to gently transfer this to a greased pie dish. Here's what I used. I bought this pie dish ages ago anticipating this exact moment! Well, not really, but atleast it was put to good use after 7 months of buying it.

Golden Onion Mushroom Quiche Recipe

Gently lift the rolled out dough and lay it over the dish. Press it down lightly at the bottom and along the sides. If there's a gap somewhere, just take the overhanging dough fromt he sides and patch it up. Go on, nobody needs to know. I did it along the top and left hand side, can you tell? Of course you can, but, it doesn't matter. That's the beauty of a quiche.

Refrigerate this crust while you put together the filling.

Pre-heat the oven to 350F / 180C.

To prepare the filling:


Heat the oil in a pan and fry the onions until golden brown. Add the mushrooms and saute until soft and all the water has evaporated from the pan. Top off with ground pepper and salt and mix well. Cool completely.

Golden Onion Mushroom Quiche Recipe

Break 2 eggs into a bowl and beat lightly. I know there are three in there but I ended up with a lot of extra filling and I really don't want you to waste good ingredients. So stay with me here, ok? Only 2 eggs needed.

Golden Onion Mushroom Quiche Recipe

Add 1/2 a cup milk to the eggs.

Golden Onion Mushroom Quiche Recipe

And top off with about 3/4 cup of shredded cheddar cheese. Mix well.

To assemble and bake:

Golden Onion Mushroom Quiche Recipe

Bring out the prepared crust from the fridge.

Golden Onion Mushroom Quiche Recipe

Lay the onion mushroom mixture evenly on it.

Golden Onion Mushroom Quiche Recipe

And top off with the milk-egg-cheese mixture until it reaches almost up to the top of the crust.

Golden Onion Mushroom Quiche Recipe

Bake until the top turns golden brown and patchy in parts and the crust turns golden - about 25 to 30 mins.

Golden Onion Mushroom Quiche Recipe

Cut into wedges and serve warm.

Golden Onion Mushroom Quiche Recipe

I had some leftover dough and filling so I made 4 of these adorable mini quiches with it in these tart moulds that came with my old oven. These only need to be baked for about 20 mins and are fantastic single-serving portions for parties or potlucks.

This was a great "Sweet Punch" for September. Will link to the roundup as soon as its done. Thanks ladies!

Thursday, June 17, 2010

Heavenly Sesame Potatoes in Hot n Sweet Tomato Sauce

This recipe has probably spent the maximum number of days in my bookmarks. At the time I read this, I had just  moved to Singapore and didn't have a kitchen, let alone sesame oil and the rest of the ingredients this recipe requires. I finally made it a few weeks back and it was as yummy as I had imagined. Thank you Rajani for a keeper of a potato recipe that's both easy and delicious.


Sesame Heavenly Potatoes


Heavenly Sesame Potatoes in Sweet Tomato Sauce
Adapted from: Rajani's EatWriteThink


Ingredients:
Serves: 2

2 large potatoes, cut into wedges (I used russet potatoes)
1 large onion, chopped fine
2 tomatoes, sliced into small pieces
1 small capsicum (or half of one), chopped fine
2 tsp soya sauce
1/2 tsp brown sugar (white sugar is also fine)
1 tsp crushed garlic (or 1/2 tsp garlic paste)
1 tsp red chilly powder
2 tbsp gingelly / sesame oil (must use this oil)
Salt to taste
Coriander leaves or spring onions, for garnish

How I Made It:

1. Shallow fry the potato wedges in oil until golden brown. Set aside to drain on a kitchen napkin.

2. In the remaining oil, add the onions and garlic and fry until golden brown. Then add the chilly powder and fry for a minute. Then add the tomatoes and saute until soft and mushy.

3. Turn heat to high and add the soya sauce and sugar. Fry on high for a minute and lower to medium heat. Add the capsicum and salt and mix well. Remove from fire after about 3-5 minutes.

4. Spoon this sauce over the potatoes and serve warm with garnish.

Heavenly Potatoes Recipe II

Monday, May 31, 2010

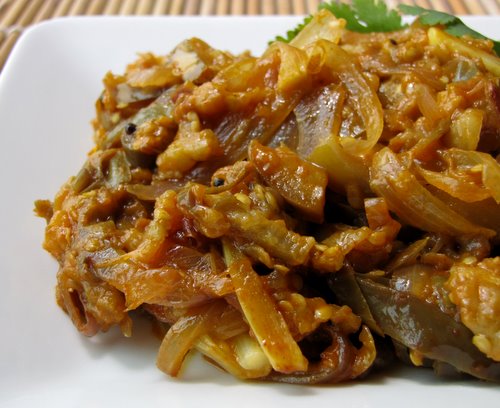
Roasted Brinjal / Eggplant in Tomato Ketchup

I don't think I need to talk again about how much we love eggplant or brinjal. I buy it every week and end up adding this vegetable to one thing or the other - sometimes to sambar, or a simple brinjal palya, or a quick Vangi Bhath, or if I have time, Bagara Baingan, which is our favourite.


This recipe, however, doesn't really have a traditional name because.. well, its not traditional! Amma used to make this often and as a kid, it was my favourite because it was not spicy and the sweetness the tomato ketchup gives to the dish is just delicious. 

A must-try if you like brinjal or have kids at home who refuse their vegetables.


Recipe for Roasted Brinjal in Tomato Ketchup 

Ingredients:

2 cups brinjal, sliced into slightly thin pieces
1 medium sized onion, sliced long
2 cloves garlic, sliced long
1 tsp red chilli powder (or to taste)
2 tsp coriander powder / malli podi
A pinch of turmeric powder
1 tbsp oil
1/4 tsp mustard seeds
Curry leaves (optional)
1 tbsp tomato sauce or ketchup
Salt to taste

How I Made It:

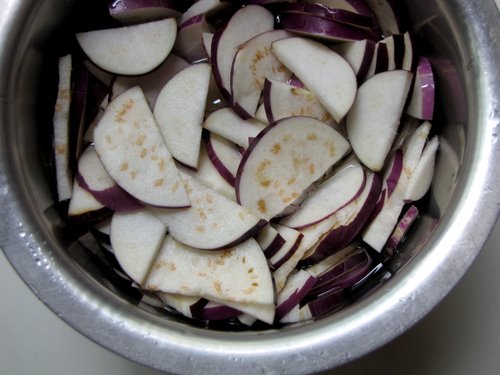
1. Slice the brinjal and add the pieces to a bowl of water to prevent browning. Set aside. 
2. Heat oil and add the mustard seeds. Once they pop, add the chopped onion and garlic. Fry until golden brown. 
3. Add the masala - turmeric, coriander, chilly, curry leaves if using - and fry for another minute. 
4. Now add the brinjal pieces, reduce flame to low and mix well. Cook covered for 5 minutes, stirring once or twice in the middle to prevent the vegetable sticking to the pan. 
5. Once the brinjal is cooked almost mushy, add the ketchup or sauce and mix well. Add salt. 


Goes well with rice, roti, dosa, idli, anything! I used to mix this with rice and eat just that as a kid. 

Tuesday, May 18, 2010

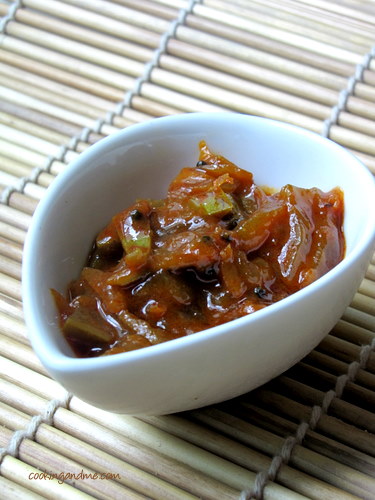
Sweet Mango Pickle - Amma's Recipe

This sweet mango pickle takes me places. It takes me to places that I lived as a 12-year old, in a house that had a huge kitchen, the time that we had the hottest summers in Kottayam and the baths we used to take under the backyard tap in the dusky evening light. The hot dosas for dinner and this sweet and slightly sour pickle that complemented the dosas like not even coconut chutney could. The bottle was brought out when there were chapatis and parathas on the table too.


Easily, the best part of this recipe is that fact that amma came up with it just like that one hot, sweaty Kerala summer day. She was slicing onions, oh so fine like she normally does, and then randomly took a couple of raw mangoes from the counter-top and starting putting together this condiment that would later be made again and again and filled in many many bottles, devoured by her youngest daughter with practically anything, and sent to relatives and friends who were near and far.

The sesame oil and the near-burnt fengreek seeds create a symphony with the chopped onions and mangoes that's hard to describe. It gels with anything you spread it on, making the meal magically taste better. Just like mothers spread their love and support on everything and magically make your life better. This is my soul-food, my comfort, amma's love.


Amma's Sweet Mango Pickle Recipe
Makes one small bottle

Ingredients:

Raw mangoes - 3 nos (orange sized ones, approx)
Onions - 3 big
Jaggery / raw sugar (or brown sugar) - 1/2 cup, grated or melted
Turmeric powder - 1/2 tsp
Chilly powder - 6 tsp
Gingelly / Indian sesame oil - 1/2 cup
Fenugreek seeds / uluva / menthayam - 1/2 tsp
Asafoetida / hing / kaayam - 1/4 tsp
Mustard seeds / kaduku - 1/2tsp
A few curry leaves
Salt to taste

How Amma Makes It:

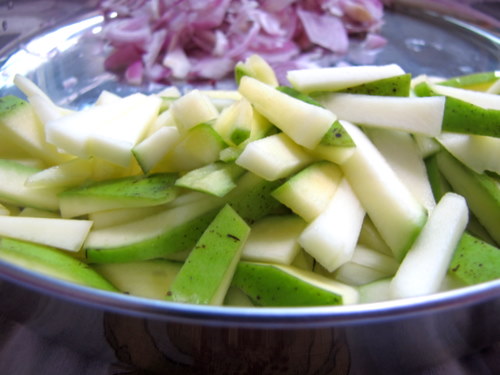
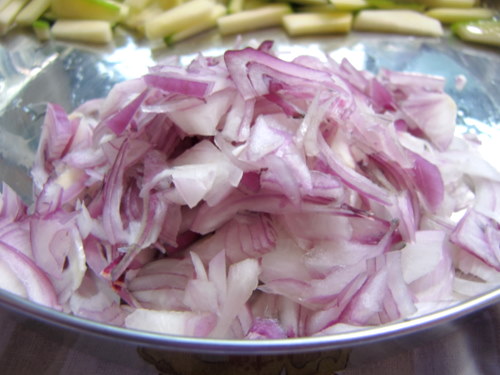
1. Slice the mangoes and onions into thin pieces.

2. Heat oil in a pan and add mustard seeds. When they pop, add the fenugreek seeds. When they turn a nice brown, add the onions. Take care not to burn the seeds otherwise they turn very bitter. Let the onions brown well.

3. Now add the chilly powder, turmeric powder, hing and curry leaves. Stir around for a minute and then add the sliced mangoes and salt. Add 1/2 cup water to this and cook covered on a low flame (on sim, preferably).

4. After abount 10 mins, add the jaggery, mix well and let the mixture come to a boil. Remove, cool and store in air-tight bottles. Keeps in the refrigerator for up to a month.
I am sending this post to 'Of Chalks and Chopsticks' hosted by Bong Mom this month and conceptualized by Aqua.

Tuesday, December 22, 2009

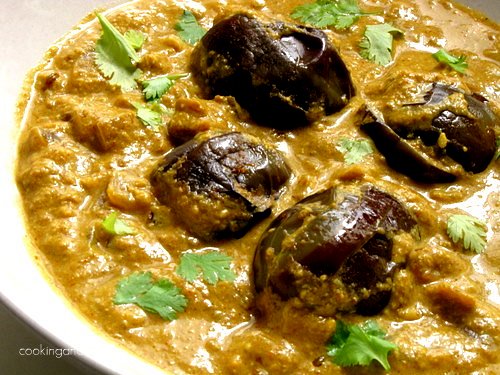
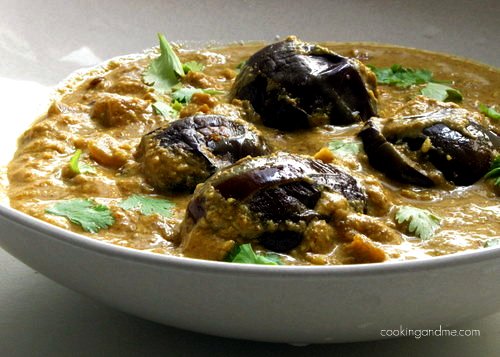
Hyderabad Style Bagara Baingan Recipe - Step by Step

I am getting increasingly lazy these days. I feel like I have lost the mojo to try out new stuff with as much frequency as I used to or click pictures with as much interest. I have about 4 food photography basics posts in my drafts just lying there because I have to edit and upload pictures to go as examples with the posts. I also haven't been visiting as many blogs as I used to and my unread blogs list on reader just keeps getting longer and longer.


I made this Bagara Baingan ages ago. Its loosely based on a recipe I saw in a Nita Mehta book at the library. I didn't borrow it so made this based on what I could remember from her recipe. The amount of ingredients are all my own approximation but it turned out very tasty, a perfect combo with roti, pulao or biryani (like they serve it in Hyderabad).

Ok now for the step by step. First, dry roast about 2 tbsp of white sesame seeds / til / ellu until golden brown. Set aside.


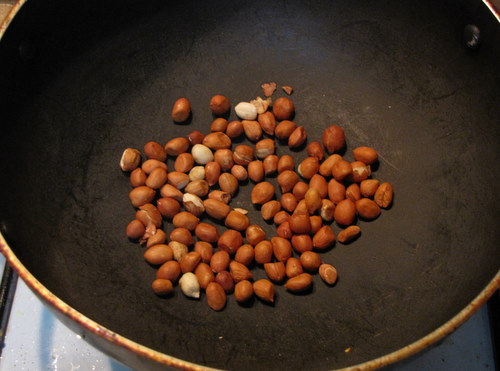
Then, dry roast 2 tbsp peanuts until roasted and brown. Mine was raw and unsalted so if you are going to use the salted kind, then make sure you keep that in mind while adding salt to the final dish. Set aside.


Next, heat 1 tbsp oil in the same kadai and throw in the washed and slit baby brinjal. We are using the same kind used for ennai kathirikkai kuzhambu. Fry until soft and set aside.


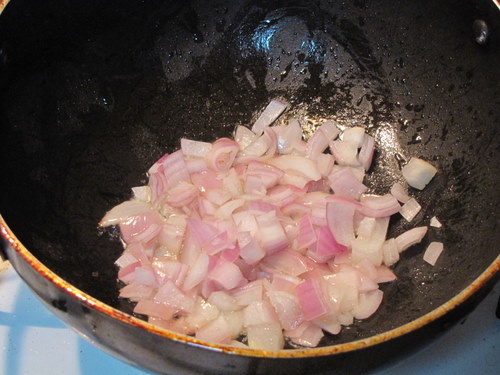
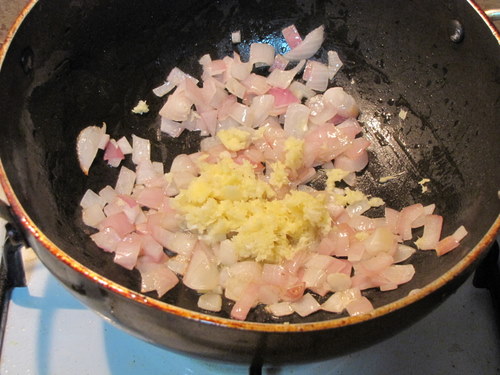
In the same oil, add 1 onion, chopped fine.


To this, add a 1" piece ginger and 2 garlic pods ground together. Alternately, add 2 tsp readymade ginger garlic paste.


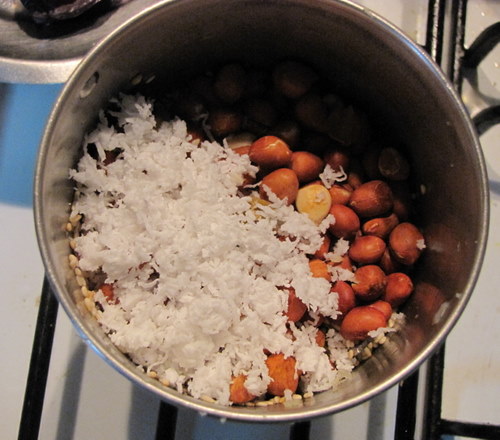
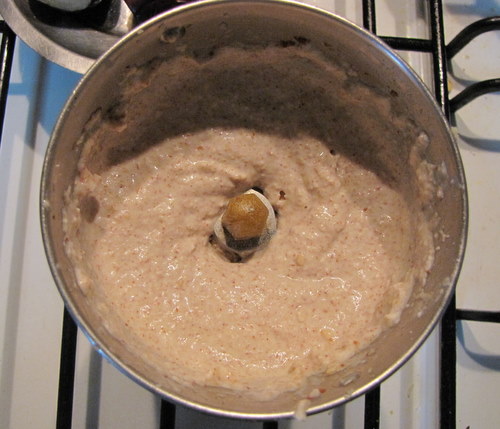
While you let that fry, grind the sesame and peanuts with 2 tbsp grated coconut to a smooth paste.


Which looks like this. Yes, you can add a little bit of water while grinding.


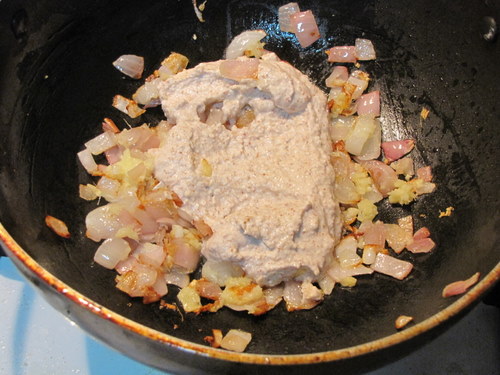
By now, the onions would have started to brown. Add the ground paste and mix well.


To this, add 1/4 tsp turmeric powder, 1 tsp jeera, 1 tbsp coriander powder and 1-2 tsp red chilli powder, with salt.


Mix well and stir for a minute until the paste thickens.


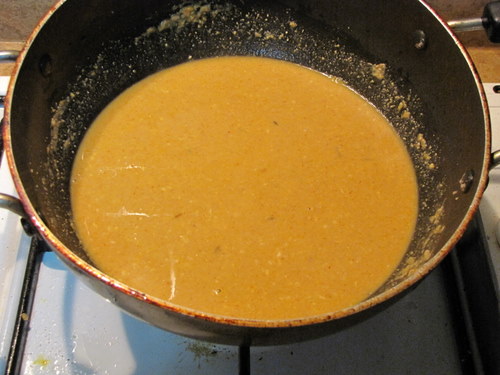
I know this looks kinda gross so let's quickly get this over with. Add the tamarind water made with a small lemon sized ball of tamarind and 1 cup warm water. Ok next step, quick!

*Please ignore the stains on my stove. They are from a dish I made just before this. Thank you*


Ah, not so bad once its mixed. So mix well and then..


.. add the fried baby brinjal.


Cook closed for 5-10 mins until the gravy thickens.


Serve warm with a garnish of chopped coriander leaves. This tasted really really good and I really think I should make more curries with roasted peanut paste as the base. The sesame really helps enhance the taste too!


I am too lazy to type the recipe again!

The recipe, all in one place now (sigh..)

Bagara Baingan Recipe
Serves: 2

What I Used:

6 purple baby brinjals
2 tbsp white sesame seeds
2 tbsp peanuts
2 tbsp grated coconut
1 onion, chopped fine
1" piece of ginger
2 garlic pods (or 2 tsp ginger garlic paste)
1/4 tsp turmeric powder
1 tsp jeera/cumin seeds
1 tbsp coriander powder/malli podi
1 tsp red chilli powder (or to taste)
A small lemon sized ball of tamarind
1 tbsp oil
Salt
Fresh coriander leaves for garnish

How I Made It:

1. Dry roast the peanuts and sesame seeds separately until golden brown. Set aside to cool. Then, grind together with the coconut and little water to form a smooth paste.

2. Extract the tamarind paste in 1 cup warm water. Grind the ginger and garlic together if using fresh gg paste.

3. Fry the brinjals in oil until soft but still holds shape. Drain and set aside. In the same oil, fry the onions and ginger garlic paste until golden. Then add the ground paste and fry for a minute.

4. To this, add turmeric powder, chilli powder, jeera, coriander powder and salt. Mix well and fry for another minute.

5. Add the tamarind water, mix, then add the brinjals and cook closed for 5-10 mins. Garnish with fresh coriander leaves before serving.

Ranjani made a video of this recipe so if you want to check it, click here.

Sunday, December 13, 2009

Cheddar Cheese Soup Recipe

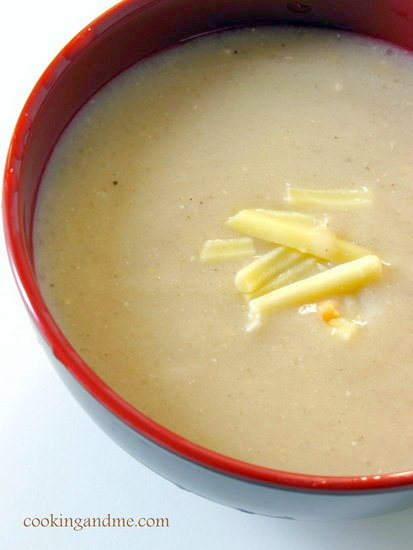
This is from Nita Mehta's Soups, Salads and Starters. I was slightly skeptical when I read the name of the soup but since I had some cheddar cheese lying around and really wanted to use it up. The soup was a pleasant surprise, not as heavy as I expected but quite filling and creamy.

Cheddar Cheese Soup
Source : Nita Mehta's Soups, Salads and Starters
Serves : 5-6

What I Used:

2 onions, chopped
3 medium potatoes, peeled and chopped
25gm (1 cube Amul cheese) cheddar cheese, grated
2 tbsp butter
1 cup milk (I used low fat 'cuz that's all I had)
5 cups water
1/2 cup sour cream (I didn't use this)
1/2 tsp freshly ground black pepper
1 tsp salt

To Garnish:

Croutons
25gm (1 cube Amul cheese) cheddar cheese, grated
Fresh coriander leaves (optional)

How I Made It:

1. In a pressure cooker pan, add the butter and brown the onions lightly.

2. Add potatoes and saute for 1-2 mins. Then add the water and pressure cook for 3-4 whistles. Remove from fire.

3. When cooled, blend the pressure cooked onions and potatoes in a mixer to a puree, along with the water used for cooking them.

4. Strain the puree (I didn't do this) and set aside.

5. Boil the milk separately. Bring the strained pureed soup separately to boil and add the milk, stirring continuously. Simmer for 2-3 mins on low flame.

6. Add grated cheese, salt and pepper.

7. Finally add the sour cream, if using, keeping the soup on very low flame and stirring continuously. Remove from fire.

8. To serve, grate top off with some grated cheese and toasted croutons with coriander leaves if using. Serve hot.
This goes to Monthly Mingle - Soups, conceptualized by Meeta and hosted this month by Sunshinemon. Thanks for reminding me, Sonia :)

Monday, September 28, 2009

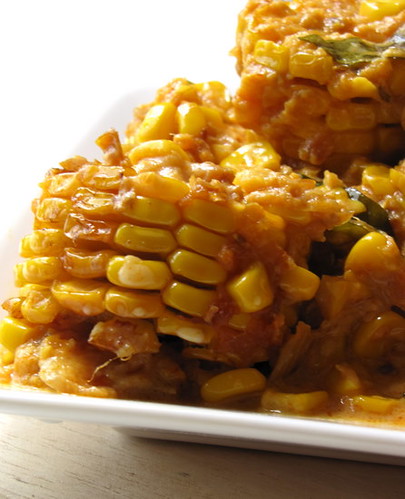
Sweet Corn in Rich Onion Sauce - Step by Step Recipe

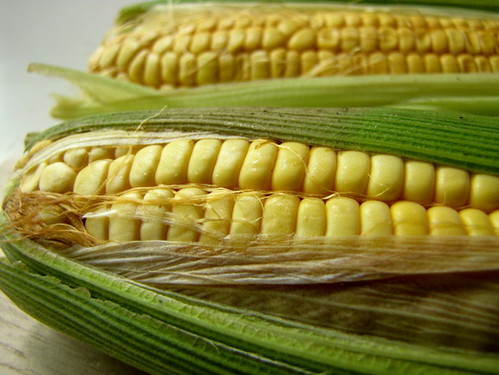
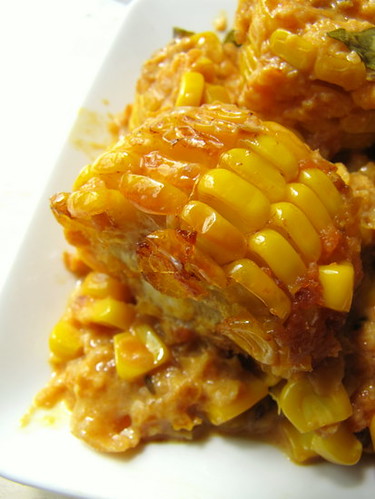
I took this picture recently.

Yes, I take all the pictures for this site but this one is easily the most delicious looking, according to me. If you don't agree, its because you don't know how good this dish tastes, so let's do something about that, shall we?

2 corn cobs from the super market and I was good to go.

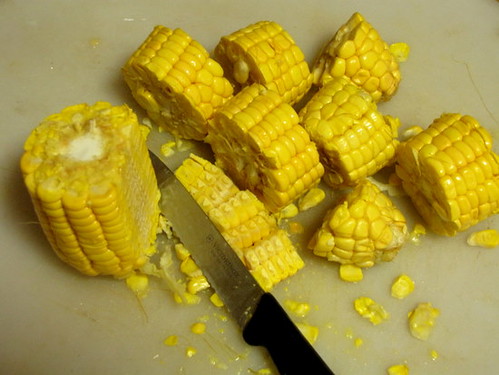
First step is to chop them up corn cobs into 1" long pieces. I want to be honest with you here - you need a mighty sharp knife for this. I only have wuss-knives and it was a very tough task. I did the best I could and then shaved the rest of the corn off the cob. That will get added to the sauce gravy. Nice, eh?

Speaking of the sauce, let's get started with that. Chop up 2 large onions, 2 pods garlic and a 2" piece of ginger and throw them into the mixer.


Grind to a coarse paste like so.

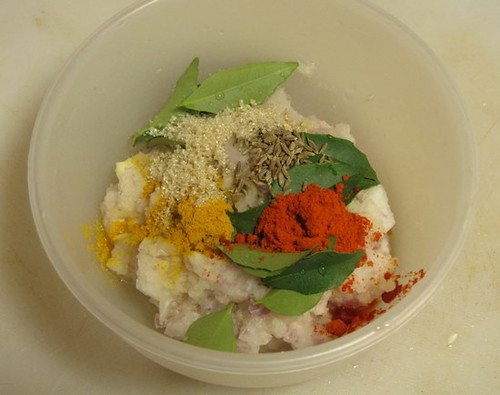
To this, add 1/4 tsp turmeric powder, 1/2 tsp jeera (cumin), 1 tsp red chilli powder, 1/2 tsp onion seeds (optional, cuz I didn't have any!), 1/2 tsp sugar and 6-8 curry leaves.

Something about the above picture makes me smile. I think its those fresh curry leaves. Fresh curry leaves always make me smile.

Mix well. If you are anything like me, you would smell this mixture before keeping it aside. Go ahead, do just that!

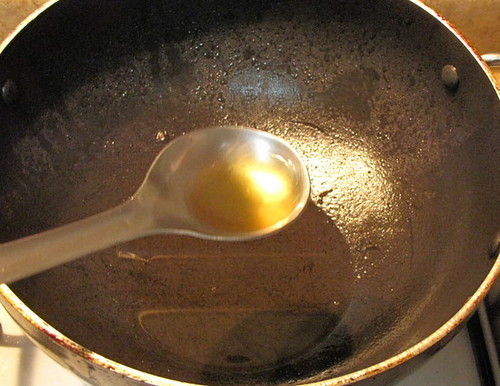
Heat about 1 cup oil in a pan.

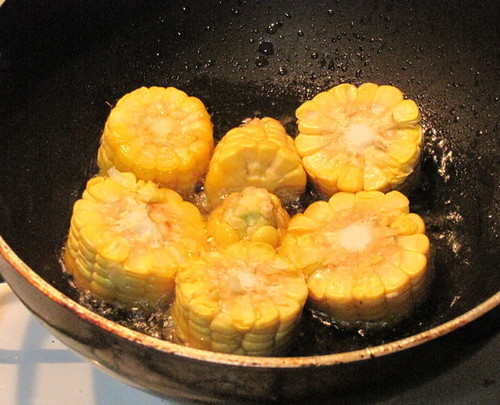
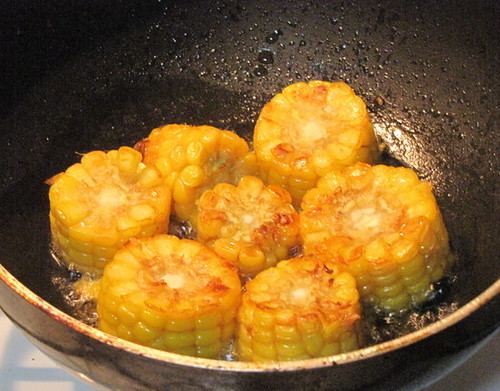
Gently place the corn pieces in the hot oil. Take care not to splash oil on yourself. It burns!

Turn and fry the other side, until its golden brown all over.

Drain and set aside. (Sidenote: using steel ladles on your non-stick cookware and taking a picture with your right hand while dealing with hot stuff with your left is to be done at your own risk. )

When the oil has cooled down a bit, remove the excess. We want only about 1 tbsp oil for the sauce.

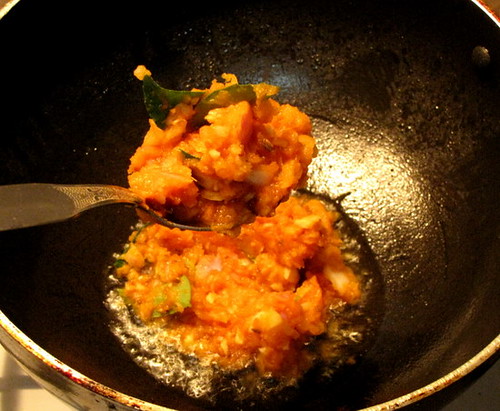
Start up the stove again and when the oil heats up, add the mixed onion-spices paste.

Fry for 8-10 mins and then add the shaved corn pieces. (An extra step because I don't have sharp knives in the house - refer above). Mix well.

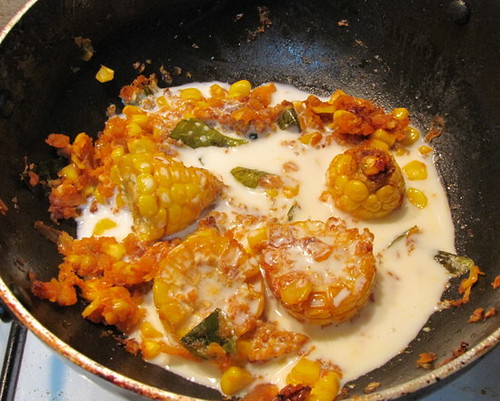
Now add the fried corn cobs.

Lower fire to minimum and top it off with 1 cup scant curd/yogurt. I added 1/2 cup water to 1/2 cup curd and beat well before adding (make sure your heat is at low and you use scant yogurt, otherwise the mixture will curdle and that will just not be a good thing to happen at this stage!)

Let it simmer on a low fire for 2-3 mins. Add salt and mix well before removing from fire.

Its absolutely yummy. If you like corn, this is super delicious - hot and sweet!
Here's the recipe again, all in one place.
Sweet Corn in Rich Onion Sauce
Serves: 2

What I Used:

2 corn cobs
2 large onions, chopped
2 garlic cloves
A 2" piece ginger
1/4 tsp turmeric powder
1/2 tsp onion seeds (optional)
1/2 tsp cumin seeds
1 tsp chili powder
6-8 curry leaves
1/2 tsp sugar
1 cup scant yogurt
Oil
Salt

How I Made It:

1. Cut corn cob into 1" pieces.
2. Grind onion, garlic and ginger.
3. To the above, mix in the spices, curry leaves and sugar.
4. Heat 1 cup oil and fry corn pieces until golden brown. Remove excess oil and fry the onion paste mixture until oil separates (8-10 mins). Add the shaved corn pieces and the fried corn cobs. Mix well.
5. Lower heat and fold in the curd/yogurt. Simmer for 2-3 mins. Add salt and remove from fire.
This may be a good combination with roti. Or maybe even rice. We have no idea because we ate it as is. We bit into the juicy corn and licked the sauce until the plate was clean.

Since this is just not any other dish, it seems like a good entry to Hb's event. Some interesting recipes are sure to show up on her blog very soon!