Showing posts with label Tomatoes. Show all posts

Tuesday, August 2, 2011

Summer Tomato Pasta with Fresh Basil


I am back home after over two weeks in Philadelphia and am glad to be back in my kitchen. Too bad its so hot I don't feel like cooking and/or baking. The garden fared fairly well after being more or less neglected, but some rodents had their way with my rutabagas. Alas! The first of the tomatoes are starting to ripen, so here is a nice simple pasta that does not heat up the kitchen too much. If you aren't feeding a family of six like I am, you might want to halve the recipe since refrigerated tomatoes taste terrible.

INGREDIENTS
- 1 lb pasta (something small. I used ditali.)
- 2 cups chopped tomato, plus slices for garnish
- 1/2 pkg extra firm tofu, crumbled
- 1 tsp lemon juice
- 1/4 cup nutritional yeast
- salt to taste
- 1/2 cup chopped fresh basil
- 2-3 tbsp olive oil
- salt and pepper to taste

METHOD
1. Cook pasta according to directions.
2. While pasta is cooking, gently mix lemon juice and nutritional yeast into the tofu. Let sit for a few minutes, then mix again and season to taste with salt.
3. When the pasta has cooked, drain and rinse with some cold water to cool down a bit. You want warm but not hot pasta. Mix in olive oil (enough to lightly coat the pasta) and basil. Gently stir in tomatoes and tofu, then season to taste with salt and pepper. Serve at room temperature garnished with tomato slices and some basil leaves.

Sunday, June 12, 2011

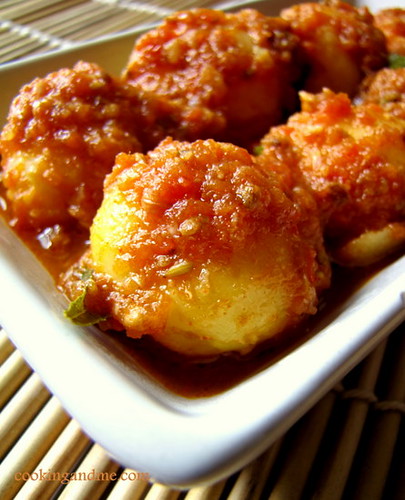
Banarasi Dum Aloo Recipe

If I see a bag of baby potatoes when I head to the supermarket near my place, I pick it up. Always. Good things always come out of having a bag of baby potatoes in your kitchen. You will see. 

Dum Aloo Banarasi Recipe | Indian Potato Recipes

Earlier last week, I was telling myself how inefficient and wasteful I am being. I almost always turn online if I want a recipe but love to buy cookbooks and stack them up in the kitchen shelf. In my new kitchen, all the books are out and neatly arranged so I really have no excuse for not using them more. 

Dum Aloo Banarasi Recipe | Indian Potato Recipes

So armed with about 15 baby potatoes, I turned to one of those small Tarla Dalal booklets, simply and efficiently called "Potatoes". There were some really great looking recipes in there but I had to zero in on Banarasi Dum Aloo because that's what I had all the ingredients for.

Dum Aloo Banarasi Recipe | Indian Potato Recipes

Since this is a cuisine I am not familiar with at all, I decided to not meddle with the original recipe and follow it to the T. This meant frying up the entire batch of baby potatoes but all I did was gulp once before going head and doing it. 

Banarasi Dum Aloo
Serves 2-3 as a side
Total cooking time: 45 mins

Ingredients:
12 to 15 baby potatoes
oil for deep-frying

1/2 tsp powdered cardamom (about 8 pods)
1 tbsp dried fenugreek leaves (kasuri methi)
3 tbsp cream (or 1/4 cup plain curd)
A small bunch chopped coriander for garnish
2 tsp butter
Salt to taste


For the gravy:
2 cups roughly chopped tomatoes (2 large ripe tomatoes)
1 tsp ginger garlic paste
3-4 dry red chillies (use dry Kashmiri red chillies for added colour)
2 tbsp broken cashew nuts
1 tsp cumin seeds (jeera)
1 tsp fennel seeds (saunf)
2 1/2 cups water

How I Made It:

1. Wash and dry the baby potatoes. Pierce each potato all around with a fork and deep fry in hot oil, with the skin on, till the potatoes are cooked and golden brown. Drain on absorbent paper and keep aside.

2. Combine all the ingredients together under the "gravy list". I know this sounds weird but trust me on this. Dunk all the ingredients together along with the water and cook on a low flame for around 15 mins or until the tomatoes have turned mushy and soft. Cool and blend to a smooth paste. If you have one of those soup blenders like me, just go ahead and whip it up hot. Saves a lot of time.

3. Heat the butter in a pan and add the powdered cardamom and gravy paste and allow it to come to a boil. Simmer till the oil separates form the gravy. This will take about 12-15 mins. Keep the fire on simmer throughout and be prepared for a slight mess if you don't use a deep pan. The tomato gravy will bubble up all over your stovetop.

4. When the gravy is ready, add the potatoes, kasuri methi, and salt and simmer for another 3-4 mins. Finally, add the cream and coriander and serve hot with jeera pulao or rotis.

Dum Aloo Banarasi Recipe | Indian Potato Recipes

Notes:

- I like to use powdered cardamom because its not pleasant to bite into the pods when you are eating. 
- The original recipe also called for 1 tbsp honey but I omitted this because we were not in a mood for a sweet-ish dish. I think this is meant to be hot and sweet so add that in if you want to get more of an authentic Banarasi Dum Aloo. 
- You can boil and add the potatoes to the gravy if you want a healthier version. Adding cubed, fried regular potatoes will also taste brilliant, I am sure. 
- Banarasi Dum Aloo does not use dahi or curd as normal dum aloo does so use cream if you have it. Substitute with curd as a last option. 
- The gravy gets thick on sitting for a while so if you are reheating leftovers, add a little bit of curd of water before heating it up. Don't add more cashews than what's mentioned, it will make the gravy even thicker.
- As you can clearly see, I was out of coriander leaves :)

Sunday, April 10, 2011

Tomato Basil Pizza with Gouda Cheese - From Scratch!

I am a few days late to post this month's Sweet Punch entry but I had to do it, even if it late. Its pizza from scratch, how can I not?!

Pizza from Scratch with Gouda Cheese

The first and only time I made pizza from scratch was when I went for cooking classes at Palate Sensations. It was amazing (especially because I didn't partially burn it then) and since then I stopped buying pizza base. What that also meant is, I didn't make pizza at home for ages.

DPizza from Scratch with Gouda Cheese

But its super easy. Remember those garlic rolls that all of you loved and tried at home? Trust me when I say this is not even half as hard. With me? Ok here goes.

Pizza Base From Scratch
Recipe source: Pioneer Woman

Ingredients

  • 1 tsp Active Dry or Instant Yeast
  • 4 cups all-purpose flour
  • 1 tsp salt
  • 1/3 cups extra virgin olive oil

Instructions

  1. Sprinkle yeast over 1 1/2 cups warm (not lukewarm) water.
  2. In a mixer, combine flour and salt. With the mixer running on low speed (with paddle attachment), drizzle in olive oil until combined with flour. You can definitely do the mixing by hand, just knead gently, no need to waste too much energy.
  3. Next, pour in yeast-water mixture and mix until just combined.
  4. Coat a separate mixing bowl with a light drizzle of olive oil, and form the dough into a ball. Toss to coat dough in olive oil, then cover the bowl tightly with plastic wrap and store in the fridge until you need it.
Yield: 2 crusts
Prep Time: 00:10 mins
Cook time: 00:20 mins

According to PW, it’s best to make the dough at least 24 hours in advance, and 3 or 4 days is even better. I kept it in the fridge for exactly 25 hours.

Pizza from Scratch with Gouda Cheese

Here's how it looks after 24 hours or so. Slightly risen and quite airy.

Pizza from Scratch with Gouda Cheese

Transfer half the dough to a floured surface. Lift and rotate the dough into a circle or rectangle, letting gravity do its job extending the dough on all sides. My dough didn't seem too elastic though and I was a bit worried. But it turned out perfect in the end.

Pizza from Scratch with Gouda Cheese

Once you have a rough shape, transfer to a greased baking sheet (or use your Silpat - I got mine this time from the US - yay!!) and shape further using your fingertips to the right thickness you desire. I kept it neither too thick nor too thin. 

Pizza from Scratch with Gouda Cheese

Oh btw, I decided to make a face at convention and used Gouda cheese in my pizza. You should do it too. Its not as elastic or chewy but has a lovely flavour and gives more depth to the pizza, making it taste gourmet. Or something like that. Try it.

Pizza from Scratch with Gouda Cheese

Once you have your base ready, rub some olive oil on the base and you can go crazy with your options. I decided to keep it relatively simple. Some diced tomatoes went on first, followed by thin slices of portobello mushroom. 

This exercise actually make me realise how little you need to make a pizza. I used like half a mushroom to cover up the pizza!

Pizza from Scratch with Gouda Cheese

The tomatoes and mushroom were followed by the freshly grated Gouda cheese and lovely, gorgeous, fresh basil leaves from my own herb 'garden'. I was so proud!

Pizza from Scratch with Gouda Cheese

Bake in a 500F / 260C oven (or as high as your oven goes) for about 10-15 mins (until the crust turns brown and the cheese bubbles up nicely). I slightly burnt one side of my pizza because I had a guest and was talking to him. That also explains the very hastily taken last pic!

Loved this challenge, love pizza from scratch - actually love anything with cheese.

The end. 

Wednesday, December 15, 2010

Creamy Chickpea and Tomato Curry

OK, I know this is not Christmas related (unless you eat Indian food at Christmas), but I made this the other day and it is so easy and tastes so amazing that I had to share it. The recipe comes from Gordon Ramsay's Great Escape Cookbook (hence the metric measurements), but uses chickpeas instead. Who knew tomatoes and coconut milk tasted so awesome together? I used some diced tomatoes from my garden that I had frozen at the end of the summer--they were awesome and far superior to canned.

INGREDIENTS
- 3 cups cooked chickpeas
- salt and pepper
- 2 tbsp oil
- 1/2 tsp cinnamon
- 1/4 tsp cloves
- 1 tsp garam masala
- 1 tsp chili powder
- 4 curry leaves
- 1 sweet onion, diced
- 2 garlic cloves, minced
- 500g chopped fresh tomatoes, skinned
- 400 ml can light coconut milk

METHOD
1. Heat oil in a large frying pan over medium heat. Toss chickpeas with salt and pepper and set aside.
2. Add spices and curry leaves to the pan and fry for a min, until nice and fragrant. Add onions and garlic and saute for 6-8 mins, until soft. Add a splash of water to deglaze the pan, if needed.
3. Add chickpeas and tomatoes, mix well, and season to taste. Heat to bubbling, then add coconut milk. Simmer gently until ready to serve (over rice). The dish tastes best if it has sat for a while so the flavours can blend. Even better the next day!

Monday, October 4, 2010

Zucchini Pancakes with Tomato-Onion Relish

Over the next week or so I am going to post some recipes that have their roots in the recent issue of Food and Drink from the LCBO. (On a side note, does anyone else think it's weird that the government puts out a food magazine so we buy more alcohol?) Food and Drink has finally started to cater (somewhat) to the vegetarian crowd, but has yet to make a significant foray into vegan cuisine (even though we cocktail-sipping veggie hipsters would love it). First up is this veganized zucchini pancake (they call it a fritter, but it's not) with a version of my onion and tomato relish. Vegan Mom and I enjoyed these as an appetizer on date night before launching into onion soup and baguettes.

Tomato-Onion Relish
- 1 tbsp oil
- 1 large sweet onion, diced
- 2 tbsp packed brown sugar
- 2 tbsp apple cider vinegar
- 1 large tomato, diced
- 1/4 tsp salt
- fresh ground black pepper

METHOD
1. Heat oil in a saucepan over med to med-hi heat. Add onions and saute for about 5 min, until soft and translucent but not browned. Add brown sugar and vinegar and stir. Bring to bubbling and cook for 3 mins, stirring regularly.
2. Add the remaining ingredients and bring to bubbling over med-hi to high heat. Cook for about 5 mins, stirring regularly. Drain relish in a fine mesh sieve so it is no longer runny. Keep warm.

Zucchini Pancakes
Makes at least 8
- 1 cup all purpose flour
- 2 tbsp cornstarch
- 1/2 tsp baking powder
- 1/4 tsp baking soda
- 1/4 tsp salt
- fresh ground black pepper
- 1/3 cup soy yogurt
- 1 tsp apple cider vinegar
- 1/2 cup soy milk (more if needed)
- 2 sage leaves, finely chopped
- 1 1/2 cups finely shredded zucchini (or so--1 small zucchini will do)
- oil for frying
- chopped parsley for garnish.

METHOD
1. Whisk together dry ingredients in a medium bowl.
2. In a separate bowl, whisk yogurt, vinegar, and soy milk together. Squeeze excess moisture out of the shredded zucchini and add to liquid ingredients with the sage leaf. Mix.
3. Gently mix the wet ingredients into the dry, adding a few splashes of soy milk, if needed until the dry ingredients are just moistened. The batter should be firm (not as runny as pancakes) but not stiff.
4. Heat a think layer of oil in a cast iron skillet over medium to med-lo heat. You want to be able to cook the pancakes for about 3 mins per side so they get golden and crispy but not burnt. Drop a scant 1/4 cup of batter into the oil and flatten slightly. Repeat (you should be able to get 4 pancakes in the pan at one time). Cook about 3 mins, then flip and cook 3 mins.
5. You can keep these warm on a rack in a 300 degree oven for about 30 mins or so if you need to make them ahead for a dinner party. Serve with the relish and garnish with parsley.

Wednesday, September 8, 2010

Zesty Onion and Tomato Relish

If you have been following Vegan Dad on Facebook you know that I grew cayenne peppers in my garden this year. I'm not sure why, exactly . . . for fun, I guess. I have always had bad luck with peppers but this summer's hot weather has yielded a fine crop of bright red and super hot peppers. The problem is what to do with them since I shy away from really hot foods because of the kids (though there was that time I went on a ques to make the hottest jerk sauce on earth . . . .). So cayenne recipe number one is this zesty relish. It is quick and easy to make and you can decide how hot to make it by leaving the seeds in the pepper or adding more than one.

INGREDIENTS
Makes about 2 cups
- 1 tbsp oil
- 1 large sweet onion, diced
- 1/4 cup packed brown sugar
- 15 cherry tomatoes, halved or quartered (if larger)
- 1/2 cup apple cider vinegar
- 1 cayenne pepper, seeded and minced (or leave seeds in for more zest!)
- 1/2 tsp salt
- fresh ground black pepper

METHOD
1. Heat oil in a saucepan over med to med-hi heat. Add onions and saute for about 5 min, until soft and translucent but not browned. Add brown sugar and stir. Bring to bubbling and cook for 3 mins, stirring regularly.
2. Add the remaining ingredients and bring to bubbling over med-hi to high heat. Cook for about 10 mins, stirring regularly, until most of the liquid had evaporated. If the relish is still too runny you can drain it in a fine mesh sieve.

So what did I do with the relish? Luckily, I had some awesome tomatoes and basil ready to be eaten. I seasoned some tofu slices with salt and pepper and fried them a bit on each side in a bit of oil. Then, on a freshly made kaiser roll, I slathered on some pesto (Isa's recipe from VWAV, but made with toasted sunflower seeds because I was out of walnuts), the tofu, some slices of beefsteak tomato, and a large dose of relish. Dee. lish. us.

-

Thursday, June 17, 2010

Heavenly Sesame Potatoes in Hot n Sweet Tomato Sauce

This recipe has probably spent the maximum number of days in my bookmarks. At the time I read this, I had just  moved to Singapore and didn't have a kitchen, let alone sesame oil and the rest of the ingredients this recipe requires. I finally made it a few weeks back and it was as yummy as I had imagined. Thank you Rajani for a keeper of a potato recipe that's both easy and delicious.


Sesame Heavenly Potatoes


Heavenly Sesame Potatoes in Sweet Tomato Sauce
Adapted from: Rajani's EatWriteThink


Ingredients:
Serves: 2

2 large potatoes, cut into wedges (I used russet potatoes)
1 large onion, chopped fine
2 tomatoes, sliced into small pieces
1 small capsicum (or half of one), chopped fine
2 tsp soya sauce
1/2 tsp brown sugar (white sugar is also fine)
1 tsp crushed garlic (or 1/2 tsp garlic paste)
1 tsp red chilly powder
2 tbsp gingelly / sesame oil (must use this oil)
Salt to taste
Coriander leaves or spring onions, for garnish

How I Made It:

1. Shallow fry the potato wedges in oil until golden brown. Set aside to drain on a kitchen napkin.

2. In the remaining oil, add the onions and garlic and fry until golden brown. Then add the chilly powder and fry for a minute. Then add the tomatoes and saute until soft and mushy.
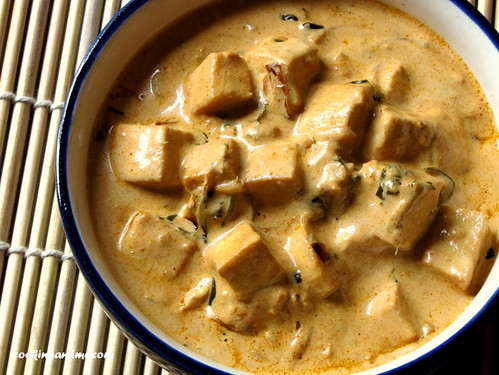
3. Turn heat to high and add the soya sauce and sugar. Fry on high for a minute and lower to medium heat. Add the capsicum and salt and mix well. Remove from fire after about 3-5 minutes.

4. Spoon this sauce over the potatoes and serve warm with garnish.

Heavenly Potatoes Recipe II

Tuesday, May 11, 2010

Penne with Seitan Sausage and Tomato Sauce

I am still on the quest for kid-friendly dishes for my newly veggie nephew and had recently concocted a pasta dish with lentils and beans, but then found out that he really does not like beans. Alas! So, this is a much less complex dish that uses good ol' seitan sausages and a simple but tasty tomato sauce. Since this dish only calls for 2 sausages, fire the other two in the freezer to have ready for next time. This is adapted from The Sopranos Cookbook. If you want more zing, add some red pepper flakes to the sauce.

INGREDIENTS
- 1 lb penne, or rigatoni, or ziti
- 2 seitan sausages, cooled and sliced
- 3 tbsp olive oil
- 2 cloves garlic, finely chopped
- 1/2 cup dry white wine
- 1 28 oz can plum tomatoes (juice and all) passed though a food mill, or 1 28 oz can crushed tomatoes
- salt and pepper to taste
- 1 tbsp basil
- 2 tbsp tomato paste
- 1/2 cup nutritional yeast

METHOD
1. Prepare pasta according to the directions on the box.
2. While paste is cooking, heat 2 tbsp of the oil in a large pan over medium heat. Fry sliced sausage for a few mins on each side, until nicely browned. Remove from pan and set aside. Add remaining tbsp of oil, then fry the garlic until very lightly browned and fragrant.
3. Add wine and simmer until wine reduces by about a third to a half. Add tomatoes then seasons with salt, pepper and basil. Simmer for 10 mins, uncovered.
4. Add tomato paste and nooch and stir well to thicken. Add more paste if needed. Add sausages to the pan and heat through.
5. Drain pasta and toss with the sauce. Serve.

Tuesday, April 20, 2010

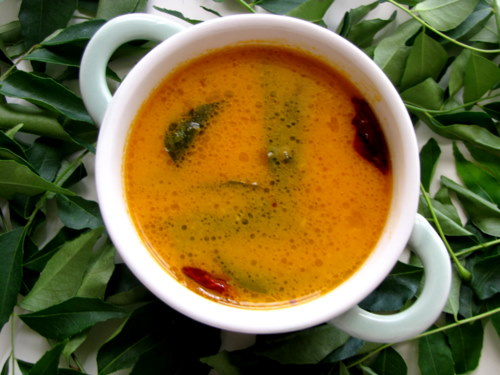
Thakkali Thella Pulusu / Tomato Coconut Gravy Recipe

Thella pulusu and vatti pulusu are the two most popular Reddiar curries (kozhambu / pulusu). While growing up, I definitely liked the milder thella pulusu but now, home food means a good thoran with vatti pulusu. Ah yumm. My aatha (amma's amma) used to make the best vatti pulusu (the recipe of which my sis has shared here).

This recipe is actually very similar to Arch's tomato saar recipe that I had posted pics of the other day. But there are some minor differences that  make them taste significantly different.


Considering Reddiars are kinda going extinct, I really should have posted this long back but here goes anyway. I couldn't ask aatha for her exact recipe before she passed away but amma has a pretty good approximation of the recipe so sharing that here.


You can add any vegetable of your choice, the most popular ones being tomatoes, drumsticks, brinjal, etc. I made my favourite, the tomato version with drumsticks. 

Thakkali Thella Pulusu 
Serves 4

What I Used:

1 big tomato, cubed
1 drumstick, cut into 4" pieces
1 cup tamarind water (from a small lime-sized ball of tamarind)
Salt to taste

Grind to a paste:
1/2 cup grated coconut
4-5 shallots / ulli
1/2 tsp jeera
2 dry red chillies
A pinch of turmeric
1 clove of garlic

For tempering:
2 tsp oil
A few fenugreek seeds / uluva / menthayam
1/4 tsp mustard seeds
A few curry leaves
4-5 sliced shallots

How I Made It:

1. Take the tamarind water in a kadai and add the tomatoes and drumsticks to it along with salt. Bring to boil.

2. Add the ground masala paste to this and continue to boil on sim until the drumsticks are soft. This should take about 12-15mins. Add water as necessary to keep the consistency right (same consistency as sambar). Remove and set aside.

3. Heat oil and add all the ingredients for tempering. Once the mustard seeds have popped and the fenugreek seeds are roasted (take care not to burn them!), dunk them into the gravy. Mix well, adjust salt.

Serve hot with rice, mezhukkupuratti and pappadom.

On other news, I am giving away a waffle maker in MMKT and the last date to enter is April 25th 2010 - midnight SG time (GMT + 8:00). So HURRY! 

Thursday, February 25, 2010

The one where I am bored but also includes Tomato Saar Recipe Link

Yes, I am bored. Of what? Of:

- blogging regular every-day recipes like rasam and sambar and paratha and paneer butter masala.
- looking at the same old template that this site has been stuck with since the middle of last year (or has it been longer?).
- looking at my Reader chock full of blogs I am yet to read simply because I am too tired or busy to comment and I hate leaving a site without commenting. I have to say something (only genuine stuff though, don't worry).

What does this mean?

I think the content of this site needs some serious overhaul. I am going to look for those gems out there. In other blogs and sites, in cookbooks, in relatives' kitchens, everywhere! Recipes that are not run-of-the-mill. Recipes that are quick or are worth the extra time you may need to spend on them.

I only have two more recipes in my draft, one is the tomato saar that's coming up and the next one is Methi Paratha so don't tease me when I post that because a Methi Paratha recipe is anything but radical.

But.

This is like a resolution I have for the blog so let's see how it goes. For now, I am going to leave the template alone. God knows how obsessed I can get when I start editing it.


Now onto the Tomato Saar Recipe. This is directly lifted from Arch's blog, The Yum Factor. Tried it based on SJ's reco and loved it. Thanks Arch!

Saturday, January 23, 2010

Roasted Vegetable Ragout

We spent the afternoon hiking through the snowy woods, so this thick and hearty stew made for the perfect dinner. I really apologize for the truly terrible picture--the colour is reminiscent of those pictures of luncheon meats from the 70s they used to hang over the deli counter in the grocery store. I love the combination of vermouth, tomato, and basil in this dish, and I like a stew so thick you can eat it off a plate. Roasting is worth the extra time to bring out the sweetness of the onions, but feel free to use whatever veggies you want.

INGREDIENTS
- 1 large sweet onion, cut into wedges
- 3 red potatoes, diced
- 2 large carrots, sliced
- 6 garlic cloves, chopped
- 15 Brussels sprouts, halved
- 1 19oz can white kidney beans, rinsed and drained
- 2 tbsp oil
- salt and pepper
- 2 tsp basil
- 1 28oz can diced tomatoes, drained
- 2/3 cup dry vermouth
- 1 cup spaghetti sauce

METHOD
Preheat oven to 450 degrees
1. Toss veggies and beans in oil, season with salt and pepper, and then mix in basil. Spread out on a heavy baking sheet with sides (I used a stoneware sheet). Drain tomatoes very well and spread out over veggies. Bake for about 1 hour, turning veggies every 20 mins, until cooked and nicely browned.
2. Transfer veggies into a large pot. Add in vermouth and bring to bubbling. Cook for 10-15 mins, until reduced, then stir in spaghetti sauce. Bring to bubbling again, adjust seasoning, and serve. If the Brussels sprouts need more cooking, reduce heat, cover, and simmer until tender.

Wednesday, November 4, 2009

Spaghetti Squash with Slow Roasted Tomato Sauce

Now that summer is over we are back to the tasteless, anemic, tomatoes from the grocery store. Sigh. I wanted to make a tomato sauce to go with a recently purchased spaghetti squash, but knew that the tomatoes this time of year leave something to be desired. Enter slow roasting. I was amazed--this process brought out more flavour than I ever could have imagined. Combined with the vermouth, this sauce is bursting with tomatoy goodness and is the perfect complement to the flavour and texture of the squash. Obviously, this recipe needs a bit of planning. I roasted the tomatoes the day before and kept them in the fridge until I needed them.

INGREDIENTS
- 1 spaghetti squash
- 6 large tomatoes, cut into wedges
- 8 garlic cloves, unpeeled
- olive oil
- seat salt
- 1 tbsp olive oil
- 1 leek, light green and white part, thinly sliced
- 1 tomato, small dice
- 1 cup vermouth (plus a few generous splashes)
- 1 tsp basil
- salt and pepper taste

METHOD
1. Slow Roasted Tomatoes: Preheat oven to 225 degrees. Gently toss tomato wedges and garlic cloves in a bit of olive oil and spread out on a baking sheet lined with parchment paper. Sprinkle with sea salt. Bake for 3.5 to 4 hours, until well-roasted, wrinkly, but still with a moist centre. Peel the garlic and chop.
2. Roasted Spaghetti Squash: Cut a small hole in the squash to let steam escape. Roast at 375 degrees until soft to the touch. This will depend on how big you squash is, but generally about 1.5 to 2 hours. Cut open, let cool a bit, then remove squash strands with a fork. Toss in a bit of margarine and season with salt and pepper.
3. Sauce: Heat oil over medium heat. Add leeks and saute for a few mins, until softened. Add a generous splash of vermouth and cook for a few mins more, until nice and soft. Add more vermouth, if needed. Add roasted tomatoes, roasted garlic, diced fresh tomato, and 1 cup of vermouth. Let simmer for 10 mins or so, until sauce is thick. Season to taste with salt and pepper. Serve over squash.

Monday, October 26, 2009

Potatoes in Red Coriander Sauce Recipe

This is a quick and easy Potato Recipe from Complete Indian Cooking by Mridula Baljekar, et al. I have tried quite a few recipes from this book with good success and this one was a must-try for two reasons.

1. Its the simplest recipe in the book!
2. It has the least number of ingredients and still looks so good.

Actually, there's one more reason: I love coriander. I hardly ever use coriander seeds in anything other than vatha kozhambu and the like but this recipe calls for whole coriander seeds. The flavour was delightful.

Potatoes in Red Coriander Sauce
Serves: 2
Preparation time: 15-20 mins
Source: Complete Indian Cooking by Mridula Baljekar, et al.

What I Used:

A dozen baby potatoes (or 3 potatoes, cubed)
1.5 tsp coriander seeds / malli
1.5 tsp cumin seeds / jeera / jeerakam
4 garlic cloves
3 tbsp thick tamarind juice (or 1 tbsp readymade tamarind paste)
1 pureed tomato (or chopped fine)
A few curry leaves
1/2 tsp sugar
2 tbsp oil
Salt to taste
Coriander leaves / kothamalli to garnish

How I Made It:

1. Boil the potatoes in water until they are cooked yet not mushy. You can pressure cook for 1 whistle to make the job easier.

2. Grind the coriander seeds with the cumin seeds and garlic cloves to a coarse paste using a pestle and mortar or your small mixie jar.

3. Heat oil in a pan and add the ground paste with the tamarind juice, tomato puree, curry leaves, salt and sugar. Lower fire to medium-low and cook until the oil separates (about 7-10 mins)

4. Add the potatoes and stir well until coated with the sauce. Cover and simmer for about 5 mins. Garnish with fresh coriander leaves and serve hot.


Note

- Instead of using whole coriander and cumin seeds, their powders can also be used. This will help you avoid the grinding, although the flavour will change a bit. It still tastes good, I have tried it both ways :)

Its been ages since I sent entries to any events so I am glad this fits in perfectly with Sunita's Think Spice event hosted by Priya, this month featuring coriander seeds.

Monday, October 12, 2009

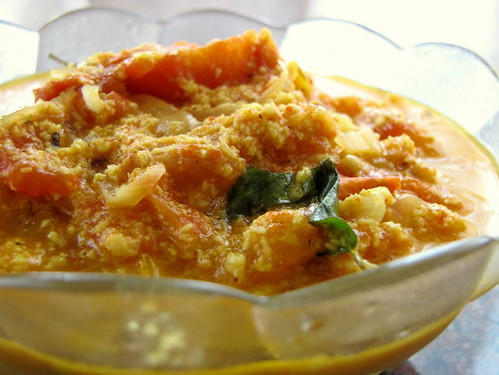
Thakkali Muringakka Aviyal Recipe / Tomato and Drumsticks in Coconut

I don't know if this a common Kerala recipe but ever since I can remember amma has been making this a quick side dish for Chicken Biryani. Her rationale is, biryani is intense and doesn't have coconut and any Malayali should know that we always pair curries with coconut and without coconut together, to balance the flavours.

Amma sent me the recipe through my uncle who typed it out while she listed the things to be done. The picture was taken in Kottayam when I was there this August and amma made it, not me :)

thakkali muringakka aviyal

Thakkali Muringakka Aviyal Recipe
Source: My mom
Preparation time: 30 mins

What Is Needed:

4 tomatoes, sliced into six long pieces
1 drumstick / muringakka, cut into 3" pieces
1/2 cup grated coconut
12 peeled shallots / chinna vengaayam / cheriya ulli
2 flakes garlic
1/4 tsp jeera / cumin seeds / jeerakam
1 tsp red chilly powder
A few curry leaves
1/4 tsp mustard seeds / kaduku
1 tbsp oil (preferably coconut oil)

How Its Made:

1. Add the chopped drumstick to about 1 cup water with with some salt and the chilly powder. Keep on a medium flame and cook until soft. The mixture shouldn't be too watery, so if it is, boil some more on a low flame.

2. To this, add the cut tomatoes and cook some more until the tomatoes begin to soften.

3. Grind together - coconut + jeera + garlic to a coarse paste.

4. Heat oil in a pan and add the mustard seeds. When they pop, add the shallots and curry leaves. Fry for about 2 mins, until the shallots soften.

5. Next, add the ground coconut paste and fry for another 1 min. To this, add the drumstick and tomatoes. Mix well. Simmer for 2-3 mins until well combined. Adjust salt.

Serve hot with steamed white rice or chicken biryani.

Sunday, October 4, 2009

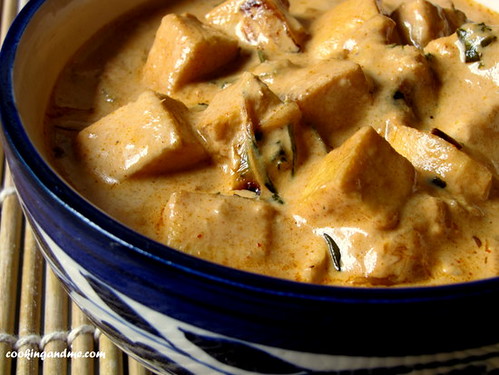
Paneer Butter Masala: Restaurant-Style Recipe - Step by Step

Let's talk about Paneer Butter Masala today. Not just any kind, the kind that you get in Indian restaurants. Why? Well, I've already posted the Paneer Butter Masala Recipe I usually make, long back. Its also one of the most popular recipes on this site for two reasons:

- since its a popular Indian dish, a lot of people have tried it from my site and sent me feedback.
- this is the only recipe that has received as many good feedback as disappointing feedback.

Most people said this or a variation of this - "I tried your paneer butter masala recipe today. It came out nicely, I did everything you mentioned but it didn't come out like the one we had in that North Indian restaurant last weekend and my husband/wife/mom/dad/sibling loved! Help!"

I guess they found my Paneer Butter Masala Recipe too homely!

In most Indian restaurants, dishes are more creamy and have thicker gravy. The reason is very simple - they use cream. They use it as the base of every dish you order and it may make the dish arguably tastier. This is not hard to whip at home provided you have no qualms about adding that bit of cream and kicking up the amount of oil a notch.

So here it is, my second Paneer Butter Masala Recipe, like they serve in Indian restaurants!

Oh did I mention its going to be step-by-step? Also, a huge thanks to my cousin Divya for giving me the basic recipe. Ok here goes, a picture of the final dish.

I'd say the only thing that's different from this dish and the one you get in Indian restaunts is the difference in the colour. That's because they add red food colour and I didn't.

Ok, let's get started.

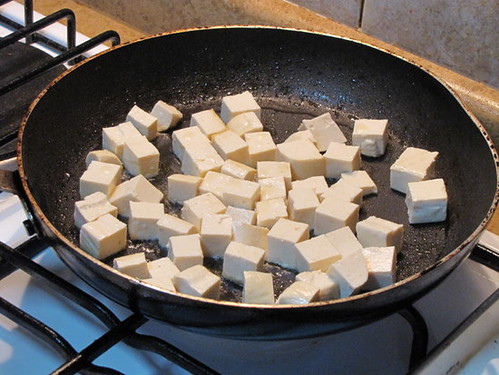
Add 2 tbsp oil to a hot pan and swirl around until the base of the pan is well coated.

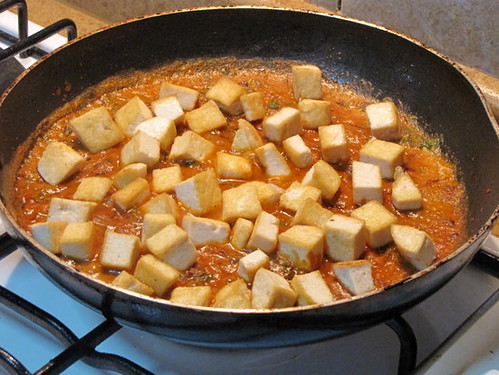
Add in cubed paneer pieces.

(Sidenote: Let's please pretend these are paneer pieces 'cuz its actually tofu. I was out of paneer and couldn't go all the way to get some. Also, it tastes as good with tofu, trust me!)

Lightly fry the paneer cubes until golden brown on all sides.

Drain and set aside on a plate lined with a paper napkin.

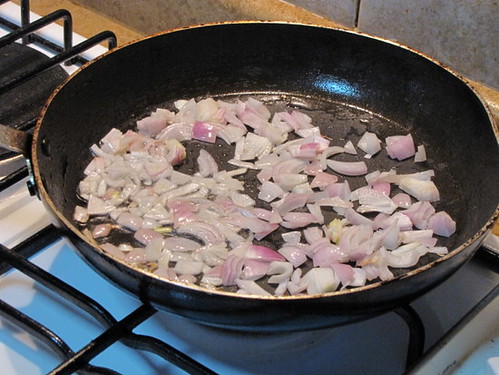
Add 1tbsp oil to the same pan and thrown 1 medium-sized chopped onion.

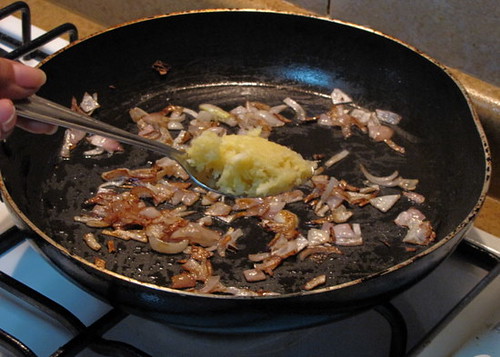
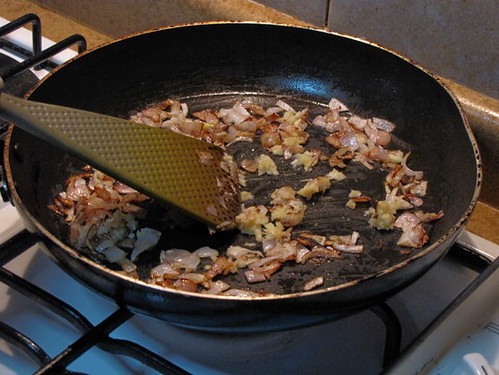
Fry until golden brown. To this, add 1 tbsp freshly minced ginger-garlic paste. (Ok fine, use your bottled paste, it just doesn't taste as good)

Fry for a minute.

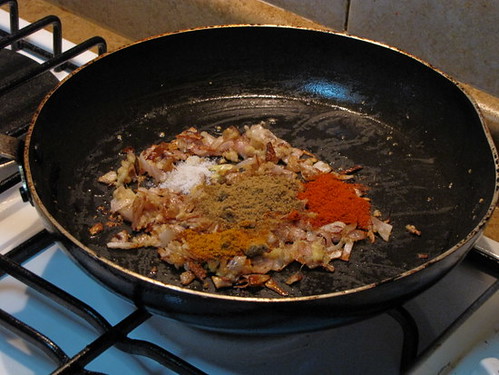
To this, add 1 tbsp dhania powder/malli podi, 1 tsp chilli powder, 1 tsp garam masala and 1/2 tsp salt. Fry for 30 seconds until the masalas are well combined.

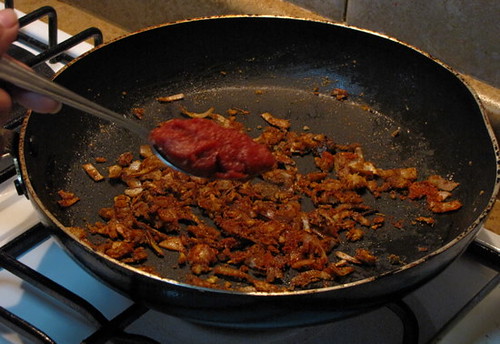
Next you need 1 tbsp tomato paste. I used the same kind I used for the Tomato Spinach Pulao. If you don't have tomato paste handy, just puree 1 medium-sized tomato and add it at this stage.
Next we need tomato ketchup or tomato sauce, the bottled Maggi/Heinz kind. Add in an almost-1tbsp of this.

Bring out your kasuri methi next. A generous pinch of this needs to go in.

(This picture makes my heart break, btw. The focus should've been on the kasuri methi but its actually on the blob of tomato sauce in the pan. Well, I took only one shot and my hands were smeared with oil and ketchup and I had to balance.. oh never mind!)

To this mixture, add 1/2 cup milk. Mix well and cook covered for about 5 minutes on low fire.

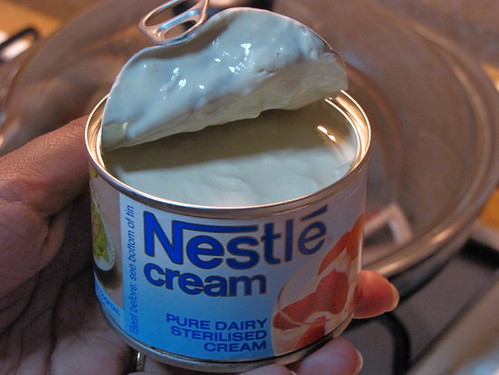
Meanwhile, bring out the secret ingredient for making restaurant-style paneer butter masala (or any Indian curry for that matter). CREAM!

I used Nestle cream but if you have fresh cream, please oh please use that. Just open the can and set aside or get your fresh cream ready.

Once the tomato sauce mixture has cooked covered for 5 mins, open and add the fried paneer.

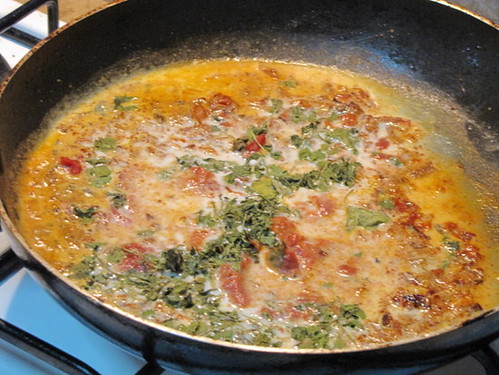
Top this off with 1 cup cream. Mix well and simmer on low fire for 3-4 mins. Adjust salt.

The recipe again, all in one place.
Paneer (or Tofu) Butter Masala: Restaurant Style Recipe

What I Used:

Paneer/tofu - 1 block, approx. 2 cups of cubes
Onion - 1 medium-sized one, chopped fine
Ginger-garlic paste - 1 tbsp
Dhania powder/malli podi/Coriander powder - 1 tbsp
Garam masala - 1 tsp
Red chilli powder - 1 tsp
Tomato paste- 1 tbsp (or 1 tomato, pureed)
Tomato sauce/ketchup - almost 1 tbsp
Kasuri methi/dried fenugreek leaves - 1 generous pinch
Milk - 1/2 cup
Cream - 1 cup
Oil - 3 tbsp
Salt - to taste

How I Made It:

1. Heat 2 tbsp oil in a pan and fry the paneer/tofu cubes until golden brown. Drain and set aside.
2. In the same pan, add 1 more tbsp oil and fry the onions until golden brown.
3. Add the ginger garlic paste and fry for a minute.
4. Next, add the dhania, garam masala, chilli powder and some salt. Fry for 30 seconds.
5. To this, add the tomato paste/puree, tomato sauce and kasuri methi. Mix well and add the milk.
6. Lower fire and cook covered for 5 mins.
7. Open lid, add the fried paneer/tofu and the cream. Mix well and simmer for 3-4 mins.
8. Garnish with fresh coriander leaves if you have any.
Serve warm with rotis/pulao/jeera rice.

Its yummy, no doubt. Probably not something you want to make every weekend but its good when you entertain guests and people end up having only 2-3 spoons of one dish anyway. Its also a good recipe to "wow" your non-Indian friends.

Because when they Paneer Butter Masala, this is what they expect!