Showing posts with label Bread. Show all posts

Sunday, April 10, 2011

Tomato Basil Pizza with Gouda Cheese - From Scratch!

I am a few days late to post this month's Sweet Punch entry but I had to do it, even if it late. Its pizza from scratch, how can I not?!

Pizza from Scratch with Gouda Cheese

The first and only time I made pizza from scratch was when I went for cooking classes at Palate Sensations. It was amazing (especially because I didn't partially burn it then) and since then I stopped buying pizza base. What that also meant is, I didn't make pizza at home for ages.

DPizza from Scratch with Gouda Cheese

But its super easy. Remember those garlic rolls that all of you loved and tried at home? Trust me when I say this is not even half as hard. With me? Ok here goes.

Pizza Base From Scratch
Recipe source: Pioneer Woman

Ingredients

  • 1 tsp Active Dry or Instant Yeast
  • 4 cups all-purpose flour
  • 1 tsp salt
  • 1/3 cups extra virgin olive oil

Instructions

  1. Sprinkle yeast over 1 1/2 cups warm (not lukewarm) water.
  2. In a mixer, combine flour and salt. With the mixer running on low speed (with paddle attachment), drizzle in olive oil until combined with flour. You can definitely do the mixing by hand, just knead gently, no need to waste too much energy.
  3. Next, pour in yeast-water mixture and mix until just combined.
  4. Coat a separate mixing bowl with a light drizzle of olive oil, and form the dough into a ball. Toss to coat dough in olive oil, then cover the bowl tightly with plastic wrap and store in the fridge until you need it.
Yield: 2 crusts
Prep Time: 00:10 mins
Cook time: 00:20 mins

According to PW, it’s best to make the dough at least 24 hours in advance, and 3 or 4 days is even better. I kept it in the fridge for exactly 25 hours.

Pizza from Scratch with Gouda Cheese

Here's how it looks after 24 hours or so. Slightly risen and quite airy.

Pizza from Scratch with Gouda Cheese

Transfer half the dough to a floured surface. Lift and rotate the dough into a circle or rectangle, letting gravity do its job extending the dough on all sides. My dough didn't seem too elastic though and I was a bit worried. But it turned out perfect in the end.

Pizza from Scratch with Gouda Cheese

Once you have a rough shape, transfer to a greased baking sheet (or use your Silpat - I got mine this time from the US - yay!!) and shape further using your fingertips to the right thickness you desire. I kept it neither too thick nor too thin. 

Pizza from Scratch with Gouda Cheese

Oh btw, I decided to make a face at convention and used Gouda cheese in my pizza. You should do it too. Its not as elastic or chewy but has a lovely flavour and gives more depth to the pizza, making it taste gourmet. Or something like that. Try it.

Pizza from Scratch with Gouda Cheese

Once you have your base ready, rub some olive oil on the base and you can go crazy with your options. I decided to keep it relatively simple. Some diced tomatoes went on first, followed by thin slices of portobello mushroom. 

This exercise actually make me realise how little you need to make a pizza. I used like half a mushroom to cover up the pizza!

Pizza from Scratch with Gouda Cheese

The tomatoes and mushroom were followed by the freshly grated Gouda cheese and lovely, gorgeous, fresh basil leaves from my own herb 'garden'. I was so proud!

Pizza from Scratch with Gouda Cheese

Bake in a 500F / 260C oven (or as high as your oven goes) for about 10-15 mins (until the crust turns brown and the cheese bubbles up nicely). I slightly burnt one side of my pizza because I had a guest and was talking to him. That also explains the very hastily taken last pic!

Loved this challenge, love pizza from scratch - actually love anything with cheese.

The end. 

Wednesday, March 16, 2011

Green Mint Chutney & Cheese Sandwiches

Picnic food is fun to make, especially if you are not really going on a picnic but just pretending to on a rainy, weary weeknight.

About once a month, TH and I have sandwiches for dinner. Its just one of those inexplicable things we do.

DSC_2430

Since I got my mint plant, there's no dearth of fresh mint and I love using fresh herbs in my cooking. Well, don't we all?

This is a quick sandwich recipe that works great for a picnic, tiffin box or even brunch or tea party. It tastes great and is filling too!

Mint Chutney and Cheese Sandwiches
Makes 4 - Serves 2

Ingredients:
8 slices of bread of your choice
4 slices of cheese

For the Mint Chutney:
A bunch of fresh mint leaves
1/2 cup freshly grated coconut
1 green chilly
1/2 tsp minced garlic (optional)
A pinch of dry ginger powder or 1/2" piece of fresh ginger
Salt to taste

Grind all ingredients together with very little water to a smooth paste.

To assemble and toast the sandwiches: Spread a generous amount of the mint chutney on one side of the bread slice. Top with a slice of cheese and toast in a sandwich maker until done. You can also toast in a pan on the stovetop with a pat of butter until both sides are golden brown and the cheese has melted.

DSC_2440

Serve hot with ketchup.

Sunday, November 28, 2010

Garlic Pull-Apart Rolls Recipe - Step by Step

I had been eyeing this recipe of Suhaina's for a long time. When she brought them for our Singapore food bloggers' meet, I was totally sold. Finally managed to make them this weekend. I would highly recommend this to all those who are dying to bake but fear the yeast monster. Trust me when I say this is really fool-proof and you can feel so proud of yourself when done!

Eggless Garlic Rolls Recipe

I halved the recipe and got 8 mini rolls, enough to serve 2 very generously. We had one here and one there, through the weekend.

Garlic Pull-Apart Rolls
Recipe source: Suhaina
Makes 8 mini rolls

Ingredients:
Plain Flour - 1.5 cups
Warm Water- 1/2 cup + 1 tbsp
Yeast - 1/2 tbsp
Salt - 1tsp
Sugar - 1 tbsp
Olive Oil - 1 tbsp + 1 tsp

For Garlic Spread:
Salted butter, at room temperature - 6 tbsp
Minced garlic - 2 tbsp
Chopped coriander leaves - 2 tbsp

How I Made It:

1. Mix flour, yeast, warm water, salt and sugar together until you get a smooth, slightly stick dough.

Eggless Garlic Rolls Recipe

2. Add oil to your fingertips and knead until the dough springs back when you press with your fingers - about 4-5 mins.

Eggless Garlic Rolls Recipe

3. Wrap in cling film and allow to double by keeping in a warm place for about 45 mins. Meanwhile, make the garlic spread by simpy mixing all the ingredients.

Eggless Garlic Rolls Recipe

4. Grease a baking pan or loaf tin with olive oil. I used my Pyrex loaf pan which was the perfect size for 8 mini garlic rolls.

5. Knock down the air in the dough and divide the dough into two equal portions.

Eggless Garlic Rolls Recipe

6. Transfer one portion of the dough to a floured surface and roll gently into a rough rectangle of 1/2" thickness. Apply more flour sparingly if sticky.

7. Spread about 2 tbsp of garlic spread on one side.

Eggless Garlic Rolls Recipe

8. Roll from one end gently and firmly.

Eggless Garlic Rolls Recipe

9. Cut into half and then each half again into two halves to get 4 equal portions.

Eggless Garlic Rolls Recipe

10. Now place the rolls with the cut side up in the greased pan.
Repeat the same procedure for the remaining dough.

11. Spread a little milk on the rolls and add the remaining garlic spread on top. I am sure sesame seeds as Suhaina has added will make the flavour even better but I didn't have any.

Eggless Garlic Rolls Recipe

12. Allow to rise for another 20 minutes. In the mean time preheat the oven to 180C / 375F.

13. Bake for about 30 mins until the top is golden brown. My Pyrex glass pan usually takes longer to bake in, so mine took about 35 mins to bake just right.

Eggless Garlic Rolls Recipe

These are really really soft and have an amazing flavour. Serve fresh and hot!

Eggless Garlic Rolls Recipe

Suhaina's Notes:

1. The amount of water depends on the type of flour you are using. Use your judgment to get a slightly sticky dough that behaves when you apply oil.

2. The amount of yeast can be reduced if you don't like the flavour of yeast too much in your breads. You can add just 1 tsp and let it double over a couple of hours, slowly.

Monday, May 10, 2010

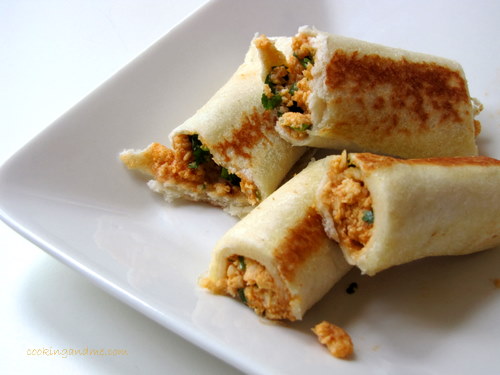
Bread Paneer Rolls - Step by Step Recipe

The bunch of you who wrote to me asking 'post recipes that we can cook with kids' or kid-friendly recipes, etc etc, I am looking right at you. I don't have kids so I have never really tried this with them but I have a very good feeling about this, trust me you. 


Funky paneer recipes totally float my boat, especially if they are easy to prepare. I saw this recipe in a Nita Mehta book in the library. I didn't borrow the book and didn't have anything to quickly note down ingredients and details AND I made this a whole 2 months later. So this is pretty much my own recipe, coming to think of it. What that also means is, you can make it your own by simply adapting, adding, subtracting and testing out your own variations to the paneer mix used in this recipe. 

Bread Paneer Rolls Recipe
Adapted from some recipe of Nita Mehta's, I think. 
Makes 4 rolls

Ingredients:

1 cup crumbled paneer
1 small onion, chopped fine (I should have added this!)
1/2 tsp red chilli powder
1/4 tsp powdered cumin / jeera
1/2 tsp garam masala
1/2 tsp ginger garlic paste
A small bunch of coriander, chopped fine
1 tsp or a bit more tomato sauce / ketchup
4 slices of bread
Butter to toast
Salt to taste

How I Made It:

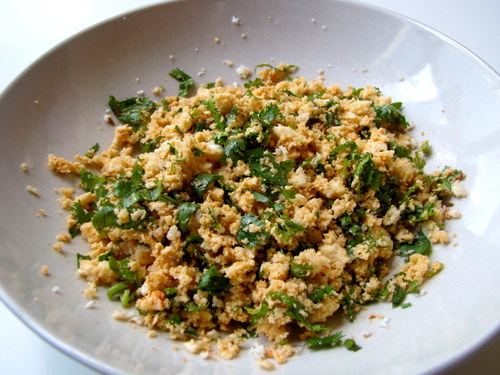
Place the crumbled panner in a nice bowl. Mine is from Ikea, thanks for asking.

Add the red chilli powder, garam masala, salt, chopped coriander, chopped onion, and jeera to this. 

Mix lightly with your finger tips. 

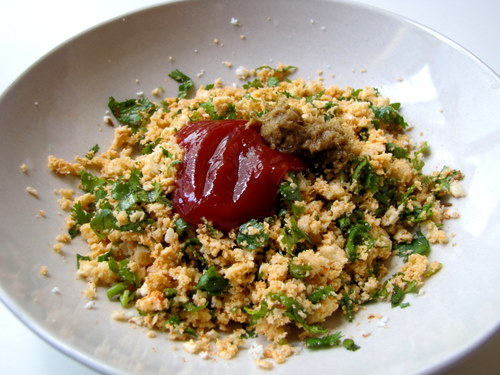
Then add the tomato sauce or ketchup and the ginger garlic paste. 

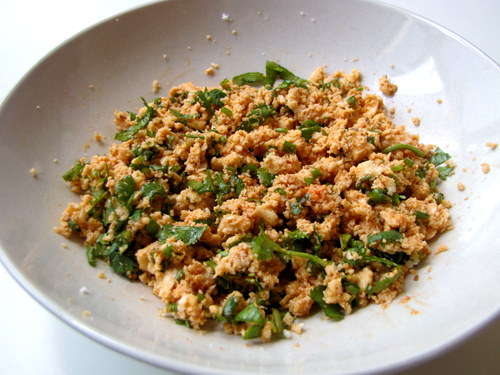
Blend again with finger tips. Set aside while you prep the bread.

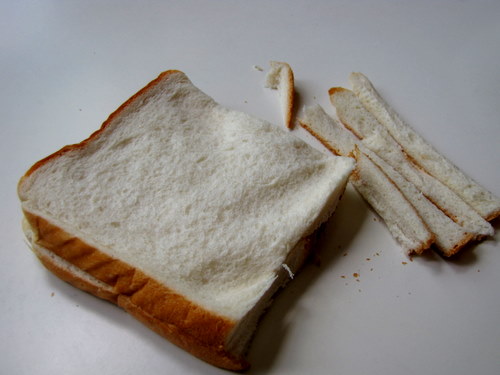
Remove the crusts from your bread. Use the regular white commercial variety. 

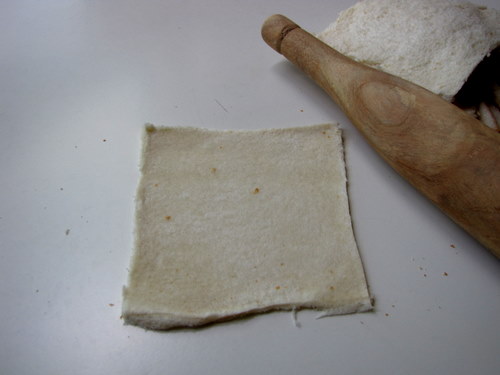
Roll out each slice as thin as you can. Commercial bread will have tons of leaveners in it so you get to do this quite easily. 

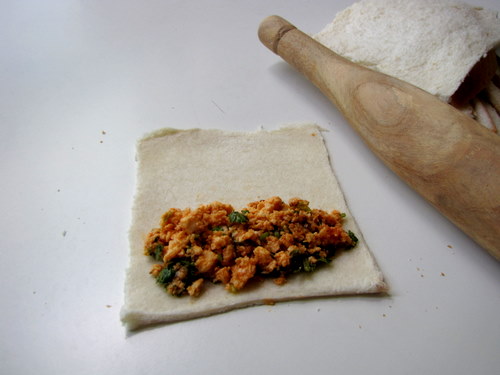
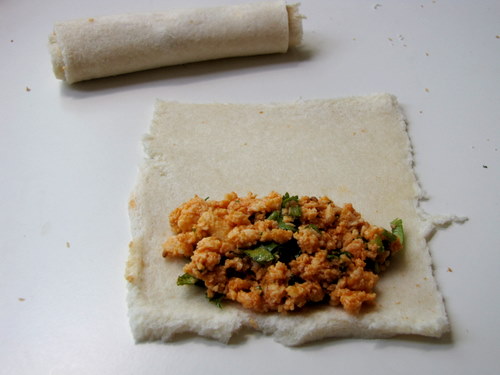
Place about 1 tsp or so of filling on one end of the rolled out bread slice. 

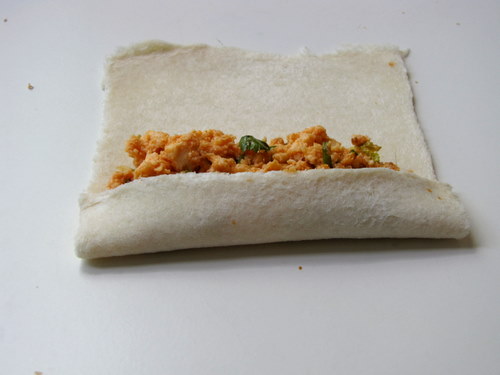
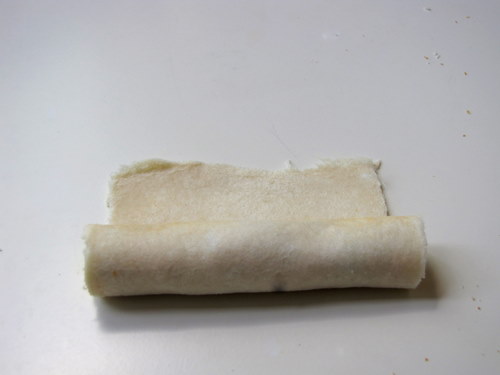
Gently roll in from one end, making sure that the filling stays well within the first turn of the roll. 

Go ahead and roll it all up. 

Repeat with the remaining bread slices. 

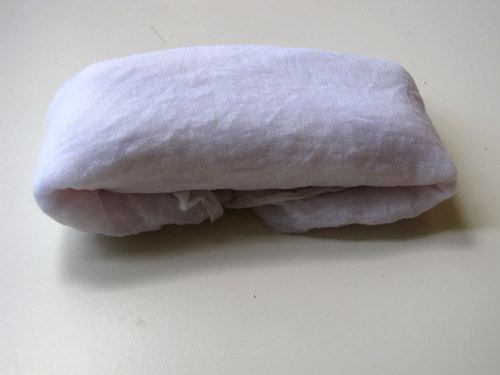
This step may be unnecessary but I remember the book mentioning it so I did it. Wrap up the tightly rolled bread slices with filling in a clean, damp kitchen towel. I used my cheese cloth, folded over twice for enough thickness. 

Set aside for about 15 mins. I think this makes the bread moist or something, no idea why we would do this otherwise. If you omit this step, let me know how that turns out, won't cha?

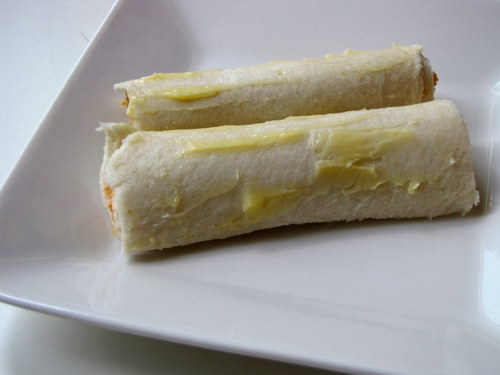
Now, butter up the rolls well on all sides. 

Lightly roast in a pan until all sides are browned. Cut up and serve with tomato sauce. Don't they look lovely? 

If you have store bought paneer in the fridge, then this can be put together in minutes. Imagine a fun evening cooking this with your kids or even better, wow-ing your guests with an appetizer that hardly took more than 30 mins to make. Its easy to do a bulk batch of this too. You can also cut up the rolls into smaller discs, stick a toothpick in, and serve it as a fancier appetizer. 

Sunday, March 7, 2010

Spiced Methi Paratha Recipe

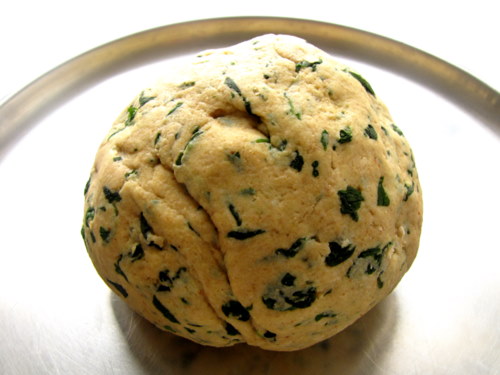
I love fresh methi or fenugreek leaves for the slight bitterness they add to any dish. Methi dal is the usual favourite for TH and me. Each time I go to Little India, I scout around for a bunch. They are not very easy to find so when I do get them, I wrack my brain on what to make with it.

Methi Paratha was the outcome one such weekend. I checked out many recipes online and a couple of cookbooks have. There are two ways to make methi paratha:

1. Make a spiced stuffing like you do for aloo paratha or gobi paratha and make methi parathas the same way.
2. Chop up the leaves and add them to the atta while making the dough and make parathas as normal.


I decided to go midway between the two options.

Methi Paratha Recipe
Makes: 6 parathas

What I Used:

4 cups packed fresh methi / fenugreek leaves, cleaned and chopped fine
2 green chillies, chopped fine
1" piece ginger, grated
1/2 tsp powdered jeera / cumin seeds
1 tsp oil
Salt to taste

5 cups atta / wheat flour
Water as needed
Ghee or butter to make the parathas

How I Made It:

1. Heat the oil and add the jeera. After about 5 seconds, add the ginger, methi leaves, green chillies and some salt. Stir until the leaves start to wilt and get lightly toasted. Don't cook it for more than 7 mins. Let this mixture cool.

2. Add the spiced methi mixture to the atta, more salt if needed and enough water to make a soft, pliable dough. Divide into 6 equal-sized balls. Roll out each and cook on a tawa or griddle until both sides are golden brown.

3. After removing from fire, pat ghee or butter on both side and keep covered to maintain softness.


Serve warm with mango pickle and curds.

Thursday, February 4, 2010

Nan On Tawa or Tawa Naan Recipe - Step by Step

Naan or Nan is TH's favourite bread. That and palak paneer are his absolute favourite dishes to order in a restaurant. I recently got the book Artisan Bread in 5 Minutes a Day from the library and got totally smitten by it.  I don't have most of the stuff that they have mentioned as requirements, like pizza peel and oven thermometer and baking stone and even a proper oven to do broiler method of baking in but this, this Tawa Nan I could try.

The dough is the master Boule recipe mentioned in Artisan Bread in 5 Minutes a Day. I halved the recipe since I only wanted to use it for Nan the first time around. 
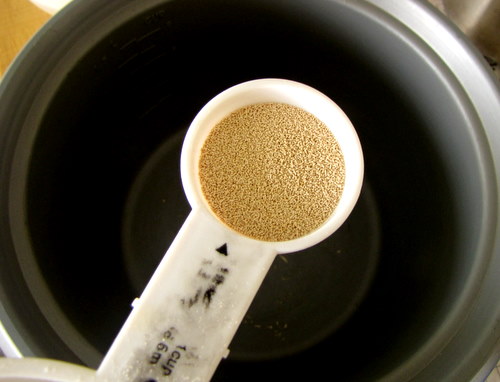
Here's what we need first - 3/4 tbsp of active dry yeast. Please make sure that its fresh and not past the expiration date. Why do I mention this explicitly? Err... no particular reason. Let's move on. 


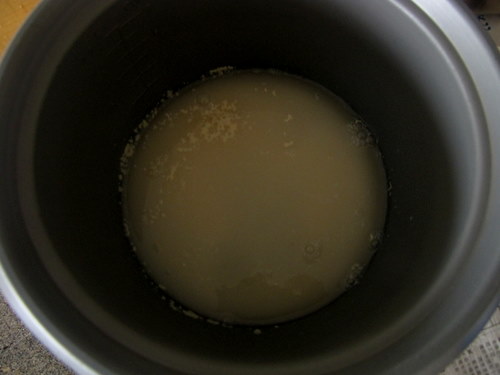
Throw the yeast in a bowl with 1.5 cups of lukewarm water. I warmed my water in the microwave for a minute on medium-high powder. The recipe says no need to dissolve the yeast or anything but I secretly made sure it is dissolved. You see, nothing wrong in being extra careful. 

Yes, I check atleast twice if the front door is locked before I go to bed. Why do you ask?

Btw, the below picture is not pretty. 


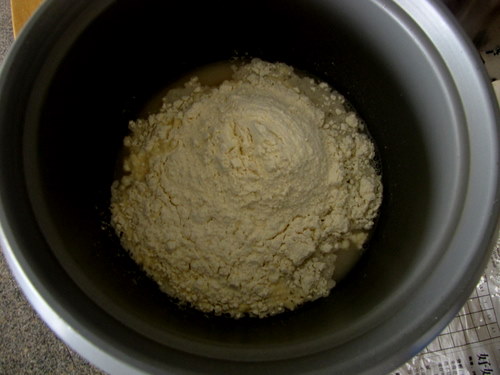
Told ya! Just add 3 and 1/4 cups of all purpose flour and a generous pinch of salt to it and the prettiness factor increases exponentially. 

See? 


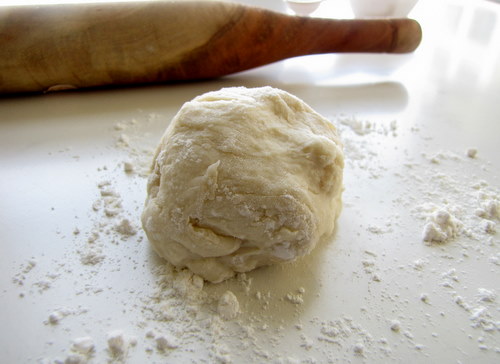
Ok, now bring the mixture together with your fingers. No need to knead. Heh. You'll be left with a sticky mass of dough. Just leave it covered somewhere for about 20-30 mins. 


I left it alone for around 20 minutes and it almost doubled. The recipe says not to worry about doubling, etc so I didn't. I always listen to what cookbooks say. Ok, almost always. 


The dough will be sticky and very elastic. Dig your hand in some flour and tear off a peach-sized piece. 


Lay it on a floured surface (my 'surface' is this). 


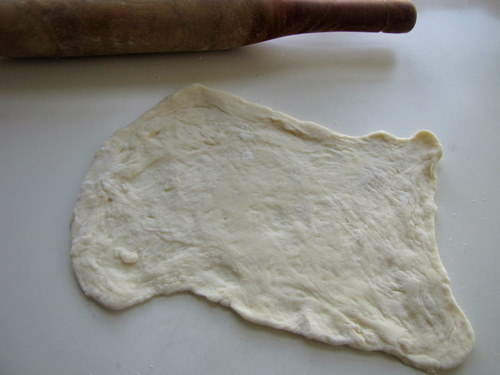
With the use of your hands and/ or your rolling pin, stretch out the dough till you form a nan shaped... err.. thing. Mine is square cuz TH wanted square naans. What? You don't believe me? Its true!


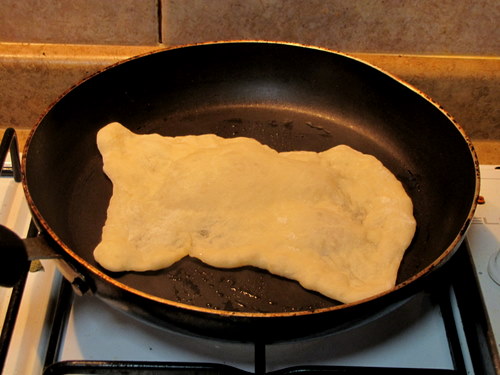
Heat a skillet on high heat, brush on some ghee or oil, lower the heat to medium and lay the nan on carefully. 


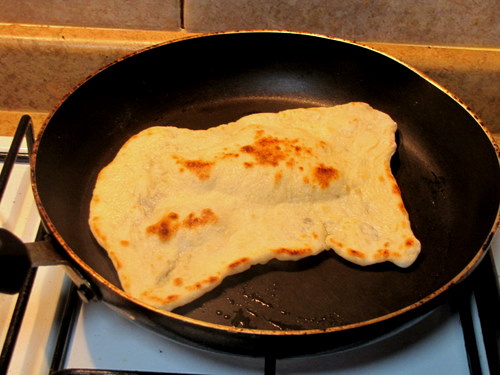
Flip over in about 2 mins when the first side starts browning. 


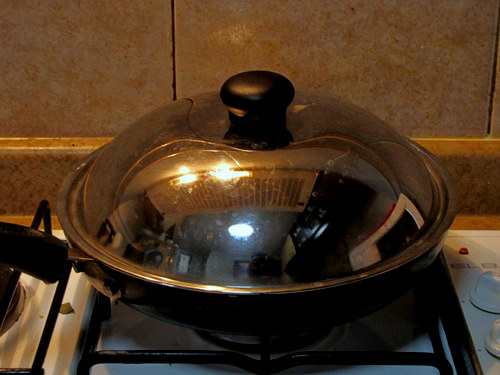
Cook closed for 30 seconds to a minute now, depending on the thickness of your nan, which shouldn't be too much, btw. 


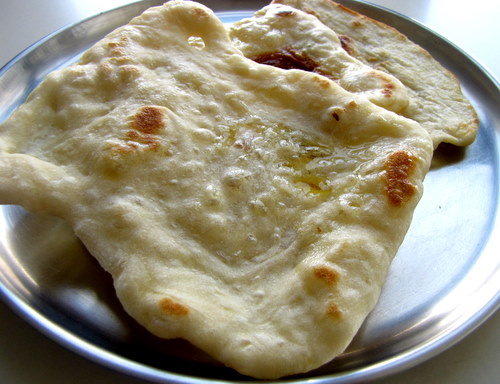
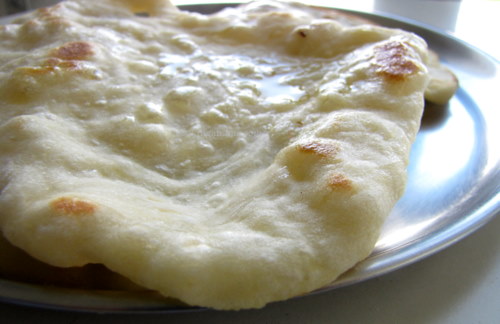
That's it! Yummy, spongy, soft nans are now ready. 


The texture and taste was awesome and we loved it. Just make sure to have it when still hot otherwise the nan may turn a bit rubbery. That's to be expected right, even the ones baked in tandoors that we get in restaurants turn all hard on us if we don't eat it immediately. 


Reminds me of pizza base. Ahh.. pizza base from scratch! That's what I am making next. 

Here's the recipe, all in one place. 

Tawa Naan / Nan Recipe

What I Used:

1.5 cups lukewarm water
3/4 tbsp yeast
3 and 1/4 cups of all purpose flour
A generous pinch of salt

How I Made It:

1. Dissolve the yeast in the water. Add in salt and the flour, incorporate well until a sticky dough is formed. No kneading necessary. 

2. Set aside covered for 20-30 mins. 

3. Tear or cut off with a serrated knife peach-sized amounts and transfer to a floured surface. Shape into oblong nans with help of rolling pin if necessary. Make sure there are no holes in the nan once you are done rolling it out. 

4. Heat a skillet on high heat, brush on some ghee or oil, lower the heat to medium and lay the nan on carefully.

5. Flip over in about 2 mins when the first side starts browning. 

6. Cook closed for 30 seconds to a minute now, depending on the thickness of your nan. 

Serve HOT.