Showing posts with label Coriander Leaves. Show all posts

Sunday, November 28, 2010

Garlic Pull-Apart Rolls Recipe - Step by Step

I had been eyeing this recipe of Suhaina's for a long time. When she brought them for our Singapore food bloggers' meet, I was totally sold. Finally managed to make them this weekend. I would highly recommend this to all those who are dying to bake but fear the yeast monster. Trust me when I say this is really fool-proof and you can feel so proud of yourself when done!

Eggless Garlic Rolls Recipe

I halved the recipe and got 8 mini rolls, enough to serve 2 very generously. We had one here and one there, through the weekend.

Garlic Pull-Apart Rolls
Recipe source: Suhaina
Makes 8 mini rolls

Ingredients:
Plain Flour - 1.5 cups
Warm Water- 1/2 cup + 1 tbsp
Yeast - 1/2 tbsp
Salt - 1tsp
Sugar - 1 tbsp
Olive Oil - 1 tbsp + 1 tsp

For Garlic Spread:
Salted butter, at room temperature - 6 tbsp
Minced garlic - 2 tbsp
Chopped coriander leaves - 2 tbsp

How I Made It:

1. Mix flour, yeast, warm water, salt and sugar together until you get a smooth, slightly stick dough.

Eggless Garlic Rolls Recipe

2. Add oil to your fingertips and knead until the dough springs back when you press with your fingers - about 4-5 mins.

Eggless Garlic Rolls Recipe

3. Wrap in cling film and allow to double by keeping in a warm place for about 45 mins. Meanwhile, make the garlic spread by simpy mixing all the ingredients.

Eggless Garlic Rolls Recipe

4. Grease a baking pan or loaf tin with olive oil. I used my Pyrex loaf pan which was the perfect size for 8 mini garlic rolls.

5. Knock down the air in the dough and divide the dough into two equal portions.

Eggless Garlic Rolls Recipe

6. Transfer one portion of the dough to a floured surface and roll gently into a rough rectangle of 1/2" thickness. Apply more flour sparingly if sticky.

7. Spread about 2 tbsp of garlic spread on one side.

Eggless Garlic Rolls Recipe

8. Roll from one end gently and firmly.

Eggless Garlic Rolls Recipe

9. Cut into half and then each half again into two halves to get 4 equal portions.

Eggless Garlic Rolls Recipe

10. Now place the rolls with the cut side up in the greased pan.
Repeat the same procedure for the remaining dough.

11. Spread a little milk on the rolls and add the remaining garlic spread on top. I am sure sesame seeds as Suhaina has added will make the flavour even better but I didn't have any.

Eggless Garlic Rolls Recipe

12. Allow to rise for another 20 minutes. In the mean time preheat the oven to 180C / 375F.

13. Bake for about 30 mins until the top is golden brown. My Pyrex glass pan usually takes longer to bake in, so mine took about 35 mins to bake just right.

Eggless Garlic Rolls Recipe

These are really really soft and have an amazing flavour. Serve fresh and hot!

Eggless Garlic Rolls Recipe

Suhaina's Notes:

1. The amount of water depends on the type of flour you are using. Use your judgment to get a slightly sticky dough that behaves when you apply oil.

2. The amount of yeast can be reduced if you don't like the flavour of yeast too much in your breads. You can add just 1 tsp and let it double over a couple of hours, slowly.

Monday, December 28, 2009

Mushrooms Stuffed with Brie : Recipe

I think I am very smart so what I do occasionally is, read a recipe and if I like it, I read the ingredients again and fool myself into thinking I can remember them all when I go shopping. Here's what happened the last time I did that.


Mini Portobello Mushrooms

I saw this recipe on Pioneer Woman and instantly knew I'll be making it. I read through the ingredients list and thought they were easy, especially since I had some brie left over after making this salad. Turns out that's the only ingredient that's common between her version and mine.


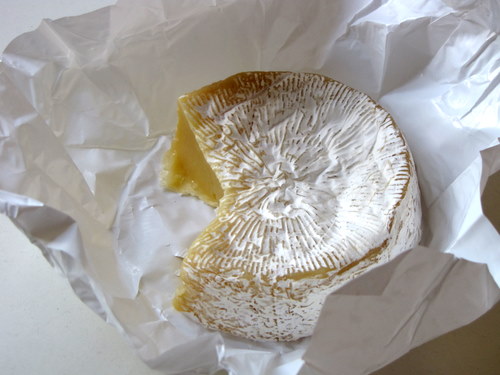
Brie


She used button mushrooms - I used portobello mushrooms
She used parsley and green onions - I used cilantro (coriander leaves) and totally forgot the green onions
She used brie - I used very little brie and then some mozarella
She didn't use onions - I did

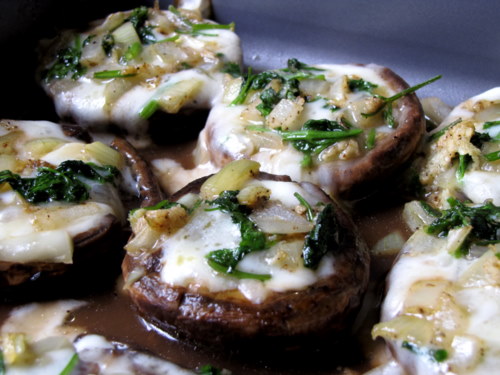
But the bottom line is, this turned out super yummy! Its a quick appetizer and sure to win over any mushroom-lover. You can also make big batches in one go, so its awesome when you are entertaining.

Here's my version.


Mushrooms Stuffed with Brie
Serves 2

What I Used:

12 mini portobello mushrooms
1 small onion, chopped fine
1 small block of brie cheese
3 tbsp grated mozarella
1/4 - 1/2 cup lightly packed fresh coriander leaves
2 cloves garlic, minced
1 tbsp butter
Salt to taste

How I Made It:

1. Wash and remove the stems from the mushrooms. Pat dry with a dry kitchen napkin.

2. Melt butter in a skillet and add the mushrooms. Sprinkle with some salt and toss them around until well coated with the butter.

3. Arrange these on an oven-proof dish stem side up and set aside.

4. In the same skillet, add minced garlic and onion and fry lightly for 30 seconds. Then add the chopped coriander leaves and sprinkle some salt. Toss around for a minute until the leaves soften. Take care not to fry or burn it.

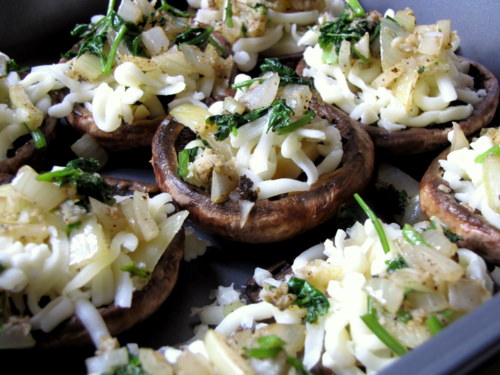
5. Cut the brie into small squares and lightly press into the mushrooms, where the stems were removed from. Top off each mushroom then with grated mozarella. Finally sprinkle the coriander leaves mixture evenly.

6. Bake in a 180C/350F oven for 15 minutes/until the cheese is melted and soft.

This is one good-tasting appetizer. Its very forgiving so you can use pretty much any meltable cheese and any herb that takes your fancy. And yeah, apparently any kind of mushroom too :)


Thursday, September 10, 2009

Fortified Curd Rice Recipe

The most striking thing about being married to a Tamil Brahmin is the addition of curd rice to my daily diet. TH cannot do without at least a spoonful of curd rice at the end of each meal, if we are having rice and curry. He is not very particular about rasam and is fine if I make only one kozhambu and two side dishes but curd is not subject to compromises, ever!

So I always have a good amount of curd in the fridge and proceed to make the next bowl if the current one is depleting. This is extra-advantageous after a long day at work and neither of us feel up to cooking or going out for dinner.

I don't find just curd and rice with pickles a justifiable meal because I feel it doesn't have even nutrition, comforting as it is. So I have a 'fortified' version adding as much vegetables as can be eaten raw.


Here's my standard version that I stick to more or less each time we have only curd rice for dinner.

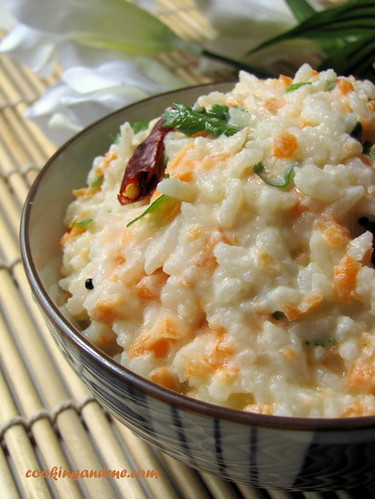
Fortified Curd Rice
Serves: 2
Preparation time: 15 mins

What I Used:
4 cups cooked rice
1 cup thick curd / plain yogurt
Half cup or so water
1 grated carrot
1/4 cup grated cucumber
1/2 tsp grated ginger
A bunch of fresh coriander leaves, chopped fine
A pinch of salt

For tempering:
2 tsp oil
1/4 tsp mustard seeds
1/4 tsp urad dal / ulutham paruppu
A pinch of hing / asafoetida / perungaayam
2 red chillies, torn into small pieces

How I Made It:

1. Mash the rice with a potato masher. Add the curd and water and mix well.
2. To this, add the chopped coriander and grated vegetables and mix well.
3. Heat oil in a pan and add the ingredients for tempering. When the mustard seeds pop, remove from fire and add to the rice. Mix well with salt.

If the consistency is too thick, add some more water / curd. If you keep this for long, the rice will absorb the water and make it thick, so adjust accordingly.


Isn't this so much nicer and prettier than normal boring curd rice? ;)

Thursday, May 7, 2009

Rhengan Reveya Recipe - A Gujarati Specialty!

I bookmark about 3 recipes each day on an average. I end up cooking about 4-5 of them each month, if its a good month, simply because there are way too may of them and just weekends for me to experiment and try out new stuff. But the moment I saw this recipe on Sia's site, I knew I'll be trying it out as soon as I could lay my hands on some good baby aubergines / Indian eggplant aka kathirikkai. I decided to give Little India a shot and I was not disappointed. I picked up some real beauties!

Rhengan Reveya is a traditional Gujarati recipe that is a delicious satay of baby aubergines and baby potatoes marinated in a spicy peanut paste. I have not yet tried peanut-based curries and that made this all the more exciting. Also, aubergines are my weakness, as you can see from the number of aubergine / kathirikkai recipes on this blog :D

Anyway, on to the recipe now.


Rhengan Reveya Recipe

Original recipe inspiration from here
Serves 4

What I Used:
6 baby aubergines / kathirikkai
2 potatoes, cubed (or 8 baby potaoes, halved)

For Spice Powder / Marinade:
1/2 cup peanuts
1 tbsp coriander seeds
2 tsp cumin seeds/ jeera / jeerakam
4 dry red chillies
1 pinch turmeric powder
1/2 tsp amchur / dry mango powder (optional but recommended)
1 tsp sugar
A big pinch of hing / asafoetida / kaayam
1" piece grated ginger
A bunch of coriander leaves, finely chopped
3 tbsp oil
Salt to taste

For Tempering:

2 tsp oil
1 pinch hing / asafoetida / kaayam
A few cumin / jeera seeds

How I Made It:

1. In a wide pan, dry roast peanuts, coriander seeds, jeera seeds, red chillies, hing, turmeric powder and amchur. Grind this to a powder. The oil from the peanuts will make this mixture a bit pasty.

2. Make slits in the brinjal from the bottom until the base of the stem. Make sure you keep the stems intact to make sure the aubergine stays in one piece. Scoop the spice powder into the slits and stuff as much of it in as you can.

3. Once all the aubergines are stuffed, mix this with the cubed potatoes, add the remaining spice powder, ginger, chopped coriander leaves, sugar and salt and keep aside for 10 mins.

4. Heat oil in a pan and add ingredients for tempering. Once the cumin seeds start sizzling, add the aubergine-potato mixture. Add 2 cups boiling water to this, keep fire on medium and cook closed for 5 mins.

5. After 5 mins, mix the vegetables, add more water if needed (the peanuts make this dish quite thick so I added about 1/2 cup water at this stage) and cook again closed for about 15 mins more. Mix in between to ensure uniform cooking, just make sure you don't break the aubergines while mixing.

6. Garnish with more chopped coriander leaves and serve hot with steamed white rice.


Notes

- While picking the baby brinjal, try to make sure they are of somewhat similar sizes. This is to ensure uniform cooking. Remember, we are not chopping them up but cooking them whole!

- Instead of using coriander seeds, jeera seeds the whole red chillies, you can use their powders. This could bring down the flavour, as Sia points out. If you ask me, go with the whole masala and grind them up, its really worth the effort :)

We absolutely loved our Rhengan Reveya and TH is not even a huge fan of peanut-based gravies! We licked our plates and the pan clean during lunch so basically we wiped out what can actually feed four people :D Thanks Sia!


Sunday, May 3, 2009

Gajar Matar Recipe - Carrots & Peas In A Milk Gravy

The moment I saw this on their blog, I knew I wanted to try it. It seemed so simple and the story behind it was quite amazing. I tried it a few weeks ago and have been wanting to post it ever since! 

The fact that cilantro / coriander leaves was a must and not just a garnishing suggestion made me wait until I had some fresh leaves ready to be used. 

I didn't have onions so added a few chopped shallots instead. I also omitted the cream, but otherwise, the recipe is 'authentic' :D 


Gajar Matar Recipe
Carrots and peas cooked in a creamy spiced milk gravy
serves 2

What I Used:

Carrots - 1.5 cups, chopped
Peas - 1 cup
Shallots - 1/4 cup, finely chopped
Milk - 2 cups
Cumin / jeera- 1 tsp
Turmeric powder - a generous pinch
Chilli powder - 2 tsp
Garam Masala -1 tsp
Oil - 2 tbsp
Salt - to taste
Fresh coriander leaves - add as much as you want, chopped


How I Made It:

1. Heat oil in a pan and add the jeera. Once they splutter, add the shallots and fry lightly. 

2. Add peas, turmeric and chilli powder to this and stir around for 2 minutes. 

3. Add the chopped carrots and a little water (not more than 1/4 cup) and cook covered, until the carrots are semi-cooked. You can also pre-cook the carrots separately or in the microwave. 

4. Add 1.5 cups milk and top it off with the garam masala and salt. 

5. Keep fire on sim and cook covered for about 10 minutes. At this stage, the curry will be dry and the vegetables cooked. Add the rest of the milk (1/2 cup) and bring to boil. Do not let the gravy thicken too much because it will once you remove from fire. For a more creamy consistency, add err.. cream! 

6. Garnish with coriander leaves and enjoy! 
This is my entry to JFI - Cilantro hosted by Cilantro :D Wow! There's going to be a lot of Cilantro at the round up! 

Tuesday, February 17, 2009

Coriander Rice / Kothamalli Sadam Recipe

This is another recipe from Chandra Padmanabhan's Southern Spice. I have been trying more and more recipes from the book with good results and this kothamalli sadam recipe is definitely a winner. Both TH and I love fresh coriander and pretty much anything made with it. When I have some extra leaves on the verge of wilting and wasting away, I chop them and add them to dosa batter, that's how much we love it!

The original recipe in the book called for mixed vegetables to be added but since I didn't have any carrots or cauliflower, I only added frozen peas. You can keep this recipe as the base and add vegetables and even paneer/tofu to get a different dish each time.

coriander rice
Recipe For Coriander Rice
What I Used:
(Serves 2)

Basmati rice (or any long-grained rice) - 2 cups
Green peas - 1/4 cup (optional)
Salt - to taste

For the Coriander Paste:

Fresh coriander leaves - 1 cup
Chopped onions - 1, medium
Green chillies - 2, more or less

For Tempering:

Oil - 2 tsp
Chana dal / kadala paruppu - 1 tsp
Urad dal / uzhunnu parippu - 1/2 tsp
Hing / Asafoetida - a generouns pinch
Curry leaves - a few

For Garnish:

Roasted cashewnuts - a handful
Chopped coriander leaves - 1/4 cup
How I Made It:

1. Soak the basmati rice in some water for 20 mins and cook in sufficient water until the grains are cooked, yet firm. I pressure cooked it this time for one whistle with 1:1 rice:water ratio.

2. Grind the ingredients for the coriander paste with little water.

3. Heat oil for tempering and roast the chana dal and urad dal until golden brown. Add the curry leaves and hing and mix well.

4. Now add the ground coriander paste and blend well adding enough salt. Throw in the green peas and let it simmer for 2-3 mins.

5. Switch off fire and mix in the rice while the paste is still hot.

6. Garnish with cashewnuts and chopped coriander leaves.
coriander rice
I served it with a simple cucumber raita and papad. The flavour will be a true delight for coriander lovers!

This recipe goes to Weekend Herb Blogging hosted by Susan of The Well-Seasoned Cook. For previous hosts and recaps of WHB check out Haalo's blog

--------------------------------------------------------------------------------

Please keep those recipes coming for The Recipe Diary Contest.


Thanks to everyone who started contributing already. You are all that much closer to winning the cookbook of your choice!
---------------------------------------------------------------------------------

Monday, February 9, 2009

Ridge Gourd Coriander Chutney

Ridge Gourd is a vegetable I haven't seen much in Kottayam. Or maybe it was available but I never noticed it. I do remember the dried ridge gourd (peechanga in malayalam) that we used to scrub ourselves in the shower. This was before the entry of a free loofah with every bottle of body wash (God! I feel old now!).


Anyway, ridge gourd is very commonly seen in all supermarkets and wet markets in Singapore. I used to pass by without a second glance because I had never cooked with it before and had no clue where I can fit it in. I vaguely remember amma making a bajji (not the deep fried kind, we also refer to pachadi-like curries as bajji at home) with the vegetable but I wasn't even sure if this was the same vegetable.


I would always resolve to go home and search for ridge gourd recipes online so that next time I can buy it. Of course the search never happened and I invariably forgot about it until I came to the supermarket next.


One day, I have no idea what came over me but I walked straight to the ridge gourd tray and picked up one. TH panicked. I could read his thoughts which went 'now what experimental dish is she going to cook up with this weird looking thing?' He asked me a few times if I knew how to cook it and I very confidently said 'I will figure something out'. The challenge was not to cook something with it but to cook something that he would like.


Long story short, I came home and searched online for ridge gourd recipes and, of course, Sailu's blog was among the top ten. I saw the recipe, realized it was quite easy and made it over a weeknight. It tasted so good that I had to take a picture even in sucky light just so that I can share it.


And yes, TH liked it too :)


Ridge gourd is known as beerakai in Telugu, peerkangai in Tamil, peechanga in Malayalam and torai/dodka in Hindi/Marathi.


Sailu's recipe involves tempering the chutney but I avoided that because I was lazy it’s healthier that way and still tastes great! I also avoided roasting the coriander leaves since I prefer the fresh flavour. So basically mine is a much lazier.. err.. simpler version :D

Recipe for Peechanga Chammanthi

What I Used:


Ridge gourd - 2 cups (1 medium sized vegetable), peeled and chopped

Fresh coriander leaves - 1/2 cup, chopped

Green chillies - 2, or to taste

Chana dal / bengal gram / kadala paruppu - 2 tsp

Urad dal / uzhunnu parippu / ulatham paruppu - 1 tsp

Cumin seeds / jeera / jeerakam - 1/4 tsp

Hing / asafoetida / kaayam / perungayam - a generous pinch (optional)

Sesame seeds / til - 1 tbsp (I used white sesame seeds, do not avoid this ingredients as its vital for the flavour)

Tamarind paste - 1 tsp (or use 1 tbsp lemon juice)

Salt - to taste

How I Made It:


1. Peel and chop the ridge gourd into chunks. Cook this with 1/2 cup water until soft and mushy. Set aside to cool.


2. Dry roast the chana and urad dal in a pan. When they are about to turn golden brown, add the sesame seeds and keep roasting until all are nicely browned and smell good. Throw in the jeera and the hing when the pan is still hot and set aside to cool.


3. Once the ridge gourd and the roasted ingredients have cooled completely, grind to a smooth paste with the coriander leaves, tamarind, green chillies and salt.

Tastes good with dosa and steamed rice. Actually not just good, but really really good! The sesame seeds are the winners in this recipe so do not avoid those. Oh I said that already? Ok then!


This is my entry to this week's Weekend Herb Blogging hosted by Cheryl of Gluten Free Goodness