Showing posts with label Nablowrimo. Show all posts

Thursday, October 30, 2008

Paruppu Urundai Kuzhambu

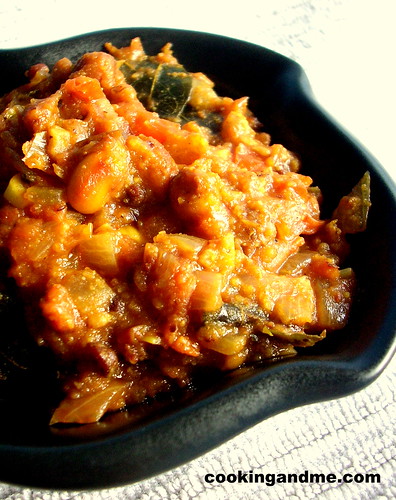
Paruppu Urundai Kuzhambu literraly means dal balls in a gravy. As with most tam Brahm recipes, this one has the most common ingredients like toor dal, tamarind, hing and of course sambar powder! 


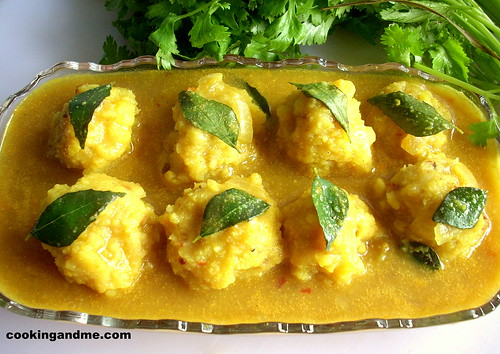
I have mentioned before how new I was/still am to an extend to Tamil Brahmin cooking. My parents-in-law are here for a visit and that means amma takes care of all the cooking and dinner is ready by the time I get back from office. Bliss. But, I told her first off that I wanted to watch her making Paruppu Urundai Kuzhambu. The dish features dal balls in a tangy tamarind sauce. Though it looks a bit like kofta curry, the recipe couldn't be further from it. Amma had given me the recipe long back and I tried it once but the dal balls (urundai) dissolved in the sauce and it ended up like sambar in the end. It does take some practise to get it right and what better way to learn than by watching!


What We Used:

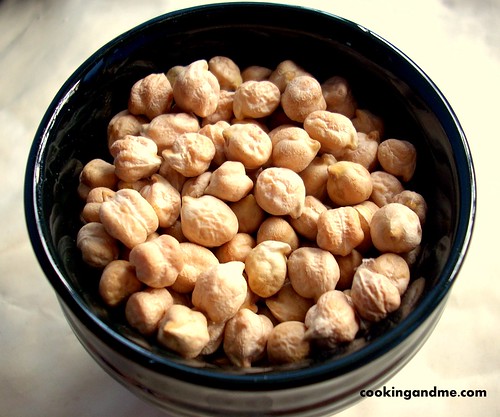
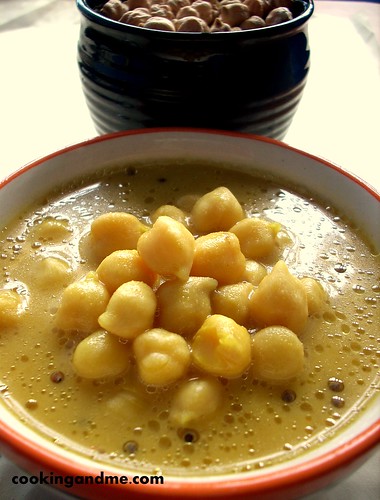
Toor Dal – 1 cup, soaked in water for atleast 1 hour
Onion- 1 small, minced
Hing - 1/4 tsp
Dried red chillies - 3 to 4
Salt – 1 tsp

Tamarind water - 2 cups (or 2 tbsp tamarind paste dissolved in 2 cups water)
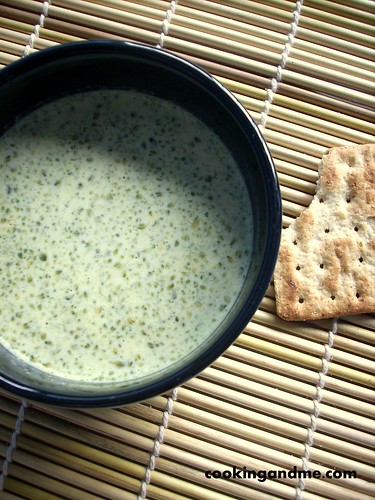
Grated coconut (fresh or frozen) - 1/4 cup, ground to a paste in little water
Sambar powder- 1 heaped tbsp
Turmeric powder - 1/4 tsp
Hing - a pinch
Oil - 1 tbsp
Mustard – 1/2 tsp
Curry leaves – a few
Salt - to taste
How We Made It:

1. Take a heavy-bottomed pan that's preferably evenly shaped at the bottom (so that the dal balls cook evenly). Pour in the tamarind water and add turmeric and salt. Bring to a boil.

2. Then add the hing, sambar powder and ground coconut and let it boil on low flame.

3. Meanwhile, rinse the soaked toor dal completely and grind it with red chillies, hing and salt, without adding any water.

4. Mix in the minced onions to the above dal paste and make small lemon-sized balls with it.

5. Add the dal balls one by one, slowly, into the boiling sauce. Do not mix around too much or else the balls will crumble. If you are trying this for the first time, add one or two balls at a time and then keep adding more.

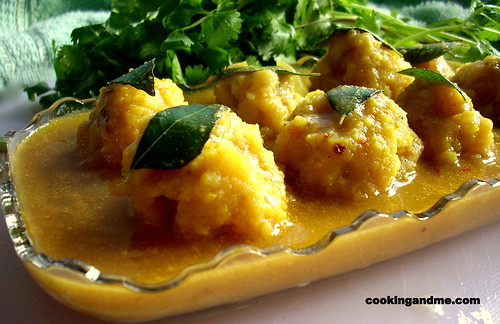
6. Now its time to be patient and wait for the dal balls to cook. They will almost double in size as they boil in the sauce and the sauce will thicken as well.

7. Once the dal balls are cooked (will take about 15-20 mins), temper mustard seeds in some oil, add curry leaves and transfer to the boiling kuzhambu.

8. Remove from fire and serve hot.

We made this kuzhambu last weekend and though I didn't have a flat bottomed pan which brings out the best results, the kadai worked pretty okay too. We had to keep stirring the balls gently so that it cooks evenly. If you are making this for the first time, you can also try steaming the balls before dropping in the sauce. This will prevent break-age. I will let you know how it comes out when I try it on my own next :D

-------------------------------------------------------------------

There is something else that I kept forgetting to mention in my previous posts so doing so now. Better late than never. Mansi of Fun and Food had hosted a Healthy Recipes Contest and I won! She sent me this amazing book and I want to thank her for hosting and everyone who voted.

But wait! What's the recipe that won? Click here to find out!

Friday, October 24, 2008

Authentic Tomato Rice / Thakkali Sadam

I have already posted my easy peasy tomato rice recipe here but this one is more authentic and has some grinding and roasting to do before you can enjoy it. And let me also tell you that its totally worth the effort. Of course, if you are too pressed for time or are too tired to be doing anything than some bare minimum chopping and stirring then the first recipe is the one for you.

The paste

This is my aunt's special recipe and she has been using it for ages to impress her guests (and my uncle of course).

Tomato Rice

What I Used (Serves 2):

Rice - 2 cups
Tomatoes - 3 ripe medium-sized ones. If in India, do not use the 'Bangalore tomatoes' but the other firmer, tangier variety.
Onion - 1 medium, very finely chopped
Salt - to taste

Dry-roast and grind:

Coriander seeds (malli) - 1.5 tbsp
Chana dal - 2 tbsp
Red chillies - 5 or 6
Fenugreek seeds (methi/uluva) - 1/2 tsp

For tempering:

Mustard seeds: 1/2 tsp
Urad dal - 1 tsp
Chana dal - 1 tsp
Green chillies - 3, chopped fine
Peanuts - 1/2 cup (I use slightly more since I like their crunch in the rice)
Asafoetida/hing - a pinch
Turmeric powder - 1/4 tsp
Curry leaves - a few
Sesame oil (nallennai) - 2 tbsp
How I Made It:

1. Dry roast and grind the list of ingredients under that head and leave aside to cool. Make sure that you don't burn the fenugreek while roasting. To avoid this, add it once the other ingredients are almost roasted.

2. Cook the rice. Make sure that its not overcooked or too mushy. I used ponni rice but basmati brings out a nice flavour and unique taste to the dish.

3. Heat the oil and temper mustard seeds and urad dal. Add the chana dal, green chillies, peanuts and chopped onions and saute for about 2 to 3 mins.

4. Then add the turmeric, hing and the curry leaves. Fry for another minute or two.

5. Add the ground powder (masala) and fry for another 3 to 4 minutes.

6. Now add the chopped tomatoes and mix well. Keep the fire on low and cook till the raw smell leaves the mixture. This should take about 10 to 12 mins. Add salt. The oil will begin to separate. Make sure that the mixture is a thick paste and not watery (in short, don't add water).

7. Once done, mix in the rice, stir well until blended well and serve hot with raita, achaar and papad.
This rice dish goes to Srivalli's Rice Mela.

Wednesday, October 22, 2008

Easy Vathal Kuzhambu

This tangy South Indian specialty gets its name from Vathal which is vegetables sun dried and then added to the gravy for flavour. The common vathal is made with sundakka (Turkey Berry), vendakka (Okra) or manathakkali (interestingly known as black nightshade in english). You can also add vegetables like brinjal or drumsticks for a different flavour.

I had been using the MTR ready mix since I came to Singapore but decided to make the authentic version. I wasn't very confident since this is a very authentic recipe and may not come out well during the first try. I searched online and came across this relatively simple version that didn't require any grinding or roasting and decided to give it a shot.

It came out much better than I expected so this one is definitely a keeper.

What I Used:

Shallots -12, halved or whole if not too big
Vathal/Drumsticks/Aubergine - 1/2 cup (you can add pretty much any of these in the kozhambu for a unique flavour)
Tamarind paste - 2 tbsp (or half cup tamarind water made by squeezing a lemon sized tamarind ball in luke warm water)
Fenugreek/venthayam/uluva - 1/4 tsp
Sesame oil - 3 tbsp
Peppercorn - 1tsp
Sambar powder - 2 tsp
Salt - to taste
For tempering:
Mustard seeds - 1/4 tsp
Urad dal - 1/2 tsp
Curry leaves - a few

For thickening:
Either 1 tbsp urad dal roasted and powdered OR 1 tbsp rice flour mixed with some water.
How I Made It:

1. Heat the oil in a heavy-bottomed pan temper mustard seeds, urad dal and curry leaves.
2. Then add the shallots and any vegetable or vathal you are using and fry for about 2 minutes.
3. Add the sambar powder and peppercorn and fry for another 30 seconds.
4. Add the tamarind water and water and allow to boil on low flame for 8-10 minutes.
5. Add the thickening ingredients of choice and let boil for another 3-4 minutes.
Serve hot with steamed white rice and ghee drizzled on top.

Thursday, October 16, 2008

Aloo Paratha

Aloo Paratha really doesn't need an introduction to any Indian cuisine lover. I remember having it in an Indian restaurant in Dublin and though everything else tasted nothing (much) like Indian food, their Aloo Paratha was very near the real one. The best Alu Paratha I have ever tasted was in a well-known dhaba in Gurgaon lovingly called the Convergys Dhaba. Darsh took me there during one of our many visits to Gurgaon and I will never forget the taste of that paratha which was super-thick, soft, oozing in butter with a square butter piece on top that melts around the paratha as you eat. And they serve it with a really nice achaar (pickle). The paratha was hot till I finished eating it, that's how thick it was. Bliss..


As with most street food, its impossible to get that taste at home for me. I chicken out and add very little butter and I guess that's for the best anyway. I like my parathas nicely browned and with avakka pickle while TH also takes curd with his.

What I Used:

For the roti/bread:

Wheat flour/atta - 4 cups and a bit more while rolling
Warm water - 2 cups (a little more or less)
Milk - 4 tbsp
Salt - 1 tsp
Butter - as needed to cook

For the potato/aloo filling:

Potatoes - 2 to 3, cooked and mashed until soft
Green chillies - 2, finely chopped [if you are not used to chillies and don't want your tongue to fall out when you accidentally bite into them, use 1/2 tsp red chilly powder]
Jeera powder/jeerakam - 1/2 tsp
All purpose curry masala/garam masala - 1/2 tsp (optional)
Ginger - 1/2 tsp, finely minced
Fresh coriander leaves - a generous bunch, finely chopped
Turmeric powder - a pinch
Salt - to taste

The filling is quite flexible and you can add pretty much anything you want. Some people add minced onions, garlic, more spices, etc. Customize it to what suits you best. But the basic idea is to keep it a bit mild and simple.

How I Made It:

Dough:

Mix the salt and wheat flour well. Add the milk to it and mix again. Add water little at a time until you get a soft pliable dough. It should make a soft dent when you press your thumb down. Knead well till you get this consistency. Cover and keep aside.

Filling:

1. Add all the ingredients together in a bowl and mix well. The potatoes should be mashed and any hard lumps removed.

The process:

Make lemon-sized balls of the dough and roll into thick discs. Make balls of half the size with the filling and place inside the dough discs. Cover completely with the dough and make into a ball again. Press lightly with the palm of your hand and dust with flour before rolling out into thick flat parathas.

Finish off the dough and the filling in this manner.

The final step:

Heat an iron griddle and cook the parathas with generous dabs of butter on both sides. Sometimes I add some chaat masala to the butter before cooking for a different flavour.

This popular Indian bread goes to Zorra's World Day of Bread Event.

Friday, October 10, 2008

Chettinad Aloo / Potatoes with Chettinad Masala

Do not get thrown away by the blahh pic accompanying this recipe. You have to try it to see how awesome it tastes. Before I go any further, this recipe is an original one but from a cousin. She is very new to cooking and yet came up with this amazingly flavourful dish for us. I took the recipe from her (she just calls it throwing a few things together) and have made it twice in 2 weeks.

I think I am beginning to like potatoes almost as much as TH!

What I Used:
Pototoes - 3 big
Ginger garlic paste - 1 tsp
Red chilli powder - 1 tsp or to taste
Cardamom - 1
Cinnamon - 1" piece
Cloves - 2
Star anise - 1 (optional)
Grated / dessicated coconut - 2 tbsp
OR
Khus khus / poppy seeds - 1 tbsp, soaked
Salt - to taste

For tempering
Oil - 1 tbsp
Mustard seeds - 1/2 tsp
Urad dal - 1/2 tsp
How I Made It:

1. Boil and mash the potatoes. Set aside.

2. Grind together the cinnamon, cardamom, anise, cloves and coconut/couscous with no added water. Ok fine, you can add very little water if you absolutely must.

3. Heat oil in a wide pan and temper mustard seeds. Add the urad dal and fry till golden brown.

4. Then add the ground paste along with the ginger garlic paste and the chilli powder and roast for 30 seconds.

5. Finally, add the potatoes and leave on sim (lowest heat) for 10-15 minutes till the masala blends with the curry. Add salt.
Serve hot with steamed rice or roti.

This original recipe goes over to Lore's monthly Original Recipes Event.

Related Posts:

Aloo Gobi
Aloo Tindora Curry
Kerala Potato Stew
Potato Cabbage Gravy

Tuesday, October 7, 2008

Kadala Kozhambu / Chickpeas in Coconut Milk

Today is a my mom-in-law's b'day and I wanted to do something for her that would be meaningful to both of us. Before I go any further I have to say how lovely she is to me, like my own mom :)

She is an amazing cook too and this is one of the first recipes I learnt from her since TH loves it. Its simple and looks mild but is amazingly flavourful, just like all her dishes are. She is super fast in the kitchen and is normally done cooking for the day by the time I am up (err.. which is around 7 in the morning :D).

So here is to her and her special day. Happy B'day Amma :)

Chickpeas / Kabuli Chana

What I Used (Serves 2-3 people):

Chickpeas/Kabuli Chana - 1/2 cup

Thick coconut milk - 3/4 cup

Tamarind - one marble sized ball (or 2tbsp if you are using paste)

Sambar cum rasam powder - 1 tbsp - I told you its versatile, and has more uses than just in sambar and rasam ;)

- if using your own sambar powder, use 1/2 tsp and 1/2 tsp red chilli powder.

Turmeric powder - a pinch

Hing/Asafoetida/Kayam - 1/2 tsp

Salt - to taste

Oil and mustard seeds - for tempering

How I Made It:

1. Soak the chickpeas overnight in 3 cups water. Pressure cook and keep aside.

2. Use 1/2 cup warm water and blend the tamarind with your hand to extract the juice. If using paste, dilute it in 1/2 cup water.

3. Heat a pan and bring the tamarind water to boil. Add turmeric powder, hing, salt and the sambar powder to this. Sim and let it boil for 10 minutes.

4. Add the cooked chickpeas and boil for another 10 mins.

5. Remove from fire, add coconut milk and mix well. Adjust salt.

6. Heat some oil in a small saucepan and temper some mustard seeds. While hot, pour on the above gravy and mix well. You can even use some curry leaves at this stage.

Kadala Kuzhambu

Serve hot with rice. TH loves it with parippu usili.

This special dish goes to Sra's Event - Legume Love Affair, conceptualized by Susan.

Sunday, October 5, 2008

Easy Broccoli Soup

Broccoli is very expensive in India so I have never cooked with this vegetable before. Its very widely available in Singapore and priced pretty much like any other vegetable so I bought some the other day. The only problem was, I didn't know what to make with it. Ignoring TH's comment to "cook it like you do with cauliflower, maybe Aloo Broccoli?", I started searching around for a good soup recipe since I was sure I had come across some nice ones before.

Finally zeroed in on this very easy Broccoli Soup recipe from BBC - Food.


What I Used:

Broccoli - 2 cups, chopped (discard the thicker part of the stem)
Vegetable stock - 4 cups (I used store-bought but here is a nice simple recipe if you want to make your own vegetable stock)
Garlic - 3 to 4 cloves, chopped
Olive oil - 1 tbsp
Salt and pepper - to taste (freshly ground pepper makes a lot of difference to the taste)
How I Made It:

1. Heat the oil in a pan and saute the garlic till it turns a light brown at the edges.

2. Add the stock and the broccoli, bring to boil and simmer for 25-30 minutes. The broccoli should be cooked at this point.

3. Blend in a mixie/blender and serve hot with some salt and pepper.
In case you've been wondering where my Nablowrimo posts since Thursday are, hope on here :)

Other Soup Recipes On This Blog:

Tomato Soup
Pepper Rasam
Easy Vegetable Soup

Wednesday, October 1, 2008

Nablowhat? Nablowrimo!

Nablowrimo or National Blog Writing Month is here! Get more details and a lip balm if you join, over at Amy's place. It essentially means I will be blogging every day in October, either here or in my other blog (cuz God knows I don't make 31 different dishes in a month to post it all here). I don't know how I am going to pull it off but its going to be great to challenge and stretch myself to this limit, especially with work getting more hectic by the second, what with the start of a new quarter and all. 

I have also decided to take better pictures starting this month. I am largely inconsistent with that and its time my blog had only good pictures and none of those blurry horrid bleghh onesthat I hate putting up here, but too lazy to re-take (this was a looong time ago, though). 

My first non-food macro pic

Anyway, here is to October. What I hope is going to be a great month, both blog-wise and otherwise.