Wednesday, December 31, 2008

PURE Bar: A Product Review


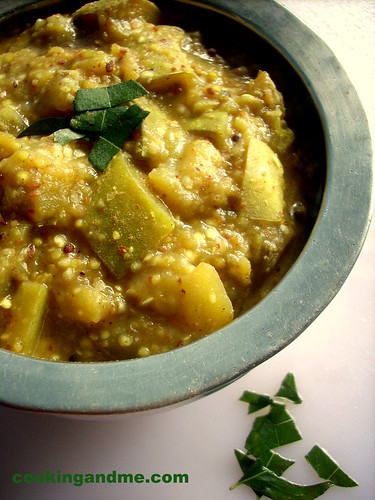
I was sent some PURE Bars to review them on the blog. So . . . here is my review. PURE Bars are organic, vegan, raw energy bars created by Veronica Bosgraaf after her daughter decided to become a vegetarian. Nutrition-wise, these bars have a lot going for them: 4-5 grams of fiber, 6-7 grams of protein, high in omega 3s, organic, raw, and no refined sugar. I was sent three flavours: Apple Cinnamon, Cherry Cashew, and Wild Blueberry. I chopped each up into 5 pieces and passed them around after dinner to get the kids' thoughts. They weren't really crazy about them, to be honest. Son #1 tried a nibble from each, Son #2 had a few bites, and Son #3 ate them all. I found them a bit on the pasty side, and not particularly "fruity" tasting. I noticed on the website that there is a Chocolate Brownie and a ChocChip Trailmix bar, and I have a feeling the kids would have liked these flavours better. That being said, the bars were still good, and you have to appreciate how much nutrition is packed into each one. They would be perfect for a snack while on a hike, or on a long car trip through non-vegan territory (i.e. just about everywhere).

Tuesday, December 30, 2008

Holiday Roundup

With the cookbook(s) done and the trip back home for the holidays done, I finally have some time to blog again! No real recipes in this post, I am sorry to say, just a tour of some of the gastronomic holiday highlights.

First up, birthday cake (sort of). If you have been reading this blog for a while you know that I decorate a cake however the birthday boy wants for his special day. This year, under the influence of the Christmas cards arriving daily at our door, Son #1 requested a gingerbread house. Vegan Mom and I thought it would be a good idea to let each kid at the party decorate his own house, so I made these four houses (thankfully, Son #1 only had one friend over for a sleep-over party, plus his two brothers). I used the same recipes as last year, except I tried something new for the icing to hold the houses together. I heated 1/3 cup of light corn syrup in a small pan, then added enough icing sugar to form a thick paste. I let it cool a bit, then rolled strips of it in my hands to create a mortar-like substance. It held really well.
For Christmas dinner with my in-laws I made the roast from Everyday Dish. No pic, I am sorry to say. I found the whole thing rather disappointing--bland and tough. For Christmas with my parents I made seitan cutlets cooked in apples, apple juice, roasted chestnuts, dried cranberries, and thyme. The recipe was rather like this one, and was very tasty.
Here is an apple frangipane tart that my sister-in-law made. My plan is to veganize this puppy in the near future, so stay tuned for that.
Other dishes in the recent past that were simple and tasty but not novel enough to warrant their own post: red peppers, onions, garlic and seitan chunks (could be tofu), and rotini tossed in olive oil, nooch, and plenty of basil.
Rice vermicelli, tofu, and bok choy in and orange ginger sauce. Kind of like this recipe.

Monday, December 29, 2008

The Vegan Dad Cookbook: The Printed Version

Over the holidays I made a black and white (and pictureless) version of my cookbook, for those of you who want an actual book you can hold in your hand. It's not as flashy as the .pdf version, but it has all the recipes. You can always look up the recipes on the blog if you want to see what the dish looks like. I have also made a black and white download available for those who want to bypass the colour printing altogether.

Sunday, December 28, 2008

Basic White Cupcakes

The best way to start baking after a long time - from the basics. I have always loved the simplicity of plain cakes, or tea cakes, as they are sometimes called. My mom used to make them quite regularly as a snack when we were in school. She used those manual egg-beaters that formed beautiful white peaks when the egg whites have been beaten for about 45 minutes.


This recipe doesn't call for beating the egg too much cuz since I don't have an electric beater, I go for such recipes mostly.

What I Used:
(Makes about 16 cupcakes)

Butter - 1/2 cup, at room temperature
All purpose flour / maida - 1 3/4 cups
Powdered sugar 1 cup (measure after powdering)
Egg - 1
Milk - 3/4 cup, at room temperature
Baking powder - 1 tsp
Vanilla essence - 1 tsp
How I Made It:

1. Pre-heat oven to 375 degrees.

2. Cream butter and sugar together until nicely mixed.

3. Use a fork and whisk the egg for about 10-15 minutes. The more you beat, the softer the cupcakes turn out. I lose patience at the end of 15 mins or so.

4. Sift the flour, baking powder and salt until blended well. I didn't have a sieve until recently so before that, I just used to put the dry ingredients in a bowl and mix thoroughly.

5. Once the flour mixture is well blended, add to the butter-sugar mixure.

6. Mix well, in one direction. Then add the beaten egg and milk little by little making sure the batter is nicely blended. You don't need to eccessively mix at this time, just make sure the ingredients are blended.

7. Once the milk and egg have been completely added, mix in the vanilla essense.

8. Grease a muffin tray or line it with muffin paper cups. Pour batter 2/3 of the way.

9. Bake in a 375 degrees oven for about 20-25 mins until a toothpick inserted in the center of the cupcakes comes out clean.


Notes

- In case you don't have a muffin tray, you can use a regular cake try to make a normal cake.

- This recipe, with a little less sugar can be used to make layered cakes with frosting in the middle.

Sunday, December 21, 2008

Quick and Easy Rasmalai Recipe

Here is a recipe I have been dying to post. Its from my mother-in-law and its the most easy and quick rasmalai recipe ever! Promise!

But wait, what is rasmalai? Its sweetened, flattened or round balls of paneer (Indian cottage cheese) soaked in milk cream. Sounds yummy? That's 'cuz it is!

So in case you want to celebrate the holidays with some Indian dessert, whose sweetness level you can control, then this one is for you. Did I mention its super easy?

The recipe does use eggs, which would probably make the inventors of rasmalai turn in their graves, but the taste is not compromised one bit and there is no 'eggy' smell at all.

What I Used:

For the pieces

Milk Powder - 1.5 cups
Egg - 1

For the liquid base

Whole cream milk - 4 cups
Sweetened condensed milk - 1/2 tin (adjusting according to the size of your sweet tooth)
Crushed cardamom - 3
You can use other flavoring of choice like rosewater, pistachios, almonds, saffron, etc.

How I Made It:

1. Mix the egg and the milk powder together to form a thick, sticky dough-like mass. Divide into lemon sized balls and flatten gently on palms. If too sticky, dampen palms. Lay these flattened pieces without overlapping, on a tray.


2. Heat a wide bottomed pan and bring the milk to boil. Once it starts boiling, bring the heat to sim and gently, very gently, add the milk powder-egg discs to this.

3. You don't need to mix or stir much, but be careful to give the discs enough space from each other in the liquid. They will expand a bit when they start cooking.


4. After about 10 mins, add the crushed cardamom and. Let it cook for another 10 mins.

5. When the pieces have expanded considerably and seem soft and cooked through (take out once piece, break and check inside if the dough is still sticky), remove from fire.

6. Add the condensed milk when still hot and mix gently. Adjust amount according to sweetness required.

Chill before serving.

Now you can tell me you love me for this quick and easy rasmalai recipe :)

I am sending this to FIC - White over at Kitchen Flavours. 

Saturday, December 20, 2008

The Vegan Dad Cookbook

"This is the dad you always wanted, only he makes a better meatloaf." -Isa Chandra Moskowitz

Making vegan food the whole family can enjoy seems like a daunting task. No more! The Vegan Dad Cookbook contains over 120 recipes that take kids’ food beyond the veggie dog. From brunch to dinner, Vegan Dad has you covered with dishes from around the world as well as good ol’ fashioned comfort food. This book provides the answer to that daily question, “what’s for dinner?”

Downloads of the cookbook are available at Lulu.com for $10. The book is 144 pages, full colour, indexed (the best I could), and contains selected recipes from my September 2007 to June 2008 blog postings. If you would like to purchase a copy but don't have a credit card, send me an email at the address listed in the bottom right hand column of the blog.

Please note that the .pdf file is formatted for 2-sided printing.

(I decided against the paper copy because it would have cost about $5o.)


Here is a pic of the copies I printed and bound for my family.

Thursday, December 18, 2008

Wednesday, December 17, 2008

Baked Sweet Potato Fries

One of my friends had this picture of baked sweet potatoes in her Facebook album and of course I immediately wanted the recipe. Not that I hadn't come across the dish online but to see someone you know had tried it and with success, made me want to try it too. She passed me the link and I tried it the next day! I am nothing if not a sucker for "immediate" action when it comes to trying out simple recipes ;)

Oven-baked sweet potato 'fries'

The potatoes came out quite well and though TH would have preferred it with normal potatoes, I enjoyed the subtle sweet flavour and contrasting heat form the chillies. I also loved the fact that it requires very little time to prepare and most of the work is done by the oven anyway! We had it as a quick snack at about 6 in the evening but next time I want to try this with russet potatoes and serve with dinner.

Oven-Baked Sweet Potato Fries Recipe
From Country Living

What I Used:

Sweet potatoes - 3 (about 300gm)
Red chilly flakes - 1.5 tbsp
Cumin / jeera powder - 1 tsp (optional)
Olive oil - 1 tbsp
Salt - to taste
How I Made It:

1. Cut the sweet potatoes length-wise and then into 3" long pieces/wedges. Transfer to a bowl.

2. Add the olive oil, salt, chillies and cumin to the sweet potatoes and mix well until the pieces are well coated.

3. Preheat the oven to 200 degree C (about 400F). Line a tray with a baking sheet and lay out the potato pieces in one layer without any overlap. Bake until the edges are crisp and the pieces are cooked. Took about 30 mins for me.

*Notes*

- You can follow the same recipe with russet potatoes as well.

- Substitute the cumin with any dried herbs for a different flavour.

Creamy Corn Soup

If you are a low fat vegan type you probably should stop reading now. As I was putting the cookbook together (almost done!) I noticed how much of my food is related to some childhood memory. This soup is no exception. I always got to choose my birthday dinner as a kid, and I usually asked for tacos and corn soup. The original is made with cream and milk, so I used soy milk and coconut milk. It's pretty rich, but also pretty tasty. We always garnished it with corn chips, but I didn't have any on hand.

INGREDIENTS
Serves 5-6
- 3 tbsp margarine
- 3 cups plain soy milk
- 1 cup soy creamer
- 4 cups corn
- 1 can coconut milk (I like Thai Kitchen--it is less "coconuty" for stuff like this)
- salt and pepper to taste
- corn chips to garnish

METHOD
1. Melt margarine over medium heat in a large pot. Add soy milk and creamer and bring to bubbling.
2. Add corn and return to bubbling. Simmer for 5 mins, stirring regularly.
3. Add coconut milk and season to taste with salt and pepper. (I like a good amount of pepper to contrast the creaminess). Do not boil.
4. Serve garnished with some corn chips.

Monday, December 15, 2008

A Tale of Two Breads

I haven't bought a cookbook in a long time, but recently I treated myself to two new ones. The first is Peter Reinhart's The Bread Baker's Apprentice. I have been eyeing this for a while and thought it would be a good purchase, what with the bakery business and all. This book is all about both the science and the art of great bread. Today I made this stollen, a German Christmas bread. I am going to do a little Christmas baking for the teachers at the boys' school so I wanted to take this for a trial run first. I'm usually not the biggest fan of the candied fruit in fruit bread/cake, but this is really good (probably because the fruit is soaked in rum first). If you have the book, I subbed a flax egg (1 tbsp ground flax seed whisked in 3 tbsp of water) for the egg, and margarine for the butter.

The other purchase was Artisan Bread in 5 Minutes a Day, a book that, in essence, says that Reinhart is full of crap. All the kneading, gluten development, sponges, and starters are unnecessary. All you need to do is mix together a simple dough and store it in the fridge for up to two weeks. When you want to make bread, you shape a chunk into a loaf and bake it. The results are actually pretty good. The flavour is not a good as more complex recipes (like Reinhart's) but for easy everyday baking the work to taste ratio is quite good.

So if you are in the mood for some baking, I recommend these books.

Curry Leaves Chutney / Kariveppilai Chutney

Curry leaves are one of the staples of Indian cooking. Its the one herb that we cannot do without and you will find this in practically every Indian kitchen, or shall I say refrigerator :) However limited space people have around their houses and apartments, its not uncommon to see at least one curry leaves plant that is carefully watered and tended to. My mom has about three plants around the house and my sis has practically a tree growing out of her backyard.

The house we moved into first in Singapore had 3 plants outside the front door. A neem plant, a money plant and curry leaves! The other 2 died when I went to India for 3 weeks but the curry leaves plant harbored on and was still standing strong and healthy when we moved out 2 weeks back. I miss breaking out fresh sprigs of curry leaves while cooking but some good things must come to an end.


However, I didn't leave before I made this super-quick chutney one day. As we know, curry leaves are just added for flavor to dishes and most of us remove them from our servings before we eat, but they are said to have high iron content. No wonder my grandma used to force me to eat them and promised a head full of lustrous hair if I did! Our maid of so many years, Mary, loves the flavor of curry leaves and any dish made by her is sure to have a generous amount of these lovely-smelling leaves.

I have gone on and on, quite uncharacteristically (cuz I do all the ranting here) but I guess that shows my love for curry leaves.


Curry Leaves Chutney Recipe
What I Used:

Curry leaves - 2 cups (just throw them in loose)
Grated coconut (fresh or frozen) - 3/4 cup
Tamarind paste - 1 tsp (mix in 1 tbsp warm water to a marble-sized amount and squueze well)
Dried red chillies - 2 to 3, depending on taste
Hing / asafoetida / kaayam / perungayam - a pinch
Garlic - 2 pods (optional)
Oil - 1 tbsp
Salt - to taste
How I Made It:

1. Heat oil and add the red chillies and garlic (if using), making sure they don't burn by lowering the heat.

2. Now add all the other ingredients and fry for about 5 minutes, until the curry leaves turn slightly brittle and the coconut turns a light brown.

3. Remove from fire, cool and grind well.

I am sending this to Andrea's Grow Your Own.

Sunday, December 14, 2008

On Feeling Like a Deadbeat Vegan Dad

I really have been neglecting the blog lately what with all my extra time going into finishing up the cookbook. I am starting to feel pangs of guilt, like a negligent parent. I miss the regular postings and interaction with you all. I also feel bad that I have not been offering any ideas for the impending holiday season.

On the cookbook front, things are moving along nicely. I have shown the draft to my inner circle of 7th level vegans, and a friend from grad school is copy editing as I type. I have also received a kind offer for help with the cover photography. More on that later.

Things have been plenty busy around here, even without a book to finish. Much time has been spent shovelling the ludicrous amount of snow that has fallen. *sigh* And to think that winter has not even officially started.
I also baked up a bunch of lemon currant rolls for the Christmas bazaar fundraiser for the boys' school.
Business at the bakery is brisk, and I feel like I am honing my baking craft. I have also been trying to make soy yogurt. No success so far.And, I do have a few recipes to post. I will get to them this week.

Wednesday, December 10, 2008

The Cookbook is Almost Here!

Good news! I have finally finished the rough draft of the cookbook. I need to do a few edits and all that, but it is almost ready to go on sale. I had no idea it would be so much work!

The book's near completion raises the question of how to sell it. I was planning to integrate Google Checkout into my blog, but it is not available to Canadians (grrr). PayPal looks complicated, so I was thinking of selling it through eBay. It already has a PayPal option, and I can place a posting on both the Canadian and American site. I'm not sure how the whole thing works when you are selling a digital file, so if anyone has some advice I would be much obliged.

Kathrikka Podi Curry / Brinjal Cooked in Roasted Spices

I apologize to all those brinjal haters out there for posting so many brinjal recipes but these are quick and easy and one of the vegetables that are available at all times for me. Also, I love brinjals :D


This one is a traditional Tamil Brahmin Recipe except that I made a slight twist in it and added pureed onions. You can omit that and you will get a dry fry dish. I wanted something that was slightly soft and not fried.

What I Used:

Brinjal / eggplant - 2 cups, cubed
Onion - 1 small, ground to a paste or chopped fine
Mustard seeds - 1/8 tsp
Oil - 1 tbsp (preferably gingelly/sesame oil)
Salt - to taste

To dry-roast and grind:

Dhania / malli - 2 tsp (or 3 tsp dhania powder)
Bengal gram / Chana dal / kadala parippu - 1 tbsp
Urad dal / uzhunnu parippu / uzhutham paruppu - 1 tsp
Dried red chillies - 4, adjust to taste
Curry leaves - a few
How I Made It:

1. Dry roast the list of ingredients until golden brown, cool, grind and set aside.

2. Heat oil in a pan. temper mustard seeds and lightly saute the onion paste. Then add the brinjal pieces and fry until they turn colour and get soft. Add salt.

3. Mix in the ground spice mixture and fry well for 3 to 4 mins. Remove from fire.
Serve hot with steamed white rice and spicy baby potatoes.

Monday, December 8, 2008

Black Eyed Beans Thoran

This recipe is adapted from Das Sreedharan's Fresh Flavours of India. Das is a Malayali who runs the Rasa chain of hotels in England. His restaurants are supposedly popular and when I mentioned it to a couple of friends in England, they knew it instantly. I first came across this book in the National Library and borrowed it for 2 weeks. I loved the simple recipes, beautiful illustrations and the general 'feel' of the book. What I liked best about the pictures was that they gave the dishes a very 'easy-to-make' look which need not necessary be true for a beginner in Indian cooking. However, like I mentioned, I felt it was more for non-Indians or beginners to learn the basic recipes and not necessarily for me 'cuz I'd like to believe I have graduated from the beginners' level :) But after seeing my enthusiasm over the pictures, TH got it for my birthday this year, so I have one anyway!

This is one of the recipes that caught my eye immediately. Black eyed beans thoran. The basic thoran recipe includes coconut, shallots, jeera, green chillies and curry leaves, along with a vegetable (or two) of choice. This one is not much different but the use of black eyed beans with this recipe, was new to me.


What I Used:

Black eyed beans - 1 cup
Grated coconut (dessicated works too) - 1/2 cup
Shallots / small onions - 1/3 cup, chopped
Dried red chillies - 4
Turmeric powder - 1 pinch
Urad dal - 1/2 tsp
Mustard seeds - 1/4 tsp
Curry leaves - a few
Oil - 2 tsp (I used coconut oil)
Salt - to taste
How I Made It:

1. Soak the beans overnight or atleast for 5-6 hours. Pressure cook for 3 whistles (or cook in little water for about 15 mins, until soft).

2. Heat oil in a pan and temper mustard seeds. Then add urad dal, curry leaves, turmeric and the red chillies, each torn into three. Fry for 2 mins. Then add the shallots and fry for another 3 mins.

3. Now add the grated coconut and cooked beans. Add salt and mix well. Let it cook for another 2-3 mins. Remove from fire.
Serve with rice and curry of choice.

This dish goes to Ramki's Recipes For The Rest Of Us that's trying to bring together simple, easy recipes. That's what this blog is all about anyway :)

Saturday, December 6, 2008

Multi Grain Bread

As promised, here is my multi grain bread recipe. The bread looks pretty much the same as when I posted before, so I am reusing the picture. My kids love this toasted in the morning and have given up their regular diet of cereal.

INGREDIENTS
Starter
- 1 tbsp active dry yeast
- 1 1/2 cups warm water
- 2 cups whole wheat bread flour

- 1 1/2 cups 7 (or 12) grain cereal
- water

Dough
- 1 tbsp yeast
- 1/2 cup water
- 1/2 cup rye flour
- 1/2 cup kamut flour
- cereal from above, drained
- 3-4 cups white bread flour
- 1 tbsp salt

METHOD
1. The night before you want to make the bread, whisk yeast into warm water, then whisk in flour until smooth in a large bowl. Cover and set aside over night. Also, place cereal in a bowl and cover with water. Cover and let sit over night.
2. To make the dough, whisk yeast into the water, add starter, rye and kamut flours, and cereal (after being well-drained in a fine mesh sieve). Add 3 cups of the bread flour and the salt, then bring together into a rough dough. Turn out onto the counter top and add enough of the final cup of flour (I never use much) to make a slightly tacky dough. Knead for 10 mins, until smooth.
3. Place in a large bowl, cover, and let rise for 1 hour in a warm place. Punch down, and press down/stretch on the counter top into a rectangle. Fold like an envelope, rotate 90 degrees, and repeat. Shape into a ball and return to the bowl. Let rise until doubled.
4. Cut dough into 2 pieces and shape into two loaves. Cover and let rise until almost doubled.
5. Heat oven to 450 degrees with a pizza stone on the middle rack. Place a cast iron pan on the bottom rack,and get some water boiling in a kettle. Transfer loaves to a peel dusted with cornmeal and slash tops with a razor. Slide loaves onto the stone, and pour 1 cup of water into the pan. Bake for 10 mins.
6. Reduce heat to 375 degrees and remove cast iron pan. Bake for 25-30 mins more, until crust is a deep golden brown and loaves sound hollow when thumped on the bottom. Remove from oven and cool on wire racks.

Friday, December 5, 2008

Pizza Rolls

Tonight's recipe idea comes from Jen, one of my bakery customers (thanks, Jen!). It is so easy and such a great idea I can't believe I haven't seen it before. I also wish I had thought of it myself. Ha! The dough is adapted from Isa's pizza dough in Vegan With a Vengeance, which she is letting me post here (thanks, Isa!). It tastes even better if you make it the day before and let it rest in the fridge overnight.

INGREDIENTS
- 1 cup warm water
- 1 1/2 tbsp brown sugar
- 2 1/4 tsp active dry yeast
- 1 1/4 cup whole wheat bread flour
- 1 1/2 cup all purpose flour
- 1 tsp salt
- 2 tbsp oil

- tomato sauce
- your favourite pizza toppings

METHOD:
1. Mix sugar into the water and stir in yeast to dissolve. Set aside for 10 mins to proof.
2. Whisk together flours and salt in a bowl, then add yeast mixture and oil. Bring together into a soft dough, then knead on a floured surface for 8-10 mins, until smooth. Add in flour if dough is too sticky.
3. Place dough in an oiled bowl, cover, and let rise until doubled. Punch dough down and knead for a few mins, then return to the bowl. Let double again, or place in the fridge to use the next day.
4. Preheat oven to 450 degrees. Lightly oil a muffin tin. Roll dough into a large rectangle, 24" x 8". Slather with a layer of tomato sauce, followed by your toppings.
5. Roll up like a jelly roll, then slice into twelve 2" sections. Place into muffin tins. Bake for 12-15 mins, or until golden and baked through. Let cool for 10 mins before serving.

Thursday, December 4, 2008

Cajun Meatloaf with Sweet Bourbon Glaze

I had a hankering for my meatloaf recipe tonight, but decided to spice it up a little since I really enjoyed the Cajun dish from a few nights ago.

INGREDIENTS
Makes 10 mini meatloaves.
- 2 8.5 oz pkgs tempeh, coarsely grated
- 1 large sweet onion, coarsely grated
- 4 cloves garlic, finely grated
- 3/4 cup vital wheat gluten
- 1 tbsp paprika
- 2 tsp sage
- 2 tsp thyme
- 2 tsp coriander
- 1 tsp seasoned salt (or to taste)
- cayenne pepper to taste
- 1 tbsp soy sauce
- 2 tbsp HP sauce (or A1)
- 2 tbsp olive oil
- water (if needed)

Glaze
- generous 2/3 cup ketchup
- 1/2 cup brown sugar
- 1 tsp mustard
- 3-4 tbsp bourbon

METHOD
Preheat oven to 350 degrees. Oil a 9 x 13 baking pan.
1. Mix grated tempeh, onion, garlic, flour, and spices in a large bowl.
2. Add in sauces and oil, and enough water (you may not need any at all) so you are able to mash everything up with your fingers. Knead/mush/mash for a few mins to mix everything well.
3. Divide dough into 10 pieces and shape into small loaves. Place into oiled pan, and spray lightly with oil. Bake for 15 mins.
4. While loaves are baking, bring glaze ingredients to bubbling in a small saucepan. Let thicken a bit. Spoon over baking loaves. Bake loaves for 15 mins more, then scoop excess glaze back over the loaves. Bake for an additional 20-25 mins, or until glaze is thickened and darkened.

Dum Aloo / Potatoes in Yogurt-Tomato-Onion Gravy

'Dum' cooking is a traditional method of slow-cooking, normally on a bed of coal with pots over them, sealed with flour and water so that no heat escapes it. Sometimes coal is spread out on the pot lid to distribute heat evenly. Thanks to our modern-day cooking accessories, nothing takes that much effort, though the difference in change is definitely debatable. Dum aloo is not something I make often because I try to avoid using the mixer on weeknights and normally don't buy pureed stuff in cans (or anything in cans for that matter, except milkmaid!).


This was made on a weekend a few weeks back when I was in a lovely mood to cook and I followed the recipe I had scribbled down from mom-in-law, to the last letter.

What I Used:

Baby Potatoes / New potatoes - 15 nos
Tomato - 1 large, chopped
Onion - 1, chopped
Green chilly - 2
Ginger - a 1" piece
Garlic - 3 cloves (or 1 tbsp ginger garlic paste)
Yogurt / curd - 2 Tbsp

Oil - 1 tbsp
Salt to taste
Coriander (cilantro) leaves - for garnishing

Spices:
Coriander / malli powder - 2 tsp
Red chili powder - 1 tsp
Turmeric powder - a pinch
All purpose curry masala - 1 tsp
Cumin seeds / jeera / jeerakam - 1/2 tsp
How I Made It:

1. Wash the potatoes and boil in water till cooked. Cool, peel and keep aside. (I cooked them in the pressure cooker for 1 whistle)

2. Puree the tomato and keep aside.

3. Grind the onion, garlic, ginger and green chilly to a paste.

4. Beat curd to remove any lumps and mix all the spices in it. Stir well to make a paste. Add a little water if too thick.

5. Heat oil in a pan and when hot, add the cumin seeds. When it starts spluttering and turns brown, add the onion-chilly-ginger-garlic paste and fry for about 3 mins.

6. Now add the yogurt mix and stir continuously for 4 mins.

7. Mix in the tomato puree and the add the potatoes. Cook covered for 2 mins and then leave pan open on a medium flame and cook till the oil separates from the gravy. Add salt.

8. Garnish with chopped coriander and serve with rotis/chapatis.

Tuesday, December 2, 2008

Tofu and Sweet Potatoes over Cajun Quinoa

When the weather outside is frightful you have to turn to food to warm up. This dish makes use of Cajun flavours to transport you to the Bajou in the middle of the winter weather. You can serve this over rice, but I went with quinoa if only because it's fun to say "Cajun quinoa." To make it I cooked 1 cup of quinoa in 2 cups of water. When done, I added 1/4 cup of chopped fresh parsely and a few dashes of hot sauce.

INGREDIENTS
- 2 tbsp oil
- 1 large sweet onion, diced
- 2 celery stalks, diced
- 1 green pepper, diced
- 2 bay leaves
- 3 cups diced sweet potato
- 1 pkg extra firm tofu, diced
- 1/3 cup of water, plus more as needed
- 2 tsp paprika
- 1 tsp thyme
- 1 tsp seasoned salt
- cayenne pepper to taste
- freshly ground pepper
- 1 can coconut milk

METHOD
1. Heat oil in a large pan over medium heat. Saute onion, celery, green pepper, and bay leaves for 5-7 mins, until onion is soft and translucent. Add potatoes and fry for 2 mins. Add tofu, water, and spices. Cook uncovered for about 10 mins, until potatoes are beginning to soften. Add a few splashes of water to keep everything from sticking.
2. Add coconut milk to the pan and bring to bubbling. Simmer for 10 more mins, until veggies are cooked through. Season to taste and serve.

Here is the view out the back door these days.

Monday, December 1, 2008

Earthlings: A Movie Review

The kind folks at Evolutus PR sent me a DVD copy of Earthlings to review. After watching it, I am not sure whether to throw up, cry, or a mixture of the two. Narrated by Joaquin Phoenix, and written and directed by Shaun Monson, this documentary packs a visual punch that is bound to impact anyone who sees it. Maybe I am just a major weenie (I've been told that a few times), but I actually had to watch the film over the span of a few days because I could only handle so much at one time. Most of the footage is undercover camera shots from slaughterhouses, factory farms, animals testing sites, puppy mills, circuses, and zoos. The film questions the assumption that humans are superior to animals, and compares our species-ism to the other "isms" that have blighted humankind's past: racism, sexism, etc. It then shows, in graphic detail, the gruesome results of our desire to make animals service our perceived needs (food, clothing, entertainment, and research).

And now for the film critic part: while the film has an incredible visual impact, I felt that it lacked a variety of voices that makes documentary film-making interesting. Shaun Monson's commentary is at times monotonous, and other times hyperbolic. No one was interviewed for the film, so Monson via Pheonix is the only voice we hear. I personally found it a bit tiring, even though I agree with what the movie is trying to say.

That being said, Earthlings makes a valuable contribution by exposing what goes on behind the purposefully closed doors of the animal-harvesting industry. It reinforced my commitment to veganism, and I can see why they call the film "the vegan maker."

For friends and family who read this blog and would like to see the film, drop me a line. I would be more than happy to lend it out.