Monday, May 31, 2010

Roasted Brinjal / Eggplant in Tomato Ketchup

I don't think I need to talk again about how much we love eggplant or brinjal. I buy it every week and end up adding this vegetable to one thing or the other - sometimes to sambar, or a simple brinjal palya, or a quick Vangi Bhath, or if I have time, Bagara Baingan, which is our favourite.


This recipe, however, doesn't really have a traditional name because.. well, its not traditional! Amma used to make this often and as a kid, it was my favourite because it was not spicy and the sweetness the tomato ketchup gives to the dish is just delicious. 

A must-try if you like brinjal or have kids at home who refuse their vegetables.


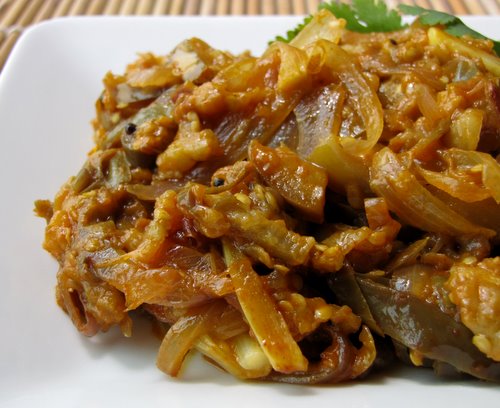
Recipe for Roasted Brinjal in Tomato Ketchup 

Ingredients:

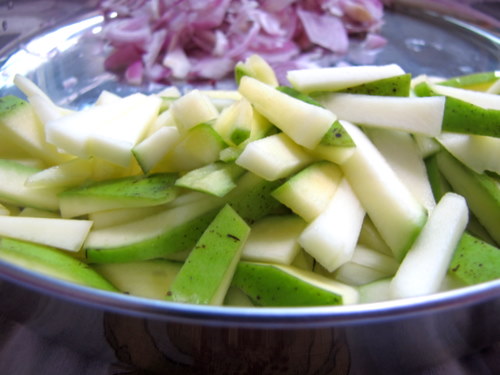
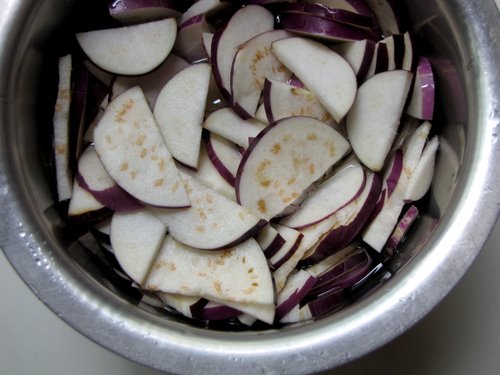
2 cups brinjal, sliced into slightly thin pieces
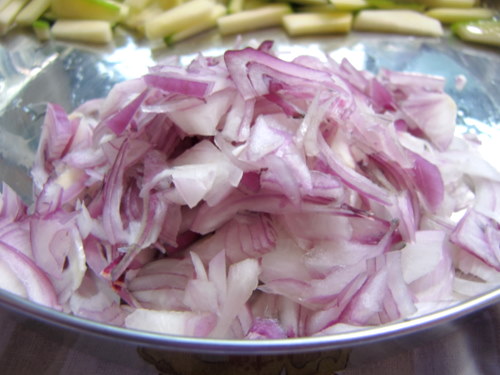
1 medium sized onion, sliced long
2 cloves garlic, sliced long
1 tsp red chilli powder (or to taste)
2 tsp coriander powder / malli podi
A pinch of turmeric powder
1 tbsp oil
1/4 tsp mustard seeds
Curry leaves (optional)
1 tbsp tomato sauce or ketchup
Salt to taste

How I Made It:

1. Slice the brinjal and add the pieces to a bowl of water to prevent browning. Set aside. 
2. Heat oil and add the mustard seeds. Once they pop, add the chopped onion and garlic. Fry until golden brown. 
3. Add the masala - turmeric, coriander, chilly, curry leaves if using - and fry for another minute. 
4. Now add the brinjal pieces, reduce flame to low and mix well. Cook covered for 5 minutes, stirring once or twice in the middle to prevent the vegetable sticking to the pan. 
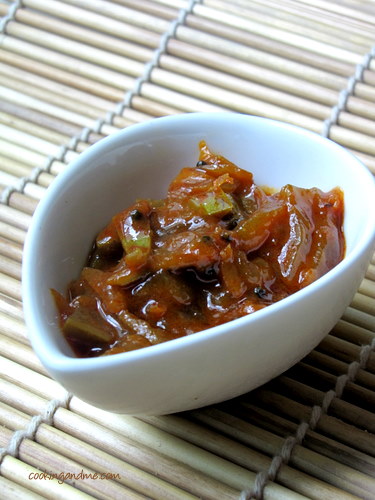
5. Once the brinjal is cooked almost mushy, add the ketchup or sauce and mix well. Add salt. 


Goes well with rice, roti, dosa, idli, anything! I used to mix this with rice and eat just that as a kid. 

Stuffed Roasted Garlic Paste and Blue Cheese Hamburgers

While all the real chefs out there seem to be ingredient-driven--as in what looks best at the farmer's market that day makes it on the menu that night--I've pretty much stayed the course with being more ohhh-that-might-make-for-an-interesting-challenge driven. Matt's birthday meal was no exception: I had my heart set on grinding my own meat. One of my pals lent me her meat-grinding attachment--thank you Kathleen--and that was it. I had the challenge and the grinder. I only needed the recipe.

At first, I wanted to do Ad Hoc's version, but let us remember that this was for Matt's birthday dinner and Ad hoc's version didn't call for cheese. Uh, no. I remembered Gourmet had written something about making your own burger from scratch in one of their close to last issues, but when I found it, again, it just wasn't Matt enough. I turned to Martha and her recent issue, but then I remembered that she and I are fighting. So, very inspired yet still recipe-less, I kept looking and finally found one in Michael Chiarello's garlic and blue cheese version.
(1. Martha Stewart Living's June issue, 2. Ad Hoc at Home cover, 3. via Ad Hoc at Home, 4. via Gourmet's A Burger With (Homemade) Everything.)

Our version: (Recipe by Michael Chiarello. Culled burger knowledge from aforementioned places put to use in below result by me.)
Two reasons why the Michael Chiarello recipe won out. 1. Blue Cheese 2. Garlic paste, made by roasting salt and peppered garlic cloves in olive oil until they get nice and caramelized and then mashing it all together once cooled.
Apart from the satisfaction of knowing exactly what's in your ground meat, another advantage of grinding your own meat is being able to season it beforehand. We used skirt steak, which came highly recommended via Gourmet .
I was totally expecting clean, spaghetti-ish lines of ground meat to shoot out of the business end of the grinder like it does on TV, but instead I just got this glacier-flow of minced meat.
Maybe grinding meat and hamburgers in general don't make for the prettiest pictures, but this burger was delicious. Easily the best burger I've ever had. Consider the facts: You make a skirt-steak patty, make a little well in the patty, put some blue cheese and garlic paste in that well, and then cover it up with another patty and seal the edges. The result is one giant patty. Chiarello specifies 3oz. per half, but we didn't have a scale and definitely overestimated. So, word to the wise: Think manageable-eating-sized burgers. Also word to the wise: Make this garlic paste. It's the gift that keeps on giving. 

Sunday, May 30, 2010

Green Curry Summer Rolls

Last week we had a bit of an early heat wave so I was looking for a nice cool dish that didn't involve a lot of cooking. Although the boys totally hated these, Vegan Mom and I loved them. The crunch of the lettuce contrasts the vermicelli and rice paper, while the punch of heat from the curry paste is cooled by the cucumber. Yum. Not a real recipe, but here is the stuff I put in mine. Adjust amounts according to how many rolls you want to make.

INGREDIENTS
- steamed broccoli (crisp and bright green, not mushy. Once the broccoli is cooked, plunge it into ice water to stop it from cooking)
- thinly sliced lettuce (romaine, or other)
- cooked rice vermicelli, cut into about 3" pieces, tossed with soy sauce and green curry paste (to taste)
- thinly sliced shallots
- thinly sliced cucumber
- finely chopped cilantro (or sliced basil, Thai or otherwise)
- rice paper
- dipping sauce

METHOD
1. Soak rice paper in warm water as per directions, fill with ingredients, roll like a burrito. Serve with dipping sauce.

Types of Ovens - How to Choose an Oven

These are the most common question I get, especially after starting this blog.

"What sort of oven should I buy?"

"What's the better option - an OTG, a microwave oven or a conventional oven"

So here are the different options you need to consider. All of them differ in cooking method, price, etc. Consider the space you have in your kitchen, your budget and what sort of use you have for your oven before zeroing in on one.

(a) Conventional ovens


Conventional ovens work on an electric element for cooking or a gas burner. In this type of oven, heat radiates up and pushes cold air down which can lead to uneven cooking or baking. However, this type of oven is very common and usually inbuilt in kitchens or come as part of the kitchen range.

(b) Convection ovens

Convection ovens cook food a bit differently. There's a fan at the back that forces air circulation throughout the oven, cooking food more evenly. This also results in quicker heating and is said to consume less power. The cooking time will differ from that of a conventional oven.

(c) Microwave Ovens


These are the 'ovens' that most of you probably own. They are most popularly used for heating and defrosting and use radio waves for this. There are some microwave-oven-specific recipes that are best for baking in a microwave. If you try a normal recipe in the microwave, it may not work out well so don't make that mistake.

(d) Microwave cum Convection Ovens


These are the rage now! Its a microwave oven that has a convection oven option, which means, when you turn a knob, your microwave turns into a normal oven (convection type) and you can bake your cakes and cookies and anything else, as usual following the usual recipes. Some of these ovens also come with a grilling option and you make use of that feature too. There's a very useful FAQ on DK's blog and you can read more about this here. 

(e) Oven Toaster Grill (OTG) Oven

These use old-fashioned filament coils for heating and cooking (much like a geyser). Although they work fantastic for making toast and even grilling, baking in them doesn't work out as best as in the other ovens. Before I moved to Singapore, I had an OTG in which I used to bake and although the food turned out just fine, sometimes, the crust used to dry out or the cake used to get unevenly cooked. I made these Triple Chocolate Fudge Brownies and my first No-Knead Bread in an OTG and although they tasted just fine, I am sure they would have come out much better in a convection oven.

I have a post coming up from Aparna who has a MW Convection oven, who will talk about her experiences.

**Disclaimer**
This post and information on it is based on my research. I claim to be no expert so if you find anything wrong or unclear, do drop a note. 

Thursday, May 27, 2010

grilled bacon, egg, and cheddar cheese breakfast sandwiches

Last year as part of Matt's birthday gift, I made frighteningly delicious pasta carbonara, although for the actual day, I was out of town. This year Matt had to work, but I was here and had the day off. What ensued cannot be covered in one post. Here is breakfast. The rest (blue cheese burgers with meat we ground ourselves & three-layer cake) is to be kimchinued...

Sara Foster's version:

our version:
Are you guys familiar with Sara Foster? This is from her cookbook Sara Foster's Casual Cooking, one of my first cookbooks. Don't wait as long as I did to make this sandwich. It's so simple and shockingly good.

RECIPE (serves 4):

8 thick slices nitrate-free bacon
1 tbsp. olive oil
1 tbsp. unsalted butter, plus extra for buttering the bread
4 large eggs
Sea salt and freslhly grund black pepper
8 slices whole-grain bread
4 slices Cheddar cheese

The cookbook offers a lengthy description of exactly how to prepare this, but it's so easy, I want to just paraphrase for her. Hope that's OK, Sara. Here goes:
Cook bacon.
Fry two eggs--just one minute per side. Believe me when I tell you that you want the yolk to be a little runny.
Spread one side of each slice of bread with butter and put those sides down on the hot pan. Stack up your cheese, bacon, and eggs. Top with other slice of bread. Grill until bread is golden brown and cheese is melty. Enjoy!

Pane Siciliano: Baking Through the Bread Baker's Apprentice

I think this is the only bread in the cookbook that takes 3 days to make, but it was fun nonetheless. You can actually skip the third day and bake it on day 2, but I thought that since I had got that far I might as well go one more day to develop as much flavour as possible. This loaf combines bread flour and semolina flour and the end result is a golden loaf with a wonderfully crispy crust. The whole family enjoyed eating it by the slice, and as the bread for wee sandwiches.

GENERAL NOTES
- none

VEGAN NOTES
1. I subbed maple syrup for the honey. I'm sure you could just use sugar, or some agave as well.

Wednesday, May 26, 2010

Rhubarb Syrup

This post may be too late for all y'alls in the US, but up here it is rhubarb season and we have it coming out of the wazoo. Every year I make stewed rhubarb (not photogenic, but tasty) and the kids always balk at first but end up bolting it down with gusto. This year I did something different: I strained off most of the juice (making the stewed rhubarb thicker, like an applesauce) then boiled it into a syrup. It is absolutely wonderful in lemonade (as pictured) or in a glass of ginger ale.

You can play with the proportions, depending on how much rhubarb you have on hand. Here is what I did:

INGREDIENTS
- 10 cups chopped rhubarb
- 1 cup water
- 1 cup sugar (or to taste)
- 1 cup homemade strawberry jam
- 2 tbsp lemon juice

METHOD
1. Combine all ingredients in a large stock pot and bring to bubbling. Reduce heat, cover, and simmer for 30 mins, or until rhubarb is cooked down and falling apart.
2. Strain rhubarb through a fine sieve (I use a spoon to stir/mash it a bit), taking a much liquid as you want (you now have tasty stewed rhubarb).
3. Put the liquid in a stock pot that can hold about 3 times the volume of the liquid. Bring to bubbling over high heat (it will foam up like cray, so use a large pot). Stir rapidly, until foam goes down, then cook and stir for about 5 mins, until liquid has become glossy.
4. Cool and store in the fridge, adding to drinks as you see fit. Pour the syrup down the back of a spoon to get the funky look pictured above.

Monday, May 24, 2010

Toblerone Candy Bar Shortbread Recipe

You know sometimes you try something new and you wonder to yourself "why on earth did I never come across this gorgeousness before?"

Well, this is one of those recipes. Its from a brilliant book called A Passion for Baking by Marcy Goldman. Its uber simple and all you need is 4 ingredients. Yes, that's right! 4 ingredients and you can whip up these bars and I guarantee 'wows' from your friends, family, guests, dog, whoever.


Toblerone Candy Bar Shortbread
Makes about 15 -18 bars

Ingredients:

1 cup butter, at room temperature
(I used salted butter. If using unsalted, then add a pinch of salt to the flour)
2/3 cup sugar
2 1/4 cups flour
100gm Toblerone chocolate bar, at room temperature
How To Make It:


Preheat oven to 325F / 165 C. Sift flour (and salt if using unsalted butter). This sifting business is optional by the way, I just like to do it so that its easier to fold into the wet part of the dough.


toblerone candy bar shortbread recipe
Cream the butter and sugar until soft. You can use a whisk and do this by hand.

Dunk in the flour

Gently mix with fingertips until the mixture resembles bread crumbs


Pat firmly on to a brownie tray or the flattest baking pan you have. Make sure that this layer is not more than 1 to 1.5 inches high. Press with the back of a spoon to layer it firmly.

Bake in the pre-heated oven for 15-30 mins or until the top turns a light golden brown.

Meanwhile, bring out your Toblerone bar. Make sure its at room temperature. Due to the heat in Singapore, mine was squishy - and that's perfect!

Once the base is baked, while its still hot from the oven, chop the Toblerone bar and sprinkle over the base.

With an icing spatula or a flat spoon, spread the chocolate evenly over the baked base.


Cool completely. Using a knife, mark squares so that its easier later to cut them along these marks, when the bars are set.


We are done! Transfer to the refrigerator to set. Once set, cut along the pre-marked lines into square bars and serve. Store in refrigerator so that the chocolate doesn't get runny. I kept mine in the fridge for a week.

The reason why Toblerone works perfect for these bars is beacause of the nougat and cashew pieces in the choclate bars. It gives a surprise element when you bite into the bars! But I am definitely going to experiment with other chocolates too.

Drop me a line if you do try this! Would love to hear from you :)

Sunday, May 23, 2010

coffee flan

There's something particularly dreamy about flan. And then there's something about the below picture that makes it even dreamier.
photo by: Mikkel Vang

our version:
Who can claim this lovely dessert? I guess it's technically Spanish, but it feels sort of French and Italian as well, though the mainstay of my encounters with flan have been entirely Argentine. I have distinct memories of my Argentine host mom ordering this dessert on more than one occasion. "Un flan." I can hear her say it--for the non-Spanish speakers, it goes something like: oon flun. Between the light custardy texture and the thin, cold caramel-syrup it's soaking in, there's something so special about this dessert--a treat seemingly only found in restaurants so that it just appears in front of you like magic. But now I've made un flan. En casa. And I'm almost afraid to ruin everything by telling you that it's an extremely manageable endeavor. Since making this coffee flan for the first time for this attempt and a potluck dinner, I've already made it again just for Matt and me.

That being said, perhaps all flan recipes aren't created equal. I can only tell you that this recipe, which I pulled from the cookbook, The Best of Gourmet, and which calls for sweetened condensed milk is quite manageable. This brings me to something I've been meaning to discuss: sweetened condensed milk. Why is this food product not available at Trader Joe's or Whole Foods? Is it not a whole food? It's just milk and sugar, right? I mean, if Whole Foods carries shortening, I would think that they could find it in their hearts to carry sweetened condensed milk. And if I could take you a little further on this matter, if I had to blame this oversight on some entity--if it is indeed an oversight--I would blame it on the design/packaging people of Eagle Brand. With a product named sweetened condensed milk, you gotta make a sexier-looking can than this.
Hands down the coolest part of this flan was making the caramel. I guess this makes sense now, post-attempt, but I had no idea that you could cook dry sugar all by itself and it would turn into this beautiful amber liquid that would harden in a matter of seconds and then after baking and chilling would turn into that sugary syrup that envelops the custard part.
Sherlock Holmes would be like: "After stabbing the flan for the second time with a commonplace butter knife, Amelia realized the dessert was done cooking."
This flan tasted exactly like flan should. Like caramel and cream with a very vague delicious almost-burnt taste to it. Do you know what I'm talking about? It's a taste very specific to flan and many things caramel-ly. If only all meals could end with something this light and dreamy. Though tonight it's cookies and cream ice cream and a viewing of The Last Mistress. I'm not in Rafaela, Argentina, but it could be worse.

For recipe, click HERE.

Pain de Campagne: Baking Through The Bread Baker's Apprentice

Boy, this is quickly turning into a vegan baking blog. Well, I guess that just reflects where all my culinary energy is these days. Baking through The Bread Baker's Apprentice has turned me into more of a baking enthusiast than ever before. There has not been a single recipe that I have not been able to veganize, which makes me realize how overrated eggs are in baking. Yes, vegan baking is delicious and diverse.

So, on to the bread at hand. I thought I would enjoy this loaf much more than I did. It uses pate fermentee, like the french bread that I totally love, but also has whole wheat flour for texture and taste. I made little batards to use like a hoagie roll for lunch at work. The result was good, but not great. Don't get me wrong, it was tasty, but I was not blown away like I have been with other recipes in this book.

GENERAL NOTES
1. I used whole wheat flour, but Reinhart suggests rye can be used as well. Net time I will use rye.
2. I made 4oz batards and baked them for 15 mins.

VEGAN NOTES
- none

Wednesday, May 19, 2010

While reading How to Cook a Wolf last night


In particular, the chapter on meat (How to Carve the Wolf), Fisher describes her Prune Roast recipe, which other cooks have told her is "not wholly dependable: sometimes the prunes cook to bits; sometimes the sauce is too thin or too thick." And she concludes: "I have never found this to be true, but I do know that no recipe in the world is independent of the tides, the moon, the physical and emotional temperatures surrounding its performance."

This line felt like such a perfect response to my trio of tortilla soups attempts, I just had to include it here. (Also, can someone please braid my hair like this?)

Tuesday, May 18, 2010

Sweet Mango Pickle - Amma's Recipe

This sweet mango pickle takes me places. It takes me to places that I lived as a 12-year old, in a house that had a huge kitchen, the time that we had the hottest summers in Kottayam and the baths we used to take under the backyard tap in the dusky evening light. The hot dosas for dinner and this sweet and slightly sour pickle that complemented the dosas like not even coconut chutney could. The bottle was brought out when there were chapatis and parathas on the table too.


Easily, the best part of this recipe is that fact that amma came up with it just like that one hot, sweaty Kerala summer day. She was slicing onions, oh so fine like she normally does, and then randomly took a couple of raw mangoes from the counter-top and starting putting together this condiment that would later be made again and again and filled in many many bottles, devoured by her youngest daughter with practically anything, and sent to relatives and friends who were near and far.

The sesame oil and the near-burnt fengreek seeds create a symphony with the chopped onions and mangoes that's hard to describe. It gels with anything you spread it on, making the meal magically taste better. Just like mothers spread their love and support on everything and magically make your life better. This is my soul-food, my comfort, amma's love.


Amma's Sweet Mango Pickle Recipe
Makes one small bottle

Ingredients:

Raw mangoes - 3 nos (orange sized ones, approx)
Onions - 3 big
Jaggery / raw sugar (or brown sugar) - 1/2 cup, grated or melted
Turmeric powder - 1/2 tsp
Chilly powder - 6 tsp
Gingelly / Indian sesame oil - 1/2 cup
Fenugreek seeds / uluva / menthayam - 1/2 tsp
Asafoetida / hing / kaayam - 1/4 tsp
Mustard seeds / kaduku - 1/2tsp
A few curry leaves
Salt to taste

How Amma Makes It:

1. Slice the mangoes and onions into thin pieces.

2. Heat oil in a pan and add mustard seeds. When they pop, add the fenugreek seeds. When they turn a nice brown, add the onions. Take care not to burn the seeds otherwise they turn very bitter. Let the onions brown well.

3. Now add the chilly powder, turmeric powder, hing and curry leaves. Stir around for a minute and then add the sliced mangoes and salt. Add 1/2 cup water to this and cook covered on a low flame (on sim, preferably).

4. After abount 10 mins, add the jaggery, mix well and let the mixture come to a boil. Remove, cool and store in air-tight bottles. Keeps in the refrigerator for up to a month.
I am sending this post to 'Of Chalks and Chopsticks' hosted by Bong Mom this month and conceptualized by Aqua.

Monday, May 17, 2010

Vegan Chocolate-Glazed Donuts

I'm not sure why I have not tried to make a vegan donut before now. I think I was convinced that eggs were absolutely essential to the dough but they totally are not. Having baked quite a few yeasted sweet doughs in the past year I now know that eggs really aren't needed for leavening, but are just another way to enrich the dough (along with the shortening and milk). So, I went with flax seed to give the dough some pliability and cohesion. Worked like a charm. I veganized Alton Brown's recipe on the Food Network site, mainly because he only called for 2 eggs and other recipes asked for 5. The end result was perfection: a tender and tasty donut that kicks the butt of anything they serve at Tim Horton's (or Dunkin' Donuts for those outside Canada).

INGREDIENTS
Makes at least 24 small donuts
- 3/4 cups soy milk
- 1 1/4 oz vegetable shortening
- 2 tbsp sugar
- 3/4 tsp salt
- 3 tbsp warm water
- 1 tbsp ground flax seed
- 2 1/4 tsp instant yeast
- 11.5 oz all purpose flour
- canola oil for frying

METHOD

1. Heat soy milk, shortening, salt, and sugar in the microwave, or on the stove, stirring regularly until shortening melts. Set aside.

2. Whisk flax into water. Let sit a few minutes, then whisk again until thick. Set aside.

3. In a large bowl, mix together yeast and flour. Add soy milk mixture (making sure it is between 95 and 105 degrees F) and flax mixture. Mix together into a rough dough, then knead for about 5 mins until smooth, adding more flour or more water as needed to make a nice soft and tender dough.

4. Transfer dough to a lightly oiled bowl, cover, and let rise for 60-90 mins, until doubled in size.

5. Line a baking sheet with parchment paper. Spray with oil.

6. Roll out the dough on a lightly floured surface to 3/8" thick. Cut out 2" circles with a biscuit cutter, then cut out a 5/8" centre (or use a donut cutter. I cut the end off a kid's medicine syringe. It was the perfect size and I use the plunger to push out the dough). Dough scraps (and holes) can be re-rolled and cut. Place on prepared baking sheet, spray with oil, and cover. Let rise for 1/2 hour.

7. Heat oil to 350 degrees. Fry donuts in batches (30-60 seconds per side) until golden, drain on paper towel or paper bags, then let cool on wire rack. Let fully cool before glazing.

For the glaze, I used this recipe, subbing margarine for butter and soy milk for milk. This recipe makes a lot, so cut it in half.

The donuts (glaze and all) freeze and thaw very well. Place on a sheet pan to freeze. Once frozen, they can be placed in a bag and they won't stick together.

Aval / Poha / Flattened Rice Vadai - Quick Vada Recipe - Step by Step

When my family visited in February, amma brought me a huge sack of aval (poha or flattened rice). Well maybe not a huge sack but for someone who cooks for two, it definitely seemed that way. We didn't have any when they were here so I was stuck with a whole lot of aval and a guy who doesn't like aval nanachathu. So what's a girl to do except resort to snack-making and deep frying? 

So here's how you can make a pretty quick avai vadai. Since there's not much soaking and no grinding involved, this is a quick snack that will keep people guessing as to what went into their vada!

Let's start with 1 cup aval / poha

        Soak it in about 1/2 cup water until soft - about 10 mins. 

Meanwhile, prepare the other ingredients - 1 small chopped onion, 2 green chillies (adjust to taste), 1/2 tsp jeera, 1 tsp grated ginger, 1-2 tbsp besan / chickpea flour and 1-2 tbsp of rice flour

Mix these into the soaked aval along with salt (also add curry leaves and fresh coriander leaves if you have any handy - I only had curry leaves)

Flatten into small discs that are not too thick. While shaping, if the mixture is too thick, dip fingers into a bowl of water and try to shape. If the mixture is watery, add some besan or rice flour. 

         Deep fry until golden brown. Serve hot with chutney.

       Or dunk them into some tomato rasam like we did! 

Aval Vada Recipe
Makes 7-8 vada

Ingredients:
1 cup aval / poha
1 small onion, chopped
2 green chillies
1/2 tsp jeera
1tsp grated ginger
1-2 tbsp besan (use as required to shape vada)
1-2 tbsp rice flour 
Curry leaves or coriander leaves, chopped
Salt to taste
Oil to deep fry

How I Made It:

1.Soak aval in about 1/2 cup water for 10 mins, until soft. 

2. Add the rest of the ingredients to this and mix well. 

3. Shape into roughly 1/4" thick discs. While shaping, if the mixture is too thick, dip fingers into a bowl of water and try to shape. If the mixture is watery, add some besan or rice flour. 

4. Deep fry until golden brown and serve with chutney or dunk them into some tomato rasam. 

The texture is more smoother and spongier than lentil vadai. We loved it, especially as rasam vadai. The added bonus is, its so quick to make (although I didn't tell TH that or else he would ask for this every weekend!).