Thursday, April 29, 2010

Ikea Egg Slicer

Here's a nifty little tool for mess-free slices of hard-boiled egg. In Sig's words, "It cuts hard bolied eggs into attractively thin slices and wedges for salads."

What? Egg Slicer
Where? Ikea
Price? Less than 5 USD


The egg slices look so pretty! And all it takes is a second with this slicer. You can see these egg slices in action on Sig's Curried Pork Belly Sandwich Recipe

Thanks for sharing your Kitchen Thing Sig!

Wednesday, April 28, 2010

Chena Vanpayar Curry / Yam 'n Black Eyed Peas Curry Recipe

This is a slightly varied version of the popular Kerala recipe - Erissery. I didn't have coconut in hand so I had to improvise since I was really in a mood for some mushy curry type thing with yam and it also had to go with roti and rice. I remembered amma putting together something like this but I was almost sure she wouldn't remember the dish nor the recipe because it was her own concoction. So I went with what I had and instinct.

By the way, I used black eyed peas because red cow peas (vanpayar) is not easily available here. Traditionally, that's what's used in erissery.


I guess you can call this:

Chena Vanpayar Erissery without Coconut!
Serves 4

Ingredients

2 cups elephant yam, cubed
3/4 cup black eyed beans / vanpayar

To grind:
4 green chillies
6-8 shallots / pearl onions
1/2 tsp jeera / cumin
A pinch of turmeric

To temper:
1/4 tsp mustard seeds
1 dry red chilli,  broken into half
A few curry leaves
2 tsp oil

How I Made It:

1. Pressure cook the black eyed beans with sufficient water for 3-4 whistles. Alternatively, you can cook in a closed pot with enough water to cover it for 45 mins to an hour until soft but not mushy.

2. Grind the ingredients in the list under 'To grind'. Set aside.

3. Cook the yam in a pan with enough water to cover it, until soft. This should take about 10-12 mins. Once done, drain any remaining water and set aside.

4. Heat oil for tempering in a pan and add the remaining ingredients. When the mustard seeds pop, add the ground paste. Fry for 10 seconds and add the cooked yam and beans. Add salt. Cook for 5 mins until well mixed.

Serve warm with rotis or rice.

Light Wheat Bread: Baking Through the Bread Baker's Apprentice

Yes, another bread post. I have been doing a lot of baking lately and not a lot of cooking. Well, I have been cooking, but nothing of particular interest due to all my time being consumed by grading. Now that all the papers have been marked (huzzah!) I can get back into the kitchen. Reinhart describes this bread as "a poor compromise for whole-grain purists" but still a "tasty, soft" loaf. Mine rose like crazy and made for a perfect PB and J sandwich the next day.

GENERAL NOTES
1. This is one of the few breads in this book that can be made in one day, which is a real plus.
2. The recipe only makes one loaf, though it is a 2 lb loaf. I dislike recipes that only make one loaf because it seems like a lot of time to spend on bread that will be gone the next day. But, I suppose I could just double it.
3. I used Robin Hood "Best for Bread" whole wheat flour. I think all purpose would have sufficed since it is only 1.5 cups. The Robin Hood is the best bread flour I have been able to get around here. I tried some organic whole wheat bread flour from the local co-op, but it was more like a bag of bran with so little gluten my bread did not rise much at all. Bummer, man.

VEGAN NOTES
1. I subbed soy milk powder for the powdered milk, but I think I could have just left it out.
2. The recipe calls for sugar or honey, but I used maple syrup.

Won That Waffle Maker!

I didn't want to do a traditional write-on-paper-shake-in-jar system for picking the winner so I asked my Facebook friends to pick a number between 1 and 20 (eliminating comments by me and duplicate ones). Shyam picked the winner, his number was 1 so...

Divya Kudua who said "Hmmm..I've got no luck in Giveaways as yet and look at this..shipping only to US..?!well,let me see if my friends in US have got some luck..:) My top kitchen wish list would be a KitchenAid..ah!!" is our lucky winner!!!


Well, definitely looks like your luck in giveaways has taken a turn for the better. I hope you can find a friend in the US who would like to receive this gift. Email me at meetmykitchenthings[at]gmail[dot]com and let's talk details!!

Thanks everyone for participating in the giveaway and stay tuned for the next one coming up soon!

Sunday, April 25, 2010

Paneer Burji / Bhurji Recipe

Some time back, I had asked people to share their favourite paneer dish in the Edible Garden Facebook page. I was quite surprised to see that Paneer Burji got the most votes, only followed by paneer tikka masala. I was surprised that this simple dish that I hadn't even bothered to blog about impresses so many people.

So here goes, my most versatile paneer recipe - Paneer Burji. The beauty of this recipe is, its entirely flexible. You can change around the masala powders (like using pav bhaji masala) you use and experiment with adding different vegetables (like adding tomatoes).


Paneer Burji Recipe
Serves 2

What I Used:

1.5 cups paneer, crumbled
1 small onion, chopped fine
2 green chillies, chopped fine (adjust to taste)
1/2 of a capsicum, chopped fine
A pinch of turmeric
1/2 tsp jeera powder
1/2 tsp garam masala
Fresh coriander leaves to garnish
2 tsp oil
Salt to taste

How I Made It:

1. Heat oil in a pan and add the onions and green chillies. Once the onions turn soft and pink, add the jeera, salt, and turmeric. Fry for a minute.

2. Now add the paneer, garam masala and capsicum. Stir well and cook on low fire for 7-8 mins, stirring in between. The capsicum should be crunchy. Adjust salt.

3. Garnish with the coriander leaves and serve warm with rotis or use in a sandwich. Yum!


That's so ridiculously simple that if you use store-bought paneer cubes, this should be done in less than 15 mins. How's that for a quick dinner idea?

Note: Substitute crumbled paneer with scrambled eggs and you have egg burji!

Coffee-Glazed Doughnuts

Gourmet's version:

our version:

Coffee and Doughnuts. The below is a study on the color brown.
So. We made doughnuts. They turned out browner than I'd have liked them to be. And our apartment did smell like a carnival for about twelve hours.

But I don't regret a thing. Making them was a lot of fun. Dissolving the yeast into warm water, tossing the dough out on the table, filling one of our biggest pots with vegetable oil and watching the little o-shapes puff up and change color within seconds of being dropped into the hot oil. It was fun biting into the first one and really fun to discover it didn't taste of char. Don't get me wrong, these guys were dense, definitely past golden brown even though we had them in the oil for a fraction of the 2 minutes the recipe called for, and yes, they would not have made the cover of Martha Stewart, but they weren't bad. I mean, they're doughnuts.

For the recipe, click here!

Marbled Rye Bread: Baking Through the Bread Baker's Apprentice

This is one of those loaves that was interesting to make, but now that I have made it I don't think I will make it again. Marbling the loaves made for a splashy presentation but the extra work is not worth it for everyday baking. Maybe I will revisit this one when I need to impress someone.

GENERAL NOTES
1. The bread is not overly "rye-y" since the rye flour is in a 1:3 ratio with bread flour. This is perfect for those who aren't that crazy about rye, but will disappoint others who like lots of rye flavour.
2. I skipped the caraway seeds because I hate them.
3. I coloured the dark rye with cocoa powder. The downside of this is that it tricks your brain into thinking you are making some desert loaf.

VEGAN NOTES
1. I did not bother subbing the egg wash with soy milk.

Friday, April 23, 2010

Kadalai Sundal Recipe / Chickpeas Sundal Recipe

This is a Navaratri special recipe. I have never paid much attention to sundal before in my life but one night, I this sudden craving for it, maybe because there was a bowl of soaked and pressure cooked chickpeas in the fridge and I knew this would be done in a jiffy.


Its great as a snack, in addition to being a decent side dish with rice and some gravy. Of course, you can also bookmark it if you are looking for Navaratri Special Recipes.

Sundal Recipe
Serves 2

What I Used:

1 cup chickpeas / kabooli channa, soaked overnight
2 tbsp grated coconut
2 tsp oil
1/4 tsp mustard seeds
1/2 tsp urad dal / ulutham paruppu / husked and split black gram
2-3 dry red chillies
A few curry leaves
Salt to taste

How I Made It:

1. Pressure cook the chickpeas for 3-4 whistles (until its cooked but still holds its shape). 3 whistles is a safer bit although in Singapore I feel pressure cooking takes more time.

2. Heat the oil in a pan and add the mustard seeds. When they start to pop, add the urad dal, red chillies each broken into two and the curry leaves.

3. Once the urad dal turns a golden brown, add the drained chickpeas, coconut and salt. Mix well on medium flame for 3-4 minutes.

4. Serve warm as is or with rice and side dish.

Check out Mochakkottai Sundal Recipe I had posted earlier.

------------------------------------ Note ------------------------------------------

I am reverting to the old template for a while because I am figuring out some technical issues with the new one. A lot of users are not able to reach me through Google Search and I am trying to see if its the issue with the new template or just something else amiss. Will change back in a week's time or so.

Wednesday, April 21, 2010

Red Lentil Sloppy Joes

Here is installment number two of kid-friendly meals for my newly veggie nephew. It is a marriage of my original recipe (made with tempeh) and Isa's lentil-based recipe from Veganomicon. I love this version because the red wine vinegar gives it lots of zip. Red lentils are also a great choice because they cook quickly and are pretty neutral in flavour. The trick here is to cook the lentils until they are soft enough but not too much so they go mushy.

INGREDIENTS
- 2 tbsp oil
- 1 onion, chopped
- 1 rib celery, chopped
- 1/2 green pepper, chopped
- 1/2 tsp oregano
- 1 cup red lentils, rinsed
- 1 cup ketchup
- 1 1/2 to 2 cups water (more if needed)
- 1/4 cup red wine vinegar
- 1 tbsp vegan Worcestershire sauce (optional)
- 1 tbsp brown sugar
- salt to taste
- freshly ground black pepper
- Tabasco sauce to taste

METHOD
1. Heat oil in a frying pan over med-hi heat. Saute onion, celery, green pepper, and oregano for 5-7 mins, until onion is translucent and pepper has softened.
2. Add lentils and mix well. Add ketchup, 1 1/2 cups water, vinegar, Worcestershire (if using), sugar, salt and pepper, and Tabasco.
3. Bring to bubbling, then reduce heat, and cover. Cook for about 30 mins, stirring regularly, adding more water if needed until lentils are cooked but still hold their shape.
4. Serve on toasted rolls, open-faced if you want.

Tuesday, April 20, 2010

Win That Waffle Maker!

I have been wanting a waffle maker forever! I will most likely own one by next month and I wanted some company since I know a lot of you would like one too. This is why I grabbed the opportunity when CSN Stores got in touch with me asking if I'd like to host a giveaway on MMKT. They are into various products, the most popular ones being kids beds, cookware, and home accessories.

I intend to make giveaways a regular feature on this site anyway. After all, who wants to just look at pretty kitchen stuff without being able to own some of them :)

So here's what you can win. I have one of these beauties to give away!


Oh boy, just looking at that makes me ogle!

Here's what you need to do to enter the giveaway.


1. "Like" (Become a fan) Meet My Kitchen Things on Facebook; and
2. Leave a comment on this post with the name of one kitchen thing that you absolutely cannot do without OR the top kitchen thing from your wishlist. I may just be able to make your wish come true :)

That's it!

Since I don't want to come between you and beautiful waffles, this post ends here.

The last date to enter is April 25th, 2010, midnight Singapore time (GMT + 8:00).

Please note:

- This giveaway is sponsored by CSN Stores
- Shipping is available only to US and CA. If you have relatives or friends in either of these countries, you can choose to ship it to them. You can also gift them to someone there, if that's what you'd like. 

Thakkali Thella Pulusu / Tomato Coconut Gravy Recipe

Thella pulusu and vatti pulusu are the two most popular Reddiar curries (kozhambu / pulusu). While growing up, I definitely liked the milder thella pulusu but now, home food means a good thoran with vatti pulusu. Ah yumm. My aatha (amma's amma) used to make the best vatti pulusu (the recipe of which my sis has shared here).

This recipe is actually very similar to Arch's tomato saar recipe that I had posted pics of the other day. But there are some minor differences that  make them taste significantly different.


Considering Reddiars are kinda going extinct, I really should have posted this long back but here goes anyway. I couldn't ask aatha for her exact recipe before she passed away but amma has a pretty good approximation of the recipe so sharing that here.


You can add any vegetable of your choice, the most popular ones being tomatoes, drumsticks, brinjal, etc. I made my favourite, the tomato version with drumsticks. 

Thakkali Thella Pulusu 
Serves 4

What I Used:

1 big tomato, cubed
1 drumstick, cut into 4" pieces
1 cup tamarind water (from a small lime-sized ball of tamarind)
Salt to taste

Grind to a paste:
1/2 cup grated coconut
4-5 shallots / ulli
1/2 tsp jeera
2 dry red chillies
A pinch of turmeric
1 clove of garlic

For tempering:
2 tsp oil
A few fenugreek seeds / uluva / menthayam
1/4 tsp mustard seeds
A few curry leaves
4-5 sliced shallots

How I Made It:

1. Take the tamarind water in a kadai and add the tomatoes and drumsticks to it along with salt. Bring to boil.

2. Add the ground masala paste to this and continue to boil on sim until the drumsticks are soft. This should take about 12-15mins. Add water as necessary to keep the consistency right (same consistency as sambar). Remove and set aside.

3. Heat oil and add all the ingredients for tempering. Once the mustard seeds have popped and the fenugreek seeds are roasted (take care not to burn them!), dunk them into the gravy. Mix well, adjust salt.

Serve hot with rice, mezhukkupuratti and pappadom.

On other news, I am giving away a waffle maker in MMKT and the last date to enter is April 25th 2010 - midnight SG time (GMT + 8:00). So HURRY! 

Sunday, April 18, 2010

Shellfish Paella & Other Spanish Stuff

When I was a junior in college, I was fortunate enough to spend a semester abroad in Madrid and live with a Spanish family who made traditional, classic Spanish dishes like paella on a regular basis. And like your average Spaniards, they ate these meals around 2 or 3 pm so that when I got home from school an hour later, the leftovers would be waiting for me at that perfect post-dining temperaturewhen the food's no longer hot but not cold either and the flavors have had a little extra time to just hang out and get to know each otherand do you know what I would do? Not eat it because I wasfor no real reason apart from being "healthy"a vegetarian. Can you believe that? My Spanish host mom must have thought I was insane to pick at her paella, eat a few bites and say, "Ya comí," before quietly retiring to my room for the afternoon. The saying that youth is wasted on the young is the TRUTH. Times a thousand.

So when my real mom came to visit this past weekend and wanted to make paella, I thought it might be a perfect time to try to redeem myself and to publicly and finally say I'm sorry to my Spanish host-mom for snubbing her beautiful homemade paella with the full-bodied shrimp, the head of which I'm sure was what really scared me appetite-less at the time.

Saveur's version:
Photo: Luca Vignelli
our version:
(Only headless shrimp were available at the grocery store.)

Coincidentally, Saveur did a special feature on The Principles of Paella recently. Because of this, I now know that this step pictured below of steeping the saffron is the "most traditional way of coloring and flavoring paella."
Also coincidental, or perhaps just Spanish synergy at this point, this past weekend marked the opening of Spanish-bullfight-inspired Faena Nueva: New Glazes on New Pots by Adam Silverman at Heath Ceramics. I grabbed myself the middle one below. Sooo coool, right? The show is up through the 25th so if you're in L.A., you should definitely stop by and check it out in person.
OK, back to paella: We were banking on my mom's knowledge for how to debeard the mussels, but she only shouted from the living room: "I don't know how to do that!" We Googled it and as it turns out, it mostly involves just ripping the hairy stuff off and then scrubbing the shells clean.
I don't think I even need to label this as a success. It's pretty apparent, no? Only we did fail to get the nice crust on the bottom--tips on how to do that, anyone?--and it was just a tad on the bland side. Next time, I think I'd like to use a stock of some kind instead of water. Also, adding some chorizo would definitely not hurt, but then of course it wouldn't be Valencian (as this recipe describes itself).
Oh Mom, how will we ever redeem ourselves with the Spaniards when you are pairing their famed dish with diet Coke?

For recipe, click here.

Saturday, April 17, 2010

Stuff I've Made But Did Not Make Up

The school year is almost over and the mountain of marking has not been whittled away to a reasonable sized pile. Let me tell you, nothing kills creativity like grading a few hundred undergraduate essays. So, I have been relying on other people to do the culinary thinking for me.

The first two recipes come from the recent issue of Vegetarian Times. I've never really looked at VT before, but when the kids came home selling magazine subscriptions as a school fundraiser I decided to give it a whirl (it was the only veggie option in the whole lot). First up: broccoli pesto. Amazing! The mint gives it a little bite and the hazelnuts are a nice change from walnuts.
Second up: Oyster Mushroom Rockefeller. This is from a section of recipes by the owners of Horizons in Philly. I made this for Easter Dinner with my family, and everyone enjoyed it, vegan or otherwise. The sauce is really rich (hence naming it after Rockefeller) but perfect for a special occasion when you need to bring a vegan entree to a dinner party. An added bonus is that you can make and bake it in about 30 mins. Lucky for you, VT has a digital edition of this issue online.
Third: biscuits from Peter Reinhart's Artisan Breads Everyday. He claims they are the best biscuits ever, and he is right. You start with a soft dough (almost a batter), then turn and fold it 4 times whilst heavily dusting with flour. Like puff pastry, this results in a laminated dough that rises high and fluffy in the oven.
Lastly, I made the beer-battered onion rings from American Vegan Kitchen. I know I shouldn't have, but I did. I have not had an onion ring in a decade or more, and these are the best I have ever had by far.

Wednesday, April 14, 2010

Lavash Crackers: Baking Through the Bread Baker's Apprentice

I had no idea it was so easy to make crackers. Reinhart calls these "Armenian-style crackers" that can be seasoned with sesame seeds, paprika, cumin seeds, caraway seeds, or kosher salt. I kept it really simple and just used sesame seeds so the kids wouldn't freak out too much. This recipe made a box worth of crackers for a fraction of the cost.

GENERAL NOTES
- none

VEGAN NOTES
1. I subbed maple syrup for the honey.

Tuesday, April 13, 2010

Vendakka Thayir Pachadi / Okra Curd Pachadi Recipe

I had forgotten how easy and quick it is to put together a thayir pachadi and call it a side dish. Now that summer has officially set in in Singapore (its technically summer here throughout the year!), our consumption of buttermilk and curd has gone up significantly - as if TH wasn't guzzling down enough of it already.


Pachadi, especially vendakka pachadi is a very common part of a sadya or wedding meal. Its simplicity balances out the heat of the other curries and side dishes that are seen as more important. I have always had a soft corner for the simple pachadi.

Vendakka Thayir Pachadi
Serves 2

What I Used:

10 vendakka / okra
1 small onion
1 tsp oil
1/4 tsp mustard seeds
1/4 tsp roasted jeera / cumin
1 green chilli (or to taste)
1 cup thick plain yogurt
1/4 to 1/2 cup water
Salt to taste

How I Made It:

1. Cut the okra into thin rounds. Chop the onion finely and the green chilli into small pieces (or crush using a pestle and mortar).


2. Heat oil, add mustard seeds and when they pop, add the onions, green chilli and okra. Fry for 8-10 mins until the onions are golden and the okra is fried and crisp. Drain and leave aside to cool.

3. Beat yogurt with salt and jeera. Dunk in the fried okra mixture and mix well.


Serve with rice and side dish / kozhambu.


This goes to JFI - Wedding Treats hosted by Priya of Akshayapaatram, originally conceived by Indira of Mahanandi.

Monday, April 12, 2010

American Vegan Kitchen: A Cookbook Review

I was really pleased when Tamasin Noyes contacted me to review her cookbook, American Vegan Kitchen, because I had been eying it on Amazon. I dig comfort food, and this book is expressly dedicated to all things homey and comforting. From donut bites to potato skins to burgers and onion rings to apple crisp, this book has you covered from breakfast to dessert. The book begins with a brief intro to the basics (what is tempeh?) and a few recipes for seitan, veggie broth, spice blend, etc. What follows is almost 200 pages of breakfast food, starters, soups, salads, sandwiches, entrees, sides, and desserts. Most recipes get their own page (shorter recipes share a page with other shorter recipes) which makes them very cook-friendly (I hate having to flip back and forth between the ingredient list and method). The book is published by Vegan Heritage Press, which, from what I can tell, is a small company that only publishes vegan books. The front cover is great, but I wish the photos in the colour insert were of the same quality. The layout is a touch spartan, but easy to read and follow.

As to be expected with a cookbook of veganized American cooking, the entrees and sandwiches are heavy on the seitan and tempeh which stand in place of meat. That being said, the book is not simply a fake-meat fest. Flip through the table of contents on Amazon to see what I mean. Some recipes are there in their full deep fried glory (which you will either love or hate), while others have a baked option (the onion rings, for example). I will be honest, I don't really cook from cookbooks on a regular basis, but I can see turning to this book to supplement Sunday brunches and neighbourhood BBQs.

After leafing through the recipes, I decided on the Tuna-Free Noodle Casserole. It was a total hit with the whole family: a creamy cashew-based sauce with roasted chickpeas and a crumb topping. The ingredient list is one of the longest in the whole book, but the kids loved it so it was worth the work. As you can see, I can't get egg-free ribbon noodles here, so I used bowties.

Sunday, April 11, 2010

Meyer Lemon Tortilla-Crepe Cake

This was an exciting week. For the first time (I think?) I was able to hone my scant but growing culinary knowledge and successfully alter a recipe to suit my skill level. Do you remember Kenny Shopsin and the mac 'n' cheese pancakes? Well, after my failed Easter eggs, I really wanted this crepe cake to turn out, and I remembered reading his trick for crepes in Eat Me. How does Kenny Shopsin make a crepe? He uses flour tortillas. Have you ever heard of doing this? He dips one side of the tortilla in a mixture of eggs and cream, fries it in a buttered pan, waits until that side gets nice and mottled with brown spots, coats the other side with the egg and cream mixture, browns that side and voila, he's got himself a crepe.

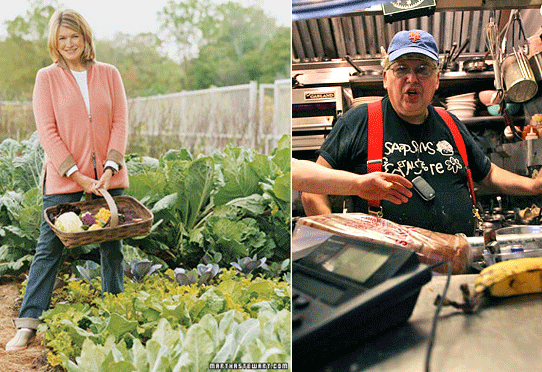
Could you imagine stranger bedfellows than Martha Stewart and Kenny Shopsin?

With that, I give you Martha's version:

And here's our version:
The first step, making the lemon curd mousse, is all Martha.
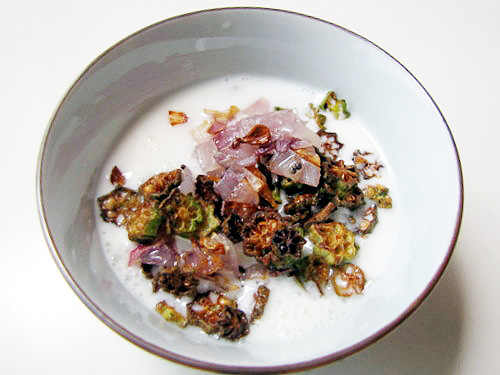
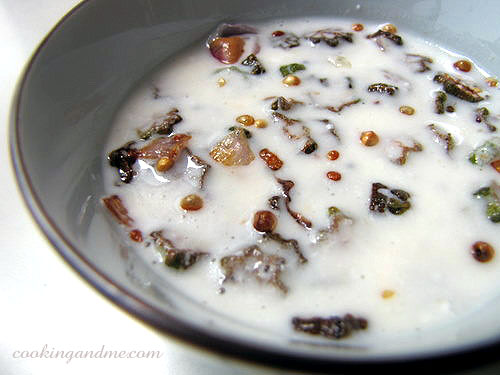
Candying the meyer lemons? This has Martha written all over it.
When you pull out flour tortillas for a dessert this gorgeous and WASPy, you kind of know you are in Shopsin territory.
The result of this crazy amalgam of these two food-making superheroes on opposite spectrums of the urf?

Crazy deliciousness. The buttery chewiness of the tortilla-crepes and the sweet, slightly sour yet creamy lemon mousse curd with the uber-tart bite of the candied lemon was superb. Super superb.
But why stop there? Can I take this Martha/Kenny combination even further? Let me try:

Possibly my favorite story of all time is that of Elizabeth Bennet and Fitzwilliam Darcy from Pride and Prejudice, which I just recently pulled off my shelf and reread. Consequently, this week I've been seeing the world with Jane-Austen glasses.

Can you deny that there is nothing more romantic, more pre-Victorian and Pride and Prejudice-y than this meyer lemon crepe cake? And even though meyer lemons weren't discovered until the 1900s, couldn't you just picture this cake at Pemberley?

And by this thought-process, can we not jump to the next conclusion: a modern day version of Pride and Prejudice set firmly within the Manhattan foodie scene? Shopsin though, with his wit and "inferior connections" would have to play the role of Elizabeth, and Martha with her immaculate breeding and cold demeanor would fall perfectly in line with a Mr. Darcy rendition. Am I right on track or what, P&P fans?

Meyer Lemon Crepe Cake (adapted from Martha Stewart)
Ingredients
15-20 flour tortillas
3 large eggs
1 cup heavy cream
butter for the pan
Meyer Lemon Curd Mousse
1/4 cup heavy cream, whipped
Candied Meyer Lemons, optional

Directions
Make Meyer Lemon Curd Mousse and Candied Meyer Lemons. Whip some heavy cream while you're at it. All that's left are your tortilla-crepes and some mild assembly!

Whisk together eggs and heavy cream in a medium bowl. Dip one side of the tortilla in the egg and cream mixture, fry it in a hot, buttered pan until the side gets nice and mottled with brown spots. Coat the other side with the egg and cream mixture and brown that side as well. Congratulate yourself as you slide your tortilla-crepe a la Shopsin onto a plate. Repeat with remaining tortillas. Let cool.

Place 1 tortilla-crepe on a flat serving dish. Spread about 1/4 cup lemon curd mousse onto tortilla-crepe. Top with 1 tortilla-crepe. Continue layering tortilla-crepes and mousse. (Use 15-20 tortilla crepes, ending with a tortilla-crepe on top.) Refrigerate until firm, about 1 hour.

Top tortilla-crepe cake with whipped cream and 3 or 4 candied lemon slices.