Tuesday, March 31, 2009

Simple White Bread - Step By Step Recipe

I first made bread when I was in Hyderabad. I'd tried no-knead bread and I used my OTG to bake it in. I didn't have a proper bread tray or any idea whatsoever what on earth I was doing! Yet, it came out fine and most importantly, edible.

Baking bread can be a bit daunting, especially for beginners. But something remarkable about it is the use of minimum ingredients, ones that are available all around the world! The technique and other stuff can be perfected in time but the idea is to take the first step.

Everyone loved my Butterscotch Blondies Step by Step Recipe and gave good feedback saying since it was step by step, it made it look less daunting. A lot of people tried it even though butterscotch chips was not easily available where they live. Many of you wrote to me with creative substitutes you used and some even sent me pictures. That was probably one of the most encouraging set of comments I have ever received.

Anyway, after my first attempt at bread, I tried agian about a month ago, but this time I decided to go for the normal bread, the one where you need to knead it. The good part is, the ingredients are very very simple and easy to get everywhere.

I hope the step by step recipe makes it less scary for people to take the first step :) If you need to skip the pictures, please scroll to the end of the post for the complete recipe, in one place.

Simple White Bread - Step By Step Recipe

Make sure that you get some good quality active dry yeast.

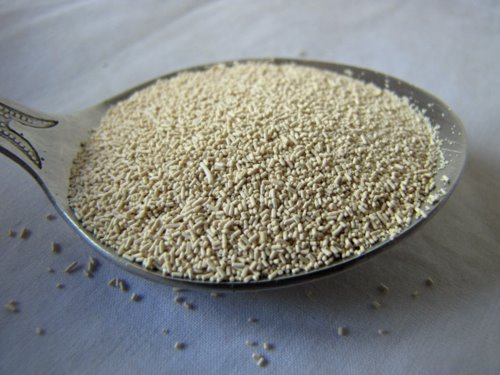
1. Mix together 1/2 tbsp active dry yeast (1.5 tsp), 1 tbsp sugar and 1/2 cup warm water. Let it stand for 10 - 12 mins until the mixture starts to froth, like so.

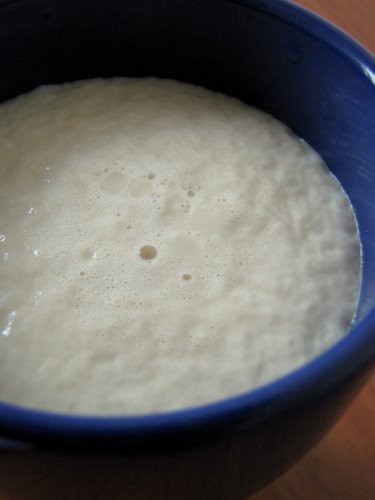
If your yeast is not good enough or is nearing its expiry date, it won't froth much so that should be a good indicator.

Also, this mixture doesn't smell so good so if your husband or anyone else at home comes around saying "what the heck is that smell? what on earth are you making?", don't let that deter you. We can get back at them with the heavenly smell of baking bread very soon.

2. Measure out your flour next. You will need 2 cups of maida or all - purpose flour.

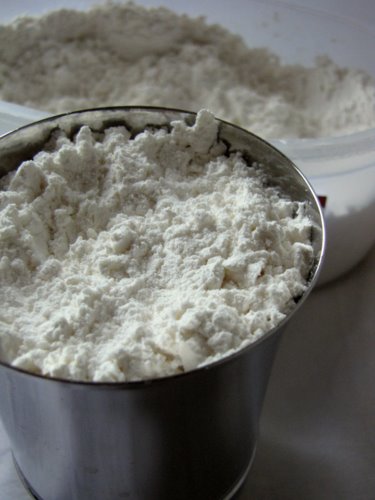
You can substitute half of this with atta or whole wheat flour if you want. Since atta is coarser than whole wheat flour, or so she says, run it through your mixer once before using it. (Thanks Nandu!)

3. Mix the flour gently into the yeast mixture with about 1/2 tsp salt, and knead until it all comes together. This dough will feel unbelievably silky. Sprinkle some flour while kneading it gets too sticky.

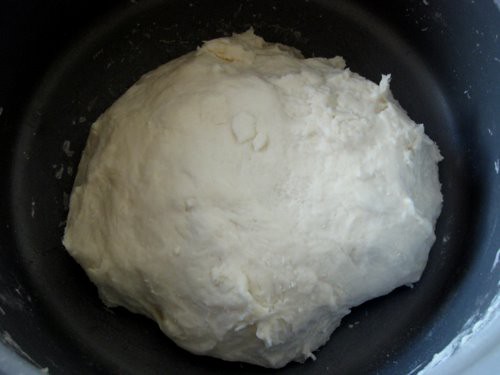
Ok, it may not look so silky or even smooth because I suck at shaping it out nicely and making it look pretty. But this is good enough, you will see. Make sure you rub in some olive oil (or butter) on the sides of the bowl to prevent the dough from sticking on too much.

Let this sit for an hour. You can cover it with some cling wrap. I didn't have any, so I cut up a thin plastic bag and used that instead.

5. After an hour, you will see that the dough has risen to almost double its size and that it looks quite uniform and pretty, unlike the previous picture. Always let nature (or yeast, in this case) do its own thing.

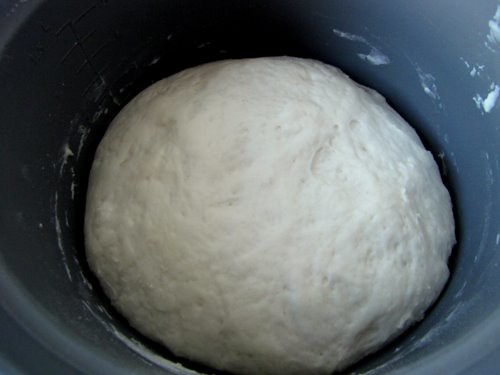
Note: its still not going to smell so good but like I said, ignore and keep going.

6. The next step is to knead down the dough a bit, on a floured surface.

If you are anything like me, you will be a bit tired by now, with all the measuring and the waiting and the photography. So call in your husband, or anyone else you can boss into helping you knead. You don't need to knead your palms off, just be slow and firm.

Make sure you interfere them while kneading and ask them to pose for a few pics. Its all in the game of bread-making.

PS: If you have a bread-making machine, then you fall into the category of people who I am jealous of, so don't rub it in by commenting and gloating about it, please.

7. After about 10 minutes of kneading, transfer the dough to a loaf tray that's dabbed with olive oil or butter on all sides. Don't go overboard with the dabbing though.

I used a pyrex glass loaf tray, and I blame it for this ugly picture. Cover this again with cling wrap / cut up plastic bag and let it sit for another hour.

8. It will rise again to almost double its size, like so.

If you touch the top of the dough, it will be s-o-f-t. Resist temptation to punch it down and play with it. Its time to bake your bread!

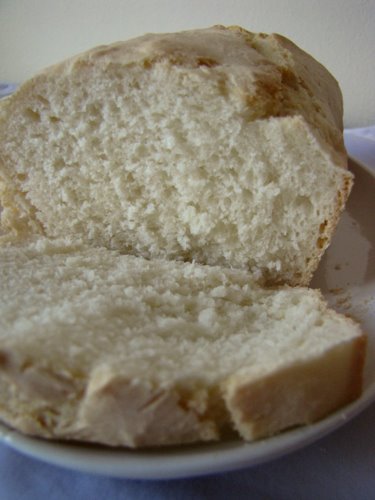
9. Pre-heat oven to 200 C / 390 F and bake for about 20 mins. The crust will turn a lovely golden brown.

This, my friends, will be the best smelling thing you have ever made! Trust me!

My crust got a little dry, but you can dab some butter when it just comes out of the oven. I didn't, because I was too busy taking pictures!

10. Cut it into slices and store in an air-tight container for upto 3 days. I got about 9 slices so it didn't last that long.
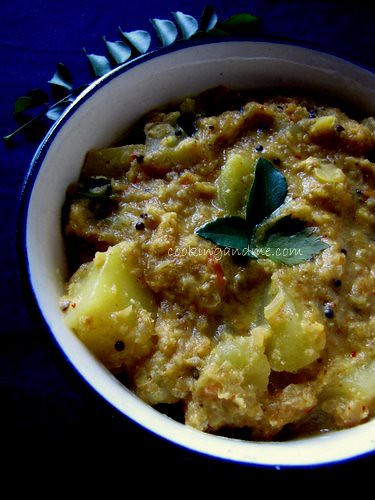

Here is the recipe again, all in one place.
Simple White Bread Recipe

What I Used:

2 cups all-purpose flour / maida
1/2 tbsp (1.5 tsp) yeast
1 tbsp sugar
1/2 cup warm water
1/2 tsp Salt
Olive oil or butter to grease

How I Made It:

1. Mix sugar, warm water and yeast together and leave aside for 10-12 mins until the mixture froths.

2. Mix in the flour and salt and knead gently. Place in a greased bowl covered with cling wrap for an hour, until the dough doubles in size.

3. Knead on a floured surface for 10 mins and transfer to a greased loaf tin. Cover with cling wrap and let it rise for another 1 hour. It will again double in size.

4. Bake in a pre-heated oven at 200 C / 390 F for about 20 mins until the crust turns golden brown.

5. Slice and enjoy!
We had this with some home-made hummus when it was still warm, and let me tell you, the feeling that I created all this, was awesome!

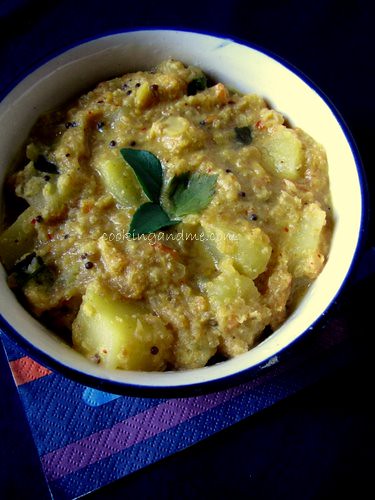
Freshly baked white bread with hummus

Try it and drop me a line, won't you? 

This goes to Susan's Yeastspotting, a weekly event that showcases all the yeast-y goodness out there!

Monday, March 30, 2009

Still Savory: Mushroom Turnovers With Sour Cream

Dear faithful and fair-weather readers,

I've been feeling sort of guilty about not tackling another behemoth of a recipe like this one or this one or this one, all of which I have had my eye on and would love to tackle. AND will, soon. In four week's time, I will be permanently reunited with my baking companion, matt, as well as a food processor. This will be blog-changing...

But in the mean time, I am trying to make do. The following is a recipe that tools-wise only called for a rolling pin, which my roommate had. YES! And despite its simple ingredients list and (dishonest) stated prep time of 25 minutes, it was definitely still challenge enough for me to mess it up... as you will see.


and mine :(

sooooo, it started off easy enough: olive oil, onions, mushrooms, salt and pepper.

But then I had trouble rolling the puff pastry out to the 20x10 inches the recipe called for.

which led to me not trimming the edges like I was supposed to because 1. I thought I needed all the space I could get and 2. at the time, I didn't see the harm in it.

Then I saw the harm. Not only did they end up looking much less uniform/ Martha-esque, but functionally, the edges didn't line up and so they didn't seal up properly and so they leaked juices everywhere:


And due to this leaking, they totally stuck to the pan. So sad.

That being said, they tasted pretty good and even better with a healthy portion of sour cream.

Sunday, March 29, 2009

Potato Saagu / Aloo Saagu Recipe


Potato Sagu / Aloo Sagu Recipe
The first time I heard about this recipe is from my mother in law. She mentioned it when talking about a buffet lunch they went to and how the aloo sagu tasted really good. When I said I hadn't heard of it before, she gave me the rough recipe. I made some notes but then forgot about it. This happened before I was gifted the awesome Simply South by Chandra Padmanabhan

The saw the recipe again in that book with very detailed ingredients and a nice picture too, under the title Urulaikizhangu Sagu, so I had to try it. Its a bummer that khus khus (poppy seeds) are not available in Singapore (something to do with how you test positive for drugs if you have eaten this!). I hear its even banned so trying to ship it in from India may not be such a good idea either. 

So my version does not have khus khus in it, sadly. But if you have it handy, please add it in. I am sure the taste will differ considerably! 
Potato Sagu  / Aloo Sagu Recipe

What I Used:

5 medium potatoes - boiled, peeled and cubed
1 1/2 cups coconut milk
1 onion, chopped
2 green chillies, finely chopped
1/2" piece ginger
2 medium tomatoes, finely chopped
1/2 tsp turmeric powder
salt to taste

Grind to a Smooth Paste

1 tsp poppy seeds / khus khus, powdered (I didn't have this)
3 dried red chillies
1 tbsp roasted Bengal gram / Channa dal / Kadala paruppu
1 tbsp coriander seeds / malli
1/2 tsp fennel seeds / saunf / perum jeerakam
1/2" stick cinnamon
2-3 tbsp water

For Tempering

2 tbsp oil
1/2 tsp mustard seeds
1 tsp cumin seeds / jeera / jeerakam
1/2 tsp urad dal / ulatham paruppu / uzhunnu parippu
1 tsp Bengal gram / Channa dal / Kadala paruppu
1 sprig curry leaves

How I Made It:

1. Heat oil in a pan and add all ingredients for tempering. When mustard seeds start spluttering, add onions and saute till golden. 

2. Mix in green chillies, ginger, tomatoes, turmeric and salt and fry for 1-2 minutes. 

3. Stir in 1 cup water, lower heat, cover pan and simmer for about 5 minutes. 

4. Mix in ground spice paste and potatoes and simmer uncovered for another 5 minutes until well blended. 

5. Pour in coconut milk and simmer for 1-2 minutes longer. 
Garnish with fresh coriander leaves and serve hot with roti, poori or steamed rice. 

Potato Sagu / Aloo Sagu Recipe
Notes:

- You can use this spice paste base for any vegetable or even a mix of vegetables. A great idea to use up the leftover vegetables almost rotting in the fridge. 

- If you have a different version or do something differently, please leave a comment, I would love to try it differently!


Maple Garlic Tempeh Balls

Spring is slowly coming to the North which means it is maple syrup time! Of course, we had to pack up the kids and head out to the local sugar shack. We hiked through the forest, checked out the 70 kms of piping bringing sap to the shack, made maple syrup taffy, bought maple sugar candy, and loaded up on syrup. There is nothing like breathing in the sweet air of the sugar shack while being surrounded by dozens and dozens of bottles of syrup. We left on a serious sugar high. Tonight's recipe is a take on honey garlic meatballs. Some recent comments on my tempeh meatballs made me rethink the recipe to make them a bit firmer.

INGREDINETS
Makes 25 tempeh balls
- 1 8.5 oz pkgs tempeh
- water
- 1 tbsp soy sauce
- 1 tsp salt
- 1 tbsp Montreal Steak Spice
- 1 small onion, coarsely grated
- 1 garlic clove, finely grated
- 1/3 cup instant oatmeal
- 1/3 cup vital wheat gluten
- 1 tbsp cornstarch
- 1 tbsp instant tapioca
- 1 tsp ground fennel seed
- 1 tsp sage
- 1 tsp thyme
- 1 tsp oregano
- 1 tsp parsley
- 1 tbsp soy sauce
- 2 tbsp HP sauce, or BBQ sauce

Sauce
- 1 1/4 cup water
- 1/3 cup maple syrup
- 2 large cloves of garlic, minced
- 1 tbsp soy sauce
- dash of hot sauce
- salt to taste
- 1 tbsp cornstarch

- 2 green onions, finely chopped

METHOD
1. Cut tempeh into 4 pieces and place in a sauce pan. Add enough water to cover the tempeh, along with the soy sauce, salt, and steak spice. Bring to bubbling then simmer for 10 mins. Remove from water and let cool.
2. Grate tempeh and mix with onion, garlic, and the rest of the ingredients in a large bowl. Mix well with your fingers and knead for 1 min.
3. With wet hands, form into 25 balls. Let rest for 5 mins to firm up.
4. Heat a thin layer of oil in a non-stick frying pan over med-lo heat. Add meatballs and cook for 15 mins, turning regularly, until browned all over. Remove from pan.
5. Whisk together sauce ingredient and add to pan. Bring to bubbling and simmer for 5 mins, letting sauce thicken and garlic cook. Add meatballs and turn to coat. Cook for a few mins more to heat through. Right before serving, sprinkle with green onion.

Sap on its way to the sugar shack.

Thursday, March 26, 2009

Carrot and Baby Corn Stir-Fry Recipe

This recipe is from Das Sreedharan's Easy Indian, and he is right, it is easy! The book is a good mix of really simple recipes like this one and ones that require a bit of practise, like Indian dumplings. Even then, the entire book has recipes with easy-to-get ingredients and something all Indian kitchens stock up on anyway.

Though there is nothing much that's unique or different about the recipe, the combination was quite new to me, something I hadn't tried before - carrots and baby corn! The crunchiness of the baby corn offset the soft cooked carrots and the simple masala mix gave it a nice twist.
Carrot and Baby Corn Stir-Fry Recipe

What I Used:

Carrots - 1 cup, cut into long thin pieces
Baby corn - 1 cup, quartered into long pieces
Onions - 1/2 cup, chopped into thin long slices
Red chilli powder - 1/2 tsp
Garam masala or curry powder - 1 tsp
Mustard Seeds - 1/4 tsp
Oil - 2 tsp
Salt - to taste
Fresh cilantro / coriander leaves - to garnish (optional but highly recommended)

How I Made It:

1. Heat oil in a pan and add the mustard seeds. When they pop, add the onions and fry until soft and transparent.

2. Add the chilli powder and salt and fry for another 30 seconds. Then add the chopped carrots and sprinkle some water on the it. Cook closed for about 5-7 minutes until the carrots are cooked through. Make sure to check in between to ensure that they don't burn and the carrots don't get too mushy.

3. Increase the heat to high and add the baby corn, stirring continuously until the vegetables mix well. Lower the heat, mix in the garam / curry masala and adjust salt if required. The baby corn should still be crunchy so remove from fire about about 2 mins.

4. Garnish with chopped cilantro and serve hot with steamed rice or wrapped in a chapati / roti.

Wednesday, March 25, 2009

White Bean Bruschetta

I had a serious hankering for some bruschetta, most likely because I had just baked some bread and wanted to put it to good use. Much to my dismay, I was totally out of tomatoes. I decided to sub in some white beans and proceed forth as planned (plus, the tomatoes this time of year are pretty pathetic). I am not sure what I thought of the final product. I liked the flavour, but I'm not sure about the texture of the bread and the beans together. Anyway, here is the recipe if you are interested.

INGREDIENTS
- 12 slices of bread (I cut slices of Italian bread in half)
- olive oil
- 1 garlic clove
- 1 can cannelini beans, drained and rinsed
- 2 tsp olive oil
- 1 tbsp balsamic vinegar
- salt and pepper to taste
- 1/4 cup chopped fresh parsley (or basil, if you have some)

METHOD
Heat the broiler in your oven
1. Lightly crush the garlic clove, then rub on the slices of bread. Brush the bread with olive oil. Place on a cookie sheet. Toast under the broiler for a few mins, until lightly browned. Remove from oven.
2. Toss beans in oil and vinegar and season with salt and pepper. Mix in parsley and divide evenly on the bread slices. Return to the oven for a few mins, until bread is nicely toasted and beans had heated up. Serve immediately.

Vangi Bhath / Brinjal Rice Recipe

vangi bhath / brinjal rice
I love anything with eggplant in it. Roasted, grilled, fried, sauteed, curried, you name it! I don't remember liking kathirikkai so much as a kid but now, I pick it up every week during vegetable shopping. In Singapore the more common variety is the longer purple ones that are called Japanese brinjal. The good part is, they usually don't have worms or bugs in it and stay fresh in the fridge for a longer time.

But I really couldn't resist these smaller eggplants that we see more in India. I got it from the local Malayali store and immediately made vangi bhath with it - something amma didn't make and so had been on my to - do list for a long long time.

vangi bhath / brinjal riceCube the brinjal and dunk them into the tamarind juice

The basic recipe is from Chandra Padmanabhan's Southern Spice, a book that I turn to so much for anything South Indian!

Vangi Bhath Recipe

What I Used:

1 cup cooked rice (I used ponni rice but basmati will work too)
A marble-sized ball of tamarind
1/4 tsp salt
1/2 tsp turmeric powder
6 small aubergines / eggplant / kathirikkai

For Spice Powder:

2 tsp oil
1 tbsp coriander seeds
1/2" stick cinnamon
2 cloves
4 dry red chillies (I'd make it spicier next time)
3 tsp Bengal gram / Chana dal / Kadala paruppu
2 tsp Urad dal / ulatham paruppu / uzhunnu parippu
1 tbsp grated coconut (fresh, frozen or dessicated)

For Tempering:

2 tbsp oil
1 tsp mustard seeds
1/2 tsp cumin seeds / jeera / jeerakam
1/2 tsp asafoetida / hing / perungayam
1 dry red chilli, torn into pieces
1 sprig curry leaves

For Garnish (Optional)

2 tsp ghee
1/4 cup halved cashewnuts

How I Made It:

1. Soak tamarind in 1/2 cup warm water for 10 mins and extract juice. Add salt and turmeric to this and transfer to a pan.

2. Cube the aubergines and add to the tamarind juice and let soak for 15 mins.

3. Heat oil for spice powder in a pan and add remaining ingredients for spice powder. Fry till spices are fragrant and the dals turn golden brown. Cool and grind to a powder.

4. Heat ghee for garnish in the same pan (if using) and fry cashewnuts until golden brown. Set aside.

5. Heat oil for tempering in the same pan and add all the ingredients for tempering. When mustard seeds start popping, add the aubergines with the tamarind extract.

6. Cover pan and simmer for about 10 mins till the aubergines are tender and water is almost completely adsorbed.

7. Mix in the cooked rice and spice powder and remove from fire.

8. Garnish with the fried cashewnuts and serve warm with raita.

vangi bhath / brinjal rice

Monday, March 23, 2009

Adding Banners To Food Pics Using Powerpoint

Sometimes you feel your pictures need some zing, something extra to take it to the next level. The answer may not always be picasa, or photoshop or other editing software. It could even be Powerpoint!

When I started off food blogging, I used powerpoint to add watermarks, borders and banners to my pictures. It was simple and I used powerpoint so much at work that it didn't seem like much of an extra effort to me. As soon as Picasa came up with the feature to add text to pictures, I slowly moved away from powerpoint.

But, I still use it to jazz up my pics a bit, add a border and make it look a bit different, maybe like a cookbook cover which is what a lot of you said after seeing this picture of mine :)

So let's see how we can make this picture..

.. look like this in a few easy steps.


I recently upgraded to MS Office 2007 so this tutorial is using 2007. That really shouldn't be a problem because all the features we are using to do this is very much available in 2003 and older versions too. The menu options may be different so I have tried to highlight those here. I am doing this from memory so please bear with me :)

1. Ok so let's start with opening Powerpoint (Ppt).


Ppt 2007 users click on the ppt icon from your start menu.

Ppt 2003 users.. err.. do the same :D (ok, lame joke)

2. I usually like to work on a plain slide but that's just me. This is not a necessary step but just nice-to-do. So if you'd like to work on a plain slide,

Right click on the slide --> Layouts --> Choose blank layout

For 2003 users, the layouts will open on the right hand side of the page.


3. Next, we need to open the picture we want to edit. For that, click on,

Insert --> Picture --> and browse for the picture in your computer.

For 2003 users, the options are the same except that you would need to specify 'picture from file' before you can browse and add it on.


So here's our picture, ready to be worked on. Notice the extra white spaces from the slide on both sides? Don't let that bother you too much, we are going to get rid of it at the end.

4. Next, we need to add the basic rectangular banner on which we can type our text. For that, go to,

Insert --> Shapes --> and pick the rectangle from the list


For 2003 users, you should be looking for basic shapes. You will find the rectangle in a toolbar at the bottom of your slide. Click that and we are good to go.

5. Drag and draw the rectangle to the desired size.


You can decide to put it in the top centered, to one side like I have done, at the bottom to the right. This is where you can let your imagination run wild and come up with unique ways to make your pics stand out.

6. We have the basic shape in place, so now its time for the fun part! The first and most important thing is to adjust the transparency of this box so that it doesn't look like its blocking out a part of the picture.

To adjust transparency,

Right click on picture --> Format shape


You'll see this box pop up:


Choose fill from the left hand side and move the transparency slider to the right. I have chosen 75% here.

You can also change the colour of the box (just above transparency slider) to match your picture (shown below)


2003 users, right click on the picture. If I remember correctly, you should see an option to 'Format Picture'. If not, use the Format menu option and choose picture.

7. Next step that's quite small but significant is to change the outline properties of the box. Ppt 2007 automatically chooses a blue box as we saw above and changing the fill colour and transparency still leaves the outline of the box in a dark blue.

To change this, choose Line Color from the 'Format Shape' box as below.

You can either pick a different colour that matches the box colour above ..


.. or choose 'No Line' so that the box just becomes seamless (the outline matches the colour of the box). This is the option I always choose.


Here is our what we are left with. I still remember how excited I was the first time I did this!


8. To add text, just click on the box and start typing. Ppt 2007 defaults the text to a dull white.


The options to edit the font are endless. Choose a font and colour you feel complements your picture the best.

I chose a boring maroon and an even more boring font because I was a bit tired of taking screenshots. Forgive me.


9. We are almost done! Let's save the file. Since this is a powerpoint presentation currently, you will need to save it as a picture. For this,


Click on the windows icon in the top left corner and choose Save As --> Name your file and from the drop down below it, choose JPEG format.

For 2003, its File --> Save As..

Voila! Done!!

10. But wait, your picture has that white space on both sides, right? No worries.

Open it in Picasa.. (notice the white bars on both sides?)


.. and crop it off!!


Go to File --> Save as and save your cropped file.

You will feel really happy when you open your saved file and see this! Especially if you are doing this for the first time, trust me!


I know this sounds like a lot of steps but if you know your way around in powerpoint, its really not hard.

Please let me know your thoughts on tutorial and if I have made any silly mistakes in the 2003 instructions. I would appreciate it if any of you who have Ppt 2003 can let me know the exact options to do the steps.

Some of the screenshots may be fuzzy because I used the age-old print screen option. I do funny things when I am tired or lazy or cranky.

For previous posts in the Food Photography Basics series, please click HERE.

As always, if you try this out, do drop a line in the comments and I would love to see it!

Sunday, March 22, 2009

Lemon Parsley Potatoes

I have an abundance of lemons. I keep buying them and never using them. This is a variation on good ol' parsley potatoes, but I think the lemon adds a nice touch.

INGREDIENTS
- 4-5 red potatoes, cut into chunks
- salted water
- 2 tbsp olive oil
- juice of 1 lemon
- sea salt and pepper to taste
- 2-4 tbsp chopped fresh parsley

METHOD
1. Place potatoes in a pot and cover with water. Add some salt and bring to boil. Simmer for about 10 mins, until potatoes have softened.
2. Heat oil in a frying pan over medium heat. Drain potatoes and add to pan. Fry for about 10 mins, until potatoes are cooked and lightly browned.
3. Add lemon juice and stir, until evaporated. Season with salt and pepper and remove from heat. Stir in as much parsley as you see fit. Serve.

Mini-Étempt: Parchment-Baked Salmon

I'd never baked anything in parchment before and so had previously placed it in the realm of ridiculous recipes I would never make/ thought it would be perfect for this blog, however it was soooooooooo easy that I sort of feel guilty about even posting it, but then, because it was so easy and so delicious, I wanted to share it. (What a conundrum!)

OK, I'm posting it. Here we go. Martha's version:
And mine:

For me, the biggest challenge was getting over the task of buying fish at the supermarket. And when I got there, sure enough there was no black bass, only chilean sea bass and since I watch Top Chef/ worry about overfishing, sustainability, etc., I knew that that was a definite NO for me. BTW, this website is really cool...just type in any fish and it tells you the deal on what you want to buy, etc. So, luckily, I knew my next bet would be wild-caught sockeye salmon. Isn't it pretty?

Honestly, I can't get over how easy and simple this dish was. I'm going to add it to my list of "recipes I feel comfortable making and look good while making it." (I don't really have a list like that and if I did, I wouldn't add this recipe to it, I'd add this recipe).