Thursday, September 30, 2010

Black Forest Cookies Recipe

I have quite a few recipes bookmarked from The Purple Foodie but these Black Forest Cookies have been on top of the list for ages. I had trouble finding dried cherries and then gave up looking for them and substituted with dried blueberries instead. Who is to know, right?

Black Forest Cookies Recipe

What I absolutely LOVED about these cookies is that they turned out almost exactly like the Double Chocolate Chip cookies from Subway. Raise your hands if you love those. Yep, me too!! So this is a total win in that sense.

Black Forest Cookies Recipe
Dried Bluberries
But, it was sweet. It was very sweet. It was so sweet that even my sweet tooth were nudging me and asking what the heck I was thinking eating three of these in one shot. So I had to have half at a time.

Black Forest Cookies Recipe

 Not really. Do I look like someone who can eat just half a cookie and stop at that? Nope. I am not that someone.

Black Forest Cookies Recipe

Anyway, these were very easy to bake up, the only catch being, you need to refrigerate the batter for a few hours for it to firm up.

A side story here is, I was baking these cookies when my old oven just refused to turn on. There was a loose contact and the current batch in the oven were turning all gooey and running over each other, and that batter went to waste. That's when I decided this is the last straw, took a cab to the nearest kitchenware store and bought myself a new oven! I came home and baked the rest of the batter after that. That reminds me, I am yet to share pics and details of my new oven. Stay tuned to MMKT for that!

Black Forest Cookies Recipe

Even then, mine got super runny before I baked them and so the cookies were super flat. Didn't stop me from eating them though, they were really good!

Black Forest Cookies
Adapted from: The Purple Foodie
Makes 12 large cookies

Ingredients:
40gm / 1/3 cup all purpose flour or maida
1/2 cup white sugar
3/4 cup firmly packed brown sugar
3 eggs
1/2 tsp baking powder
8 oz / 225gm baking chocolate bar (semi sweet or bitter sweet will do)
1/2 cup semi sweet chocolate chips
1/3 cup white chocolate chips
1/3 cup dried blueberries
5 tbsp/75gm butter
1 tsp vanilla extract
A pinch of salt (if using unsalted butter)

How I Made It:

1. In a double boiler, melt the chocolate bar (broken into pieces) and the butter until smooth and shiny. Set aside.

2. Whisk flour, salt and baking powder together. Set aside.

3. In a large bowl, whisk the eggs and both sugars for about 5 mins (if using electric beater) or 10-12 mins if doing by hand. The mixture should be pale and thick.

4. Add the cooled butter-chocolate mixture and the vanilla to this and mix until just combined. Don't overbeat. Add the flour mixture to this and mix until all the flour disappears into the batter. Again, don't overbeat, just combine gently.

5. Next, mix in both the chocolate chips and the dried blueberries. The batter will be a bit runny.

6. Refrigerate this for 6 hours or overnight.

7. Preheat oven to 375F / 190C. Line a baking sheet with parchment paper and use an ice-cream scoop to scoop out the batter and place on the baking sheet at a distance of 2". If baking in multiple batches, return the batter to the fridge immediately after filling up one sheet.

8. Bake for about 12-15 mins until the top looks crackly. Cool and store in air-tight jars for upto 3 days.

Note: I have given the adjusted amounts of sugar since I found my cookies way too sweet. Adapt according to your taste.

Black Forest Cookies Recipe

Wednesday, September 29, 2010

LG Convection Microwave - Review

I can't believe its been a month since I updated something in here but I am super happy I have a fantastic review sent by Madhuri on her LG Convection Oven.

Before you read on, here are a couple of articles you may find useful:

- Types of Ovens
- Samsung Convection Oven Review

Over to Mads!

"Hello there y’all! It feels good that I have finally kept my promise to Nags, and sent her this read to share with you all here on MMKT. Nags, a big, heartfelt ‘Thank You’ to you for giving me an opportunity to share this article about my LG convection oven with your readers. I’m tickled pink!

I’ve spent a better part of my life baking, thanks to the baking bug running in the family. It goes right back till my great grand-mom, and am I glad I inherited those genes or what?!! Thank you fore-mothers! When I was little, I used to see great-grandmom and grandmom bake in their stove-top oven, filled with sand, and a cake would take what felt like eons to bake in it. The taste was great nonetheless. Later, when I was old enough to help Amma with baking, she got a round electric oven, which was treated with more love and care than anything else around the house back then. It was a piece of treasure to Amma and me. God, how many baked goodies we’ve made in that oven…I can’t even remember. Come Saturdays, and Nani (my maternal grandmom) would come over, and the three generations of women in the house, would be huddled in the kitchen, baking away! I couldn’t care less about getting in their way, but that is how I’d say the bug latched onto me like a leech, and hasn’t let go till date. We baked with the round oven for a good 15 years, and then Amma got a MW Convection Oven to save space in the kitchen. And ever since then, I’ve been in love with MW Convection ovens, ‘cos they work like a charm!

So when I had to set up my house, I opted for a 26 litre, LG Convection MW Oven (Model No - MC
7648WH) after a lot of market and internet surveys on price/features/capacity. It fit the budget that wehad set, and I was happy with the features. So it was a win-win situation for both the hubby, and me! He still wins hands down ‘cos he gets to eat all the scrummy stuff I churn out from the oven, doesn’t he? ;)
My LG Convection oven I should say, has never failed me (knock on wood) and I’ve never once regretted buying it. It is one of the best deals in the market if I could say so, without sounding partial to LG. Every baked goodie featured on Cook-curry Nook has been made in my LG oven, and I’m proud of it.

The first time I baked in it, I made these Chocolate Fudge Brownies, and they were simply yum-de-dum! Apart from the regular Microwave mode, and having a convection mode to bake in, the oven also boasts of grill and combination cooking modes.

Key Features:
  • Intellowave Technology
  • Multi cook Tawa
  • 36 Auto Cook Menus
  • Indian Auto Cook Menu
  • Next Step Guide
  • Quick Start
  • Steam Clean
  • Health Plus Menu
Where we bought it: Devi International Electronics, Jayanagar, Bangalore.

How much it cost us: INR 11990 was the quoted price when we bought it in December 2009; however, since we bought 4-5 of our big electronic gadgets from the store while setting up our house, we got it at INR 10,000, which was quite a steal. I’m sure this model costs a tad less now. For more information, you could also look it up on the LG website here."

Thanks for sharing your review on your LG convection oven Mads. I am sure people will find it useful :)

Monday, September 27, 2010

Super Easy Thai Coconut Rice

I live fried rice as a quick and easy answer the question of what is for dinner. This dish is nothing fancy, for sure, but it tastes great and the kids love it. You can use chickpeas, tofu, or seitan in place of the Tofurky--it's just what I had on hand. Try to pick a veggie mix with some great colour that can contrast the yellow rice. I really don't put a lot of curry paste in because I enjoy the creamy mellowness of the coconut milk and tumeric.

INGREDIENTS
- 2 tbsp oil
- 1 large sweet onion, halved and thinly sliced
- 2 garlic cloves, minced
- 2 tbsp lemongrass paste
- yellow or red curry paste to taste
- 4 cups cold cooked rice
- 1/4 to 1/2 cup coconut milk
- 1/2 tsp tumeric
- 1 tbsp hoisin sauce
- 1 pkg Tofurky lunch meat, cut into strips
- 3 cups frozen veggies (some Asian mix), thawed
- salt to taste

METHOD
1. Heat wok over med-hi heat, then swirl oil in. Add onions and stir fry for 2-3 mins, until golden and softened. Add garlic and stry fry 30 seconds. Then add lemongrass paste and curry paste and mix well.
2. Add rice and fry for a few mins, turning to coat the rice well. Add coconut milk, tumeric, and hoisin, and lower heat to medium, mixing well. Add more coconut milk of mixture is too dry.
3. Add Tofurky and veggies and heat through. Season with salt and serve.

Sunday, September 26, 2010

Pacha Manga Chammanthi / Raw Mango Chutney

Q: What do you do when you pay $2.50 for one raw mango on a Sunday night?
A: Make chammanthi with it on the same night and take sparkly pictures with unnaturally high ISO and a tripod.

pacha manga chammanthi recipe

Or atleast, that's what I did.

Chammanthi is a Malayali's comfort food. Although it can be roughly translated to chutney in English, its not watery like chutney tends to be. Pacha Manga Chammanthi is almost always served with kanji or Indian congee, to balance the blandness but I served it with fresh, hot dosas!

Pacha Manga Chammanthi
Serves 4

Ingredients:
1/2 of a raw mango or about 1/2 cup peeled and chopped raw mango
3/4 cup grated coconut
3 green chillies
A small piece of ginger
1 shallot
2-3 curry leaves, optional
Salt to taste

How I Made It:

1. Grind the green chillies, coconut and mango pieces well together.

2. Add the ginger, shallot, curry leaves if using, and salt and pulse for a few seconds until well blended. I added a few drops of water to bring it all together.

pacha manga chammanthi recipe

Serve with kanji or dosa or rice and curry.

Notes:

- Its very hard to give a rigid recipe for chammanthi. The proportion of ingredients is always dependant on persona tastes
- For this chammanthi, adjust the ratio of coconut to mango according to the sourness of the mango and how sour you like your chammanthi
- You can omit the ginger, shallot or both if you want to keep the flavours more plain and focussed on just the mango. I sometimes omit the shallot but love the heat from the ginger
- Add a very small piece of tamarind if your mango is not sour at all. Then again, that mango is not best suited to make a chammanthi anyway

Coming soon: how to take pictures in the night with a point and shoot and no tripod, as part of the food photography series. Stay tuned!

Saturday, September 25, 2010

The Splendid Table & Their Chicken Curry with Gentle Spices

Bon Appetempt is all grown up? A few months shy of two years old, and it's old enough to go out and get on the airwaves all by itself. And not just any airwaves—American Public Media's The Splendid Table and an interview with the inspiring Lynne Rossetto Kasper!

I'd previously admired her and Sally Swift's cookbook The Splendid Table's How to Eat Supper at my sister-in-law's house, but the moment after I was contacted by the show, I dropped this in my online shopping cart and pressed BUY. It was time to stop, in culinary-speak, waffling and time to learn how to eat supper.
I was drawn to many of the photographed recipes, but this cozy, mellow curry sounded perfect for the fall weather L.A. was experiencing a few days ago, right before our temperatures skyrocketed.

The Splendid Table's version:

our version:

I like when recipes don't just tell me what to do, but also tell me which parts of the process are a bit more significant than the others. Along the margins of the recipe, in big bold letters, reads: "Also essential to the curry are Steps 2 and 3 in the recipe: sauté the curry paste until the sauce 'breaks' (the oil separates out from the rest of the sauce) and reducing the first addition of yogurt. Please follow the instructions to the letter; in these two steps lies the success of the curry."

And if this is the first time you're making a curry like this, which it was for me, might I recommend that you do it with someone in a nearby room to whom you can continue to ask, "Do you think the sauce has broken?" "Do you really? I'm not sure if it has." But in retrospect, it's pretty obvious when the sauce breaks. It gets all splotchy and well, broken.
This curry was so flavorful. I was thinking of the leftovers all day at work today. And here it is on day two:
The sauce looks a little thicker, no? I would say the first time around, my sauce never really thickened. My guess is that having cooked it in a straight-sided 12-inch sauté pan like the recipe called for would have really helped on this front. Though I can't be sure, I think my nine-inch, curve-sided pan caused the ratio of sauce to surface-of-the-pan to be too high, and so the sauce never really had a chance to kind of dry out before I added the yogurt. Do you know what I mean? Matt says he doesn't know what I mean.

But honestly, thick or thin sauce, we both loved this meal. Twice.

Which brings us to thanking the Splendid Table crew, twice. Once for recognizing my little blog and then again for the curry.

And so for those of you who aren't my facebook friend or following me on Twitter, here's the interview. Enjoy!


Recipe via How to Eat Supper:

CURRY PASTE
1 large onion, cut in half
6 large garlic cloves
One 3-inch piece fresh peeled ginger
generous 1/2 tablespoon blend of ground coriander, ground cumin, and fresh-ground black pepper
1/2 teaspoon salt
1/2 ground cinnamon
2 medium-sized ripe tomatoes; or 3 or 4 canned tomatoes
1 or 2 jalapenos, stemmed and seeded (or not, if you like it hot) *I used two not seeded and it was fantaaaasticly spicy**
1/2 cup water

CHICKEN
cold-pressed vegetable oil
2 cups organic plain whole-milk yogurt
2 pounds boneless, skinless chicken thighs (organic if possible), ct into bite-sized pieces
1/3 cup water
salt and fresh-ground black pepper
2 tight-packed tablespoons fresh corander leaves, chopped

1. In a food processor, combine one of the onion halves with the garlic, ginger, spice blend, salt, cinnamon, tomatoes, jalapeno, and the 1/2 cup water. Puree, and set aside.
2. Thin-slice the remaining onion half. Film the bottom of a straight-sided 12-inch sauté pan with the oil, and heat it over medium-high heat. Add the sliced onion, and sauté until it begins to color. Add the curry paste, reduce the heat to medium, and sauté for 10 minutes, stirring often with a wooden spatula, until the oil separates from the curry. Don't rush this step. Thoroughly sautéing the curry paste sets up the foundation of the dish.
3. Blend 2/3 cup of the yogurt into the curry sauce and simmer, stirring and scraping up the curry paste from the bottom of the pan, until the yogurt thickens and then nearly cooks away, 8 to 10 minutes.
4. Stir in the chicken, and add the remaining yogurt and the 1/3 cup water. Bring the mixture to a slow simmer. Cook, uncovered for 8 minutes, or until the chicken is cooked through and tender.
5. Lift the chicken out of the pan with a slotted spoon, and place it in a serving bowl. Raise the heat until the sauce is boiling. Boil it down until once again it is so thick that the oil separates from the curry paste. Taste the sauce for seasoning, and pour it over the chicken. Sprinkle the curry with the fresh coriander.

Friday, September 24, 2010

Masala Vada / Masala Vade Recipe

I am so tempted to claim this is the authentic Andhra masala vada recipe. I am this close to actually doing it, but the truth of the matter is, I am not sure if it is. I checked a few sites that have Andhra recipes and all of them give many different variations to the masala vada recipe and now, I just don't know.
Masala Vade Recipe

But, that doesn't take away from the deliciousness of this crunchy snack that I served with rice, melted ghee, Gongura Pachadi and Gongura Adugula Pappu. We definitely had a good Andhra meal that day for lunch!

Andhra Masala Vada Recipe
Makes 12-15 small vadas

Ingredients:
1 cup channa dal / kadala paruppu / Bengal gram
A few shallots or 1 small onion, chopped fine
1/2 tsp jeera / cumin seeds
3 green chillies, cut into thin circles
1" piece of ginger, grated
2 pods of garlic, minced
1/2 tsp garam masala powder
A few curry leaves (I added lots!)
Salt to taste
Oil

How I Made It:

Soak channa dal for atleast 2 hours. Drain and grind to a coarse mixture with all other ingredients. I leave some whole dal out while grinding and then add them on to the mixture before shaping, so that there's a bite in the vada. Make sure you add as little water as possible, in fact, a few drops should be sufficient, if at all you need it.

Shape into small discs and deep fry. I made these in the paniyaram pan that I use for pakoda and other fried goodies.

Masala Vade Recipe

I really should make simple thaalis like this more often!

Wednesday, September 22, 2010

Teff Biscuits

Thinking of making the Ethiopian Soup I posted yesterday? Then you also need to make these teff biscuits. The recipe is adapted/veganized from Rienhart's Artisan Breads Everyday--the best biscuit recipe around, I think. You really do need a pastry scraper for this recipe, so if you try it without one, don't say I didn't warn you! The method is similar to making croissants or other laminated doughs. The alternating hydrophilic and hydrophobic helps the biscuits rise and contributes to their flaky texture. These biscuits are a little more dense because of the teff flour, but are still remarkably tender.

INGREDIENTS
- 2 tbsp apple cider vinegar
- 8 oz coconut milk, or plain soy milk
- 1/2 Earth Balance margarine (1 stick of the baking margarine)
- 2.5 oz bread flour
- 2.5 oz all purpose flour
- 3.5 oz teff flour
- 1 tbsp sugar
- 2 1/4 tsp baking powder
- 1/4 tsp baking soda
- 1/4 tsp salt

METHOD
Line a baking sheet with parchment paper
1. Whisk vinegar into the coconut or soy milk in a small bowl. Keep in the fridge.
2. Put the margarine in the freezer for 30 mins to get nice and cold. Meanwhile, mix all the rest of the ingredient together.
3. When margarine is cold, grate it into the flour mixture, then work it with your fingers into something that looks like very coarse bread crumbs. Don't make the mixture too fine--some chunks of margarine is what you want.
4. Add coconut or soy milk mixture and stir until just combined. The mixture will be very wet (teff has no gluten) and starting to rise from the action of the soda and vinegar.
5. Turn the mixture out on to a very well floured surface. Dust liberally with flour, then pat the dough into a rectangle, about 1/2 inch thick, and square off the sides with the pastry scraper. The exact size does not really matter. The key here is that it needs to be big enough to fold into thirds, like a letter. Using the pastry scraper, fold the dough like a letter (it will most likely fall apart, on the first turn, so be patient). Rotate the dough 90 degrees and repeat, dusting with flour as needed. Rotate and repeat. Rotate and repeat. By this time enough flour will have been incorporated into the dough to make it more firm and workable.
6. Pat dough out into a final rectangle, 1/2 inch thick, then cut with the pastry scraper into whatever size biscuits you want (I like smaller ones for the kids, so I get about 20). Place on prepared baking sheet and put in the fridge while the oven heats.
7. Heat oven to 500 degrees. When heated, put baking sheet in, reduce heat to 450, and bake for 8 mins. Rotate the pan and bake for another 6 mins (more if you made huge biscuits). Serve while still warm.

Tuesday, September 21, 2010

Stir-Fried Indian Radish Recipe

I found some gorgeous Indian radish in Little India the other day and had to buy a bunch. They were fresh, with the leaves still on and quite small so I used up about 5 of them to make enough for the two of us.

Cut radish is one of the prettiest vegetables I know. Such pretty design!

Sliced Indian Radish

Yes, that's my hand. You may not know this but I have once been a hand model for an ad that featured in a Malayalam magazine called Vanitha. True story.

IMG_3151

But the radishes surely don't need my hand to enhance its own beauty. Snobs!

Stir fried Indian radish

This recipe is uber simple, can be put together in a jiffy and retains a bit of the vegetable's natural flavour and crunch.

Stir Friend Indian Radish Recipe
Serves 2

Indredients:
Small white radish, cut into thin discs - 2 cups
Thinly sliced onion - 1 small (or 8 shallots)
Crushed garlic - 1 tsp
Chilli powder (adjust to taste) -  1 tsp
Jeera / cumin - 1/2 tsp
Coriander powder - 1 tsp
Garam masala - 1/4 tsp
Amchur / dry mango powder - 1/4 tsp (or a squeeze of lime juice)
Salt to taste
1 tbsp oil
1/4 tsp mustard seeds

How I Made It:

1. Heat the oil in a pan and add the mustard seeds. When they pop, add the sliced radish and shallow fry in low heat until almost-cooked. This will take about 10-12 mins. Adjust the amount of oil if the pieces seem to be burning or too dry.

2. Add sliced onion/shallots, garlic, chilli powder, coriander powder, jeera and amchur and stir well to coat the radish pieces for a min or two. Add salt.

3. Top off with the garam masala, give it a final stir before removing from fire. The pieces will be soft yet not too much and will hold their shape.

IMG_3159

I served it with steamed white rice and ridge gourd "bajji"(recipe coming soon!)

Ethiopian-Style Soup

I say "Ethiopian-Style" soup because the flavours are inspired by the Ethiopian stews I like to make, but is not any "real" Ethiopian dish that I know of. In many ways it is just a simple and thinned down stew packed with that nourishing lentil-y goodness that I love about Ethiopian food. This was also a great way to use the first squash of the season (see below). I used Bonbon which had a delectable texture and gave the soup a wonderful sweetness to offset the spicy heat. It was even better the next day.

INGREDIENTS
Makes a lot
- 2 tbsp margarine
- 1 large sweet onion, diced
- 1 1/2 cup sliced shallots
- 6 garlic cloves, chopped
- 2 tbsp minced fresh ginger
- 1 tsp tumeric
- 1/2 tsp ground cardamom
- 2 tsp cinnamon
- 1/2 tsp nutmeg
- 1/2 tsp cloves
- berbere to taste
- 2 cups red lentils, rinsed
- 10 cups water
- 6-8 cups chopped squash (or sweet potato)
- 1/4 chopped fresh parsley (more for garnish)
- salt and pepper to taste

METHOD
1. Melt butter in a large stock pot over med-hi heat. Add onions and saute for a few mins, until the onions get a nice golden brown on the edges (don't burn them, though). Add shallots, garlic, and ginger and reduce heat to med-lo. Cook for about 20-25 mins, until the mixture has nice brown colour.
2. Add spices and lentils and raise heat back to med-hi, stirring to mix everything well. When sizzling (the spices will stick a bit), add 6 cups of the water. Bring to bubbling, then cover and reduce heat to low. Let cook for at least 30 mins (longer is nicer, if you have the time, so that the lentils and onions can break down), stirring regularly.
3. Add the remaining four cups of water along with the squash and parsley, bring to bubbling over med-hi heat, then cover and reduce heat. Let simmer for 20-30 mins, or until squash is cooked through. Adjust seasonings to taste, garnish, and serve.

Monday, September 20, 2010

Burrata Cheese with Nectarines, Mâche, and Hazelnuts

We’ve talked a little bit about burrata on this show, haven’t we? (Do you think I could get the world to start calling blogs shows if I keep referring to Bon Appetempt as my show? Let’s find out!) Matt and I are obsessed with this cream-infused fresh mozzarella. Almost once a week this summer, we’ve made our dinner out of tomatoes, garlic bread and this remarkable cheese doused with just a little olive oil and balsamic vinegar.

So simple and easy, except for the fact that the very clear winner of burrata brands can only be found at Bristol Farms, an upscale and even pricier store than the ones we normally go to. (For Rachel-Zoe watchers, it's the grocery store where she goes to buy the passover turkey with her assistant and Roger. (Roger is wearing his sunglasses the whole time and not really digging it.)) So it’s a little bit of a hassle and it's kind of expensive, but this burrata is so much better than the ones found elsewhere in Los Angeles that we deal with it, smiling even, as we know what’s in store for us later.

So, when I found this recipe in Outstanding in the Field—my newest favorite cookbook—and it mentioned that the best burrata was this certain kind by this third-generation cheese maker, Vito Girardi, and that it was made in West Los Angeles, I started to freak out a bit. Was there a better burrata out there and right under my nose? (Matt and I live in what could be considered West L.A.) I Googled Vito immediately and found this LA Times article only to very-satisfyingly confirm that the burrata Matt and I have come to know and love is that very burrata by Vito Girardi. Check it out, friends. The best burrata ever. (Thanks, Sean and Sara for introducing us. It was love at first taste.)
Now, Outstanding in the Field showcases their burrata salad a little differently than we are used to. The recipe calls for nectarines instead of tomatoes, some greens called mâche and no balsamic vinegar. I was very curious.

When Matt saw what I was up to, he wasn't as curious and in fact, more like: “What the ef is mâche and why are you ruining my favorite food with it?”


our version:
Though Matt was being way harsh on the mâche, he did have a good point. What the ef was mâche? And how was it pronounced? Luckily, mâche knows that it may not be the most well known lettuce leaf on the market—helpfully, the inside of the plastic container explained: "Mâche is a delicious and delicate European salad green now field-grown in California. Its beautiful rosette shape, pleasant nutty flavor, and vibrant green color make Mâche the ultimate salad experience."

Also, thanks to NPR, I know it's pronounced mahsh, which gives me a Halloween costume idea: Monster Mâche. Thoughts?
It was a really lovely salad and one I would definitely make again. The tartness of the nectarines complemented the sweet, creamy mellowness of the burrata, and the toasted hazelnuts added to the overall indulgence. Matt, on the other hand, doesn't care for lovely when it comes to salad. He wanted a do-over and definitely made fun of what he called mache's valiant attempt at marketing itself as the ultimate salad experience. Have I mentioned Matt's garlic bread before? It's hard for lettuce and fruit to compete with that much garlic and butter.

So that's all for this show, folks. Tune in next week when we tackle either another Kenny Shopsin original or Thomas Keller's brownies or something else entirely!

Recipe via Outstanding in the Field

1/4 cup shelled hazelnuts
2 ripe nectarines
3 to 4 ounces mache
8 ounces burrata cheese at room temperature
kosher salt and freshly gorund black pepper
2 tbsps olive oil

Preheat the oven to 400 degrees.

Spread the hazelntus on a baking sheet and toast in the oven until they are fragrant and their skins loosen, 5 to 7 minutes. Transfer the hazelnuts to a plate and let cool slightly. Rub the hazelnuts in a folded kitchen towel to release their skins. Coarsely chop the nuts and set aside.

Cut the nectarines in half and remove the pits. Slice the fruits into thin wedges. Wash the mache in a  sink filled with cold water. Carefully remove any dirt or sand stuck between the leaves and discard any root ends. Dry the mache in a salad spinner.
Cut the burrata into 1/4-inch thick slices; because it is very soft, it might be easier to slice with a serrated knife. Arrange the cheese on 6 chilled salad plates. Season with salt and freshly ground pepper and drizzle with 1 tablespoon of the olive oil.

In a medium bowl, toss together the mache and the nectarines with the remaining olive oil. Season with salt. Arrange on top of the burrata. Sprinkle with the hazelnuts and serve.

Sunday, September 19, 2010

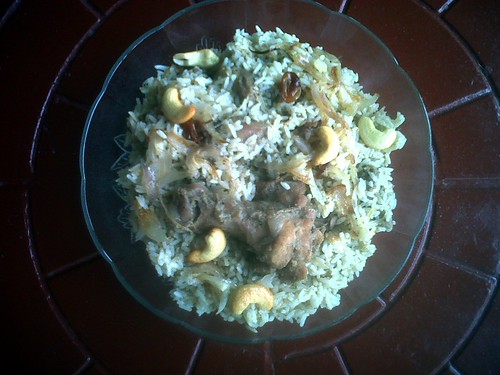
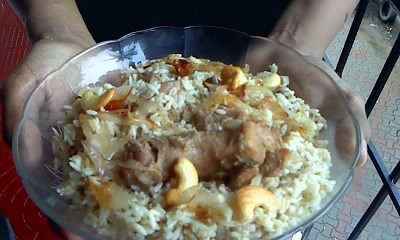
Shamshad's Chicken Biriyani / Biryani Recipe

What better way to get back fully after a lazy break from blogging? Make someone else do the work. So here's a mild yet yummy and super easy Chicken Biriyani recipe shared by my friend Shamshad. She was very apologetic about the pictures but I have to say she did a mighty good job.

Thanks Sham!

Sham's Chicken Biryani

Chicken Biriyani Recipe
Adapted from Awesome Cuisine
Serves 4-6

Ingredients:
Basmati rice -  4 cups (soaked in water for 1 hour)
Chicken pieces - 1 kg
Onions - 3 large
Ginger garlic paste - 2 tbsp
Green chilies - 5 (or as per your requirement)
Pepper powder - to taste
Coriander powder - 3 tbsp
Garam masala - 1 tbsp
Cardamom - 4
Cinnamon - a 1" piece
Cloves - 4
Salt to taste

To Marinate
Pepper powder -to taste
Coriander powder - 3 tbsp
Garam masala - 1/4 tsp
Salt to taste

For Seasoning
Ghee - 2 tbsp
Cashew nuts - 15 or so
Raisins - 10 or so
1 large onion

Method:

1. Chicken
Wash Chicken pieces. Marinate for atleast an hour with coriander powder, pepper powder, garam masala powder and salt.
Semi fry chicken pieces in a pan with little oil.

Heat oil and add onions and the ginger garlic paste. When it turns brown, add green chilies (cut into small pieces). Add coriander powder, pepper powder, garam masala powder and salt.

When it is done, add chicken pieces. Keep it for 5-10 mts till it is half cooked. In between you can turn the pieces so that it is heated equally.

Cook in pressure cooker with about 1/2 cup water. Normally 4 whistles.

Biriyani Rice
Put 2tsp ghee in the pan used to fry the chicken. Add cardamom+cloves+cinnamon.
After 2 mins, add the soaked rice. Stir well for 5 mins, else it will stick to the pan. Add the rest of the main ingredients and cook in a pressure cooker with 6 cups water (the ratio of rice:water should be 1:1.5) - normally 3 whistles for basmati rice.

Once done, mix the cooked rice and chicken.

Seasoning
Put ghee in a pan. Add onion (cut lengthwise very thin), cashew nuts and raisins. When it turns light
brown, remove and garnish the biriyani


Sham's Chicken Biryani

Serve hot with papad and raita.

Sourdough Starter: Baking Through the Bread Baker's Apprentice

Before I get into the sourdough breads in The Bread Baker's Apprentice I want to sing the praises of Reinhart's method for sourdough starter. The starter is absolutely essential, of course, but is also the most daunting aspect of making sourdough bread. The great thing about this starter is that you can abuse and neglect it and it still keeps kicking. Because the starter lives in the fridge it does not need daily refreshments and actually can be left for a few weeks (as I did when I went on holiday). Really it's the most hassle-free sourdough starter ever. My starter is now over a year old (I originally blogged about it here) and is still happy and bubbly and making great bread.

Saturday, September 18, 2010

Yom Kippur Attempt

our version:
Get it?

Hope you have an easy fast! L'Shana Tova!

Friday, September 17, 2010

Banana-Orange-Chocolate Cake

I made this dessert for date night with Vegan Mom by combining the methods from my pudding cake and cobber recipes. The base is sauteed bananas and Grand Marnier, topped with a fluffy cake with hints of orange and bursts of chocolate. It's not as oozy as the pudding cake, and not as fruity as the cobbler. And it's freaking delicious.

INGREDIENTS
- 1/3 cup margarine
- 2 large bananas, thickly sliced
- 1/4 cup Grand Marnier

- 2/3 cup sugar
- 1/4 cup water

- 1 cup flour
- 2/3 cup sugar
- 1 tsp baking powder
- 1/4 tsp baking soda
- 1/4 tsp salt
- 1/2 cup soy milk
- 1/2 cup orange juice, minus 2 tbsp
- 2 tbsp Grand Marnier
- 1/2 tsp orange extract
- 1 tbsp orange zest
- 1/2 cup chocolate chips

METHOD
Heat oven to 350 degrees
1. Heat a frying pan over med-hi heat. Melt butter then add sliced bananas. Fry for a few mins per side, until they are a nice golden brown. Add Grand Marnier. It will bubble like crazy. When it stops, remove from the stove and transfer into an 8 x 8 baking dish. Make sure the banana slice are spaced evenly.
2. Put sugar and water in a small saucepan. Bring to bubbling, without stirring, over medium to med-hi heat. Let bubble for a minute, then remove from the heat.
3. While sugar mixture is heating, make the cake. Whisk together dry ingredients, then add soymilk (don't mix yet). Place the two tbsp of Grand Marnier in a 1/2 cup, then fill up with orange juice. Add to dry ingredients along with extract and zest. Whisk together.
4. Pour cake batter over the bananas, then sprinkle chocolate chips over the batter.
5. Spoon the sugar mixture over the top of the batter. Bake for 35 mins, or until the top has reached a nice golden brown and the bananas are bubbling on the bottom.

Thursday, September 16, 2010

No-Bake Chocolate Pistachio Fudge

I went through this Nigella phase a couple of months back. I was watching her videos on YouTube back to back and ogling at the ease of the recipes and, of course, her charm.

IMG_3803

The chocolate pistachio fudge especially struck me because its a no-bake fudge recipe.

IMG_3770

It only needs 4 ingredients. How much easier can it get?
IMG_3778

Oh and also, I hadn't used pistachios in my baking before this. Look at the gorgeous colour! I got a bag from Nuts and Spices in Chennai because pista is crazy expensive in Singapore and they are from India anyway.
IMG_3781

Since this was made before Sala sent me her lovely goody bag with Ghirardelli dark chocolate in it, I used 70% dark chocolate cocoa buttons.

Nigella's No-Bake Chocolate Pistachio Fudge Recipe
Makes 25 squares, approx
Source: Nigella Express

Ingredients:
70% cocoa chocolate buttons or chopped dark chocolate - 1 cup / 175gm
(I don't recommend chocolate chips for this recipe)
Sweetened condensed milk - 1/2 can / 200gm
Shelled, unsalted pistachios - 1/3 cup
Butter - 2 tbsp
A pinch of salt if using unsalted butter

How I Made It:


IMG_3787

Transfer all the ingredients except the pistachios to a heavy bottomed pan and keep on medium fire until melted and blended well. Throw in the pistas and gently mix well until it all comes together. Don't cook for more than 5 minutes.

IMG_3791

Spread this in a 9" pan lined with aluminium foil. You can use a smaller pan if you want thicker pieces. Cool to room temperature and set in the fridge until the fudge is firm. Cut into desired pieces and freeze.

IMG_3827

Make sure to store this in the fridge or freezer because it starts to get sticky and gooey when at room temperature for too long. A great gift or an easy dessert idea when entertaining.

Here's a video of the recipe if you want to watch Nigella herself making it!

Wednesday, September 15, 2010

Pugliese: Baking Through the Bread Baker's Apprentice

I can't believe that it's been almost 2 months since I posted about my journey through The Bread Baker's Apprentice. I've been baking, I just haven't been blogging. This is the last recipe in the book before the sourdough section. It is a chewy, rustic Italian loaf whose success relies on making a rather wet dough. I find this easiest with my KitchenAid stand mixer that makes it possible to knead without making a huge mess or breaking your wrist using a spoon.

GENERAL NOTES
1. The mashed potatoes are optional. I had some on hand and I think it made for a softer loaf.
2. I do not have proofing bowls so I just lined 2 mixing bowls with towels and it worked just fine.
3. I used a 50-50 blend of durum flour an bread flour.

VEGAN NOTES
- none

Sunday, September 12, 2010

Tomato Focaccia

Hi, Friends.
I was feeling a little uninspired and stressed this week, thinking I didn't have time to make anything fun; thinking: What can possibly follow up the lovely/horrible aspic and irreverent/delicious crack pie anyway? But working on an essay for another endeavor, I came across the following lines about making bread from M.F.K. Fisher's How to Cook a Wolf, and though I know that much has been said on the beauty of the bread-making process, I think Fisher really nailed it all the way back in 1942:

It does not cost much... It is pleasant: one of those almost hypnotic businesses, like a dance from some ancient ceremony. It leaves you filled with peace, and the house filled with one of the world's sweetest smells. But it takes a lot of time. If you can find that, the rest is easy. And if you cannot rightly find it, make it, for probably there is no chiropractic treatment, no Yoga exercise, no hour of meditation in a music-throbbing chapel, that will leave you emptier of bad thoughts than this homely ceremony of making bread.

I decided on focaccia as my medium into this bread-making promised land where no bad thoughts live, and this recipe from Gourmet as I've had it bookmarked for a couple of years now.

our version:
It should be noted that boiling a lone potato emits a delicious, savory smell. I ought to do this more often.
As always, nothing quite compares to the way the scent of freshly baked bread fills the apartment.
Gourmet says that this particular recipe for focaccia is "so light it's almost cakelike," and I would almost agree except that I substituted the called-for 00 flour with regular all-purpose flour. From what I've gathered, 00 flour is typically an Italian flour that has less protein and behaves in a friendlier, lighter, and airier way. Next time, I'll have to try it. This time, however, all purpose flour worked and the resulting focaccia was still very delicious if not lighter than most focaccias I've had.

Now, I know I don't normally use this forum to share events beyond my adventures in food and sometimes, as these adventures relate to my mom and grandma, but while we're talking about inspiration, can I tell you about Freelance Whales? They are my new Loney DearI know I never told you all about Loney Dear, but let's just say that I like Loney Dear very much, particularly live. So this was a week I needed a little extra nudging, a little extra hopefulness from literature, food and music. So thank you, M.F.K. Fisher, Gourmet, Mr. Tomato Focaccia, and Freelance Whales. You've all pitched in to make this post happen.


wait

for

it

...


This also happened.

RECIPE via Gourmet
Adapted from Lucia Eriquez Castellana

1 (1/2-lb) Yukon Gold potato, peeled and quartered
1 cup warm water (105-115°F)
1/2 teaspoon sugar
3 teaspoons active dry yeast (from two 1/4-oz packages)
1/2 cup extra-virgin olive oil, divided
4 1/2 cups “00” flour, divided
1 tablespoon plus 1/4 teaspoon fine sea salt, divided
1/2 lb plum tomatoes, thinly sliced crosswise
1/4 teaspoon dried oregano

Equipment:
a stand mixer with paddle and dough-hook attachments

Generously cover potato with salted cold water (1 teaspoon salt for 3 cups water) in a small heavy saucepan and simmer, uncovered, until just tender, 10 to 15 minutes. Drain and cool slightly, then mash until smooth.

Stir together warm water and sugar in bowl of mixer. Sprinkle yeast over mixture and let stand until foamy, about 5 minutes. (If mixture doesn’t foam, start over with new yeast.)

Add potato and 1/4 cup oil to yeast and beat with paddle attachment at medium speed until combined, about 2 minutes. Remove paddle attachment and attach dough hook, then beat in 4 cups flour and 1 tablespoon sea salt at medium-high speed until combined well, about 3 minutes. (Dough will be very soft and sticky.)

Transfer to a well-floured surface and knead in remaining 1/4 cup flour with lightly floured hands until smooth and elastic, 8 to 10 minutes. (Dough will still be very soft and sticky.)

Scrape dough into a lightly oiled large bowl and cover bowl with oiled plastic wrap. Let dough rise in a draft-free place at warm room temperature until doubled, 2 to 2 1/2 hours. Generously oil a 15- by 10- by 1-inch baking pan.

Punch down dough (do not knead) and transfer to baking pan, then gently stretch to cover as much of bottom as possible (dough may not fit exactly).

Cover dough with oiled plastic wrap and a kitchen towel and let rise in a draft-free place at warm room temperature until doubled, 1 to 1 1/2 hours.

Preheat oven to 425°F with rack in lower third.

Arrange tomatoes on focaccia (do not overlap), then sprinkle with oregano and remaining 1/4 teaspoon sea salt and drizzle with remaining 1/4 cup oil.

Bake until center is firm, top is pale golden, and underside is golden (lift to check), 20 to 25 minutes.

Loosen focaccia from pan with a spatula and slide onto a rack to cool slightly. Cut into pieces and serve warm or at room temperature.

Cooks’ note: Focaccia is best eaten the day it is made but can be baked 1 day ahead and kept, wrapped in foil, in a sealed bag at room temperature. If desired, reheat, uncovered, in a 350°F oven until just heated through, about 10 minutes.