Thursday, March 31, 2011

Dry Indian Chilli Chicken ~ Indo Chinese Recipe Series

Probably one of the dishes I crave the most on odd days. There are some restaurants that serve good Indo Chinese food in Singapore but they usually leave me feeling dehydrated because of the amount of oil and MSG they use.

indo chinese dry chilli chicken recipe

This is a super simple version that I cooked at a friend's place. The two non-vegetarians at the table really enjoyed it!

Indo Chinese Dry Chilli Chicken Recipe
Serves 4
Adapted from: KhanaKhazana

Ingredients:
500gm boneless chicken pieces, cut into small cubes
1 onion, cut into cubes
1/2 of a green capsicum / bell pepper, cut into cubes
1 tbsp soya sauce
1/4 tsp white vinegar
1 tbsp green chilli sauce
1 tsp freshly ground black pepper
2-3 green chillies, slit (we used the large red chillies that have lesser heat)
1 tsp dry red chilli flakes (optional)
1 tbsp minced garlic
1 tbsp cornflour
1 tbsp all purpose flour or maida
1 egg (optional)
Salt to taste
A pinch of sugar (optional)
Oil
Spring onions for garnish

How I Made It:

1. Marinate the chicken in 1/2 tbsp soya sauce, egg, salt, pepper, flour, cornflour, half the garlic and half the green chilli sauce for atleast 30 mins. Leave it for an hour or two if you have the time.

2. Heat a shallow pan with about 1/4 cup oil and lightly fry the chicken pieces until golden brown. Set aside.

3. In the remaining oil, add chopped garlic and the chillies and flakes and fry for 2 minutes. Next, add the onions and capsicum and fry until soft (2-3 mins). Add vinegar and mix well. Top off with the fried chicken and the remaining quantities of ingredients used to marinate (1/2 tbsp soya sauce, 1/2 tbsp green chilli sauce, salt, sugar, and pepper).

4. Stir all the ingredients until well combined and fry for another 3-4 mins. Garnish with some chopped spring onions and serve hot. 

indo chinese dry chilli chicken recipe

Am sending this over to The Kerala Kitchen hosted by Magpie's Recipes this month. 

Tuesday, March 29, 2011

South Indian Dahi Vada / Thayir Vadai / Curd Vada Recipe

I was terribly jet-lagged all of last week. I couldn't keep my eyes open beyond 8pm and was up and about by 4:30 which is super duper rare for me because I am just not a morning person. I have to say I secretly enjoyed my energy at 5 in the morning the past few days. 

DSC_4308

On Saturday morning, I had this weird craving for medhu vada / uzhunnu vada. I have made this in the past so you can find the medhu vada recipe here

A few differences this time while making medhu vada: 

- I made the batter in my Ultra wet grinder and this makes all the difference in your  medhu vada. I was amazed how crisp the vadas were outside and soft inside. I was also able to get the doughnut shape (although not perfect), you just need to resist the temptation to add too much water to the urad dal while its grinding. This is harder to control in a mixie I guess. 

- I added whole peppercorn like the ones you get in restaurants. TH doesn't like biting into them but I didn't have an option because we were out of green chillies. I also added ginger more liberally than last time. 

DSC_4189

Perfect, pillowy, and soft. 

But today's recipe is all about dunking these deep fried awesomes into a bowl of flavoured curd, letting them soak for a while and then sinking your teeth in the resulting goodness. We did this with the few remaining vadas and actually enjoyed it more than the vadas by themselves. 

South Indian Thayir Vadai Recipe
Serves 2

Ingredients:
1 cup thick curd
1/4 cup water
Chopped coriander leaves
1/2 tsp paprika or Kashmiri red chilli powder
1/2 tsp roasted jeera powder
Salt to taste

How I Made It:

1. Dunk the vadas into a bowl of warm water, soak for 10 seconds, take them out and squeeze out the excess water. This will ensure that the vadas are softer once soaked in the curd. 

2. Beat the curd with some water, the jeera powder, and salt. Add the vadas in and leave in the fridge for atleast 4 hours or overnight. 

3. Before serving, garnish with some chopped coriander leaves and chilli powder / paprika. Kara boondi also makes an excellent garnish but sadly, I didn't have any. 

DSC_4334

Notes:

1. The Dahi Vada made in Northern parts of India is slightly different from this. The spices used to flavour the dahi are different and they usually serve it with dates chutney and mint chutney, the same kinds used for chaat. That tastes great, but is different from this.

2. In some versions, ground coconut is added to the curd. Although I was tempted to try this, I didn't have any coconut in the fridge (remember, I was away for 3 weeks!). Maybe next time. 

Sunday, March 27, 2011

Mexican Bibimbap

So, after over two years of posting my versions of other people’s recipes, I believe I’ve come up with an original recipe of my very own. In other words, I’ve invented something. No big deal, right? I mean: people do this all the time. Scientists constantly invent and reinvent stuff. Take Pluto for example. One day it’s a planet and then 76 years later, it’s actually a dwarf planet. And then there are elite gymnasts. I think we all remember The Khorkina.

Honestly, I’m not exactly sure what I’ve created here, but I find it to be delicious. I’m calling it the Mexican Bibimbap as it was very much inspired by my favorite Korean dish, but like the name implies, I’ve given it a Mexican twist. Instead of kimchi, I offer up a slaw (a dish that one of our favorite guest bloggers first served to me as an accompaniment to pork tacos), but with a little added heat from Sriracha. Instead of Korean vegetables, I give you pico de gallo. Get the gist?
And while it may seem like a lot of components, this bowl of goodness needs no side dishes. Plus, much of it can be done ahead of time, like the rice, pico de gallo, and marinade. In fact, the slaw gets better with time, so go ahead and prepare it the day ahead. Then, all you really need to do before dinner is sauté the mushrooms, cook the skirt steak, and fry the eggs.

Mexican Bibimbap 
Ingredients for entire meal 
serves 6

2 lbs. skirt steak
6 large eggs
6 cups (or more for leftovers!) freshly cooked medium-grain white rice
5 garlic cloves minced (separated)
1 ½ tablespoons minced ginger
¼ cup soy sauce + more to serve with meal
3 tablespoons sesame oil (separated)
juice of 5-6 medium limes (separated)
2 tablespoons sugar
1 tablespoon sake (optional, though I like the excuse to buy some sake to eat with my ‘bap.)
1 ½ cups seeded, diced tomatoes
1/2 cup diced red onion (separated)
1 tablespoon diced jalapeno
¼ minced fresh cilantro + 2 tablespoons
1 head of green cabbage
1 tablespoon apple cider vinegar
2 tablespoons mayonnaise
1 teaspoon Sriracha + more to serve with meal
2 ½ cups sliced shiitake mushrooms (about ½ pound)
salt
pepper

How I make it:
1. Make slaw. (Up to 2 days but at least 3 hours ahead.)

I find this slaw to be very therapeutic. Why? Because it’s not finicky. You don’t have to spin the cabbage leaves with your salad spinner. (I usually just throw away the top layer.) I also find it to be delicious all by itself.

Shred the head of cabbage by hand into a large bowl. Sprinkle it with 2 to 2½ teaspoons salt (depending on size of cabbage head) and massage it in with your hands for a few minutes to tenderize the cabbage. Let it sit and hang out at room temperature while you chop the red onion and cilantro. Dice ½ cup of the onion, but only use half. Reserve the other half for the pico de gallo. Same thing with cilantro. Slice ¼ cup plus 2 tablespoons of cilantro, reserving the 2 tablespoons for your pico de gallo. Toss the onion and cilantro on top of the cabbage.

Then, in a separate bowl, mix the juice of 1 lime, 1 tablespoon apple cider vinegar, 2 tablespoons mayonnaise, and 1 teaspoon Sriracha. Pour onto cabbage, onion, and cilantro and mix well. Let this sit in the refrigerator for at least 3 hours, but as previously mentioned, it’s even better if it sits overnight.
NOTE: If you are making these meal for less than 6 people, you’ll probably have a lot of extra slaw, which is really fortunate because along with the extra rice and another egg, you can have a great simple dinner the following night too.

2. Up to one day ahead: Make pico de gallo.

Put reserved ¼ cup minced red onion and reserved 2 tablespoons of fresh cilantro in small bowl. Add 1 ½ cups seeded, diced tomatoes, 1 tablespoon diced jalapeno, 1 tablespoon minced garlic, juice of 2 limes and mix. Season to taste with salt and pepper. It’s done. Set aside.
3. Up to 4 hours ahead: Marinate your steak.

In a small bowl, combine 3 minced garlic cloves, 1 ½ tablespoons minced ginger, ¼ cup soy sauce, 2 tablespoons sesame oil, juice of 2 limes, 2 tablespoons sugar, 1 tablespoon sake, a bit of salt and freshly ground pepper. Put steak into a Ziploc bag and pour this mixture over it. Now, Matt swears by sealing the bag and really massaging the marinade into the steak. I laughed at him for this because he was taking it so seriously and really working it in there, but I must say that we’ve made this recipe a few times now in order to perfect it, and the meat has been so much more tender after Matt has done this. So, I guess what I’m saying is: Seal bag and massage meat with marinade. Refrigerate for 1-4 hours.

4. Up to a few hours before: Cook rice according to packaging. (I don’t think it matters if the rice is at room temperature, but if you’d prefer it to be hot, time it so that it will be done just before serving.)

5. Sauté mushrooms. Tip for less dishwashing: I like to use the same pan for sautéing the mushrooms as I am going to use for cooking the steak and frying the egg. For me, this means a large nonstick sauté pan.

Heat the sesame oil in the pan and cook the mushrooms with a bit of salt until hot and fragrant. Set aside.

6. Cook steak.

Heat same sauté pan over medium-high heat. Pull the skirt steak from the marinade and place in pan. Between the leftover oil on the pan from the mushrooms and the liquid from the marinade, this pan may now have a lot of liquid in it. Go ahead and pour some off so that just a nice inch layer remains. Cook steak about 3 to 4 minutes per side. Remove from pan and place it on a cutting board. Let it rest about 5 minutes before cutting into slices. The last time we made this, a few of the slices weren’t completely cooked through, so we placed those ones back on the pan for another minute or two, which resulted in some seriously delicious pieces that were nice and crusty on the outside and still super tender on the inside.

7. Before you start frying the eggs, prepare each bowl. Divide the rice among the bowls and then top with portions of the slaw, pico de gallo, steak, and mushrooms in as pretty of a way as possible.

8. Fry the eggs.

Pour out any remaining liquid from your sauté pan. Add a bit more of the sesame oil. Heat pan and crack eggs onto it. Cook eggs in batches until whites are set but yolks are still runny, about 2 to 3 minutes. Place one egg on top of everything else in each bowl.

9. Serve with soy sauce and Sriracha. Enjoy!! (I hope. After two years of critiquing and sometimes having a laugh at the difficulty in other people’s recipes, I hope this one finds you well and happy and not frustrated with my directions or your results!) (Why do I feel as though I'm already apologizing?) (I'm sorry.)
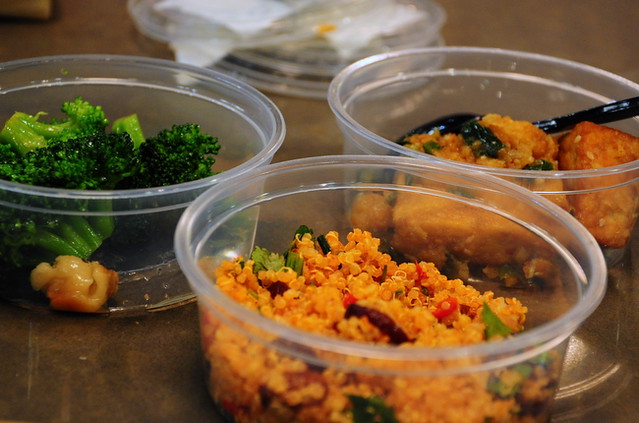
p.s. We also tried a vegetarian option, which was fairly delicious as well, though at this point in the recipe testing, the slaw hadn't been incorporated, and I just can't say enough good things about this slaw. It's my everything. It's limey and spicy and creamy and tangy. And all of its sauce intermingle with the rice. Oh, it's so good. But back to what I was saying: Vegetarians, just substitute the steak for beans. Heat up a can of refried beans on the stovetop. Add some lime juice and diced onion or whatever you would like to make the can o' beans your own. NOTE: we may have added chorizo to the beans pictured below, but you guys know what I'm driving at...

Friday, March 25, 2011

Food in the US

Remember the last time I went on a trip I shared some of the food we ate? Its right here in case you missed it - Food in Egypt

This time, I was gone for almost 3 weeks which means more meals. Not all of them were clicked, of course, and if this seems like a lot of food, that's because it is!

DSC_3535

First meal during this trip - chicken salad in a spinach-cheese bagel.

DSC_3546

During lunch at Fog Harbor in Pier 39 with Sakshi. Bread rolls and chilled butter. 

DSC_3551

Clam Chowder in a sourdough bread bowl from the same place. 

DSC_3554

The main course that we shared. Its freshly grilled fish, some yogurt dip and wild rice with steamed vegetables. 

DSC_3610

Cashew chicken at Cheesecake Factory - very blegh. 

DSC_3611

Prawn something-something, again from Cheesecake Factory - much better than the chicken.

DSC_3615

The cheesecake! Go there for the cheesecake!

DSC_3719

Frozen TV dinner from Trader Joe's. Paneer butter masala and spinach rice. Was way too creamy and rich for my taste. Couldn't even finish this small portion.

DSC_3858

Sushi with a Korean and a Chinese at Sushi House in the Bay Area

DSC_3890

Amazing vegan food at Whole Foods in Orange County. 

DSC_3935

Mexican brunch at El Torito in LA. Amazing value for money, was stuffed to the brim!

DSC_3941

Anu's Kadai Paneer. Yum.

DSC_3953

Mindblowing paan ice cream from Nirvanaah. Also tasted their English Toffee and Malai Kulfi flavours.

Now for some phone pics - excuse the quality.

IMAG0098

Jalapeno Poppers from Jack in the Box. Thanks Mahimaa!

IMAG0104

Junk food from Ontario Mills outlet mall. Pizza by the slice, roasted potatoes and cheese sticks. 

IMAG0105

More yummy junk food - Sinful Cinnabon!

IMAG0111

My absolutely favourite FAVOURITE thing of the entire trip - Yogurtland! Maybe its for the best that I don't live in the US, I would just go here every day!

I have missed taking pictures of quite a few meals, especially the ones I had in the many Google Cafes on campus, the Indian meal I had at the food blogger's meet, Korean BBQ which was very delicious, breakfast at Posh Bagel, etc etc. Maybe next time :)

PS: All pictures in this post are unedited.

Wednesday, March 23, 2011

Tofu Etouffee Over Corn Cakes

I have been checking out cookbooks from the library so I can explore various cuisines and flavours for free. I have been having good luck with the Williams-Sonoma cookbooks--nice pictures, solid recipes, and some cultural history to boot. This recipe is inspired by the New Orleans collection. I thought the corn cakes would be a little ponderous, but they are actually a wonderful addition that complete this flavourful dish.

INGREDIENTS
Tofu Etouffee
- 1 pkg tofu, cut into small cubes
- oil
- 1 tsp ground thyme
- 1 tsp red pepper flakes
- 1 tbsp smoked paprika
- 1 tsp sage
- 1 tsp smoked sea salt (or regular)
- freshly ground pepper
- 1/3 cup oil
- 1/3 cup flour
- 2 onions, diced
- 2 celery stalks, diced
- 1 red pepper, seeded and diced
- 1 green pepper, seeded and diced
- 2 large garlic cloves, minced
- 4-5 cups veggie stock, or water
- 2 generous tbsp tomato paste
- 1 tbsp fresh thyme
- 1 tbsp fresh oregano
- 2 bay leaves
- salt and pepper to taste

Corn Cakes
- 1 1/4 cups cornmeal
- 1/2 cup all purpose flour
- 2 tbsp cornstarch
- 1 tsp salt
- 1/2 tsp baking soda
- 2 tbsp apple cider vinegar
- 2 cups soy milk (less 2 tbsp)
- 3 tbsp oil
- 4 green onions, finely chopped

METHOD
1. Fry in tofu cubes in a thin layer of oil in a frying pan over medium-high heat until crispy and golden brown. Transfer to a bowl and toss with thyme, pepper flakes, paprika, sage, salt and pepper. Set aside.
2. Heat a large pot over medium-high heat. Add oil, then whisk in flour to make a roux. Continually whisk for 4-5 mins, or until flour is a deep golden brown. If you burn it, you have to start again. Reduce heat to medium and add onion, celery, and peppers. Cook, stirring constantly, until veggies are tender (about 8 mins). Add a splash of water or two to the pan to deglaze if the flour sticks too much.
3. Add garlic and cook for 2 mins, then slowly add in stock, stirring well to incorporate. Stir in tomato paste and herbs. Add tofu, bring to bubbling, then reduce heat and simmer for at least 30 mins, allowing the sauce to reduce and thicken. Add more water if it is too thick after reducing, or more tomato paste if too thin. Season to taste before serving.

While the etouffee is simmering, make the corn cakes

1. Whisk together dry ingredients in a large bowl.
2. Pour apple cider vinegar into a 4 cup measure, then fill up to the two cup line with soy milk. Whisk together, then whisk in oil. Add to dry ingredients and gently mix until just incorporated. Fold in green onions.
3. Cook, as you would pancakes, on a oiled griddle, using about 1/4 cup of batter per pancake.

To serve, place two pancakes on a plate and cover with etouffee. The pancakes re-heat nicely on a griddle the next day (can be stored in the fridge, or you can just make a 1/2 recipe), and the etoufee tastes even better as leftovers.

Monday, March 21, 2011

Simple Indian Potato / Aloo Roast Recipe

Confession: The Husband doesn't cook often or even at all, but he makes the best basic potato roast ever. I didn't mention this to him the first few times he made this but when I once asked him what he adds to it, he was like "are you asking me for my secret recipe so you can put it in your blog??" Ahem. Maybe.

Indian Potato Roast Recipe

So here it is. Its simple of course, the man doesn't believe in complicating food, especially when he is cooking! But you will love this. It gets done in 12-15 mins and is such a comfort food that when I was down with fever last month, TH made this and rasam for me after he got back from work! Ah.. yum.

Basic Indian Potato Roast Recipe
Serves: 2

Ingredients:
2 medium-sized russet potatoes
1 medium-sized onion
1/4 tsp mustard seeds/kaduku
1 tsp red chilli powder
1 tsp coriander powder/malli podi/dhania podi
1/4 tsp turmeric powder
1/2 tsp or 2 flakes minced garlic 
1 tbsp oil
Salt to taste

How its made:

1. Cut the potatoes into small cubes. Chop the onions into similar-sized pieces as the potato. 

2. Heat oil in a pan and add the mustard seeds. When they pop, add the chopped onions and saute until lightly browned. 

3. Add the coriander powder, chilli powder, turmeric powder and garlic and fry for a minute. Add the potatoes, mix well and sprinkle some water. 

4. Cook partially closed until the potatoes are cooked and soft. Add salt. Make sure you mix every 2-3 mins to distribute the heat and avoid the potatoes from burning from the bottom. 

Indian Potato Roast Recipe

Serve hot with steamed rice and rasam

My Notes:

1. TH doesn't like jeera much so he doesn't add it. If you feel the recipe is incomplete without it, then you should add them in. 

2. I've tried squeezing half a lemon over this when its still hot but didn't like the taste much. It still rocks the plain way that TH makes it. 

Sunday, March 20, 2011

Classic Meatballs

I have so many things to tell you about these meatballs. Starting with: Vegan-say-what? It seems like just yesterday we were putting dry, hard pieces of mochi on our waffle iron and waiting with confused anticipation for it to turn into something resembling a waffle. Clearly, with the title of this post, those days are gone. And not that I had to be convinced or persuaded in any real way, but it should be noted that meatballs were Matt's pick. He had had a particularly rough week at work, and so I gave him carte blanche in picking out the next attempt. I handed him a giant stack of food magazines and loved watching what happened next: He poured over each magazine, flipping down page corner after page corner and then, just to leave no stone unturned, he went through our cookbooks as well, eventually arriving at three different recipes for meatballs: Ina Garten's, Gourmet's (from a 2008 issue), and Saveur's. Saveur won out in the end. Why? Just look at this picture (of a photography by Todd Coleman).

our version:
This marks the third recipe from the issue's collection of 25 Greatest Meals Ever. First, we tried Richard Rodriguez's refried beans with chorizo, which I never posted but still might. Second was the vegetarian chili that saved the writer Suketu Mehta's life. Which brings us to number three, Dana Bowen's greatest meal: classic meatballs.
Meatballs are another one of those timeless foods that every once in a while Matt craves and that I've somehow gone my entire life without making. Speaking of my whole life, while making these meatballs, I was reminded of a test in third grade, which began with bolded directions: Read all directions before beginning. Being a particularly competitive third grader who liked to finish tests first, I skimmed the directions and began doing what the first one told me to do: Underline the nouns. No problem there. The next direction told me to circle the verbs. I know I’m only a third grader, but is it too much to ask for a c-h-a-l-l-e-n-g-e? Verbs circled. What’s next?

So, with all of my burgeoning neurotic tendencies, I completed all directives only to come to the last one: Ignore all above directions. Needless to say, it was a tough lesson. Yet one that didn’t stick with me.

See, as previously mentioned, this meal was for Matt, and Matt requested an early “Meatball Sunday!” dinner. I told him no problem. Let's skip lunch and eat at four. Only, I must have skimmed over the part about chilling the meat mixture for an hour. "Dinner at five?" Then, when I came to mixing in the ricotta, I saw what else I skipped over: 2⁄3 cup ricotta, drained in a strainer for two hours. Needless to say, my ricotta was drained for exactly four minutes, and by drained, I mean, set upon a mesh strainer for four minutes without releasing a single drop of liquid.
Fortunately, I don’t think these mistakes affected the taste at all. Unfortunately, I think they may have affected the texture a bit. The non-drained ricotta and rushed chilling time in the refrigerator equaled a looser raw meatball, and I believe this is what caused a few of them to fall apart during the browning process, and which impeded some of them from reaching a full-level of browning, which I believe would have led to a more discernible difference in the outside texture and inside texture of the finished meatballs. Know what I mean?

I don't think that all meatball recipes call for braising them in red sauce, but I think they probably should. After all the hard work of gathering, chopping, mixing and molding the ingredients into the shape of large golf balls and browning these in hot olive oil, it was a relief to add some red wine, tomato puree, and beef broth and allow yourself to forget about them for an hour and a half. Of course, you can't really forget about them because your entire apartment now smells like delicious meat and marinara sauce.
As the meatballs braised, I reread what Bowen had to say about them. Just why were they her greatest meal ever again? Well, part of it was that they were left on her "porch in a Farberware pot with a loaf of Italian bread and a note that said: 'Figured you wouldn't have time to cook.'" She and her husband had just moved and the meatballs were a gift from their new neighbors. I looked up from the magazine and told Matt what I'd just read. "Wouldn't that be so nice? To leave some of these on someone's doorstep?" We had just watched Client 9 and Inside Job on back-to-back nights and my thoughts on humanity were bleak. This is what the world needed more of—people giving away their home-cooked meatballs! I began to picture it. We didn't know anyone who had just moved but any one of our friends would appreciate some home-cooked meatballs on their doorstep. We could swing by the store on the way and get a nice fresh French loaf too. But before I could go any further with this plan, Matt, looking visibly shaken, spoke up. "These are our meatballs.” I didn't fight him on it. After all, this happened (Meatballs à la Band-Aid?):


Plus, I had promised him meatballs at four, and their ETA was now looking to be about six.

After some clean-up, we ate at six thirty. Not so bad? Right in time for the previously recorded episode of Kourtney and Kim Take New York. What? It’s hilarious and I just couldn’t watch one more documentary featuring that old guy from AIG. Anyway, I'm pleased to report that the homemade meatballs were utterly spectacular and even better the second day.

Classic Meatballs via Saveur
serves 4-6
10 oz. ground beef chuck or veal
10 oz. ground pork shoulder
2 oz. minced pork fat or unsmoked bacon
2 oz. prosciutto, minced
1 1⁄4 cups loosely packed flat-leaf parsley leaves, minced, plus more for garnish
2 tsp. dried oregano
1 1⁄2 tsp. fennel seeds
1 tsp. crushed red chile flakes
1⁄2 tsp. ground cumin
1⁄4 tsp. ground allspice
7 slices white bread, finely ground in a food processor
Kosher salt and freshly ground black pepper, to taste
2⁄3 cup ricotta, drained in a strainer for 2 hours
2 tbsp. milk
3 eggs, lightly beaten
6 tbsp. extra-virgin olive oil, plus
more for greasing
1⁄4 cup dry red wine
4 cups canned tomato purée
1 cup beef or veal stock or water
Grated Parmesan, for garnish

1. In a large bowl, combine beef, pork, pork fat, prosciutto, parsley, oregano, fennel seeds, chile flakes, cumin, allspice, and bread crumbs and season generously with salt and pepper. Using your fingers, mix ingredients until combined; set aside. In a medium bowl, whisk together ricotta, milk, and eggs; add to meat mixture and gently mix until incorporated. Chill for 1 hour. 

2. Heat oven to 300°. Grease 2 rimmed baking sheets with oil and set aside. Using a 2-oz. ice cream scoop, portion mixture, roll into meatballs with your hands, and transfer to greased baking sheets. Heat 3 tbsp. oil in a 3-qt. high-sided skillet over medium-high heat. Add half the meatballs; cook, turning occasionally, until browned, about 10 minutes. Transfer meatballs to a plate; wipe out skillet. Repeat with remaining oil and meatballs. Return reserved meatballs to skillet along with any juices from the plate. Add wine; increase heat to high and cook for 2 minutes. Stir in tomatoes and beef stock, bring to a boil, and tightly cover skillet. Transfer to oven; bake until meatballs are tender and have absorbed some of the sauce, about 
1 1⁄2 hours. To serve, transfer meatballs to a platter; spoon over sauce. Sprinkle with Parmesan and parsley. Serve with bread or spaghetti, if you like.


Saturday, March 19, 2011

How to Throw a Vegan Party that Everyone Will Like

On Friday I had the history department over for a reception to celebrate the impending birth of our department chair's second child. I decided that, rather than making it a pot-luck, I would make everything. I think this made some of the meat-dependent grad students a little wary, so I wanted to make sure that I could deliver a menu that would not disappoint. I think the trick is to keep the menu clean and simple by sticking to dishes that are more or less naturally veggie. It took some careful planning (i.e. a comprehensive chart of what had to be made and when) but the whole thing went off very well indeed. Here is what I did:

Since the reception was on Friday after a long week of work, and right after back-to-back departmental and grad faculty meetings, I wanted to make some food that offered protein and carbs to nourish and energize. To that end, I served Kung Pao Sliders from the Jan/Feb 2011 issue of Vegetarian Times. I made my own buns (50g of dough makes the perfect slider bun) and grated the zucchini and carrot for the slaw rather than julienning them as per the recipe. These were far and away the most popular item, with 36 of the 40 I made eaten. I also served white and whole wheat pita (sub 50% of the white flour for whole wheat) with hummus. I also included a veggie tray with the hummus (broccoli, cauliflower, and carrots).

In keeping with the Asian flavours of the sliders I also offered Spicy Fried Shitake Mushrooms. I tossed 1 lb of cleaned and stemmed shitake mushrooms with a large minced clove of garlic, 1 tsp minced ginger, a generous tsp of hot chili powder, 1 tsp black mustard seeds, 1/2 tsp tumeric, and some salt. I then fried the shrooms in a hot wok in some oil (adding more as needed), and when soft I poured in about 1/2 cup of coconut milk and heated through.

The other food was inspired by Italian flavours and dishes. I started with focaccia, which I cut into small squares and served with marinated veggies: I roasted 6 peppers (2 red, 2 yellow, 2 orange) and de-seeded, skinned, and thickly sliced them. I then tossed them with some olive oil, salt, 4 thinly sliced garlic cloves, some chopped fresh basil leaves, and salt and pepper and let marinate overnight in the fridge (let come back to room temperature before serving). I also thickly sliced 1 lb of washed and trimmed white mushrooms. I then sauteed 1 large minced clove of garlic in 1/4 cup of olive oil, added 1 tbsp minced fresh rosemary, and then 1 cup white white. I brought that to a boil, added the shrooms and let simmer for 1 min. I let them marinate in the fridge over night, then drained and served at room temperature. I also served Zucchini Pancakes with Tomato-Onion Relish. These were also very popular. Maybe not Italian per se, but the sage in the pancake and the tomato relish went well with everything else.

Of course we also had to have dessert. First up were Apple Turnovers. I used 1/2 block of puff pastry and rolled it into a 10 x 12 inch rectangle. I then cut out 2 inch squares, then filled them with a version of the filling here (1 tbsp margarine, 2 apples, 1 tbsp brandy, and white sugar instead of brown). I baked them as per this recipe, but for only 15 mins at each temperature. Next were Schnecken (filled with a strawberry/raspberry filling), as well as good old fashioned chocolate cupcakes.

Many apologies for not having a picture of the entire spread. Guests were arriving, I was making still firing food, and things just got too busy.

FOR THOSE INTERESTED IN THE LOGISTICS:
Guests: 20 adults, 8 kids
1. Make ahead and freeze: pita (I made a double recipe of white and a double of whole wheat. It was too much and I could have done a single of each); slider buns, schnecken (unfilled, as per the recipe linked above); puff pastry dough (make sure to put the dough in the fridge no later than the day before the party).
2. The night before: marinated veggies (I did a 1.5 recipe of the shrooms); schnecken filling; turnover filling; bake the tofu for the sliders; make and pan (and refrigerate) the focaccia; make tomato-onion relish; make hummus.
3. The day of: (several hours before) thaw previously baked and frozen goods; thaw and bake schnecken; bake focaccia; make and bake turnovers; make and bake cupcakes; make slaw for sliders; cut up veggies for veggie tray; mix wet and dry ingredients for pancakes in separate bowls; remove marinated veggies and hummus from fridge to get to room temperature; toss shitake shrooms in garlic, ginger, and spices.
4. 30 mins before (or so): Heat tofu in the oven in a covered dish at 250 degrees; make Fried Spicy Shitake mushrooms and keep warm; heat tomato-0nion relish; cut pita; warm pan for cooking the pancakes.
5. As guests arrive: assemble half of the sliders (keep tofu warm in the oven); start cooking some of the pancakes. Keep the pan warm and replenish the plate as needed. Make more sliders as needed.

Wednesday, March 16, 2011

Green Mint Chutney & Cheese Sandwiches

Picnic food is fun to make, especially if you are not really going on a picnic but just pretending to on a rainy, weary weeknight.

About once a month, TH and I have sandwiches for dinner. Its just one of those inexplicable things we do.

DSC_2430

Since I got my mint plant, there's no dearth of fresh mint and I love using fresh herbs in my cooking. Well, don't we all?

This is a quick sandwich recipe that works great for a picnic, tiffin box or even brunch or tea party. It tastes great and is filling too!

Mint Chutney and Cheese Sandwiches
Makes 4 - Serves 2

Ingredients:
8 slices of bread of your choice
4 slices of cheese

For the Mint Chutney:
A bunch of fresh mint leaves
1/2 cup freshly grated coconut
1 green chilly
1/2 tsp minced garlic (optional)
A pinch of dry ginger powder or 1/2" piece of fresh ginger
Salt to taste

Grind all ingredients together with very little water to a smooth paste.

To assemble and toast the sandwiches: Spread a generous amount of the mint chutney on one side of the bread slice. Top with a slice of cheese and toast in a sandwich maker until done. You can also toast in a pan on the stovetop with a pat of butter until both sides are golden brown and the cheese has melted.

DSC_2440

Serve hot with ketchup.

Tuesday, March 15, 2011

Double (Rainbow) Guest Attempt: Rainbow Cake

Is there anything (at least momentarily) more hopeful than a rainbow? Yes, you guessed it: Double rainbow!

(via Martha Stewart) Whisk Kid's version:
photo by Kaitlin Flannery of Whisk Kid

Sara's version:
photo by Sara Moe

Evin's version:
photo by Evin Watson


Sara's photographic recap:

Evin's recap:
My two year old daughter insisted on a rainbows-and-polka-dots themed birthday. Our friend, Jodi found that Martha Stewart had the perfect solution, a six-layer rainbow cake. I laughed when I saw the photo.

I have no real cake-making skills. The ridiculous height didn't concern me, however the color; the essence of the rainbow; how do you get those colors with that crappy, gnome shaped grocery store food coloring? The answer: gel food coloring. That is lesson number one and maybe the only one learned from this recipe, but its effect on me is immeasurable. There is no mixing liquids and ending up with dull colors and stained fingers. You just buy the gel food coloring that matches the color you are going for. Simple. And there are millions of colors to choose from. It can't be found at the grocery store, but William Sonoma seems to have it on their website, and I'm sure it is common in any baking specialty store. I got ours at this amazing baking store called NY Cake. (There is also a location in LA.)

The recipe instructs you to make the batter for all six layers at once, divide it evenly, and then add the colors. After adding the coloring, the vibrant batter immediately reminded me of that multi-colored custard they had the food fight with in Hook. Remember? They don't have food or parents, but the lost boys use their imagination to fill their bowls with roasted meat and colorful custard.

Once you've added the color to the batter everything else is straightforward. I have to say we were really impressed with the result. We didn't manage to get the icing between the layers to go on as thick as we wanted. The bands of white in Martha's cake look so good. I don't think it worked because the layers didn't cool all the way before we iced. (We don't have wire cooling racks. Those might have come in handy.)

In the end the end, we stuck to the recipe as best we could. The only thing different is the lack of sprinkles on the outside, which would have made a lot of sense. Because what is better than one rainbow? DOUBLE RAINBOW!!

OK, so I stole Evin's double rainbow joke for the first line of this post, but stand by the theft as I feel that the double rainbow joke needed to be doubly mentioned. Also: a big thank you to Evin, Keeley, Sara, and Sean for sharing! You guys are amazing. 

And lastly: this post feels a little awkward coming after what has happened and is still happening in Japan. I think Tim from Lottie + Doof summed up this confusion and awkwardness quite nicely here. And while making rainbow cakes and milk punch certainly can't hurt, I hope we can all finds ways to help. 
UPDATE! Another way to help: Heath Ceramics is donating 25% of online sales now through March 24th to Architecture for Humanity's rebuilding efforts in Japan. Check it out here.

Recipe via Martha Stewart via Whisk Kid!
Makes one 9-inch-round six-layer cake.

Ingredients
vegetable shortening
3 cups all-purpose flour
4 teaspoons baking powder
1/2 teaspoon salt
2 sticks (1 cup) unsalted butter, room temperature
2 1/3 cups sugar
5 large egg whites, room temperature
2 teaspoons pure vanilla extract
1 1/2 cups milk, room temperature
Red, orange, yellow, green, blue, and purple gel food coloring
Lemony Swiss Meringue Buttercream

Directions
Preheat oven to 350 degrees. Brush six 9-inch-round cake pans (or as many 9-inch cake pans as you have, reusing them as necessary) with shortening. Line bottom of each cake pan with parchment paper; brush again and set aside.

In a large bowl, whisk together flour, baking powder and salt; set aside. In the bowl of an electric mixer fitted with the paddle attachment, cream together butter and sugar. Slowly add egg whites and mix until well combined. Add vanilla and mix until fully incorporated. Add flour mixture and milk in two alternating additions, beginning with the flour and ending with the milk. Mix until well combined.

Divide batter evenly between six medium bowls. Add enough of each color of food coloring to each bowl, whisking, until desired shade is reached. Transfer each color to an individual cake pan. Transfer to oven and bake until a cake tester inserted into the center of each cake comes out clean, about 15 minutes (working in batches if necessary).

Remove cakes from oven and transfer to a wire rack; let cool for 10 minutes. Invert cakes onto a wire rack; re-invert and let cool completely.

Using a serrated knife, trim tops of cakes to make level. Place four strips of parchment paper around perimeter of a serving plate or lazy Susan. Place the purple layer on the cake plate. Spread a scant 1 cup buttercream filling over the first layer with a small offset spatula so it extends just beyond edges. Repeat process with blue, green, yellow, and orange layers.

Place the remaining red layer on top, bottom-side up. Gently sweep away any loose crumbs with a pastry brush. Using an offset spatula, cover the top and sides with a thin layer of frosting (also use any of the excess frosting visible between the layers). Refrigerate until set, about 30 minutes.
Using an offset spatula, cover cake again with remaining frosting.