Monday, January 31, 2011

Basil Pesto Pasta Recipe

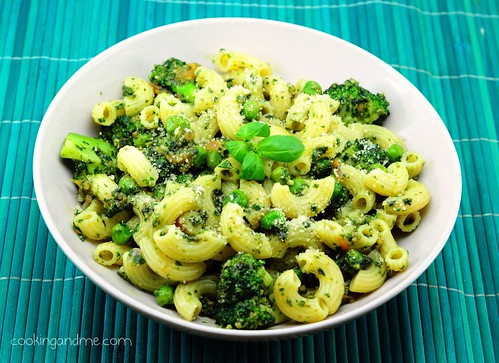
After discovering the deliciousness that is homemade fresh basil pesto, I had to try a pesto pasta immediately. It was a totally delicious, healthy, and quick-fix dinner on a weeknight (and so the pictures were taken in the light box)

basil pesto pasta

Basil Pesto Pasta
Serves 2

Ingredients:
2 cups of pasta of your choice, cooked al dente
3/4 cup basil pesto
One small broccoli, cut into florets
A handful of green peas
1 tomato, cubed
1 tsp minced garlic
2 tbsp olive oil
Freshly ground pepper, to taste
Salt, to taste
2 tbsp parmesan cheese
A few basil leaves, roughly chopped (optional)

How I Made It:

1. Heat the olive oil in a skillet and add the minced garlic. Fry for about 30 seconds until fragrant. Add the broccoli florets, tomato, and grean peas to this and stir fry for a minute. Sprinkle some water and cook for about 4-5 mins until the broccoli is cooked and soft.

2. Add the pesto and stir until it coats the vegetables. Toss in the cooked pasta, salt and pepper and mix well until all the ingredient are well incorporated.

3. Garnish with chopped basil leaves (if using) and parmesan before serving. You can serve this cold or warm.

basil pesto pasta

The beauty of this recipe is, you can add any vegetables of your choice and serve it as a main dish or even as a pesto pasta salad. Its absolutely delicious, try it!

Quick and Easy Peach-Blueberry Turnovers


OK, so you spent all that time making the puff pastry, but now what? I like wrapping veggies and the like in the pastry for some kind of en croute creation like this, but I always save some dough to make some turnovers. I posted this recipe a while back, but since doing so I got my hands on a copy of Williams-Sonoma's Essentials of Baking and I think this method makes for a nice golden and well-baked turnover. Also, after making puff pastry I am in no mood to mess around with complicated filling.

INGREDIENTS
- puff pastry
- peach jam
- frozen blueberries
- soy milk for brushing

METHOD
Line a baking sheet with parchment paper.
1. How much puff pastry you need depends on how many turnovers you want to make. 1/2 recipe of the puff pastry will make 8 turnovers. If you are making 8, roll the chilled dough into a 9x18 inch rectangle. If you are making 4, make a 9x9 inch square. Cut in half lengthwise, then crosswise to make 8 squares (or four).
2. Spoon a generous tablespoon of peach jam slightly off centre in each square. Top with a few blueberries. Fold over to make a triangle, then seal edges with a fork. Place on the prepared sheet, cover, and refrigerate for 30 mins.
3. Preheat oven to 400 degrees. When the turnovers are chilled, brush them with soy milk and sprinkle sugar over top (regular or large grain). Poke the tops with a fork a few times then bake for 20 mins. Reduce heat to 350 degrees, rotate the pan, and bake for an additional 15 mins, or until golden and nicely puffed up.
4. Let cool for 15 mins in the pan, then serve.

Sunday, January 30, 2011

Kitchen Visit: Vegetable Dumplings

Visiting my friend Jeana's kitchen this past Sunday was one of those days that seemed almost too perfect for real life. There was the beautiful, 80 degree weather in January; there was my first-ever trip to HK market in Koreatown; there was the sweet potato latte at Holly's Coffee; there was the fact that I had the day off; there was Jeana's beautiful, sun-filled kitchen; and, of course, there was Jeanaa stand-alone wealth of inspiration.

I know I've mentioned Jeana's art and blog in previous posts, but have you seen her videos? I love them. The whole time we were making these dumplings, I was thinking of the one titled Summer Day and that montage of shoes and sweets from Sofia Coppola's Marie Antoinette.

Here is the Bon Appetempt version:

Kitchen Visit: Vegetable Dumplings from amelia morris on Vimeo.


Another kitchen visit success!


Vegetable Dumplings

Ingredients
for dumplings:
1 bunch Asian chives (buchu), finely chopped
1 onion finely minced (We used a food processor.)
4 small carrots finely minced (Again with the food processor.)
1 10 oz. package of soft tofu, patted dry and mashed with a fork
6 oz. mushrooms, finely minced (Again, we employed the food processor. It was fun. See video.)
Korean glass noodles (japchae), about as much as you can hold in one hand (dry).
salt & pepper
2 packages of gyoza wrappers
vegetable oil

for dipping sauce:
2 tablespoons soy sauce
1 teaspoon white vinegar
1 tablespoon minced green onions
1 teaspoon Korean red pepper flakes or 1/4 teaspoon (or to taste) cayenne


Boil water for noodles. Mix first five ingredients in a bowl. Cook noodles for about 5-6 minutes or according to package instructions. Rinse with cold water to stop cooking, and then, while still in colander, cut into small pieces with scissors. Add minced noodles to bowl with other ingredients. Season to taste with salt and pepper.

Prepare an area for dumpling making. Grab a gyoza wrapper from the package. Spoon a healthy spoonful of the filling into the center of the dumpling. Dip your finger into a ramekin of water and wet the outer edge of half the wrapper. Fold dumpling up like a taco and then pinch the edges together, making sure to stuff back in any wayward filling and to seal edges completely. Set raw dumpling on a lightly floured surface, and repeat until the filling is gone.

Make dipping sauce by mixing all four ingredients together and set aside.

Lightly film a frying pan with vegetable oil and let it get nice and hot. Add some raw dumplings to pan and fry for a couple of minutes on each side, or until browned. Feel free to add a bit more oil or water if they are sticking and cover with a lid to ensure the dough is fully cooked through.

Serve with dipping sauce (and in our case, kimchi fried rice) and enjoy!

Whole Earth Peranakan Thai Vegetarian Restaurant, Singapore

To be fair, Singapore does have its own share of vegetarian food and restaurants. It may not be easily available in regular food courts but there are tons of restaurants that will cater to vegetarians, especially Indian.

Whole earth is one of those out-of-the-box restaurants that serve good, flavourful vegetarian food. Their monkey head mushrooms are most popular although we didn't order it during this trip.

Restaurant Board

I've been to this restaurant near work a bunch of times but thanks to my Project 365, I had my 'good' camera handy last week when we went there for dinner.

Starters

They serve peanuts that are just rightly salted, a sweet-ish pickled fruit/vegetable which I think is pear, and vegetarian sambal with calamansi. The sambal is very strong and spicy. Awesome to munch on while you wait for the food.

Orange Soursop Juice

They have a bunch of healthy drinks to pick from. This is Owen's orange soursop juice. Note: they don't serve soft drinks. How's that for a message?

Olive Brown Rice

Olive brown rice. Wonderfully flavourful and a must-have if you visit this place.


Tom Yam Fried Rice

Tom Yam fried rice. I love this too. Its mildly spicy and has a lovely note of lemongrass in it.

Hong Kong Fried Noodles

Hong Kong fried noodles. Was okay, quite passable.

Mock Fish Curry

Assam Pedas or Mock fish curry. The mock fish in it looks remarkably like fish and the gravy is really unexplainable. It has a pretty strong flavour so all may not like it.

Thai Battered Oyster Mushrooms with Citrus Sauce

Thai Battered Oyster Mushroom - sin on a plate. Its deep fried, its super crisp and the sauce is wonderfully orange-y. I love it!

Eggplant Stinky Beans in Sambal

Eggplant with sataw or stinky beans. The beans are definitely 'stinky' and quite bitter so order this dish if you really like eggplant and sambal and don't mind experimenting.

Fried Yam Ring

Yam ring. This is another deep fried dish that's super crispy outside but the yam is very creamy and yummy. Every table in the restaurant had one order of this so a must-try, definitely.

Mushroom Rendang

Mushroom Rendang curry. I love rendang! It has wonderful notes of Kerala cuisine so I never pass by an opportunity to eat it. This was my favourite dish of them all. The mushroom had a texture very similar to chicken but the flavour definitely won't put off a vegetarian. An absolute must must MUST try!

Whole Earth Peranakan Thai Vegetarian Restaurant
Website
*No added MSG

Average cost per person will be between SGD 25 to SGD 35 depending on what you order. 

FLÄCKIG Mixing bowl from Ikea

Mixing bowls are an essential part of your kitchen things if you intend to bake even once in a while. Ikea has some good, sturdy mixing bowls. I personally use their steel one but Shreya found the melamine ones quite handy too. Also shown are the measuring spoons in the same category, from Ikea. 

The info, from Shreya.

Price - US $3.99

Where you got it - IKEA, Dubai. Link to product.

Mixing bowl, perfect while baking and all general uses for a mixing bowl. Love the handle and the spout. They are also available in blue.

Also, set of measuring cups from STAM - Dhs 4.95

Thursday, January 27, 2011

Puff Pastry

This is the first of a series of posts on laminated doughs. The basic idea behind a laminated dough is to have alternating hydrophylic and hydrophobic layers that help create rise (or puff, in this case) when baked. Basically, the moisture trapped between the layers of fat cannot easily escape and so up goes the pastry. These posts are the result of me trying to improve my pastry skills and are experiments in the boundaries of vegan baking. I really just wanted to see if I could make these doughs with any success, so you are under no obligation to actually make them since they are rather high in fat. But, if you like a good challenge, then laminated dough will surely test your patience and skill. I have looked through a variety of puff pastry recipes and they are all basically the same, but I have pieced together some techniques that worked well for me. Here is what I did:

INGREDIENTS
For the Dough
- 16 oz all purpose flour
- 4 oz cake and pastry flour
- 1/2 - 3/4 tsp salt (use less salt the more margarine you use for the block)
- 2 tbsp very cold Earth Balance margarine (not the whipped kind) or vegetable shortening
- 6 to 8 oz ice cold water

For the Margarine Block

- 16 oz very cold Earth Balance margarine (not the whipped kind), or up to a 50:50 mix of margarine and vegetable shortening
- 2 tbsp all purpose flour

METHOD
1. First, make the dough. Mix the flour and salt together. Cut the butter into the flour, then add enough of the water to make a soft and smooth dough. It should not be sticky, but it should not be tough, so adjust accordingly. Knead until smooth (about 5 mins with a stand mixer fitted with a dough hook).
2. Place the dough on a lightly floured pastry mat and stretch/pat it into roughly a 12 inch square. Cover with plastic and refrigerate (I do the mat and all to make it easier) for an hour.
3. While the dough is cooling, make the margarine block. Place the margarine (or margarine/shortening mix) on a silicone mat or piece or parchment paper. Starting with your hands, but moving to a pastry scraper when the margarine gets sticky, work the margarine to make it pliable. If you are using a margarine/shortening mix, make sure it is well blended. Sprinkle the flour over top, then use the flat side of the pastry scraper to work it into the margarine. If the mixture gets too warm, stick it back in the fridge for a while and try again later. It is essential to keep everything cool or cold.
4. Lightly spray a piece of parchment paper with oil, then transfer the margarine flour mixture to it. Lightly spray the margarine with oil, then place a piece of cling wrap over top. Using your fingers, press the mixture into a 6 inch square, using the pasty scraper to square everything up perfectly. Place in the fridge until ready to use.
5. Now to laminate. The key here is to make as perfect a rectangle (or square) as possible, and to have your dough an even depth. The trick is to roll from the centre to the corners first, then along the length and width of the dough to even things up. So, remove the dough from the fridge, make sure the pastry mat is still lightly floured, and roll it into a perfect 12 inch square. Remove the cling wrap from the margarine and place margarine side down on a diagonal in the centre of the dough (i.e. it will look like a diamond in the centre of a square. Carefully peel off the parchment paper. Fold the corners into the centre to make an 8" square, make sure no air is trapper inside, and seal the seams. Take your time here, making sure each seam is carefully but firmly pinched together and completely sealed. If your margarine starts squirting out when you begin rolling the dough, all will be lost.
6. Turn the dough over so that the seams are on the bottom, and make sure your pastry mat is still lightly floured (the dough needs to slide on something so it does not stick and tear). Carefully roll the dough into a 24" x 8" rectangle. Do not press too hard or work the dough too fast. If it keeps shrinking back, let it relax for 5 mins and try again. Square everything up as perfectly as possible. Now, with the 8" side facing you, fold the bottom 1/3 up, then to top 1/3 down, like you are folding a letter. Cover in plastic and put back in the fridge for 30 mins. I like to do all this on the pastry mat so I have a rolling surface and a way to measure the dough.
7. After 30 mins, remove the dough from the fridge. Making sure the seam from the first fold is on your left, carefully roll the dough into another 24" by 8" rectangle. Fold exactly like you did before, and refrigerate for 30 mins. You want to repeat this so that you end up doing six folds in all (yes, this is going to take a while). You could stop at five and no one would notice. With every fold the dough will get more delicate so please be very careful! One errant poke of a thumbnail can tear the dough and ruin your lamination.
8. When all the folding is done, refrigerate the dough for a few hours, or up to overnight. You can also divide the dough in half or quarters, wrap tightly, and freeze for one month.

A NOTE ON MARGARINE: I had the best luck with Earth Balance baking sticks since they best approximate butter in firmness and performance. Softer spreadable margarine led to disaster because it squirted out from between the layers of dough. But, I also find that Earth Balance has a bit of a taste and so mixing it with a more neutral non hydrogenated vegetable shortening can help with that whilst making for a very flaky pastry.
Tuesday, January 25, 2011

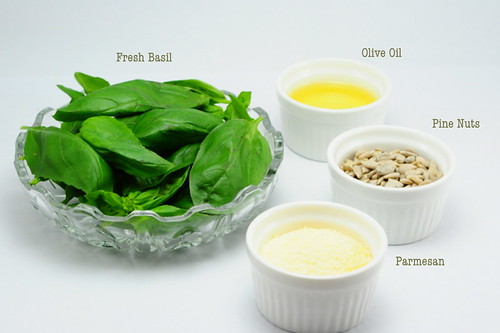
Fresh Basil Pesto Recipe

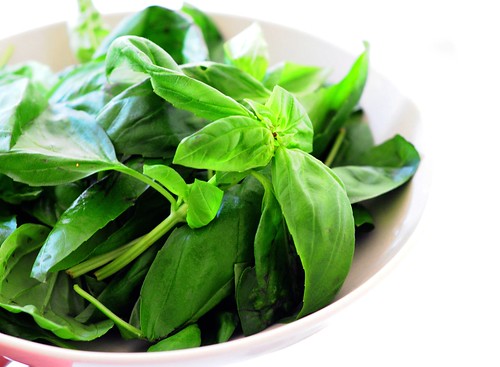
Its not super easy to get fresh basil in Singapore. Its not impossible either but somehow, when I do come across them in the supermarket, I feel they are wilted and cost too much. Why bother when there are a gazillion different types of other greens around, that are more local.

Fresh basil pesto recipe

I did, however, manage to score an entire bag of super fresh basil in Giant supermarket a couple of weeks back. Ooh the flavour was mindblowing. Although I have tried pesto pasta and pesto chicken before in restaurants, making your pesto is way way better! I was a bit skeptical if TH would like it but he actually loved the pesto pasta I made with (recipe coming up next!)

fresh basil pesto recipe

Fresh Basil Pesto 
Makes about 3/4 cup

Ingredients:
4 cups fresh basil leaves
1/2 cup extra virgin olive oil
3/4 cup grated parmesan cheese
1 tsp minced fresh garlic
1/3 cup pine nuts
1/2 to 1 tsp freshly ground black pepper
Salt to taste

How I Made It:

Dunk all ingredients into a mixer or food processor and grind to an almost smooth paste. Can be served in various ways, most popular being pesto pasta, over toasted bread, in pizza, etc. Can keep refrigerated in an air tight container for up to 3 days.

You can also substitue the pine nuts for walnuts, sunflower seeds (I tried these once and loved it!), or any other nuts you have in hand.

fresh basil pesto recipe

First two pictures in this post taken in the home made light box for food photography.

Monday, January 24, 2011

Sangria Recipe

There are a few things very off with this post, I must say. First of all, I hardly ever post recipes for drinks. In fact, among 400 odd recipes in this site, only a handful are drinks recipes.

Sangria Recipe
Photograph taken in natural light
You should know that Sangria is not served in such huge portions. Use wine glasses. I don't have any. In fact, these are the only glasses I have and you may have seen them in may posts before, but ignore that. 

Also, this drink is alcoholic! Well, if you grew up in a heavily Catholic-dominated community where every other family you know makes wine at home, you would soon stop looking at it as alcohol and just shut up and drink already!

So anyway, I thought since we have known each other for a while now, I should tell you all that my favourite drink of all times is Sangria. Since leaving Hyderabad, I've hardly ever had it but decided to make it the other day at home. TH hates any kind of alcohol so I got to drink this over the next month ;)

To Make Enough Sangria for 8

500 ml red wine (click here to see what types of wine work best)
2 tbsp brandy (optional)
1 apple, cut into tiny pieces
1/2 an orange, cut into chunks
2-4 tbsp sugar

Mix all the ingredients, refrigerate overnight and serve cold in wine glasses (very important!)

Sangria Recipe
                        Photograph taken in homemade light box for food photography

Sunday, January 23, 2011

How to Make a Statement with Dinner Rolls

Fool me once, shame on you. Fool me five times, shame on me. In other words, I tried another Martha Stewart project/recipe.

Martha Stewart's version:

our weird version:

To be fair, I knew it would be tough. I knew that those flour letters weren't going to look as clean and pretty on my dinner rolls. What I didn't count on were flat, dense, square rolls. What went wrong exactly? I'm still not sure.

The dough doubled in size. I rolled it into balls, and it doubled again.
But then, this came out of the oven.
The butter and Q-tip method didn't work out so well. If making your own lettered dinner rolls, I'd definitely recommend larger stencils.
Still, we got it done. Sort of.
Win some, lose some? I wish!

Recipe via Martha Stewart

Ingredients
(Makes 30)
1/4 cup warm water (115 degrees)
2 packets (1/4 ounce each) active dry yeast
1 1/2 cups warm whole milk (115 degrees)
1/2 cup (1 stick) unsalted butter, melted, plus more for bowl and pans
1/4 cup sugar
2 1/4 teaspoons salt
3 large eggs
6 to 6 1/2 cups all-purpose flour (spooned and leveled), plus more for work surface

Directions
Place water in a small bowl; sprinkle with yeast, and let stand until foamy, about 5 minutes. In a large bowl, whisk together milk, butter, sugar, salt, and 2 eggs. Whisk in yeast mixture.

Using a wooden spoon, stir in 6 cups flour, 1 cup at a time, until you have a soft, shaggy dough (if necessary, add up to 1/2 cup more flour). Turn dough out onto a floured work surface; knead until smooth and elastic, 5 to 10 minutes. Butter the inside of a large bowl; place dough in bowl, turning to coat. Cover bowl with plastic wrap; let stand in a warm spot until dough has doubled in size, about 1 1/4 hours.

Butter two 13-by-9-inch baking pans. Divide dough in half. Roll each half into a 15-inch rope; cut each rope into 15 1-inch pieces. Press each piece into a disk, then shape into a ball. Arrange dough balls in prepared pans. (To make ahead: Wrap pans well, and freeze, up to 2 months.) Cover pans loosely with plastic; let stand in a warm spot until rolls have doubled in size, about 1 1/4 hours (2 hours more if frozen).

Preheat oven to 375 degrees, with racks in upper and lower thirds. In a small bowl, beat remaining egg until blended; brush onto rolls. Bake until golden brown, about 20 minutes, rotating pans back to front and top to bottom halfway through. Let rolls cool 15 minutes before serving.

More Silicon Bakeware from Chennai, India

Remember the Silicon Bakeware in Chennai that Divya shared with us a few days back? Well, my sis found some more awesome silicon bakeware in Chennai so check out what she has to say:

"I was on the look out for a shallow silicon bundt pan and came across these cute ones sitting pretty on the shelves of the home products section @Home Centre, EA Mall, Chennai.


The 24 ×13.5 × 7cm rectangular tray would be ideal for baking cakes and cookies in any kind of oven and is claimed to withstand the temperature range of -40C to +220C / -40F to +430F.

I am yet to lay my hands on this quality assured, chocolate coloured, refrigerator friendly product and will get back to you soon with my baking experiences!"


Price of the Silicon Rectangular Loaf Tray (size MIX 12) = INR 345

Location Purchased:
Home Centre,
Lifestyle International Pvt Ltd,
Express Avenue Mall,
49, 50L - White's Road,
Royapettah,
Chennai- 600 014

Website - www.lifestylestores.com

Huge thanks sis, for the contribution to MMKT :)

Friday, January 21, 2011

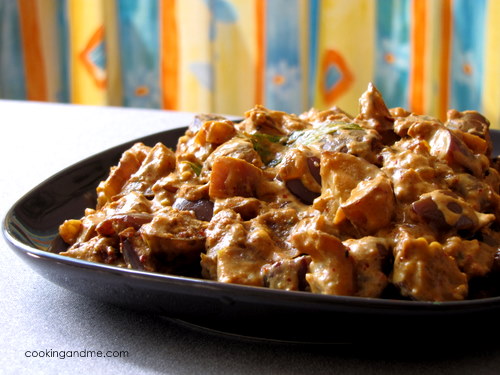
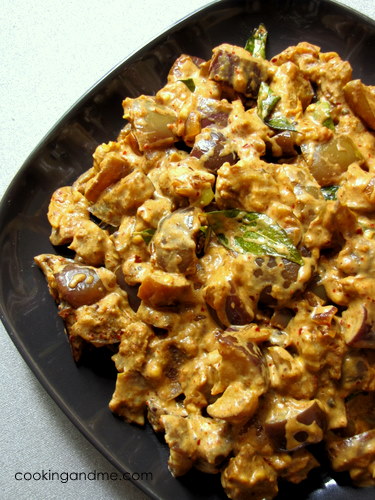
Kathirikkai Kariamudhu Recipe / Curried Brinjal from Hebbar Iyengar Community

When it comes to recipes from Chandra Padmanabhan, I mostly follow them blindly, except to suit spice levels to our taste. This very interesting recipe from one of her books had me thinking though, and I adapted it by adding some curd in the end. Very tasty and very South Indian!

IMG_3245

The ingredient list and method may look long but its really a very easy recipe to make


Kathirikkai Kariamudhu Recipe 
Adapted from Chandra Padmanabhan's Simply South
Serves 4 as a side

Ingredients:
1 small marble-sized ball of tamarind
10-12 baby brinjals, cubed
1/2 tsp turmeric powder
2 tsp grated coconut
1/4 cup curd / yogurt (optional)
Salt to taste

For Spice Powder:
1.5 tbsp channa dal / husked Bengal gram / kadala paruppu
1.5 tbsp urad dal / husked black gram / ulutham paruppu
2 dry red chillies
3 tbsp coriander seeds (or use 1 tbsp coriander powder)
1/2" stick cinnamon
1 clove

For Tempering:
2 tbsp oil
1 tsp mustard seeds
1 tsp urad dal
1 tsp channa dal
1 dry red chillies, torn into half
A few curry leaves

How I Made It:

1. Soak tamarind in 1/4 cup water for 10 mins. Extract juice and discard pulp.

2. Lightly fry ingredients for spice powder in a dry skillet over low fire. Toss gently till dals are golden brown, take care not to burn them! Cool and grind to a fine powder.

3. Heat oil for tempering and the rest of the ingredients in given order. When the mustard seeds start popping, add the cubed brinjal pieces and saute for 2-3 mins. Then add tamarind juice, turmeric powder, and salt.

4. Sprinkle some water and cook closed over low heat for about 5-7 mins or until the brinjal is tender. Cook open for a minute until all the extra moisture is absorbed. Then add the grated coconut and the spice powder. Stir well to combine, adjust salt, and finally mix in the curd before removing from fire. (For authentic Kathirikkai Kariamudhu recipe, avoid the curd).

5. Serve hot with steamed rice or roti.

IMG_3259