Saturday, January 31, 2009

Food Photography Basics For Food Bloggers

You are a great cook with a passion for serving others. Your family appreciates your dishes and your skills of presentation. Your dish is the most talked about in any potluck party. You decide to share your recipes by documenting them in your own little space in the Internet. You find sites with similar tastes and interests as yours. You even make some friends. This is great! But soon, you are wondering how you can make your food look as good as it tastes. You have a basic point and shoot camera and don't want to invest in a more expensive one just yet. After all, food blogging could end up like most of your other hobbies and fizzle out in a few weeks time.

This was me 2 years back. I loved cooking, I was already an avid blogger before I started this blog and the only thing that was on my mind was 'how do I take better pictures of my food?'. I had a basic point and shoot camera, the Nikon L10 that was a 5 megapixel, 3x optical zoom camera.

If you think you can relate to my situation and feel that the only way to better your pictures is to get a better camera, then wait! That's not true. Really.
For eg: take a look at this picture below.

Pic 1

Looks quite ordinary and maybe even a bit unappealing, right? Potato masala is a beautiful dish which can be made to look lovely and vibrant. I should be able to do much better, even with the same camera.
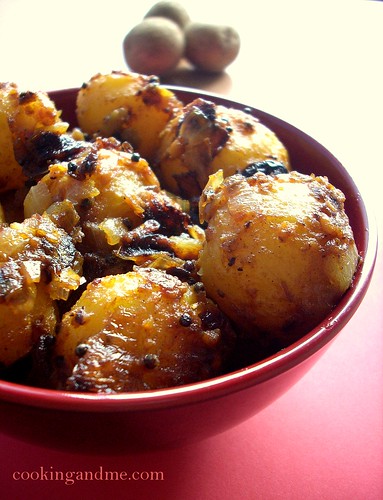

Pic 2
Now here is a picture of spicy baby potatoes that uses a slightly different recipe but captures the same subjects - potatoes and masala.

There are several things I changed in the second picture.
1. Pic 2 was clicked near a window, indoors whereas Pic 1 was clicked by putting the dish on a plate in the balcony. The light was harsher in the first case.
Understanding the right amount of light needed and placing your dish at the right spot to photograph is most often the first step.
2. I used a different bowl for Pic 2 that was wider and could hold more of the dish. This is not always necessary but having a good set of plates and bowls goes a long way too. That was one of the first things I realised and now I can safely say I am addicted to cookware. I pick up cheap yet pretty bowls wherever I go.
3. I used a red chart paper as the base for Pic 2. This helped enhance the colour tone of the picture and match the colour of the bowl. I am still working on this aspect of food photography - choosing a good base and background for my pictures. I don't have that many props yet but next time I go to India, I intend to pick up some cloth material and kitchen napkins that will give me a nice solid base and background for the pics.
4. I clicked Pic 2 in a different angle. This is pretty much up to you. Most of us are comfortable with taking a shot from above, since we don't do elaborate setting for our pictures and if we take a shot at eye-level, we are going to capture some unwanted things around the dish or in the background.
I am normally very lazy to do any setting for my pictures. The most I end up doing is to place some coriander leaves around the bowl or wrap my brown kurta around it to enhance the dish. You can still get some pretty pictures this way, I feel.
5. I did some very basic editing for Pic 2 using Google Picasa and Photoshop. Its okay if you don't have photoshop. You can still make your pictures look much better with some basic tweaking with Picasa. You can download it here.
And I will share the tips I know with you in the next post in the series :)
Disclaimer:
- I am NOT a food photography expert or a professional photographer. Since that comprises most of us out there, I am hoping you can relate to my posts as a normal food blogger who just wants to take better pictures of her/his food.
- The posts are written in the assumption that you don't own a fancy camera or lights or elaborate setting for your pictures. If you do, then you wouldn't be reading this post anyway 'cuz in all likelihood, you already take great pictures.
- There are no ugly pictures. Or bad ones. There are just different pictures. I know of people who like my pictures better than the ones you see on some professional food photography websites. This post is dedicated to them :)

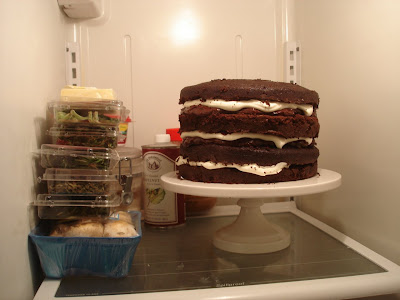
Bon Appetit's Devil's Food Layer Cake with Peppermint Frosting

their cover

my cover


But how did that happen?? Well, the below begins on Christmas day, a day after all the baking and making of the ganache layer, the white chocolate cream layer, and the peppermint frosting. All I had left to do was assemble it...

Have you ever cut a cake across horizontally? Alton Brown spent an entire ten minute segment on Good Eats on this very thing. I ended up using floss, which worked somewhat well if not jaggedly.

Oh and thank you, Sara, for letting me use your KitchenAid mixer. I really don't think I would've attempted this without it. (The peppermint icing involved seven minutes of whipping.)


Oh, whaddya know? All FOUR cake layers and SIX icing layers are assembled and popped into the fridge to set up!


One last step, to ice it. Ina (Garten) would be like, "How easy is that?"

But then... "Uh oh, babe (my husband is helping at this point), it's sliding."

"nooooooooooooooo!!!!! quick, get a plate or something. we'll slide it onto that. we can save this... oh no, that's not working. oh, no. oh, no! wait, let's at least get a picture."

Thursday, January 29, 2009

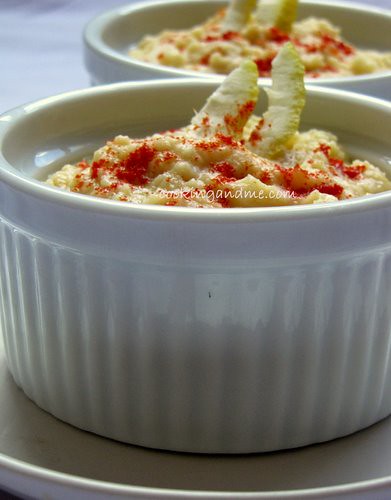
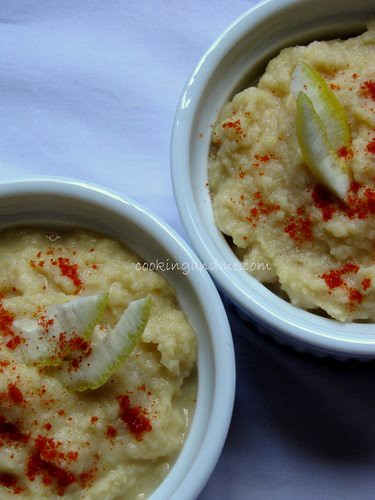
Hummus Recipe - Quick & Healthy Spread

I discovered pita bread and hummus when I was in Google Hyderabad. We had a salad bar with all these crunchy, fresh vegetables and a bowl of creamy hummus with warm, oven-fresh pita bread right next to it. It wasn't really a popular choice since our lunch buffet had much more appealing dishes but practically every other day, I used to make a pita sandwich with some lettuce, tomato slices, cucumber and a generous spread of hummus.


Those were the days that I could get hummus without going through the trouble of making it myself but now things are different. So last weekend, I set out to the task myself. I started with a Google Search for 'hummus recipe' and was quite surprised to see a site dedicated only to hummus! It was mentioned there that making hummus takes practise even if you are following recipes religiously. I beg to differ. My hummus came out really well and though next time I may blend it until creamy, I still didn't mind the coarse texture of it this time.

One ingredient you will surely need is good-quality Tahini. I got mine from NTUC FairPrice in Singapore. I don't remember the brand name now but tahini is definitely available here in Singapore.

If you want to prepare the hummus without tahini then you can avoid it, which will of course affect the flavour but the end product is still creamy and delicious. Sometimes, kids are allergic to tahini so follow the hummus recipe without tahini.

What I Used:

Chickpeas - 1 cup, washed and soaked in water overnight or atleast 8 hours
Tahini - 1/2 cup
Lemon juice - 1 tbsp
Garlic - 1/2 tsp, minced
Cumin / jeera / jeerakam - 1/2 tsp, crushed (I used cumin powder)
Salt - to taste
Olive oil / sesame oil - 1 tbsp

How I Made It:

1. Wash the soaked chickpeas well and drain water completely.

2. Pressure cook until soft (3 whistles) in sufficient water. If you don't have a pressure cooker, transfer the chickpeas to a pot and add water until it is well covered. Cook until the chickpeas are soft and mash easily. This should take about 30-40 mins. Do not add salt while cooking the chickpeas as this will harden them.

3. Drain the water used for chickpeas and keep aside. Blend the chickpeas until smooth, adding little water if too thick.

4. Add the rest of the ingredients (except oil) and continue to blend until you get a smooth, thick paste that is of spreading consistency. If too thick, add very little water at a time from the water used to cook the chickpeas.

5. Make sure you mix the oil in before serving!

I didn't buy pita bread so I served it with some home made white bread (recipe coming soon!)

I am sending this hummus recipe to Ramya's Chutney/Dip Mania and MS's JFI - Chickpeas.

Wednesday, January 28, 2009

Dinner with Van Gogh

As you know, I have three kids. More specifically I have three boys. Three active boys. That often means that dinner time can be utter chaos with everyone talking at once, Vegan Mom and me trying to keep kids in their seats, spilled drinks, etc. So, Vegan Mom came up with a great idea to help focus the dinner conversation. She signed some books about various artists out of the library, and every night each one of us tells the rest of the family what our favourite painting is by the artist of the week, and why. We then all say what we like about the painting, and discuss the elements and principles of art evident in the piece, as well as techniques that define the artist. On the weekend, we all make our own picture in the style of the artist.
It is a lot of fun to see what pieces of art the kids choose as their favourite because they have no preconceptions and don't go for the obvious. And, I have to admit, doing the original artwork is really hard! I loved art in high school and did a few pieces that weren't half bad, but art employs a part of the brain I have not used in a looooong time. I could almost feel my brain creaking and clunking away trying to get my hand to do what I wanted it to. Above is Son #1's interpretation of Van Gogh's self portrait. Below is my attempt at doing this picture a la Van Gogh. Next up: Picasso!

Tuesday, January 27, 2009

Blog Tour: Vegan Soups and Hearty Stews for All Seasons

Tonight I am doing something different. Nava Atlas asked me to be part of a blog tour for her latest book, Vegan Soups and Hearty Stews for All Seasons (it's actually the 4th edition of a cookbook she originally published as Vegetarian Soups For All Seasons). The idea is for various bloggers to try a recipe from the book and then blog about it on an assigned day. Neat, eh? The cookbook is divided into the four seasons with plenty of soups and stews in each. From Harvest Stew to Carrot Bisque to Asparagus and Spinach Soup to Melon Medley, this cookbook has over 1o0 recipes for you to try. The final chapter contains recipes for breads, muffins, and biscuits to complement all that soupy goodness.

I chose the New England Clam-less Chowder, being in the mood for something hearty. I have never had actual clam chowder so I can't comment on how it compares, but I will say that it was very, very tasty. Son # 2 described it as "super good," and Son #1 also gave it the thumbs up. I did make one change. The original recipe called for baked tofu to replace the clams, but I didn't have any. Instead, I used chopped king oyster mushrooms. It worked perfectly since the mushrooms have a bit of bouncy chew to them--kind of like what I imagine the texture of a clam would be. Son #1, who claims to hate mushrooms, immediately asked what the chunks were in his soup. Wanting to avoid a huge argument over picky eating, I just said "fake clams." "They are really good!," he replied, and ate up his soup.

Paneer Butter Masala Recipe

Paneer butter masala is something I make quite often. In fact, its one of the first paneer recipes that I tried and because I didn't use kasuri methi and because I followed a quick recipe, it didn't turn out.. well.. anything like paneer butter masala - the most popular of paneer recipes!

TH loves it and so do I, though these days I have reduced the amount of butter and cashew nuts that go into it. Even then, this is an indulgent dish, definitely not for quick fix meals over weekdays.


We like ours not too watery so I add very little water and let most of it cook away on the stove. If you have any ingredient that you add on top of all these, do let me know, I would love to experiment!

Recipe For Paneer Butter Masala

What I Used:

Paneer - 2 cups, cubed
Onions - 3 big, pureed
Tomatoes - 2 big, (blanched, peeled and pureed)
Ginger garlic paste - 1 tbsp
Coriander powder / malli podi - 1 tsp
All-purpose curry masala - 1 tsp (or use garam masala - grind 2 cloves, 1 green cardamom and a 1" piece cinnamon)
Red chilli powder - 1 tsp
Turmeric powder - a pinch
Kasuri methi / dry fenugreek powder - 1/2 tsp (try not to avoid this ingredient)
Cashewnuts - 2 tbsp, grind to paste
Mustard seeds - a pinch
Butter - 2 tbsp
Cream - 1 tbsp (optional)
Fresh coriander leaves - chopped, for garnishing (I didn't have any to use)

How I Made It:

1. Heat the butter in a pan and add the mustard seeds. Once they pop, add the onion paste and fry for 2 mins. Then add the ginger garlic paste, chilli powder and the cashewnut paste. Saute for another 2 mins.

2. Now add the pureed tomatoes, coriander powder, turmeric powder, kasuri methi, curry masala and salt. Stir well and leave on sim for about 5 mins.

3. Next, add the paneer and let cook. If the gravy seems too thick, add little water and keep cooking for about 5-6 mins.

4. Remove from fire, mix in the fresh cream if using and garnish with chopped coriander leaves.

I served it with some carrot rice but this side dish goes very well with roti, nan, chapati and any rice dish.

Note

In most paneer recipes, there are directions given to first fry the paneer cubes until golden brown. I used to do this but find that the pieces turn hard and don't absorb the gravy while cooking. An alternative method would be to fry the paneer cubes, dunk then in some water, let it soak for 2 mins and then drain before adding it to the gravy. This method is too-consuming for lazy old me and I really don't find anything wrong in adding the pieces raw to the gravy provided its cooked for atleast 10 mins in the gravy.

Sunday, January 25, 2009

Dumplings

My mom used to make stew with dumplings like this when I was a kid. Basically, these are just like mini biscuits, but cooking them on top of the stew makes them tender and moist. My mom also used to serve them with pumpkin soup. Use them as you see fit.

INGREDIENTS
- 1 cup flour
- 2 tsp baking powder
- 1/4 tsp baking soda
- 1/4 tsp salt
- 1/4 cup plain soy yogurt
- 1/3 cup plain soy milk
- 1/2 tsp apple cider vinegar

METHOD
1. Mix together dry ingredients in a bowl. Whisk together wet ingredient in a separate bowl, then add to dry ingredients, gently mixing until just moistened.
2. Drop spoonfuls of batter on the top of a simmering stew or soup. Cover, and let simmer for about 10-12 mins, until dumplings are cooked through.

Saturday, January 24, 2009

Braised Tofu and Vegetables

I love watching cooking shows. Well, more like cooking competition shows. Top Chef is a favourite, and I love anything with Gordon Ramsay, even though he pretty much mocks everything I stand for. Anyway, it seems like someone on these shows is always braising some piece of meat, so I thought I would apply the method to some tofu. Braising is usually reserved for tough pieces of meat that need to be tenderized, so I guess you really don't need to braise tofu. Still, the end result was quite tasty, and I love the taste of oven roasted veggies.

INGREDIENTS
- 2 tbsp oil
- 1 pkg extra firm tofu, thickly sliced
- 1 sweet onion, halved and sliced
- 1 small red onion, halved and sliced
- 2 celery stalks, chopped
- 1 large carrot, sliced
- pinch of tumeric
- 1 tsp thyme
- 1/2 tsp paprika
- salt and pepper to taste
- 1 1/2 cup white wine

METHOD
Preheat to 350 degrees
1. Heat oil in an ovenproof frying pan over medium heat. Fry tofu slices for a few minutes on each side, until lightly browned. Remove tofu from pan and set aside.
2. Add vegetables to the pan and fry for 8-10 mins, until softened and onion is beginning to brown. Add spices and mix well. Season with salt and pepper.
3. Add wine to the pan. Let bubble for a few mins to let the wine reduce a bit. Place tofu on top of the veggies, baste with sauce, and place pan in the oven.
4. Bake for 30 mins, uncovered, basting tofu every 10 mins, until veggies are cooked, sauce is reduced, and tofu is golden brown. Serve tofu with veggies in the side, and topped with extra sauce.

Click Red - Hot & Sweet

After much deliberation, battery-charging, camera-tweaking, bending, hemming and hawing, I finally have the entry for Click.

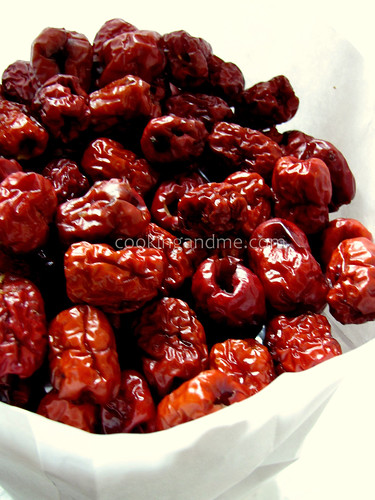
I bought some dried cherry chillies from the wet market last weekend. Or what I thought were dried cherry chillies. They were actually dried red dates! Ah well, as long as they are red, it works. And maybe I can come up with some nice chutney or dip with them, who knows.

As I did last weekend, I took close to 15o pictures today and finally have my entry. I am so happy I can finally think of food without wondering what colour it is. Phew.


Hot & Sweet - My Click-Red Entry


Now tell me. If these were in a transparent, unlabelled packet in a shop selling vegetables, wouldn't you have thought they are dried cherry chillies too? There you go!


Thursday, January 22, 2009

Orzo Risotto

I was really in the mood for a risotto but didn't have a single grain of arborio rice in the house. I did, however, have a bag of orzo pasta. Since it looks an awful lot like rice, I thought it would make a good substitute.

INGREDIENTS
- 5 cups salted water
- 1 1/2 cup orzo pasta
- 2 tbsp margarine
- 1/2 cup white wine
- 1/2 cup hot vegetable broth (or more)
- 1 cup frozen peas
- 1/4 cup nutritional yeast
- 2 tbsp finely chopped fresh parsley
- salt and pepper to taste

METHOD
1. Get the salted water boiling in a pot. Add pasta and cook for 4-5 mins, until pasta is softened but still has plenty of bite. Drain and set aside.
2. Melt margarine in a pan over medium heat. Add pasta and mix well, coating each piece of pasta. Add half of the wine, stirring constantly until absorbed. Repeat with remaining wine.
3. Add enough hot broth, a bit at a time, stirring regularly, until pasta is al dente. Add peas, yeast, parsley, and season with salt and pepper. Mix well, and cook until peas are done. Serve.

Clicking Red

This month's Click has been driving me crazier than it usually does. I have been obsessing about all sorts of red food and have been amazed to realise just how many of the things we put in our mouth is red or has red in it!

Taking on from this shot Bee took for the citrus theme, I tried the same with a tomato.


I am not that great with choosing light sources and angles and blah blah so it definitely doesn't look as good as hers but I had fun taking this shot. Yes, sometimes my idea of fun is having an almost-broken back!

Number of tomatoes cut up to get a slice I liked - 4
Number of shots taken - 84
Number of hours spent - 1:32
Number of hours my back hurt after bending over the bloody tomato - 3

The best part is, I am not sending this to Click. Not until I have tried out one more idea that's eating my brain. Sadly, I need to wait till weekend for the blessed thing that all food photographers turn to - natural light source!

Tuesday, January 20, 2009

Eggless Butter-Less Chocolate Muffins (Vegan)

One day the baking bug bit me. It bit me so bad that by the weekend, I was itching like a mad woman to bake something! I usually have all the ingredients but sadly, no eggs. Since there are tons of eggless cakes out there, I decided to do a quick search. Allrecipes had my answer. There were tons of eggless cakes and eggless chocolate cakes in there.

Some had warnings that eggless cakes will not be as moist and spongy as the ones with eggs. I beg to differ as the person who tried and tested the following recipe and dare them to look into the poor, innocent faces of these muffins and say the same thing again! I adjusted the measurements slightly to suit my need and what's more, this one is also butter-less.

Eggless butter-less chocolate muffins with frosting

So here is my eggless and butter-less chocolate muffin recipe. You can also bake it into a cake if you want. I used some frosting to add some buttery goodness to it but avoid that for a vegan version.

If you had told me last month that I would bake a vegan muffin, I would have laughed in your face and said that's not my kind of baking. Well, guess even I am wrong sometimes :D

Eggless Butter-Less Chocolate Muffins Recipe (Vegan)
(Adapted from allrecipes.com)

What I Used:

All-purpose flour / maida - 2 cups
Sugar - 3/4 cups (1 cup if you are not using frosting)
Unsweetened cocoa powder - 1/2 cup
Vegetable oil - 1/2 cup and a little more
Water - 1 cup
Soy Milk at room temperature - 1/2 cup (I used low-fat cow's milk)
Baking powder - 1 tbsp (remember, no eggs!)
Vanilla essence / extract - 1 tsp
Salt - a generous pinch

For Frosting (optional - avoid for vegan version)

Butter - 5 tbsp
Icing sugar / powdered white sugar - 3 tbsp

How I Made It:

1. In a large bowl, sift together flour, cocoa powder, baking powder and salt. This is to ensure that the ingredients are well blended. If you don't have a sieve, just make sure you mix the dry ingredients well.

2. Add sugar and mix together. I used powdered brown sugar but its okay to use white sugar as well.

3. Next, add oil, water, soy milk (or whatever kind you are using) and vanilla and mix thoroughly, churning the batter in one direction.

4. Pour into muffin/cake pan and bake in a pre-heated oven at at 350 degrees F (175 degrees C) for about 45 mins or until a toothpick inserted in center comes out clean.

5. If using frosting, cut muffins/cake into half horizontally and spread like in a sandwich.

Monday, January 19, 2009

Some Tips on Making Great Bread

I know I promised the orzo risotto recipe tonight, but the picture is being held captive on my memory card while the camera battery recharges. So, I thought would share some sagely advice on baking bread from my, uh, weeks of experience as proprietor of a home bakery. It seems that so many people are afraid of making anything leavened, no doubt because the first loaf they ever tried to bake turned out as as dense as a brick and just as tasty. Bread really isn't that hard to make, but it does take some practice to make a really good loaf. The more bread you bake, the better it will be. Here are some tips to help you on your way.

Your bread is only as good as your ingredients. Chuck out that yeast that's been kicking around the fridge for the past year and buy a fresh container. Get some organic flour.
Get a few tools. A baking stone is essential for making artisan breads. An instant read thermometer will tell you when your bread is done. Speaking of tools, a stand mixer helps bring dough together quickly, especially if you are making a lot of bread. But don't let the mixer do all the work. Kneading the dough with your hands will give you a feel for the dough and will let you know if it is too wet or too dry. Find a good place for your bread to rise. Bread will rise even in the fridge, but it goes a whole lot faster in warmer temperatures. I have found the top of the radiator works well in the winter. You can also see that I cover the bowls of dough with plates--no need to use plastic wrap. You will also notice the cookbooks. Get a good cookbook. I really like Peter Reinhart's The Bread Baker's Apprentice.Above all, keep on baking. You will undoubtedly crank out a few losers, but you will soon develop a feel for the perfect dough, know when a loaf is baked, and be able to make more complicated breads.
Sunday, January 18, 2009

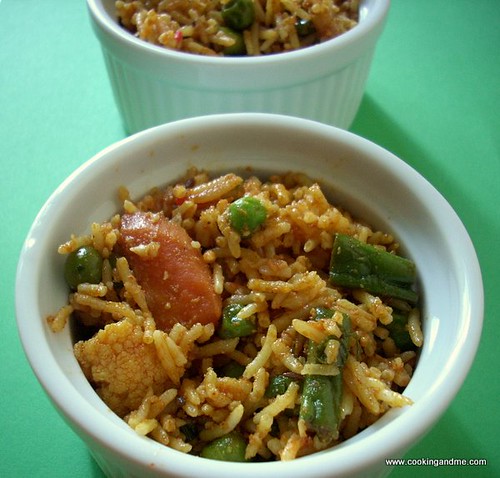
Vegetable Biryani / Biriyani

Personally, I am not a fan of vegetable biryani. I mean, who needs it when you have a much tastier counterpart - chicken biryani! But since I am looking at cooking more and more diverse vegetarian dishes, I had to try this as well. In fact, my mom calls biryani a quick fix meal when we have guests but whenever I check for recipes online, the steps have always been long-wound and involve too much ingredients and procedures.

The other day I was going through this old diary of mine that I used to write down recipes and cut out recipes from magazines, and I came across this biryani recipe. Sadly, I don't have the source but I got the feeling it would turn out well.

There are two ways of cooking this biryani with the same set of ingredients. I have outlined the longer method and the quick version is at the bottom of the post. Since I was making it the first time, I was a good girl and followed the steps but next time I am just throwing everything in a pressure cooker and reading till its done :)


What I Used:

Basmati Rice - 1 cup
Chopped mixed vegetables - 1 cup (potatoes, cauliflower, carrots, beans, green peas, etc)
Onion - 1 big, chopped
Curd - 1 Tbsp (optional)
Red chilli powder - 1 tbsp
Turmeric powder - 1/2 tsp
Fennel seeds/Saunf - 1/4tsp
Cardamom / elakka - 2
Cloves / grampoo - 2
Bay leaf - 1
Lemon Juice - 1 tsp
Oil/Ghee - 3 Tbsp (or a little less, 'cuz mine came out a bit too oily)

For Spice Paste

Coconut - 2 Tbsp (optional)
Green chillies - about 6, adjust according to taste
Cumin seeds - 1 tsp
Cinnamon - a 1" piece
Ginger - a 1" piece
Garlic - 1 tbsp, ground paste
How I Made It:

1. Wash and soak rice for about 15 mins. Cook in an open pot with 3 cups water until the rice is cooked yet firm. Alternately, you can pressure cook for one whistle with one cup water.

2. Grind the ingredients for spice paste adding very little water. Meanwhile, cook the chopped vegetables in adequate water until cooked yet firm.

3. Heat oil/ghee and roast the fennel seeds, cardamom, cloves and bay leaf for about 30 seconds. Then add the onions and fry till it turns pink and translucent.

4. Add the semi cooked vegetables next and saute for 2-3 mins. Mix in the ground spice paste and fry till the raw smells leaves it. This shouldn't take more than 5 mins.

5. Next add the curd (if using), red chilli powder, turmeric powder, lime juice and salt and mix well.

6. Turn off the heat. Add the cooked rice and mix gently until well blended.
Serve hot with raita, papad and pickles.

Note

A super-quick version of this recipe would be to do all the frying in the pressure cooker pan (spices, onions and ground paste). Add raw cut vegetables and washed, soaked rice to this. Pressure cook for one whistle in 1.5 cups water. This is what I mostly do but doing it the long way gives you more separated grains of rice and a stronger flavour.

Saturday, January 17, 2009

Seitan Scaloppine Marsala

I was in the mood for Italian tonight, but really wanted to do something without tomatoes for once. When I saw Susan's post today on Fat Free Vegan Kitchen for scaloppine with a lemon-olive sauce, I knew what to do. I'm not a big fan of olives (they honestly make me gag) so I used her cutlets to make a faux veal scallopine based on a recipe from The Sporanos Family Cookbook. I was very pleased with the results, and I think this is a meal both vegans and non-vegans will enjoy since it seems that most non-vegan will agree that veal is particularly cruel. In the background of the pic you can see what I am calling an orzo risotto. I will post it tomorrow.

INGREDIENTS
- 1 recipe seitan scaloppine with the following changes:
- add 1 tsp sage
- add 8 dried shitake mushrooms, finely ground (about 1/4 cup)
- use water or veggie broth instead of "chicken" broth
- 1/4 cup all purpose flour
- 2 tbsp margarine
- 2 tbsp olive oil
- 6oz thickly sliced cremini mushrooms
- salt and pepper
- 3/4 cup marsala

METHOD
1. Prepare seitan as per the recipe above.
2. Heat 1 tbsp of the margarine and 1 tbsp of the oil in a large frying pan over medium heat. Add mushrooms and saute for about 10 mins, until nicely browned. Season to taste with salt and pepper. Remove from pan.
3. Add remaining margarine and oil to the pan. Dredge seitan in the flour, then fry in the pan for about 1 min per side, until lightly browned. Remove from pan.
4. Add marsala and let bubble, stirring constantly to thicken. Add mushrooms back to the pan and stir. Right before serving, and seitan to the pan, turning to coat with the liquid. Add a splash of water, if needed. Serve immediately.

Thursday, January 15, 2009

Chinese Dumplings

If my kids aren't watching WALL-E these days, they are watching Kung Fu Panda. The upside of this is that they are more receptive to all sorts of Chinese food. If you have seen the movie, then you will understand why they were very keen to try some dumplings. The question was what to fill them with. The boys are not crazy about the tempeh filling in the Chinese Tempeh Buns I made last week, so I went with pulsed chickpeas. That was a good move. These are awesome! I based them on a recipe from an old Martin Yan cookbook which called for the dumplings to be boiled, but I am sure you could steam them as well.

INGREDIENTS
Makes 15 dumplings
Filling
- 1 can chickpeas, rinsed and drained
- 2 green onions, sliced
- 1/2 cup dried mushrooms, soaked and chopped
- 2 tbsp chopped cilantro
- 1 tbsp light soy sauce
- 1 tbsp hoisin sauce
- 1 tbsp sherry
- 1 tbsp cornstarch
- 1" piece of ginger, minced
- 1 tsp sesame oil

Dough
- 1 1/2 cup all purpose flour
- 1/2 cup boiling water

METHOD
1. Make the dough by mixing the boiling water into the flour with a fork. Knead on a floured surface, adding enough flour to make a soft dough that is not sticky. Shape into a 15" cylinder, cover with a damp towel, and let rest for 30 mins. Use the extra water from the kettle to soak the mushrooms.
2. While dough is resting, get 12 cups of water on its way to boiling in a large pot.
3. While dough is resting and water is heating, pulse the chickpeas in a food processor. Place in a large bowl and add the rest of the ingredients. Mix well.
4. To make the dumplings, cut a 1" slice off the dough cylinder and flatten on a floured surface into a 3-4" circle. Place some filling in the middle, then fold the circle in half and seal the edges. Cover with a damp cloth, then repeat with remaining dough and filling.
5. To cook the dumplings, add as many dumplings to the pot as you can without crowding. Stir to keep them separated. When water returns to boiling, add 1/2 cup of cold water. Return to a boil and cook, stirring, until dumplings float. Remove with a wire strainer and serve.

I made a peanut sauce that I wasn't to happy with, but you could try this peanut sauce I made before. Or, use a sauce of your choice.

Tuesday, January 13, 2009

Chettinad Mushroom Masala

Both TH and I are huge mushroom lovers. I make different dishes quite often but mostly over week nights when there is either no light or no energy left in me to plate and photograph the dishes. Last weekend I tried chettinad the Chettinad mushroom masala recipe that a friend's mother passed on me when she saw my interest in Chettinad dishes. Though I heard their non-veg preparations, I would easily kill for a nicely prepared Chettinad vada curry or Chettinad mushroom masala any day. This recipe is on the spicier side and though the original recipe called for 1 tbsp oil, I tried with lesser amount oil and it worked just fine.

What I Used:

Any mushroom variety of choice - 2 cups, chopped (I used a mix of shitake and oyster mushroom)
Tamarind - a small marble-sized ball soaked and squeezed in 1/2 water to extract juice
Salt - to taste

For Spice Mixture

Garam masala - 1 tsp (crush 1 clove + 1 cardamom pod + 1/2" piece cinnamon)
Chana dal / kadala parippu / split bengal gram - 1 tbsp
Whole black pepper - 1 tsp. If using powder, use 1/2 tsp

For tempering

Oil - 2 tsp
Mustard seeds - 1/2 tsp
Dry red chillies - 2, halved
Curry leaves - a few
How I Made It:

1. Dry roast the ingredients, cool and grind for spice mixture. If using garam masala, you can add while grinding.

2. Heat oil in a pan and add mustard seeds. Once they start spluttering, add the curry leaves and red chillies. Fry for 10 seconds.

3. Add the chopped mushrooms and stir well until it is well coated with the oil. Add salt. Let it cook till the mushrooms start sweating and become soft. Then add the tamarind mixture and cook on an open fire until the gravy gets thick and sticks to the mushroom pieces.

4. Next, add the ground spice mixture and fry for another 3-4 mins. Adjust salt and remove from fire.
Serve hot with rice or roti.

I am sending this to Srimathi's RCI: Chettinadu Vegetarian Cuisine

You may also like my no-grind Mushroom Masala Recipe.

Monday, January 12, 2009

Pasta and Potatoes with Tofu Pancetta

We still had half a loaf of ciabatta to finish, so it was more Italian food tonight. I leafed through The Sopranos Family Cookbook and veganized this recipe. I'm pretty sure the tofu tastes nothing like pancetta, but it does provide a burst of smoky and salty flavour with a chewy texture. Actual pancetta is not smoked (it is salted pork belly which is hung and left to go moldy), so I guess this is more like bacon. I think it would taste good in a BLT.

INGREDIENTS
Tofu Pancetta
- 1/2 cup water
- 2 tsp seasoned salt
- 2 tbsp brown sugar
- 1/8 tsp nutmeg
- 2 bay leaves
- 1/4 tsp thyme
- 1/2 tsp rosemary
- 1/2 tsp liquid smoke
- 1/3 pkg extra firm tofu, sliced (see pic below)
- 1-2 tbsp oil

METHOD
1. Place all ingredients except the tofu and oil in a small pot and bring to boiling. Simmer for 10 mins.
2. While that stuff is simmering, place tofu slices in a non-stick frying pan and place over med-hi heat. Once it starts to sizzle, strain liquid into the pan. Let liquid reduce down, gently turning tofu to coat.
3. Once liquid has completely reduced, add 1 tbsp of oil (more if needed). Fry 3-4 mins per side, until crispy and browned. Reduce heat a bit, if tofu is browning too much. Remove from heat and set aside.
Pasta and Potatoes
- 2 tbsp olive oil
- 1 carrot, chopped
- 1 rib of celery, chopped
- 1 onion, diced
- 1 garlic clove, chopped
- 2 tbsp chopped fresh parsley
- 1/2 pounds Yukon Gold potatoes, peeled and chopped
- 6 cups water
- 1 small can tomato paste
- salt and pepper to taste
- 12 oz dried macaroni
- 2 cups boiling water
- 1/2 cup nutritional yeast
- 1 recipe tofu pancetta

METHOD
1. Heat oil in a large pot over medium heat. Saute carrot, celery, onion, garlic, and parsley for 5-7 mins, until softened. Add potatoes, water, and tomato paste. Season to taste with salt and pepper. Bring to bubbling, then reduce heat and simmer for 15-20 mins, until potatoes are softened.
2. Add macaroni and boiling water and cook, stirring frequently, until pasta is cooked and sauce is absorbed. Add more water, if needed.
3. Add nutritional yeast and tofu pancetta and mix well. Serve.

Sunday, January 11, 2009

Tofu Cutlets in a Lemon Sauce

One of the great things about running a bakery is that you get to eat the leftover bread. One customer ordered a loaf of ciabatta today, leaving the other loaf for our dinner. Excellent. I made a batch of pasta fagioli (you can see it in the back--I only had penne on hand), Vegan Mom made the vegan Ceasar salad from Vegan Planet, and I made these cutlets. Mmmmm . . . lemony.

INGREDIENTS
- 1 pkg extra firm tofu, cut into 8 pieces
- 1/4 cup flour
- 1/4 cup nutritional yeast
- 1 tsp salt
- freshly ground pepper
- 3-4 tbsp margarine
- juice of two lemons
- 1/2 cup dry vermouth
- salt and pepper to taste
- strips of lemon zest
- chopped fresh parsley

METHOD
1. Mix together flour, yeast, and salt and pepper and place in a small paper bag. Add a few slices of tofu to the bag and shake gently to coat tofu. Repeat with remaining slices.
2. Heat margarine in a large frying pan over medium heat. Fry tofu slices 4-5 mins per side, until golden. Add more margarine, if needed. Remove from pan.
3. Add vermouth and lemon juice to the pan, stirring frequently. Once sauce has thickened, add tofu back to the pan and coat with sauce.
4. Serve garnished with strips of lemon zest and parsley.

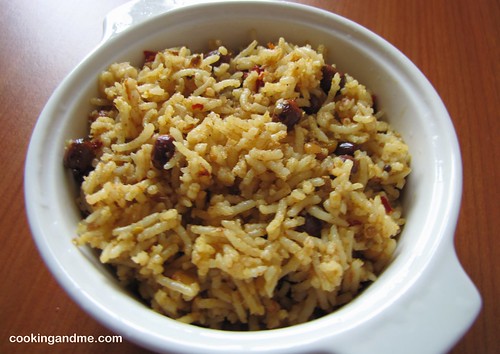
Tamarind Rice / Puliogare

I was gifted Chandra Padmanabhan's Southern Spice by a colleague in Hyderabad whose exact words when she handed it to me were 'when I saw the paniyarams on the cover, I thought of you' (Thanks Pragi!!). I am quite glad people think of me when they see delicious food, quite flattering :D Anyway, the book has many authentic South Indian recipes. I am not good with reviews and don't normally read them either. The reason being, I get very biased and it clouds my actual feelings towards something.

I did read about her first book Dakshin on Jugalbandi and since they weren't too pleased with it, I was already judging the recipes before I even tried anything (Don't start judging me now!) I have already tried a few recipes from the book, and this is the first in the series.

Chandra Padmanabhan has titled this recipe 'Avasara Puliogare' - meaning quick tamarind rice in tamil - and since I have an affinity towards any recipe that's quick, I decided to give it a shot and post it for Ranjini who has been asking for the recipe for a while.

Once I read through the list of ingredients and the instructions, I knew this was no quick recipe. To me, this is quick. Or maybe this. Definitely not what she had outlined. But I promised the recipe to Ranjini and also declared what's for lunch to TH so I decided to go ahead anyway.

Two things I significantly changed in the recipe are (a) the amount of oil used and (b) the order of soaking, grinding, roasting, etc, so that we use minimum vessels that reduces washing time at the end. I also changed the amount of ingredients here and there but that of course is normal when you follow someone else's recipe. I have written the actual recipe and changes I made in brackets. Please feel free to adapt according to your taste and email me in case of confusions.


So here goes.
What I Used:

Long-grained rice - 1.5 cups (I used basmati rice)
Turmeric powder - 1/2 tsp
Grated jaggery - 2 tbsp (I used 1 tbsp)
Salt - 1/2 tsp

For the Tamarind Paste

Tamarind - a large lime-sized ball
Fenugreek seeds / methi / menthayam / uluva - 3/4 tsp (I used 1/2 tsp)
Coriander seeds / malli - 1 tbsp
Dry red chilllies - 6
Salt - 1/2 tsp

For the Spice powder / Masala

Grated coconut - 2 tbsp ( I used 3 tbsp fresh coconut, but dessicated with work too)
White sesame seeds / til / ellu - 1 tbsp (I didn't have this but bought some to try next time)

For Tempering

Sesame seed oil / nallennai / gingelly oil - 4 tbsp (I used 3 tbsp)
Mustard seeds / kaduku - 1 tsp
Asafoetida powder / hing / kaayam - 1/2 tsp
Dry red chillies - 2, halved (I omitted this)
Urad dal / uzhutham paruppu / uzhunnu parippu - 1 tsp
Chana dal / bengal gram / kadala parippu - 1 tsp
Curry leaves - a few

For Garnishing

Sesame seed oil - 2 tbsp (I omitted this)
Roasted peanuts - 1/4 cup
How I Made It:

1. Wash and soak the rice in 4 cups water for half an hour. Rinse. Cook in an open, thick-bottomed vessel with 4 cups water (add more if its not enough while cooking) until the rice is cooked yet not too soft. Transfer to a colander and it drip off the excess water. I have found this to be the best way to cook basmati rice since pressure cooking it either makes it either under cooked or too mushy.

2. Soak tamarind and salt for tamarind paste in 1/2 cup water for 15 mins.

3. Soak fenugreek seeds, coriander seeds and red chillies in 1/2 cup water for 15 mins. Drain well.

Do all the soaking simultaneously to save time.

4. Heat a frying pan and roast the coconut (don't add any oil) till it becomes a light brown. Remove and roast the sesame seeds until they start spluttering and turn golden brown. Mix together and grind to a fine powder. Keep aside.

5. In the same grinder, combine all ingredients for tamarind paste and grind to a fine paste.

6. Heat the 3 tbsp oil in a same pan and fry the peanuts until crisp. Drain and set aside.

7. Add the ingredients for tempering to the same oil. When the mustard seeds start spluttering, add tamarind paste, jaggery, salt and 1/2 cup water.

8. Mix well and simmer till all water has evaporated and the mixture has a jam-like consistency. Remove.

9. Place rice a large bowl and gradually blend in the tamarind paste. Sprinkle in spice powder and mix well. Check and adjust salt.

10. Garnish with peanuts and serve with fried appalam.

Saturday, January 10, 2009

Naan Bread

Tonight we packed up the crew and headed out to a friend's 40th birthday party. Indian food was the menu of choice, so I provided the naan bread. I posted this recipe before, but let me say once again how awesome it is. I subbed soy yogurt and margarine for the dairy, and added chopped garlic to half of the dough for garlic naan (which you can see I also sprinkled with chopped cilantro). The party was a blast, the vegan dishes were awesome, and the naan devoured.

Thursday, January 8, 2009

Sausages in the Works

I have been working on a tempeh/seitan sausage in an attempt to make a sausage that is a little more tender and a little less "gluten-y." Sometimes I find that the steamed sausages come out a little tough, or give my stomach a gluten overload. So far, my results have been pretty good, but a little too soft, I think. They taste great and have a good texture right out of the steamer, but they turn to mush if placed in a sauce. I am kind of sausaged out right now, so I will experiment again in a little while.

Wednesday, January 7, 2009

Pan Fried Tofu with Plum Glaze

Vegan Mom and I were in the mood for mashed potatoes tonight. A simple tofu recipe seemed like the perfect accompaniment. Recently, my local Sobey's started carrying this awesome organic tofu made by Sol Cuisine (a Canadian company from Mississauga). It has the best taste and texture of any tofu I have tried, so try some if you can get it at your local grocery store. The sauce is based on a pork recipe I saw online which called for balsamic vinegar. I improvised when I discovered that I had none on hand.

INGREDENTS
- 1 pkg extra firm tofu, cut into triangles
- oil
- 1/2 cup plum sauce
- 2 tbsp hoisin sauce
- 1 tbsp apple cider vinegar
- 1 tsp Tobasco sauce (or to taste)

METHOD
1. Put tofu in a non-stick frying pan and place over medium heat. Once tofu starts to sizzle, cook on each side for 2-3 mins, until lightly browned. Add a splash of oil to the pan and increase heat to med-hi. Toss tofu to coat in oil, and fry each side until golden brown.
2. While tofu is frying, whisk sauces and vinegar together. Add to pan and toss with tofu. Let sauce bubble and reduce.
3. Serve tofu topped with sauce.

Tuesday, January 6, 2009

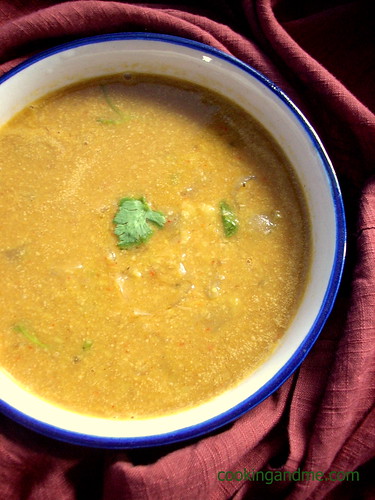
Arachuvitta Sambar

Arachuvitta sambar literally means sambar to which ground spices are added. The name itself is so traditional and delicious to me! This is a tried and tested recipe that works like a charm. The last time I made it, I made a note of the amount of ingredients I am putting in because normally for sambar, I throw in stuff and it comes out well invariably. This is a slightly more tedious sambar than how I normally make it but well worth the effort, as always :) TH loves to have this with curd rice, since I make it slightly thicker than normal.


What I Used:

Toor dal / tuvar dal / thuvaram paruppu - 1/2 cup
Shallots / small onions - 1/2 cup, halved or quartered
Tamarind paste – 3 tbsp (or a marble sized amount soaked and squeezed in half cup water)
Asafoetida / hing / kaayam / perungayam - 1/4 tsp
Turmeric powder - a pinch
Mustard seeds – ½ tsp
Curry leaves - a few
Salt - to taste
Oil – 2 tsp
Chopped fresh coriander leaves - for garnishing

Roast, cool and grind for masala mix

Coriander seeds / malli – 2 tbsp
Grated coconut (fresh or dessicated) - 2 tbsp
Chana dal – 1 tbsp
Dried red chillies – 6
Fenugreek seeds / methi seeds / uluva / menthayam – ¼ tsp (or a little less)
Curry leaves - a few
Oil - 1 tsp
How I Made It:

1. Pressure cook the dal in 3 cups water for 3 whistles.

2. Roast and grind the masala mix and set aside.

3. Heat 2 tsp oil in a heavy-bottomed pan and temper mustard seeds until they pop. Add curry leaves and chopped shallots and fry for a minute. Then add turmeric and hing.

4. Add the cooked dal and tamarind paste to the above. Adjust water to get the right consistency. Bring to boil.

5. Now add the ground masala mix and stir well, reducing the fire to sim. Add salt. Let the sambar boil for about 2-3 mins.

6. Remove and garnish with chopped coriander.
Goes well with vada, dosa, idli and steamed rice.

Summer Rolls

Just a real quick post tonight because I have to prepare for tomorrow's 8:30 am lecture. Basically, I made this recipe, and filled the rice wrappers with tempeh, sliced green onion, chopped cilantro, and steamed carrot sticks and sliced savoy cabbage tossed in soy sauce. Awesome. And, of course, I made the chili dipping sauce.

Monday, January 5, 2009

Ciabatta (Again)

This month I am featuring ciabatta at the bakery. The recipe comes from The Bread Baker's Apprentice, which is my second plug for that amazing book. Sorry I can't post the recipe here because the results are absolutely amazing. By far the best ciabatta of the several recipes I have tried.

On another note, the other day I finally got around to putting up this vegan nutritional guide in my kitchen (I bought it years ago, but had yet to put it up after moving to the new house 1.5 years ago). It is a great reference guide, and very handy to have on hand when you are prepping meals. This way you can always ensure that you are getting the vitamins and minerals you need every day.

Sunday, January 4, 2009

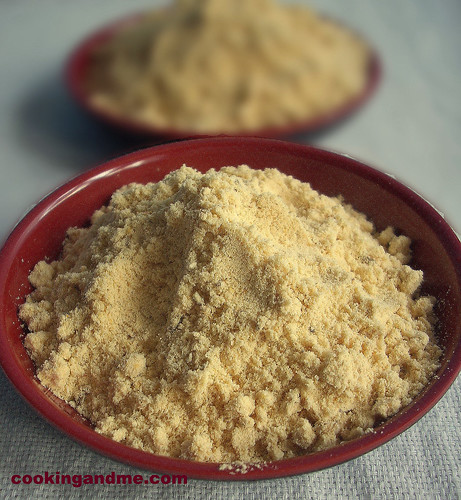
Kandi Podi / Gun Powder / Andhra Style Paruppu Podi

This is my dad's favorite accompaniment to anything. So much so that each time I visited home from Hyderabad, he would request for this and only this. I try it when we go to Andhra thali restaurants but recently I started craving them and decided to make some.

Andhra Paruppu Podi

What I Used
(Recipe from here)

Toor dal / Tuvaram paruppu /Split gram - 1 cup
Moong dal /Paasi paruppu / Cherupayar Parippu - 1/2 cup
Chana dal / Kadala paruppu / Bengal gram - 1/2 cup
Red chilli powder - 2 tbsp
Black pepper powder - 2 tsp
Hing / Asafoetida / Perungayam - 1/2 tsp
Jeera / Jeerakam - 1 tbsp
Salt - to taste

How I Made It:

1. Dry fry all the dals separately until they turn golden brown. Mix well.
2. Add the jeera and hing to the dal mixture when its still hot and keep aside to cool.
3. Once cool, grind to a course/fine powder depending on preference.
4. Add red chilli powder, pepper and salt to the ground mixture and store in an airtight jar.

Serving suggestions:

- With steamed white rice and hot ghee.
- Mix with some curd or oil and serve with dosa.
- Some variations include adding dry fried curry leaves to the powder. I am sure that's yummy as well, I just didn't have enough curry leaves in hand.

This is my entry to the 7th helping of Legume Love Affair being served by Srivalli this time.

Saturday, January 3, 2009

Chinese Tempeh Buns

These are a vegan take on pork buns. I really don't associate yeast dough with Chinese cooking, and given my love of all things leavened, I thought it would be fun to try. If you aren't a big fan of tempeh, some shaved seitan. crumbled tofu, or pulsed chickpeas would work as well (I think--I did not try all these variations, but I don't see why they would not work).

INGREDIENTS
Dough
- 4 tbsp sugar
- 1/2 cup warm plain soy milk
- 1/3 cup warm water
- 2 tsp active dry yeast
- 2 to 2 1/2 cups all purpose flour
- 1/4 tsp salt

Filling
- 12 dried shitake mushrooms
- 1 tbsp each canola and sesame oil
- 1 clove garlic, minced
- 1 tbsp minced ginger
- 1 pkg of tempeh, grated
- 3 tbsp orange juice
- 2 tbsp sherry
- 2 tbsp ketchup
- 1/4 cup hoisin sauce
- 2 tbsp vegan oyster sauce
- 1 tsp Chinese five spice
- splash of water
- 1 green onion, thinly sliced
- soy milk, for brushing

METHOD
1. Make the dough: Whisk sugar into warm soy milk and water, then whisk in yeast to dissolve. Set aside to proof. Add in enough flour to make a slightly tacky dough. Knead for 3-5 mins, until smooth. Place in a bowl, cover with damp towel, and let rise in a warm place for 1 hour.
2. While dough is rising, make the filling. Soak mushrooms in hot water until soft. Thinly slice.
3. Heat oils in a frying pan over medium heat. Saute mushrooms, garlic, and ginger for 3 mins. Increase heat to med-hi, then add grated tempeh and fry 5 mins. Add orange juice and sherry and stir well. Add ketchup, sauces, and five spice and stir well, adding a splash of water if needed. Stir in green onion and remove from heat.
4. Line a baking sheet with parchment paper.
5. Remove dough from bowl and roll into a log. Divide into 12 sections. Keep covered with a damp towel. Take one section and roll into a 4-5 inch circle (with a rolling pin) on a lightly floured surface. Place 1/12 of the filling in the centre, then gather the edges over the filling, pinching the seams together and giving them a twist. Place seam side down on the prepared baking sheet. Repeat with remaining dough and filling. Cover with damp towel and let rise for 30 mins.
6. Preheat oven to 350 degrees. Brush each bun with soy milk and bake for 18-10 mins, or until golden brown.

Friday, January 2, 2009

Cream of Potato and Broccoli Soup

Ah, the news year is here. I am desperately trying to ignore the fact that I have two courses to teach on Monday, starting at 8:30 in the morning. Gack! On the other hand, it is high time the kids stop kicking around the house and get back to school. I am not really one for new year's resolutions, so I think I will just try to keep on keepin' on (as a wise man once said). 2009 promises to bring many new challenges, not the least of which is a 4th addition to our Vegan Family. Yep. 4 kids. Wow, eh? My very own vegan commune. If your kids are like mine, they like broccoli and they like potatoes. Why not put them together in a creamy soup? I keep the skins on for this recipe, but you can peel your potatoes if that is more your style.

INGREDIENTS
- 2 tbsp oil
- 1 large sweet onion, small dice
- 1 stalk celery, minced
- 1 clove garlic, minced
- 4-5 medium red potatoes, skins on, small dice
- 1 cup water, or veggie broth
- 3 cups plain soy milk
- 1 head broccoli, cut into small florets
- 1/2 cup nutritional yeast
- 1/2 cup soy creamer, or coconut milk cream (i.e. place a can of coconut milk in the fridge to let the fat separate from the water)
- salt and pepper to taste

METHOD
1. Heat oil in a large pot over medium heat. Saute onions, celery, and garlic for 5 mins, until softened. Add potatoes and saute for 2 mins.
2. Add water and soy milk to the pot (should cover most of the potatoes--add more if needed). Bring to bubbling, then lower heat, cover, and simmer for 15-20 mins, until potatoes are soft.
3. Remove half of the soup from the pot and blend until smooth. Return to pot along with the broccoli. Return to bubbling, and cook for 5-7 mins, until broccoli is cooked (soft, but not mushy).
4. Add nutritional yeast, creamer, and season to taste with salt and pepper.

Serve with some baguettes. Look at these awesome baguette forms Vegan Mom got me for Christmas!