Thursday, July 29, 2010

Cardamom Tea and The Memories That Came With It

As she wrapped her fingers around the warm cup of cardamom tea on the way to the living room couch, she couldn't help wondering what they would be doing back home now. She glanced at the clock and realised its 2pm back home. Hmm.. nap time for everyone except her mom, who would just lie down on the living room sofa, book in hand, nodding off now and then.

Looking down at the mug in her hand, she was taken back to all those cups of tea she has shared with her family. Promptly at 4, their long-time maid would bring the steaming cups, each one of a different shape and size. Her dad liked his clear glass mug that could just about hold one cup of tea. Her mom liked bigger portions of tea so her mug was significantly bigger, easily holding about 2 cups of tea. Her grandmom, however, would not hear of using a ceramic mug, or re-heating her tea for that matter. Hers was a worn out, thick, and heavy stainless steel tumbler that was slightly dented at the bottom so it would always clang against the other mugs as it made its way to her.

Her mug, now that was a story in itself. Hers was a plain white melamin mug that she had tried to customize at various stages in her life. When she was 13, she tried to use fabric paint and draw hearts all over it. The paint washed off leaving faint stains of pink. Clearly, fabric paint was only meant for fabrics! At 16, she came across some particular type of goo in tubes that supposedly stuck to wood, ceramic and glass. Those squiggly lines and leaves peeled off in time too, now leaving faint smudges of bronze and grey over the pink stains from before.

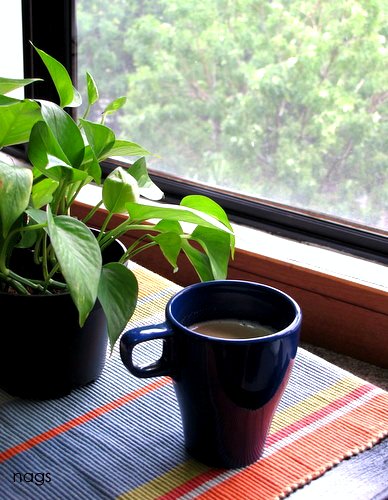
With a start, she realised she was sitting alone and smiling to herself, in this house that they had painstakingly saved up for and finally owned, each and every article carefully chosen and coordinated. Even the deep blue mug in her hand matched the rest of her kitchen utensils and the shade of their living room walls. As she looked at the last dregs of her tea and idly rotated it watching the small tea leaves swirling around the cardamom peels, she realised that she hated being alone for long.

The doorbell rang and she set down her mug and briskly walked to the door. As he came in grinning, hair still damp from his swim, she smiled again. His share of tea was waiting in the kitchen, still hot and giving out a heady fragrance. As she poured it out into his favourite black mug, she realised that there was enough to fill her mug halfway too. Mugs in hand, she walked back to the couch and sat beside him. "We should probably call your folks now, its been a while right?" he asked, vigorously toweling his head.

She nodded, smiled, and took another sip of her tea before reaching out for the phone.

Rainy day and tea

To make cardamom tea

Bring 1/2 a cup of water to boil. Add black tea leaves (unflavoured) and 3 pods of crushed cardamom, and simmer until the flavour seeps in. To this, add 1.5 cups of low fat milk and bring to boil, stirring gently. Top up with 2 tsp of sugar. Stir well. Strain into your favourite mugs and drink hot.

Serves her, him and then some more for her.

I understand that my entry to last month's Of Chalks and Chopsticks was less than satisfactory. Hope this makes up for that. Sending this off to Sra who is hosting this month's Of Chalks and Chopsticks, an event kick-started by Aqua.

Wednesday, July 28, 2010

I Finally Try Daiya

So I am about a year late to all the foofarah over Daiya cheese, but better late than never, I suppose. On my recent trip to New York I purchased some Daiya and tried it out the other night. If you care, here are my thoughts. First, it is the best vegan cheese I have had. That being said, I am starting to wonder if I really care about vegan cheese anymore. Let's face it, it's not really cheese and even though it does have some stretchiness, it more goopy than stretchy. As you can see from the pic, I totally overdid it with the cheese. I should have just sprinkled it on sparingly rather than drowning the fresh zucchini, cherry tomatoes, onions, and basil from the garden. Still, if I could get it on a regular basis I would probably use it now and then, and I think it would go over well with non-vegan guests. My guess is that it would be pretty good in a lasagna, but that theory remains untested. I also have no delusions (as per the package) that this is some healthy cheese choice. Healthier than dairy cheese, I suppose, but it's still just salty fat. But, sometime I really like salty fat . . . .

Tuesday, July 27, 2010

Lemon Reamer (Err.. What's a Lemon Reamer?)

Yep! That's pretty much the reaction I had when I saw Sala's email. When I saw this gorgeous lemon squeezing thingy on her Jalapeno Lemonade post (which, btw, have kickass photos!), I knew I wanted it to be up here in MMKT.

lemon-reamer

In Sala's words:

"When I first went looking for this kitchen tool, I asked the store assistant for the "thing you squeeze lemons with". "What thing?" she asked. I made a vigorous juicing gesture with an imaginary lemon on one hand, and this tool in the other. Thats all it require for her to point me in the right direction. Its called a lemon reamer or citrus reamer. It makes squeezing juice out of citrus fruit really easy. It comes in aluminum as well, but I like the wood one better."


squeezing-lemons-with-jalapeno-for-lemonade
(sidenote: Sala's pics are so gorgeous!)

What? Lemon Reamer / Lemon Squeezer
Where? Sala got it from Bed, Bath and Beyond. You can buy Online from Amazon (wooden reamer) or buy using this link on Amazon (aluminium reamer).
Price: USD 5.99 for the wooden one and USD 9.99 for the aluminium one.

Food Photography in Portrait Mode

The first few rules you may keep hearing about taking food photographs is probably -

- Don't use a flash (yes, please don't)
- Use your macro setting
- Click in good, natural light

These are all good and valid points, definitely. But your camera, even if its a point and shoot, has a lot more capability than you give it credit for.

So here's an experiment I did clicking with my macro setting off *gasp* and in the portrait setting. You should still leave your flash off and click in good, natural light because we are not going to break all the rules in one go. That will just be rude.

A bit about the portrait mode that's in pretty much every camera out there. Its a very basic setting, but what does the portrait mode do to your camera?

The camera is going to try to isolate the subject, so it gives you a wide lens opening or a wide aperture to blur the background and give you little depth of field, thereby, isolating the subject so the subject stands out from the background, because the background is blurry and the subject is supposed to be clear. - Source

If you are wondering what the heck aperture and depth of field are, check out my article on Aperture, F-stops and DOF. Its confusing but very very useful.

Ok, now check this picture out.

Spinach Edited

I perched the plate with the spinach on the hand of my couch and used the treetops outside my window to give it a green, blurry backdrop. Well, that actually sounded like I devised a master plan to make my picture look good but it was all spontaneous. I actually rested the plate there thinking I will go get my white table but then decided to shoot it then and there.

How I took the shot:

I turned the camera setting to Portrait (marked by the image of a head on that dial on your camera). I was sitting a bit away from the plate that was on the couch hand. I zoomed in (quite a bit) until I felt I was framing the plate pretty well. The background got beautifully blurred because the Portrait setting was doing its job. That's it!

You can later edit the picture, crop it, sharpen it, etc. This technique will give you a good set of pictures to start with and choose from.

A few important things to remember:

- Make sure there's enough natural light to give the picture clarity.

- Place the camera atleast one feet away from the subject and zoom in. That's the key!

- Keep the camera as parallel to the subject as possible. So if you feel the backdrop is your living room and its too dirty, switch the plate around until you find a satisfactory background for the picture. If you try this in a top-down shot, it may not work.

- Use a tripod if you have one. I didn't for this shot but then I am stubborn and lazy sometimes but don't be like me. If you don't have a tripod, just use a stack of books, a shelf, a stool, anything that can give the base of your camera and your arms some support. When you zoom in, your camera becomes that much more sensitive (I will spare you the technical explanation for this) so using a tripod or some sort of support is very important.

Here's another shot I took using the same technique.

IMG_3245

So, that's it folks! So go ahead and experiment with your portrait settings and don't be afraid to turn your macro off and zoom right in until you like what you see. Click 20-30 pics and pick out your favourites once you upload.

I'd love to hear from you if you try this out. You can also check out my other articles on Food Photography for Food Bloggers.

Monday, July 26, 2010

Tools of the Attempt

Dear Readers:
This month's What to Buy Now section from Bon Appetit magazine really got me wanting some products. Then, like usual, it made me want to do my own version.

Since I started this blog over a year and a half ago, my supply of cooking tools and appliances has really expanded—be it through purchases, gifts, and/or things my Grandma has sent me. And well, isn't it time that I share some of the old standbys and newly-acquired faves with you?

their version:

our version:
1. Calendar Cat/Flower Tea Towels / $? These tea towels that my grandma sent me have never let us down. Not only are they semi-absorbent, but they conveniently have calendars from the 1990s printed on them. ebay.com (if you're lucky).

2. Household Gloves / $10-12 No dishwasher? No problem! Psych. I mean, it's still a major problem, but these gloves make my post-attempt life much cozier. And they've got a cotton liner so that when our non-air-conditioned kitchen starts to really heat up and my hands begin to sweat, it's not as gross as it could be. Plus, you can just throw them in the wash when things get really bad. World Market, I think?

3. Vintage copy of Mastering the Art of French Cooking / $? I know there aren't any pictures in this book and that that's kind of what Bon Appetempt's whole premise hinges on, but this tome has offered some serious inspiration. Look for my rendition of her croissants very soon! Your local used bookstore?

4. Super Old Pan / $Free? When attempting recipes beyond your skill set and kitchen tool collection and you are still succeeding, I think it's important to remember where you came from. This pan, with a sweet black handle to boot, is an ancient relic from days of yore that Matt and I just can't seem to let go. Garage sale redux.

5. Props / $1 or less You are making matzo ball soup from scratch and your stock has congealed into a thick ice-skating-rink-like schmaltz layer and you are taking pictures of the process and you are like: how can I make this picture funnier? That's when these plastic critters really come in handy. (Both were gifts from friends so, Ashley and Rick, if you're out there, where did you get these?) Friends.

6. T-Shirt / $22 This is an amazing t-shirt a friend gave me, which I plan on making a "my version" of—a Bon Appetempt version to be specific. What do you think? That domestic duck really makes me smile. Made by Amelia.

7. Plastic Cutting Board / $2 Nothing says: "I want to make you as dull as possible, knives." like a cheap, plastic cutting board. Ikea.

8. Heath Studio Mug / $27.50 Truth be told, we can probably go 1 for 1 between our jenky tools and our super sweet dinnerware. Take for example this Heath Ceramics coffee mug in redwood. Heath Ceramics.

9. Napkin Folding / If it weren't for this book, we'd be hopeless at folding napkins. Thanks to Napkin Folding's easy-to-follow guidelines, we can turn stupid, crap napkins into swans, rabbits, princesses, and the coup de grace: the majestic "cockerel," though FOLDER BEWARE re: The Cockerel: "This attractive tablepiece for special occasions consists of The Cock's Comb, Rose and Waterfall folds combined." Bad foldings are dinner-party killers. Let them know it's on. Let them know it's not amateur hour. Napkin Folding! Bargain bins everywhere?

10. The Vivianne / $60 Sixty U.S. dollars for a masterpiece. Enough said. The Ivy Cottage

Sunday, July 25, 2010

Meal Maker / Soya Chunks Cutlets Recipe

This recipe is almost entirely flicked from the sister's blog. She has always been better with her hands than me, so my cutlets look more rugged as compared to her chubby, smooth ones. I am guessing it tasted as good though because these did taste great.

Soya Chunks Cutlet
Soya Chunks Cutlets

Soya chunks give a nice meatiness to the cutlets which is hard for vegetarians to come by. Even if you are not a huge fan of soya chunks, these may just turn you around because the infamous smell associated with soya chunks is absent in these cutlets and overall, these are healthier than their meat/fish counterparts.
Soya Chunks Cutlets
Makes: 12

Ingredients:

For cutlets
1 cup soya chunks
1 large potato, boiled and mashed
1 large onion, chopped fine
1 tsp ginger garlic paste
1 tsp coriander powder / dhania powder / malli podi
2 green chillies, chopped fine (or 1 tsp red chilli powder
1 tsp garam masala (or any curry masala you have in hand)
A pinch of turmeric powder
1/4 tsp pepper powder
A few curry leaves
Salt to taste

For frying:
1 cup bread crumbs (toast 3-4 slices of bread dry and powder in the mixie)
1 beaten egg or a paste of 2tbsp maida with 2 tbsp water
Oil for deep frying
How I Made It:

1. Soak the soya chunks in water for about 30 mins. Drain and squeeze excess water out.

Soaked Soya Chunks Edited

2. Blend in a mixer until fine. Again squeeze out all excess water.

Soaked and ground soya chunks

3. To this, add all the ingredients for the cutlets and mix well.

For Soya Chunks Cutlet

4. Shape this mixture into cutlets, dip first in the egg (or maida mixture) and then the bread crumbs. Deep fry until nicely browned. Make sure you keep the flame in medium-high so that the inside also gets cooked well.

Soya Chunks Cutlet

5. Serve hot with ketchup, or just bite in!

Soya Chunks Cutlet

Thanks for a lovely snack recipe sis. We loved it! :)

Small Vegetable Chopper

Chopping vegetables is probably the most frustrating part of the cooking process for me. Since I am quicker than TH in chopping, I take it on usually and never let go of a shortcut to get it done sooner.

Here's a cute little chopper that Sharmilee shared.

vegchopper1

It can dice up vegetables and even whip eggs for baking!

vegchopper3

What? Small vegetable chopper
Where? Rathna Stores, Chennai
Price: INR 1000 / USD 22 approx

Friday, July 23, 2010

Bahn Mi

I love all kinds of street food because it is clean, simple, and unpretentious. Ethnic food is pretty hard to come by here in the North, but you can get by. Although you can't get a tomatillo anywhere in the city, canned or fresh, the selection of Asian groceries is not too bad. I have never dabbled in Vietnamese food at all, but this recipe in Vegetarian Times looked simple enough and I had the ingredients on hand (though I did not make it very spicy for the kids). I like the idea of a pickle or slaw to ratchet up a sandwich a couple of notches and will have to explore this concept more in the future.

Wednesday, July 21, 2010

Top 5 Easy Rice Recipes on Edible Garden

Its all about eating less carbs or no carbs now, I get it. So I want to apologize for shoving these 5 rice recipes in your face but these are the most popular (pageviews popularity from Google Analytics) on Edible Garden and I wanted to list them out for you, just in case.


3. Coriander Rice / Kothamalli Sadam (I have received 17 emails to date from people who tried and loved this recipe)


4. Mint Rice / Pudina Pulao (great way to use up some pudina leaves lying around)


5. Ellu Sadam (I love the flavour 'cuz I love sesame seeds!)


What's your favourite rice recipe? Do you like it plain or spiced up?

Potato Rosemary Bread: Baking Through the Bread Baker's Apprentice

This is one of my favourite new breads from The Bread Baker's Apprentice. Potatoes make for a wonderfully soft bread with a chewy crust. The loaf has a beautiful golden colour (probably because I used Yukon Gold), and the rosemary is a nice addition because it is not overdone. In other words: perfection.

GENERAL NOTES
- none

VEGAN NOTES
- none

Tuesday, July 20, 2010

Aloo Capsicum Pulao / Potato Capsicum Pulao Recipe

A quick rice recipe from Mallika Badrinath's 100 Rice Delights. The addition of capsicum gives the rice dish a very different flavour - we loved it!

Please excuse the very mediocre picture
Potato Capsicum Pulao
Serves: 2

Ingredients:
1 cup basmati rice
1 large potato or 2 medium to small ones
1 large capsicum, diced
2 medium-sized onions, diced
1 cup pureed tomato (about 2 tomatoes)
1 cup water
1/4 tsp garam masala
1 tbsp ghee (or oil)
Salt to taste

Grind together without water:
3 tbsp grated coconut
5 dry red chillies
1 small onion (or 6 shallots)
1 tbsp roasted channa dal / Bengal gram
2 flakes garlic
1 tsp coriander seeds (or 1 tsp coriander powder)
1 medium-sized tomato

How I Made It:

1. Soak rice for 30 mins. Pressure cook the potatoes for 1 whistle, peel, and set aside. 

2. Heat ghee or oil in the pressure cooker pan and fry the garam masala for 10 seconds. Then add the onions and fry until pink and transparent. 

3. Next add the capsicum and fry until it becomes soft. Add peeled, cubed potatoes and the ground coconut paste. Fry for about 2-3 mins and then add the pureed tomato and water. Add salt and bring to boil. 

4. Add rice to the boiling mixture, mix well and close the lid. Pressure cook for 2 whistles (about 5-6 mins). 

Serve hot garnished with chopped coriander or mint leaves. 

----------------------

On another note, TH has started to write on his most favourite sport and a huge passion of this - Tennis! There will be articles and most importantly, live ball by ball updates (like Cricinfo, but for tennis) when there's a match going on. Do pass on to your tennis-loving friends and family - The Chair Umpire

Top 5 Essential Indian Utensils / Equipment to Carry Abroad

Quite a few of you wrote me asking what are the essential appliances and kitchen tools you need when setting up a kitchen, especially outside India?. What are the things you should carry from India and what are the things you should just buy from your host country or try to substitute.

I was one of you two years back so here's a quick guide that hopefully helps you.

1. Pressure Cooker


Pressure cookers are most commonly used in India which means you get a large variety and the cheapest options here. There are lots to choose from but unfortunately, I didn't get a chance to check them out because I got 3 pressure cookers as a gift for the wedding, of which 2 I carried with me to Singapore.

If you are single or just married, you will only need a small one, probably 3-5 litres. However, I would recommend getting one of those with tiered racks inside where you can keep multiple things at the same time - like rice, dal, and some vegetable. That would save a lot of time. Otherwise, its a good idea to carry 2 small pressure cookers, one for rice and one for dal or any vegetable you may want to cook up.

Hawkins and Prestige are brands you can trust.

2. Mixie


Indian cooking involves a fair bit of grinding and nothing does a job as good as an Indian mixer grinder can. It takes up some space for sure but I highly recommend lugging a mixie across the shores, you will definitely not regret it.

Sumeet is the most popular and best brand of mixie available. Mine is almost 16 years old, my aunt used it before me, and it still works better than a new model from any other brand would. Having said that, my family is heavily biased towards Sumeet and we haven't tried anything else. Also, apparently the company has gone through a major rehaul in recent years and they don't make them like they used to. Preethi is also supposedly good so check it out.

A big jar and a spice grinding jar should be enough but if your mixie comes with 3 jars, pack them all in.

A good substitute for the small spice mixer is the coffee grinders you get abroad. This is hearsay and I haven't tried it out myself. You can also get a food processor as a substitute for a mixie but consider yourself warned, it may not work as well.

3. Tawa, Dosa / Chapathi Griddle


This is probably something you can get abroad and you definitely do in Singapore. But, its considerably more expensive and you get only one kind. Since a tawa is relatively less heavy, you could easily pick up one from India. Take your pick from non-stick, hard anodised, iron, or aluminium. I would personally recommend the non-stick, if you are not entirely against the concept. Its the easiest to use and maintain. A cast iron one is what I'd like to own but it needs seasoning and that's something I don't have the patience for right now.

Rotis and dosas are taken care of if you carry the tawa with you.

4. Kadai / Karai / Cheena Chatti


A kadai is something I didn't expect to have to bring from home, but interestingly, it was tough to find one in Singapore (unless you get one from a really expensive brand). The only kind I found here were the wide pans that came with no lids so I was super grateful for the non-stick Prestige kadai that I packed as an after-thought. For the first year, I used it for everything until I invested in the Calphalon anodized wok, which is actually a tad too big when you cook for two.

Carry one with you, just in case. You may end up using this the most in your kitchen.

5. Steel Plates and Tumblers  


These are optional of course, but having grown up in a household where we primarily used stainless steel utensils and plates, I packed 2 plates, 6 tumblers and a few small plates (for snacks, to use as spoon rests, to cover bowls, etc) and have never regretted the decision. They are light, easy to clean, non-destructible and cheapest in India.

Anything else you feel is absolutely essential in your kitchen and you would recommend carrying abroad from India, in case of relocation?

Sunday, July 18, 2010

striped ice cream cake

You know it's hot when... you are washing the dishes and the water coming out of the faucet starts looking really really inviting. I kept leaning my head in toward the cold stream until finally I had completely dunked my head in the icy bliss. It was everything I thought it would be. And I'm planning on doing it again when I tackle the next round of dishes.

Just when I think I've shaken Martha Stewart, in she comes again with another beautiful, layered dessert begging for someone to recreate. This time it was her striped ice cream cake. It seemed doable. It seemed to be Martha Stewart in appearance alone, or like Martha Stewart meets Sandra Lee Semi-Homemadeonce I read through the recipe, I realized that it called for already-made, store-bought sorbet and vanilla ice cream. The only thing homemade was the angel food cake layer. I thought: This is Martha's way of reaching out to the masses, to people like me. This is something I can do, I thought. I was wrong—sort of.


Martha Stewart Living's version:

our version:
Yet again, I am reminded: there is simply no room for error when it comes to execution in Martha's recipes/crafts/lifestyle. My jam layer should've been thicker. Instead of peach sorbet, I thought lemon would be nice, but the lemon sorbet was white, not yellow and so looked too much like the vanilla ice cream. Also, my layers aren't even close to even.

What I did have going for me? Little plastic animal figurines. Is this normal baking/cooking behavior to want to stage animal figurines on different food surfaces?
Back to food:
True, as far as Martha-Stewart desserts go, this one was relatively simple. However, it requires a night of staying on task. At the time that this raspberry layer was slathered on, it was well into hour 5 and around 8pm at night. The last layer of sorbet couldn't go on for another 2 hours and then the whole thing needed to freeze overnight. Just something to keep in mind if you want to try it out yourself.

All the time it took behind us, the cake is a perfect dessert for these hot summer nights we've been having here in Los Angeles. I personally love the combo of sorbet and vanilla ice cream—very creamsicle like and very refreshing.

In closing: doesn't this end piece look like half of a sandwich? Or, if you're an east-coaster like me, a hoagie?

striped ice cream cake via Martha Stewart Living:

Before layering the ice cream and sorbets, beat them (separately) with a mixer until softened. They'll be easier to spread. 

angel food sheet cake (recipe follows)
1 cup blueberry jam
2 pints vanilla ice cream, softened
2 pints raspberry sorbet, softened
1 pint peach sorbet, softened

1. Line a 9-by-13 inch baking dish with plastic wrap. Place half the baked angel food cake in bottom of dish. Spread jam over top. Spread ice cream over top of jam. Freeze until firm, about 1 hour.
2. Spread raspberry sorbet over ice cream layer. Freeze until firm, about 2 hours. Spread peach sorbet over raspberry layer; top with remaining angel food cake. Wrap in plastic wrap; freeze overnight.
3. Remove plastic from top of cake, and turn out cake onto a cutting board; unwrap and trim edges. Slice cake, and serve immediately.

angel food sheet cake
vegetable oil cooking spray
12 large egg whites, room temperature
1/2 teaspoon cream of tartar
1 1/4 cups superfine sugar
1 cup all-purpose flour
salt

1. Preheat oven to 350. Coat a 13-by-17-inch rimmed baking sheet with cooking spray, and line with parchment. Coat parchment with spray.
2. Whisk whites and cream of tartar with a mixer on medium speed until soft peaks form. Slowly add 3/4 cup sugar, and whisk until thick and glossy, about 3 minutes.
3. Sift remaining 1/2 cup sugar, the flour, and a pinch of salt over egg-white mixture, and fold gently until just combined, being careful not to deflate whites. Spread batter evenly onto prepared baking sheet. Bake until golden and set, about 20 minutes. 
4. Let cool completely in sheet on a wire rack. (Cake should pull away from sides  easily.) Slide cake out from sheet, right side up; cut in half cross-wise to form two 8 1/2-by-13-inch pieces. Carefully remove parchment from cake.

A Passion for Baking by Marcy Goldman

If ever I was obsessed (well, almost) about a baking book, this is it. A Passion for Baking by Marcy Goldman. Its nothing short of brilliant. I am basing this out of the 4 recipes I tried from it - Sticky Date Toffee Cake with Hot Toffee Sauce, Toblerone Candy Bar Shortbreads, and 2 more I am yet to post - and all came out superb.

A Passion for Baking by Marcy Goldman

Ah, here's the Toblerone Candy Bar Shortbreads. I actually decided to borrow the book from the library so that I can try this.

A Passion for Baking by Marcy Goldman

Remember this? Sticky Date Toffee Cake with Hot Toffee Sauce, received so much good feedback and a couple of people have tried it already, with rave reviews. The good thing about this book is, the recipe comes out exactly like in the pictures and the measurements are spot on.

A Passion for Baking by Marcy Goldman

I am eyeing you Apricot squares, oh yes I am.

A Passion for Baking by Marcy Goldman

These doughnuts shall be made soon too. And to think I don't even like doughnuts much. Even to my Indian tastebuds, they are too sweet! But these, these look promising. I think that chocolate glaze did it.

A Passion for Baking by Marcy Goldman

Cheesecake is my weakness, my vice, my waist-expander of choice. And I know that if I try this recipe, it will look exactly like that picture. Oh goodness.

A Passion for Baking by Marcy Goldman

Ok this is it. A souffle and torte rolled into one? This does it!

A Passion for Baking by Marcy Goldman

 I am officially declaring this book evil and going to get my own copy, even if it means buying it through Flipkart, shipping it home in India and then bothering someone to lug it all the way to me. (Before you ask, the book costs a bomb in Singapore, so I am going to monopolize the library copy until I get my own).

The only thing I wish was different about it is the bread recipes. There are a few, and they look good. I know bread falls under baking category but I wish she had dedicated the book to sweet bakes (desserts) rather than have those handful of breads in there. But then, that's just me. I guess it actually makes it a well rounded baking book.

If you are in the US (sometimes I am so jealous of you guys, but only sometimes) or in India (always jealous of you guys, always), you can buy it online of course.


Malabar Egg Curry / Egg Curry in Coconut Milk

Whenever I make egg curry, its usually the Kerala-Style Egg Roast. Its easy and goes with rotis, rice or even dosa. Recently when I made appam, I had the craving to have egg curry with coconut milk, the sweet and spicy curry of my childhood. Using store-bought coconut milk significantly alters the taste of this so use freshly squeezed coconut milk if you have time in hand.

This recipe is my own version of the popular Malabar Egg Curry. Don't be mean if it doesn't go with what you have in mind.

Malabar Egg Curry in Coconut Milk Recipe

Malabar-Style Egg Curry
Serves: 2

Ingredients:
3 eggs, boiled, shelled and cut into halves
2 large onions, sliced
1 cup thick coconut milk (onnaam paal)
1 cup thin coconut milk (rendaam paal or 1/2 cup store-bought coconut milk + 1/2 cup water)
1 tsp ginger garlic paste
1 tsp red chilli powder
1 tbsp coriander powder
A pinch of turmeric
1 tsp garam masala (or pound/grind together 2 cloves, 1 small piece cinnamon and 1 cardamom)
Salt to taste

To temper:
2 tsp coconut oil (or any oil)
1/4 tsp mustard seeds
1/4 tsp jeera / jeerakam
A few curry leaves

How I Made It:

1. Boil eggs, shell them, cut into halves and set aside.

2. Heat oil in a pan and add the ingredients to temper. When the mustard seeds pop, add the sliced onions and fry until they turn golden brown.

3. Then add the chilli powder, coriander powder, garam masala (or masala mix) and turmeric and fry for 30 seconds. Add the ginger garlic paste and fry for another minute or so.

4. Add the thin coconut milk and reduce flame to flow. Bring to boil and let it cook for about 2-3 mins, stirring occasionally.

5. Keeping fire on low, add the thick coconut milk and the eggs. Add salt, bring to just one boil and remove from fire. If you boil too much, the coconut milk will curdle so be careful.

Enjoy warm with rotis, rice, appam or puttu.

Strawberry Syrup

I guess I am a little late with this post since strawberry season is over here, but I don't see why this recipe would not work with frozen (and then thawed) berries. We have been enjoying this syrup in endless glasses of lemonade, or with some simple syrup and club soda on ice. It is fairly potent and not too sweet. If you want it a bit thicker, just cook it for a little longer (but not too long or you will get jelly).
I just used my raspberry syrup recipe, subbing in crushed strawberries for the raspberries. It put the hot syrup in mason jars and sealed lots away for later.

Speaking of raspberries, we have a ton here in the backyard.
And even some wild blueberries! We have had some awesome pancake breakfasts lately.