Monday, February 28, 2011

Kerala Parippu Curry / Kerala Yellow Dal Recipe

Ever had a Kerala sadya? If you have, then this parippu (dal) is the first thing you would mix with rice and ghee and feel the first flavour of what is essentially the essence of Kerala food. 

Kerala Parippu Curry Yellow Dal Recipe

Before you ask, of course we add coconut to our yellow dal, we wouldn't have it any other way for a dal recipe that's uniquely Malayali! For Kerala cooking, split yellow lentils / moong dal cherupayar, is more used than toor dal. Moong dal is also a very important ingredient in Ayurveda based cooking and is said to have a better effect on our health than most other kinds of lentils. 

Kerala Parippu Curry Yellow Dal Recipe

Kerala Parippu Curry Recipe
Serves 4

Ingredients:
1 cup moong dal / cherupayar / split yellow dal
A pinch of turmeric


Grind Together:
1/2 cup coconut (fresh or frozen, not dessicated)
1 tsp cumin seeds / jeera / jeerakam
2-3 shallots
2-3 green chillies

For Tempering:
1 tbsp coconut oil
1/4 tsp mustard seeds / kaduku
3 shallots, sliced
1 red chilli, torn into two
A few curry leaves

How I Made It:

1. Roast the dal in a dry skillet until it turns a light golden brown. I generally do this in bulk and store moong dal this way to prevent bugs. It also makes the dal much more fragrant after cooking.

2. Grind the coconut with the rest of the ingredients and some water into a smooth paste.

3. Pressure cook the moong dal with 4 cups water and a generous pinch of turmeric. Once done, mash well to a smooth paste. Keeping the flame on low, add the ground coconut mixture and some salt to the dal. Cook until well blended - about 5-8 mins.

4. Heat oil for tempering and add the ingredients in the order given. Once the mustard seeds have popped and the red chilly starts to glisten a deep red, remove from fire and dunk everything into the dal mixture. Mix well.

Kerala Parippu Curry Yellow Dal Recipe

Serve hot with steamed rice and ghee. 

This Kerala Parippu Curry goes to Kerala Kitchen hosted by Ria this month. 

Sunday, February 27, 2011

Big Sur Break-ery

From top to bottom. 1. Matt on Highway One. 2. Ham and Gruyère on grilled bread at Big Sur Bakery. 3. Duck and arugula pizza at Big Sur Bakery. 4. Brown butter cookie from the Brown Butter Cookie Company in Cayucos, CA, which we stumbled upon along the drive. 5. Eggs Benedict at Deetjen's Big Sur Inn. 6. Blueberry pancakes at Deetjen's. 7. Sea life! 8. Pfeiffer Big Sur State Park. 9. Me excited about being at Pfeiffer Big Sur State Park. 10. Drinks at the Ventana Inn. 11. Blue Jay at Ventana Inn. 12. Wild Calla Lily along the river next to our hotel.  

Croissants

Vegan croissants! This is not the first recipe of its kind (Vegan LunchBox had one years ago), but I find these ingredients and method produce a wonderfully light and flaky pastry.

Makes 14
INGREDIENTS
Dough
- 2 tsp instant yeast
- 3 tbsp sugar
- 3 tbsp warm water
- 1 cup cold plain soy milk
- 1 tsp salt
- 2 tbsp melted margarine
- 13 to 14 oz all purpose flour

Margarine Block
- 1 cup Earth Balance margarine (not the whipped kind)
- 2 tbsp flour

METHOD
1. Whisk the yeast and sugar into the water. When yeast is hydrated, whisk in soy milk and salt. Add in melted margarine and flour and bring into a very soft dough. Do not overknead.
2. Transfer dough to a lightly floured surface and roll/shape into a 9 x 13 inch rectangle. Cover with plastic wrap and refrigerate for 30 mins, or until well-chilled.
3. While dough is chilling, make the margarine block. Use the method described here, but shape it into a 6 x 8 inch rectangle.
4. Laminate the dough: place the margarine block in the bottom half of the dough, making sure there is a about a 1/2 inch border.
Fold the top half down and seal the edges. Take your time to make sure everything is sealed properly.
5. Making sure your surface is properly floured, place the folded side on our left and roll the dough into a 10 x 24 inch rectangle. Take your time, rolling from the centre to the edges first. Try to square everything up as best you can. With the short side towards you, fold the bottom third up, then the top third down, like a letter. Cover with plastic wrap and refrigerate for 30 mins.
6. Repeat step five 3 more times, always placing the folded side on your left. After the final turn, refrigerate for a few hours to chill all the way through.
7. To make the croissants, roll the dough into a 9 x 32 inch rectangle. Starting in the bottom left corner, make a notch every four inches along the length of the dough. Then, from the top left corner, make a notch 2 inches in, then every four inches thereafter. With a pizza cutter, cut from the bottom notches to the top to make triangles. (You can make mini pastries with the leftover edges)
8. Gently pull the bottom of the triangle wider then, with the point pointing at you, begin to roll up the pastry. Hold the tip/point with your finger so you can pull the pastry as you roll it up. Place on a baking sheet lined with parchment paper, making sure the tip is on the bottom. You can curve the ends inwards to get the crescent shape if you like. (You can freeze them at this point, then thaw, let rise, and bake later)
9. Cover with plastic wrap and let rise for about 1.5 to 2 hours, until nicely swelled. Preheat oven to 450 degrees. Brush the croissants with soy milk, if you want.
10. Place the croissants in the oven and reduce the heat to 375 degrees. Bake for 15 mins, then rotate the pan and reduce the heat to 350 degrees. Bake for another 15 mins, until a golden brown. Let completely cool in the pan before serving.

Butterscotch Chip Cookies Recipe

Although I have made chocolate chip cookies a few times, its intereting that they've never shown up on the site before. But these butterscotch chip cookies were too good not to share. 

DSC_1236

Chunky, fudgy, gooey, yum!

butterscotch chip cookies recipe

Nestle butterscotch chips are not always available in Singapore. I once saw a bag in Cold Storage in Bugis but it was overpriced and the expiry date was in another month so I didn't get it. Then, Sala sent me an awesome goodie bag and there were butterscotch chips in that!

butterscotch chip cookies recipe

The cookie dough comes together in a jiffy and this is really a no-fail, easy recipe. 

Butterscotch Chip Cookies
Adapted from Cooks.com
Makes ~16 cookies

Ingredients:
1/4 cup regular white sugar (see note below)
1/4 cup brown sugar
1/2 cup butter at room temp
1 tsp vanilla extract
1 egg
1.5 cups flour
1/2 tsp baking soda
A generous pinch of salt (if using unsalted butter)
3/4 cup butterscotch chips

How I Made It:

1. Preheat oven to 350F/180C. 

2. In a bowl, combine sugars with the softened butter until smooth and creamy. Add vanilla and the egg and beat well until well combined.

3. In a separate bowl, combine the flour, baking soda and salt well with a fork. Add this to the wet mixture and combine well. Then add the butterscotch chips. The dough will be thick. Make sure you distribute the chips as well as possible.

4. Line a baking tray with parchment paper or a baking sheet. Use an ice cream scoop to drop the cookie dough on the baking tray. If you don't have an ice cream scoop, use 2 spoons, one to scoop up the dough and the other to smoothen it a bit and lower it on to the baking tray.

5. Bake for about 15 minutes until the top turns a light golden brown.

butterscotch chip cookies recipe

Note: Even though I reduced the amount of sugar and chips from the original recipe drastically, the cookies we still quite sweet. We couldn't have more than one at a time and that's just not done. So you can reduce the amount of sugar if you want it to accompany coffee/tea/milk. 

Thursday, February 24, 2011

Aloo Bhindi / Potato Okra Dry Sabzi

Fact: Okra is slimy
Another fact: Potatoes are delicious
Fact 3: When delicious and slimy get together, it creates a pretty great dish. 

aloo okra sukhi subzi recipe

When I go to the nearby supermarket, I run out of vegetables to buy. There are about 5 rows of green leafy vegetables which I can't bother with over weeknights, and there are the usual suspects like beans and carrot and broccoli and capsicum. I just have to reach for the okra packet on those nights. 

Aloo Bhindi Sukhi Sabzi Recipe
Adapted from: Sailus Food
Serves 2

Ingredients:
1 potato, cut into small cubes
10 okra, cut into 1/2" discs
1 tbsp tamarind water (add a small piece of tamarind to 1 tbsp water. Extract juice, discard pulp)
~ alternatively, use freshly squeezed lemon juice or a generous pinch of amchoor / dry mango powder

1 tbsp oil
1/4 tsp mustard seeds
A generous pinch of hing / asafoetida / perungaayam
1/2 tsp jeera / cumin seeds
1-2 tsp dhania / malli / coriander powder
1/2 tsp red chilli powder (adjust to taste)
1/2 tsp garam masala or curry powder (whatever you have in hand)
A pinch of ginger powder (optional)
1/4 tsp turmeric powder
A few curry leaves
Salt to taste

How I Made It:

1. Heat oil and add mustard seeds. When they pop, add the rest of the ingredients below in the order given.

2. Once the masalas have been fried for about a minute, add the cut vegetables and the tamarind water. Mix well until all the ingredients are well incorporated.

3. Cook covered, stirring frequently, until the potatoes are tender and the okra is cooked, non-slimy, and has learnt a thing or two from the potatoes. 

aloo okra sukhi subzi recipe

Serve hot with steamed rice and gravy of choice. 

Tuesday, February 22, 2011

Geetha Perima's Strawberry Milkshake Recipe

I suck at two things - taking a decent picture of drinks, and taking pictures with a dark background. So when your (husband's) aunt does these two super well and posts pictures on Facebook, you do what any self-respecting food blogger does - flick the picture, add your watermark, ask her the recipe, and post it on your blog!

strawberry milkshake recipe

Of course, it may be a good idea to ask her first! 

I have posted two recipes of Geetha Perima's before. The Instant Sambar Powder Mix recipe which was the answer to many a mothers' quest for a sambar powder to send their sons/daughters going off to a foreign land. You should check it out, its brilliant!

The other recipe I got from her and tried it myself (instead of shamelessly taking pictures of what she made or worse, flicking it from her FB page) - the amazing Palak Khichdi

Now on to her Strawberry Milkshake Recipe. Thanks for the patient answers to all the 11 questions I had on a recipe that uses 3 ingredients, perima. 

To serve 2, you need: 

7-8 fresh strawberries
2 cups whole milk
Sugar to taste

To prepare: blend the strawberries with the milk and sugar until frothy and well incorporated. You can adjust the number of strawberries depending on their size. On an average, you need 3-4 for each cup of milk. 

Garnish with sliced strawberries and serve cold. Yumville!

This strawberry milkshake goes to Pari's Veggie/Fruit a Month, this month featuring Strawberries - an event conceptualized by Mharo Rajasthan.

Monday, February 21, 2011

Mochi Waffles Drizzled with Lemon-Walnut-Rice Syrup & the Vegan Challenge Wrap-Up

Before I delve into my as-promised vegan thoughts, I would love to discuss mochi waffles. Are you familiar with mochi? Previously, I only knew it as the gelatinous dough-like foodstuff wrapped around Japanese desserts, so I was pretty impressed that it could also puff up and take the shape of a waffle.

The Kind Diet's version:

our version:
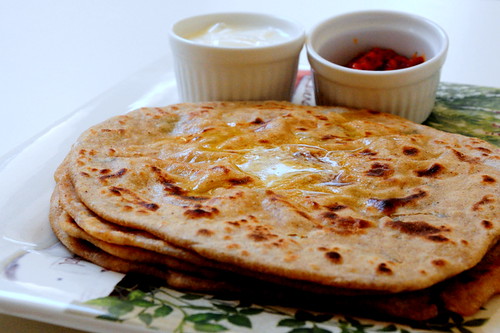
And though the mochi did impress me with its seemingly magical transformation, I can’t say it tasted exactly like the waffles of yore (pre-challenge). It was more reminiscent of a hot and chewy rice cake. And I think if it were topped with maple syrup and walnuts instead of the brown rice syrup, it would have been borderline delicious, or at least more like the real thing. Unfortunately, to me, the brown rice syrup and lemon just made it taste like health food. What didn’t taste like health food? Tempeh bacon. Without it, I think brunch would have been a total fail instead of the non-success I've labeled it as now.
And now, I bring you... vegan thoughts!

What I realized/learned through three weeks of being a vegan:

1. Going vegan is totally doable and surprisingly, not as hard as I thought. Though at first it was a bit of a shock to my system, after about the tenth day, my body and mind began to adjust. Specifically: the question of what Matt and I were going to eat for dinner didn’t feel as panic-inducing as it did throughout that first week. Being a vegan became part of the routine. And instead of elaborate, time-consuming vegan meals like the almond tofu with soba noodles, we went back to some old standards like pasta with marinara sauce (sans grated Parmesan) and southwestern corn and potato soup (with vegetable stock). And what do you know? We were happily surprised to find that these meals still worked.

2. I am a bit out of touch when it comes to the whole mind/body connection. Throughout this challenge, people asked me how I felt. “Don’t you just feel great?” or “Do you have more energy?” or just plainly, “How do you feel?” and honestly, apart from the low-level anxiety I experienced early on in the challenge, I can’t say I’ve felt much different. Matt, on the other hand, reported that after the first week, he felt he had more energy and clearer focus.

3. As further evidence to my poor mind/body connectivity, I submit the fact that it took me two whole days to pair my sudden, persistent low-level anxiety with the fact that I had completely ousted all animal products from my diet, something I have never done before. At first, I was trying to connect the feeling to anything but the change in my diet. I figured I was just stressed. I was deep into Jonathan Franzen’s Freedom and blamed the book for bringing up buried anxieties about my life, career, etc.—et cetera, always the worst of all. And then I thought it was because of something else and then something else and it wasn’t until I was listing all of these explanations to Matt when he finally interrupted me by saying: “Or maybe it’s because you just changed your diet in a very fundamental way.” that the connection was finally made. Duh. As previously mentioned, I starting taking a Vitamin B supplement and began feeling much more myself.

4. People, including me, like to make fun of people with dietary restrictions. Why? It’s different. Different is funny.

5. I read in a few different places that a plant-based diet leads to glowing skin. I got really into this idea, staring at myself in the mirror for prolonged moments and wondering if it was happening yet. After three weeks, I'm not sure I've noticed much of a difference. But here is a before and after shot taken without any touch-ups or makeup so that you can decide.

before veganism:

after:
It's hard to say. Both seem pretty glow-y.

6. Avocados were essential.

7. To be a vegan for real (i.e. longer than a 21-day challenge), I think the diet must make absolute sense to you and fit your lifestyle, which brings me to my next list.

What makes sense to me:
1. Eating foods that keep you well. This challenge has reminded me in a big way about the immediate (but oddly easy to forget) connection between what you eat and how you feel.
2. Real Food Daily’s Club Sandwich.
3. Butter (in moderation). (Please see below for further explanation)

What doesn’t make sense to me:
1. Non-dairy butter/margarine. As someone who has never experienced any form of lactose intolerance, non-dairy butter/margarine (expeller pressed natural oil, water, salt, crushed soy beans, natural flavor, soy lecithin, lactic acid, naturally extracted annatto for color) makes much less sense than butter (shaken cream).

2. A friend lent me her copy of The Kind Diet by Alicia Silverstone, which I thoroughly enjoyed reading during this challenge. Silverstone’s optimism and enthusiasm for her vegan diet are definitely contagious and the recipe portion of the book inspires, however, with that said, there were a few passages that made me take pause and scratch my head. One of those passages: Silverstone makes a case against dairy with the argument that “Our bodies are not meant to drink any milk except our own mother’s milk, and only when we are babies!” She continues, “Did you know that we are the only animals that drink another species’ milk? Pandas don’t drink gorilla milk… dogs don’t drink goat milk…” And while I can get behind other potential reasons not to ingest dairy products, I must say: this is an argument that really gets my goat(’s milk). It’s just hard for me personally to buy into the if-an-animal-doesn’t-do-it-we-shouldn’t-do-it argument. If animals had the ability to retrieve another animal’s milk and then the know-how and patience to churn it into smoked gouda and then grill it up between two pieces of bread, they would. In fact, it’s a favorite snack of my grandma’s dog! Further, and this is really pushing it, but I’m going to go there anyway: other animals do drink other animals’ milk! Can we all please collectively agree that this is what’s happening here?

All qualms aside, veganism is a personal decision, and from someone who respects other people's dietary persuasions, I'm into it. Shades of the vegan diet are for me, but not strict veganism as a whole. And so, in conclusion, I am so very glad I took on this challenge. I feel as though I’m returning to my normal diet with not only a newfound appreciation for the foods I’ve missed, but also a newfound appreciation for my good health.

But maybe I’m speaking too soon. We shall see. Tomorrow is my first day post-challenge and I have no idea what's on the menu... See you on the other side?

Mochi Waffles Drizzled with Lemon-Walnut-Rice Syrup via The Kind Diet
Serves 4 to 5
INGREDIENTS
1 cup walnuts
1 to 1 1/2 packages plain mochi (Grainaissance brand is good)
1/2 cup brown rice syrup
Juice of 1/2 lemon

PREPARATION
1. Toast the walnuts in a dry skillet over medium heat until just starting to turn golden and fragrant, about 5 minutes, stirring often.
2. Transfer to a bowl to cool, and chop coarsely. Set aside.
3. Preheat a waffle iron. Cut a package of mochi into 3 large pieces, widthwise.
4. Slice each piece into long fingerlike pieces, about 1/4-inch wide.
5. Using 6 to 8 strips for each waffle, place the mochi strips on the hot, ungreased waffle iron and close the top. Cook until puffed and slightly crispy but not too hard and dry, about 3 minutes, or until your waffle iron signals that it's done.
6. Remove the waffle and place on a plate. Do not stack the waffles because they will stick together.
7. While the waffles cook, combine the rice syrup with 3 tablespoons of water, lemon juice, and toasted walnuts in a saucepan.
8. Stir together over medium heat just until warmed. Pour over the waffles, and serve.
9. Serve and eat waffles as soon as possible — they are best hot and crispy.

Sunday, February 20, 2011

Aloo Paratha Step by Step Recipe

I have posted Aloo Paratha before. But since then, I'd like to believe that I have perfected my technique to dish out a very decent aloo paratha, especially for a South Indian!

aloo paratha step by step recipe

Potatoes have the property to inherently make aloo parathas soft so that makes our job that much easier.


Aloo Paratha Recipe
Makes 8

Ingredients:

For Dough:-
2 cups atta / whole wheat flour
Just over 1/2 cup water
1 tsp salt (or to taste)
A few drops of oil

For Aloo Filling:-
2 medium sized potatoes
1 tsp red chilli powder
1/2 tsp jeera / cumin powder
1/4 tsp ajwain / omam / carom seeds
1/2 tsp chaat masala (or garam masala)
1/2 tsp salt
A handful of coriander leaves, chopped fine

How I Made It:

1. Make the dough first. (I use my Kitchenaid now for making chapati dough and its a breeze, will share details in a later post). Mix the atta and salt well together. Add a few drops of oil and mix with fingertips. Add water little at a time and keep kneading into a soft dough. Knead for 3-4 mins and coat with some more oil (don't overdo the oil bit, very few drops will do). Set aside while making the filling.

aloo paratha step by step recipe

2. Boil and grate the potatoes. I used to mash them but that leaves small lumps here and there making it harder to roll out the aloo parathas smoothly. Grating is a better method to ensure a smooth filling. 

aloo paratha step by step recipe

3. Mix all ingredients for the filling together, making sure they are well incorporated.

The spices you add to the filling also make a large difference to the taste of your aloo parathas. There are tons of different versions here. Since I visited TH's aunt in Mumbai and watched her Marathi maid make aloo parathas (in awe, I must add!), I use her recipe for the aloo filling.


aloo paratha step by step recipe

4. Divide the dough into 8 equal parts and roll into smooth balls. Do the same with the filling. I like to make the size of the filling slightly smaller than the dough balls but you can make them into equal sizes if you wish.

aloo paratha step by step recipe

5. Flour the surface you are going to use to roll the parathas. Take one dough ball, place it on the floured surface and flatten with fingertips into a small round. I find that doing this with my fingertips makes it easier to get the surface equally thick than rolling with a rolling pin. The Vahrevah Chef agrees.

aloo paratha step by step recipe

6. Place a filling ball in the centre of the flattened dough ball.

aloo paratha step by step recipe

7. Gather the dough ball around the filling, sealing it gently on top.

aloo paratha step by step recipe

8. Make it into a momo-like ball, making sure that the dough covers the filling ball completely.

aloo paratha step by step recipe

9. You can pinch off the extra bit of dough on top. I sometimes just flatten it against the top and continue.

aloo paratha step by step recipe

10. Again, using your fingertips, gently press the filled dough ball into a small circle, making sure the thickness is equal on all sides.

In case you are wondering, there was no tripod used in any of the pics. I clicked with my left hand. The things food blogging teaches you -  mind-boggling!

aloo paratha step by step recipe

11. Then use your rolling pin to flatten it out to as thick or thin as you want. I keep it slightly thicker than chapatis. And before you ask, I still can't make a perfectly round chapati / paratha, so help me God. Oh, you weren't going to ask..

Ok moving on.

aloo paratha step by step recipe

12. Transfer rolled paratha to a hot griddle. Make sure you tap out the excess flour used in rolling. I didn't take enough for this paratha so ignore the excessive white patches.

aloo paratha step by step recipe

13. Cook until both sides are golden brown. When done, brush with some ghee / butter or oil and transfer to a plate. I use my olive oil spray while making chapatis / parathas. You can spray on the oil at the end and it creates zero mess. Of course if you want to use ghee, then the mess doesn't matter, only the flavour does!

aloo paratha step by step recipe

That's it! Serve hot with a pat of butter on top, some curd and pickles.