Wednesday, December 30, 2009

The Unavoidable Recap - Recipes of 2009!

I hadn't intended to do this, but then I am doing some other things tonight that I hadn't intended to do originally anyway. Before you let your imagination go flying, TH and I are going to one of those super crowded NYE parties we very dutifully avoid each year. I hate crowds. He hates crowds. We are so totally made for each other. This year? We don't have enough friends in SG for a house party and we did the "just you and me, first NYE after marriage" thing last year which was okay but not something you want to do two years in a row. So we are going to be brave and face the crowds. Who knows, maybe we would be converts after this.

So 2009. Its been a horrible year for almost everyone I know. Part of it is definitely due to the recession but then some were beyond that. We had a bad year too, but I still can't help feeling blessed for all the good stuff that happened this year.

But this post is about Edible Garden and the incredible year its been. I cooked a lot, baked a lot, clicked a lot, learnt a lot, its been good. Very good. Here are some of the stars of 2009.

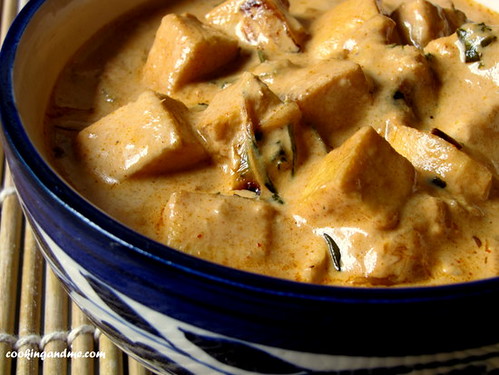
Most Visited Recipe - Paneer Butter Masala - Restaurant Style Recipe


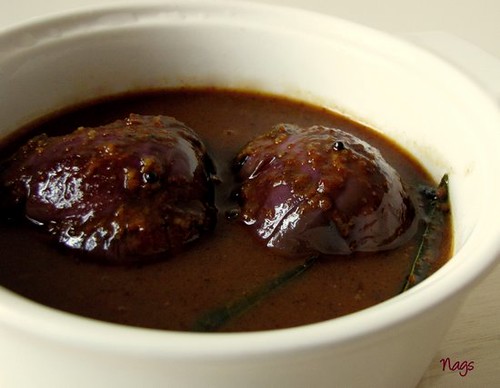
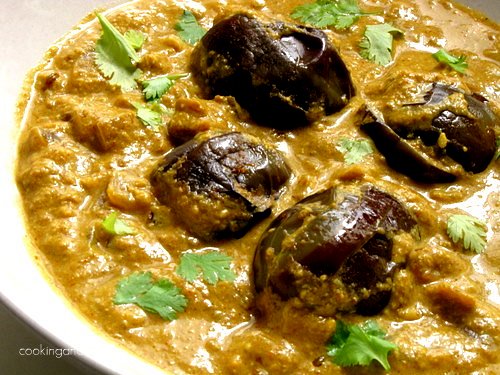
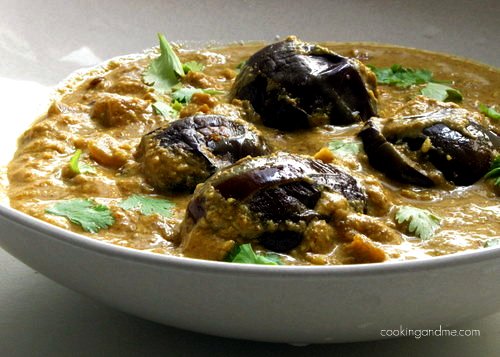
Most of you Tried - Ennai Kathirikkai Kozhambu Recipe


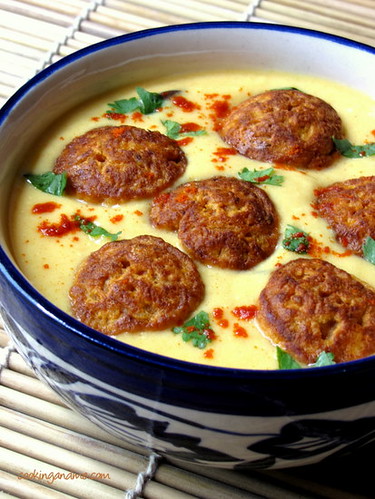
Most Commented - Khadi Pakoda Recipe


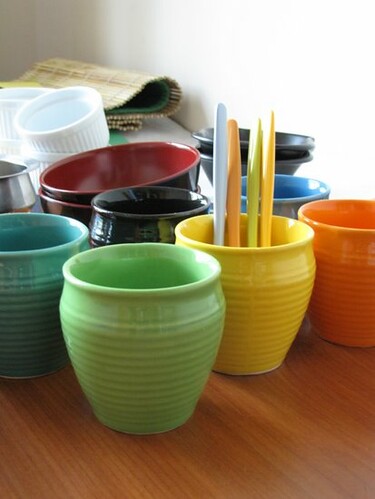
Most Appreciated - The Food Photography Basics Series


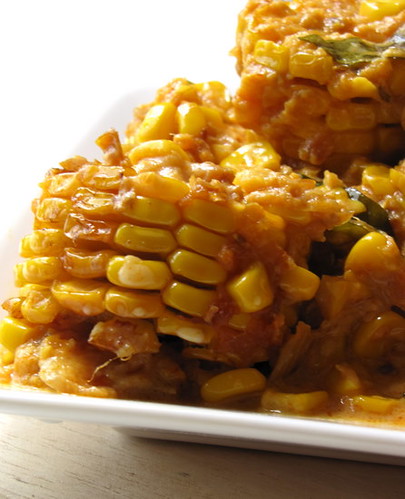
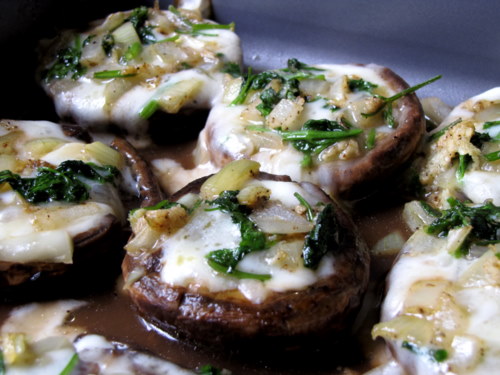
Recipe I Loved the Most - Sweet Corn in Rich Onion Sauce 


Recipe TH Loved the Most - Vegetable Spring Rolls


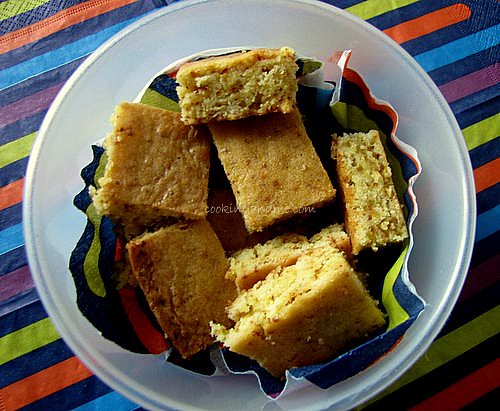
Most Popular Baking Recipe - Butterscotch Blondies


There are tons more categories I can think of but I think this list, although not exhaustive, does a good job of summing things up which is what's important anyway.

I also learnt a lot. I learnt that:

- you guys love step by step recipes
- and also the food photography basics series
- everyone likes reciprocation and being answered when they have a question. Its very easy to be rude in the blogosphere.
- not everyone comes to my site for the recipes; some come for the pictures, some come to see what's up, most come because they like me. That's immensely sweet :)
- making friends is easy, making real friends is hard.
- passion for food is a wide concept and involves so many different things.
- I am an above average cook but I learn quickly. Next year, I think I will move to the "good" region.
- I have a very high bar when it comes to cooking.
- support and appreciation from family and you all is the number one thing that keeps me going.

Yeah, that was a bit mushy but then recaps are supposed to be like that.

Hope all of you have a wonderful new year.

PS: I haven't been visiting many of you over the past few days. It has to do a bit with the losing of the mojo I spoke about earlier. I should be back soon, don't be alarmed.

Monday, December 28, 2009

Mushrooms Stuffed with Brie : Recipe

I think I am very smart so what I do occasionally is, read a recipe and if I like it, I read the ingredients again and fool myself into thinking I can remember them all when I go shopping. Here's what happened the last time I did that.


Mini Portobello Mushrooms

I saw this recipe on Pioneer Woman and instantly knew I'll be making it. I read through the ingredients list and thought they were easy, especially since I had some brie left over after making this salad. Turns out that's the only ingredient that's common between her version and mine.


Brie


She used button mushrooms - I used portobello mushrooms
She used parsley and green onions - I used cilantro (coriander leaves) and totally forgot the green onions
She used brie - I used very little brie and then some mozarella
She didn't use onions - I did

But the bottom line is, this turned out super yummy! Its a quick appetizer and sure to win over any mushroom-lover. You can also make big batches in one go, so its awesome when you are entertaining.

Here's my version.


Mushrooms Stuffed with Brie
Serves 2

What I Used:

12 mini portobello mushrooms
1 small onion, chopped fine
1 small block of brie cheese
3 tbsp grated mozarella
1/4 - 1/2 cup lightly packed fresh coriander leaves
2 cloves garlic, minced
1 tbsp butter
Salt to taste

How I Made It:

1. Wash and remove the stems from the mushrooms. Pat dry with a dry kitchen napkin.

2. Melt butter in a skillet and add the mushrooms. Sprinkle with some salt and toss them around until well coated with the butter.

3. Arrange these on an oven-proof dish stem side up and set aside.

4. In the same skillet, add minced garlic and onion and fry lightly for 30 seconds. Then add the chopped coriander leaves and sprinkle some salt. Toss around for a minute until the leaves soften. Take care not to fry or burn it.

5. Cut the brie into small squares and lightly press into the mushrooms, where the stems were removed from. Top off each mushroom then with grated mozarella. Finally sprinkle the coriander leaves mixture evenly.

6. Bake in a 180C/350F oven for 15 minutes/until the cheese is melted and soft.

This is one good-tasting appetizer. Its very forgiving so you can use pretty much any meltable cheese and any herb that takes your fancy. And yeah, apparently any kind of mushroom too :)


Guest Attempt: Mare's Bûche de Noël (a.k.a. The Yule Log Extravaganza)

I spent this summer in Paris, and ever since, Amelia has been badgering me to do a French attempt. As Christmas drew near, I realized I could not only relive my time in France but also one of my greatest moments of prepubescence: the time in seventh-grade that we had a Buche de Noël contest in French class and my buche WON. (Actually, I may not have won, but I felt like I did.)

So, back at home for the holidays and with the help of my mom, I decided to revisit the infamous Buche de Noël, one of France's most elaborate Christmas traditions. Surely having flashbacks from the first buche she got roped into, Mom kept trying to tempt me with a Bon Appetit "no-bake buche" recipe. But I wasn't in this for me--oh no. This was an Attempt. I knew it was gourmet recipe or nothing. I turned to Saveur whose buche recipe was adapted from one belonging to famed Parisian pastry house Ladurée. It was three pages long, and baking would be the least of it.

Saveur's version:

my version:
Day 1 (yes, this was a two-day affair).
Melt semi-sweet chocolate with butter and cream for the icing. Remove from heat and stir occasionally for four hours. I stirred it a couple of times!That was plenty. I had other, much more complicated things to tackle, such as the filling. I would like to note that this recipe would have been a total failure were I not at Mom's house. Mom really came through with amazing kitchen tools I have yet to/will never acquire such as a candy thermometer, egg separator, sugar duster, and standing mixer.

And despite her pretending to poo-poo complex, multi-day recipes like Saveur's in favor of recipes better suited for the busy woman's lifestyle (like the Bon Appetit no-bake buche), she busted out some extremely advanced kitchen knowledge that proved she's braved these waters before. For example. Several times in the recipe I had to make sugar syrup and heat it to "the softball stage or 236º." I had no idea what softball stage was so I aimed for 236. Suddenly, however, to my great dismay I noted that the temp had shot up to 250. Mom was working hard beating the egg yolks until they were "frothy and pale yellow," at which point I needed to slowly pour in the heated syrup.

Me: "Uh oh, Mom, it's at 250! Should I just wait til it cools off to 236?"
Mom: (freaking out) "250?!?!? Aww DAMMIT, Mare, it might be at hardball stage!!"
Me: (incredulous at Mom's expertise) "Wha?? There's a hardball stage? I'm so confused!"

Actually, she never freaked out or said dammit. But she did throw out "hardball stage." If these baseball-themed syrup stages are as baffling to you as they were to me, this will clear it up for you. Who knew? Moving along to Day 2 and the mushroom meringues that Mom could not believe I was actually going to attempt. Long story short, these shrooms were a HUGE SUCCESS! After going through the harrowing softball stage syrup/perfectly beaten egg white business again, piping the meringue from a ziploc bag (Mom's pastry tips went to Goodwill years ago) into caps and stems was the ultimate in mother/daughter fun. After baking and assembling these little guys, the whole family was beginning to pay attention to the buche operation and getting really impressed with my newly discovered pastry chef skillzz.


Baking the flourless cake was the simplest part: it just had to be thin and moist enough to roll into log formation. After spreading on the filling, the family had gathered around for the climax of the whole ordeal: THE ROLLING OF THE BUCHE. With cameras flashing all around me, I prepared for the step which would make or break the entire attempt. Upper left quadrant: I'm rolling. Upper right quadrant: Still rolling.
Voila!

High on my apparent culinary mastery (and my family's awe), decorating the log of yuletide joy was sheer bliss. Chopped off the ends of the beautifully rolled cake, glued 'em on top with icing to look like stumps, frosted the whole thing, arranged the mushrooms, and dusted with powdered sugar snow. A scene of winter woodland harmony, as only the French could recreate in pastry form. 
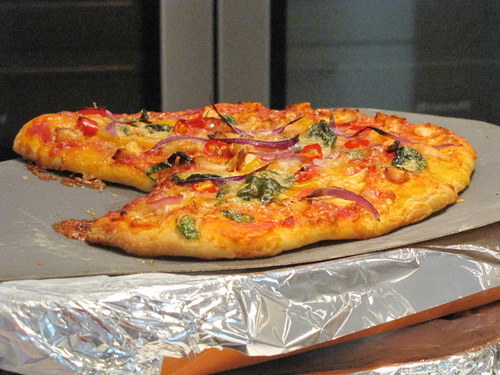
Oh yeah, and then we ate it. And if you can believe it, it tasted even better than it looked and was worth every second of labor. Thanks for an excellent recipe, Saveur. And thanks for all your help again, Mom!


Tuesday, December 22, 2009

Festive Phyllo Triangles

As you can see by the paltry number of posts this month, December has been a pretty busy month in every sense but the culinary. I had all sorts of plans to do baking and post a bunch of ideas for the holiday season, but alas . . . . What is it they say about the best laid plans? I did make Peter Reinhart's stollen recipe (awesome), and I have finally figured out what to make for Christmas dinner. Since I will be feeding vegans and omnis alike, I wanted to make something that could be enjoyed for what it was, and not some imitation of a meat dish. Enter the phyllo! The filling is chickpeas with cranberries and spinach: tasty and also red and green for Christmas.

INGREDIENTS
- 2 tbsp oil
- 2 shallots, finely chopped
- 2 garlic cloves, minced
- 1 celery stalk, finely chopped
- 1 19 oz can chickpeas, rinsed and drained
- 1 cup fresh cranberries
- 1 cup packed baby spinach
- 10 roasted chestnuts, chopped
- 2 tbsp flour
- 1 tsp rubbed sage
- 1 tsp thyme
- 1/4 tsp cinnamon
- salt and pepper to taste
- 1 pkg phyllo dough
- melted margarine, or oil

METHOD
Makes 16 Preheat oven to 375 degrees
1. Heat oil in a frying pan over medium heat. Saute onion, garlic, and celery for 5-7 mins, until soft and translucent.
2. While onions are cooking, pulse chickpeas, cranberries, and spinach in a food processor. Make sure not to process into a paste.
3. Place chickpea mixture in a bowl, then add onions. Add chestnuts, flour, and spices and mix well. Season to taste.
4. Place one sheet of phyllo on the counter and brush with melted margarine or oil. Place another sheet on top and brush with oil. Cut phyllo lengthwise into three long strips of equal width. Place a scant 1/4 cup of filling at the bottom of each strip. Fold like you see here. Brush folded triangle with oil or margarine. Place on a baking sheet lined with parchment paper.
5. Repeat with remaining filling. Bake for 15-20 mins, until golden brown.

I served mine with roasted mushroom gravy. As you can see, I could not really figure out how to present the dish. On Christmas day I just plan to put them on the plate with all the other veggies and not worry about how it looks in a picture.

Hyderabad Style Bagara Baingan Recipe - Step by Step

I am getting increasingly lazy these days. I feel like I have lost the mojo to try out new stuff with as much frequency as I used to or click pictures with as much interest. I have about 4 food photography basics posts in my drafts just lying there because I have to edit and upload pictures to go as examples with the posts. I also haven't been visiting as many blogs as I used to and my unread blogs list on reader just keeps getting longer and longer.


I made this Bagara Baingan ages ago. Its loosely based on a recipe I saw in a Nita Mehta book at the library. I didn't borrow it so made this based on what I could remember from her recipe. The amount of ingredients are all my own approximation but it turned out very tasty, a perfect combo with roti, pulao or biryani (like they serve it in Hyderabad).

Ok now for the step by step. First, dry roast about 2 tbsp of white sesame seeds / til / ellu until golden brown. Set aside.


Then, dry roast 2 tbsp peanuts until roasted and brown. Mine was raw and unsalted so if you are going to use the salted kind, then make sure you keep that in mind while adding salt to the final dish. Set aside.


Next, heat 1 tbsp oil in the same kadai and throw in the washed and slit baby brinjal. We are using the same kind used for ennai kathirikkai kuzhambu. Fry until soft and set aside.


In the same oil, add 1 onion, chopped fine.


To this, add a 1" piece ginger and 2 garlic pods ground together. Alternately, add 2 tsp readymade ginger garlic paste.


While you let that fry, grind the sesame and peanuts with 2 tbsp grated coconut to a smooth paste.


Which looks like this. Yes, you can add a little bit of water while grinding.


By now, the onions would have started to brown. Add the ground paste and mix well.


To this, add 1/4 tsp turmeric powder, 1 tsp jeera, 1 tbsp coriander powder and 1-2 tsp red chilli powder, with salt.


Mix well and stir for a minute until the paste thickens.


I know this looks kinda gross so let's quickly get this over with. Add the tamarind water made with a small lemon sized ball of tamarind and 1 cup warm water. Ok next step, quick!

*Please ignore the stains on my stove. They are from a dish I made just before this. Thank you*


Ah, not so bad once its mixed. So mix well and then..


.. add the fried baby brinjal.


Cook closed for 5-10 mins until the gravy thickens.


Serve warm with a garnish of chopped coriander leaves. This tasted really really good and I really think I should make more curries with roasted peanut paste as the base. The sesame really helps enhance the taste too!


I am too lazy to type the recipe again!

The recipe, all in one place now (sigh..)

Bagara Baingan Recipe
Serves: 2

What I Used:

6 purple baby brinjals
2 tbsp white sesame seeds
2 tbsp peanuts
2 tbsp grated coconut
1 onion, chopped fine
1" piece of ginger
2 garlic pods (or 2 tsp ginger garlic paste)
1/4 tsp turmeric powder
1 tsp jeera/cumin seeds
1 tbsp coriander powder/malli podi
1 tsp red chilli powder (or to taste)
A small lemon sized ball of tamarind
1 tbsp oil
Salt
Fresh coriander leaves for garnish

How I Made It:

1. Dry roast the peanuts and sesame seeds separately until golden brown. Set aside to cool. Then, grind together with the coconut and little water to form a smooth paste.

2. Extract the tamarind paste in 1 cup warm water. Grind the ginger and garlic together if using fresh gg paste.

3. Fry the brinjals in oil until soft but still holds shape. Drain and set aside. In the same oil, fry the onions and ginger garlic paste until golden. Then add the ground paste and fry for a minute.

4. To this, add turmeric powder, chilli powder, jeera, coriander powder and salt. Mix well and fry for another minute.

5. Add the tamarind water, mix, then add the brinjals and cook closed for 5-10 mins. Garnish with fresh coriander leaves before serving.

Ranjani made a video of this recipe so if you want to check it, click here.

Sunday, December 20, 2009

Happy belated Hanukkah with Babette Friedman’s Apple Cake

We went over to our friends' place today for a simple latke party, though what resulted was a total celebration of Jewish cuisine.

I originally wanted to make Apple Cider donuts and then it changed to Chocolate-Apricot Babka, and then I realized that I was setting myself up for failure much more than I normally do, and so I kicked it down a notch (opposite of Emeril) and went for apple cake, specifically Babette Friedman's Apple Cake.

Babette/NY Times' version:
 
photo by Owen Franken

our version:


Apple cake involves apples?

If you read last week's post, you'll fully understand how great the below Christmas gift from my mom is... Allow me to introduce you to my brand new KitchenAid artisan mixer (in pistachio). On the right, you'll notice it tilts up. Amazing. The bad news? I may have to take it easy on mom for a little while. 

Concentrically-placed apples are cool.
I've gone semi-pro. Or at least, this picture looks so good, I would assume it's been photoshopped. It hasn't!

On to the party. Morgan manned the latke station while Jodi kept her eye on the brisket while Neal kept his eye on Jodi. What isn't shown is Neal leaving his post and Jodi scalding herself with hot brisket juice. Neal, why did you leave? Jodi, how's the burn? Morgan, nice work.

The food was Jew-tastic (Matt wrote this), and as Morgan will be the first to admit, she "makes a mean bowl of [matzo] ball."(Matt as well.) And accompanied with brisket, latkes, and our impromptu menorah, this was indeed a very happy post Hanukkah latke-fest.


P.S. Sorry so brief. Next week's is going to be craaaazy. I already started it 7 hours ago.

RECIPE:
8 ounces (2 sticks) unsalted butter, more for greasing pan
1 1/3 cups plus 1 tablespoon sugar
1/8 teaspoon salt
2 large eggs
2 cups all-purpose flour
2 teaspoons baking powder
4 Gala or other flavorful apples, peeled, cored and each cut into 8 slices
1/2 teaspoon Calvados or apple brandy
1 teaspoon freshly grated ginger
1/2 teaspoon ground cinnamon


1. Preheat oven to 350 degrees. Butter a 9-inch springform pan, and set aside.

2. In bowl of an electric mixer fitted with a whisk attachment, combine remaining 8 ounces butter, 1 1/3 cups sugar and the salt. Mix until blended. Add eggs and whisk until smooth. Using a rubber spatula, gently fold in the flour and baking powder until thoroughly mixed. Fold in a few of the apples, and spread batter evenly in pan.

3. In large bowl, toss remaining apples with Calvados, ginger and cinnamon. Arrange apple slices in closely fitting concentric circles on top of dough; all the slices may not be needed. Sprinkle remaining 1 tablespoon sugar over apples.

4. Bake until a toothpick inserted into center of cake dough comes out clean and apples are golden and tender, about 50 minutes. Serve warm or at room temperature.

Yield: 8 to 10 servings.

Wednesday, December 16, 2009

Green Potato Soup

I am a negligent blogger! Christmas is in nine days and I have nothing ready! Nada! I don't even know what the entree will be! Oh, stupid job getting in the way of the holidays! While I scramble around trying to make Christmas happen, here is an awesome soup to keep away the winter chill. The most amazing thing is that the kids ate it without a single whine. Put a pile of greens on their plate and the wailing can be heard for blocks, but put it in a soup and they bolt it down. Go figure.

INGREDIENTS
- 2 tbsp oil
- 3 leeks, white and light green part, sliced
- 2 celery stalks, chopped
- 6 cloves garlic, chopped
- 1 small bunch swiss chard, stalks removed, chopped
- 4 cups water (more if needed)
- 1.5 lbs diced red potatoes
- 1 cup plain soy milk
- 1/4 cup nutritional yeast
- 4 cups baby spinach
- salt to taste
- lots of freshly ground pepper

METHOD
1. Heat oil in a soup pot over medium heat. Saute leeks, celery, and garlic for 10 mins, until soft. Add chard and saute until wilted. Add water a blend with a hand blender until smooth.
2. Add potatoes. The liquid should almost cover the potatoes. Add more water, if needed. Bring to bubbling, cover, and simmer for 20 mins, or until potatoes are cooked.
3. Add soy milk and nutritional yeast and mix well. Season to taste. I made the soup rather peppery. Then add spinach a stir until wilted but still vibrant green. Serve.

Cooking Class - Palate Sensations Singapore

One of the managers in my team at work won an award because she is a pretty awesome manager. What does this have to do with cooking classes? Well, she is a food-lover, in addition to being totally hilarious, and decided to treat her team to an afternoon of cooking as a group. Again, where do I fit in? Well, she had some available slots in the group and guess who jumped at the chance?! Me! There you go, now I fit into the picture totally, don't I?

And that's where it began.

Joann had filled me in on how nice their kitchen is but even then I was all *gasp* and *double gasp*. I mean, take a look..

Every surface either squeeks or is filled with food and/or kitchen gadgets. No complaints!

There's one entire wall full of Le Creuset stuff. Saucepans, bowls, pans, stock pots, and the list goes on and on.

The opposite wall was dedicated to Scan Pan. I hadn't heard of the brand before this but now, I am down. I go to their website every other day and just ogle.

This is probably my favourite section though. This shelf takes up so little space yet houses so many (important!) heavy things. Imagine how helpful this would be in a tiny kitchen. A food-lover's kitchen cuz otherwise, you don't even need so many kitchen gadgets!

The last shelf, dedicated to Kitchenaids. Not one, not two, but four of them. Four. FOUR!

They also had four ovens. *Dreamy sigh*

We made pizza from scratch, chicken tacos with avocado, fritatta with tomato salsa, and pear and cherry cake with a spiked glaze.

The ingredients were measured and laid out neatly before we got there.

So we cracked open a bottle of girly bubbly and got started!

I spent some quality time with the Kitchenaid as it kneaded the dough for the pizza. He even told me I will soon acquire his cousin. I hope he's right. Then again, a Kitchenaid is always right. Right?

The dough was super soft and very easy to work with after left alone to rise for a while. There was a lot of poking and touching to get acquainted.

The cake came along really well too. The batter was entirely whipped up in a Kitchenaid too. He was yellow but we didn't get a chance to chat. By the way, I made this cake the next weekend and will post soon.

The fritatta was super easy to whip up. It was partly cooked on a stove and then baked (Scan Pan is oven proof too, how cool is that?).

By the way, I am very proud of the smoke in this pic. This has never happened before and I have no clue how I achieved this.

When the cake was done, the chef did this for two reasons. 1) To loosen it gently from the ramekin and 2) So that it stays warm when we are ready to attack them!

These were for the tacos. Fresh vegetables.

The tacos themselves, with sour cream dip, shaved parmesan and the avocado dip.
Ah the pizzas. Each one was unique because we all got a blob of dough and could pick and choose our filling.

This is the chef's version. Minimalistic with two variations - simple tomato and cheese on one side, and thinly sliced potatoes on the other.

Then we got started. There were hearts..


And half moons..

And tons of different shapes, colours, textures, fillings..

Mine? Well very simple. Tomato base, fresh rosemary, and oodles of cheese. Pizza = cheese to me :D


PS: I got quite pally with the Silpat too. We may meet again in the near future for a cookie or two.

If you are ever looking for cooking classes in Singapore, Palate Sensations is a definite must-try. Its pricey but totally worth it!