Sunday, August 30, 2009

Another Giveaway - A Book This Time!

**Lucky winner of the book is Sharmilee :) Sharmilee, please get in touch with me at naagu.v[at]gmail.com at the earliest**

------------------------------------------------------------------------

I had a splendid two weeks in India this time. I went to Chennai, Bombay and Kottayam, stayed with family on all three occasions and was pampered beyond what I felt I deserved at 27! A highlight of the trip was this book I was reading all through it - Don't Lose Your Mind, Lose Your Weight by Rujuta Diwekar.

Rujuta is Kareena Kapoor's dietician and usually celebrity endorsed products get ignored by me. However, this book was recommended by Marie, a regular reader of this blog, when she saw my 3-day diet post and how I struggled through it. I just can't do diets.

I read this book in about 5 days and its probably the only non-fiction book that has had me this hooked. Far from a diet regime, what she gives is an insight into eating right. There are no 'don'ts' in the book and that works perfect for me.


To share the goodness, I am giving away a copy of Rujuta Diwekar's Don't Lose Your Mind, Lose Your Weight. To enter the giveaway, leave a comment in this blog post and tell me what you think of diets, names of any diets you have tried or about the book, in case you have already read it, before September 4th, Friday, midnight Singapore time.

Winner will be chosen randomly and I will ship worldwide. Good luck!

Ultimate Vegan Hot Wingz

Seitan is back, baby! I have to give props to my father in law for the idea of putting mushrooms into seitan to make it more tender. I have revised the method, but this recipe is still as easy as the original and is less "bouncy" and chewy. I also revised the coating to make it a little more durable and more able to absorb the sauce. While they won't fool anyone into thinking they are actually chicken, I think they will go over well with vegans and omnis alike.

INGREDIENTS
Makes about 30
Seitan
- 1 cup sliced mushrooms
- 1 small onion, chopped (about 1/3 cup)
- 1 garlic clove, chopped
- 2 tbsp olive oil
- 2 tsp poultry spice
- 1 tsp salt
- 1/2 cup water
- 1 cup vital wheat gluten

Breading
- 1/2 cup fine corn flake crumbs
- 1/2 cup flour
- 1/2 tsp paprika
- 1/2 tsp salt
- fresh ground pepper
- 2 tsp oil
- 1 cup soy milk
- 1/2 tsp apple cider vinegar

Sauce (heat these ingredients in a saucepan)
- 1/2 cup margarine
- 1/2 cup hot sauce
- 1 tbsp vinegar
- 1 tbsp ketchup

METHOD
Preheat oven to 400 degrees. Line a sided cookie sheet with foil and lightly oil.
1. Place mushrooms, onion, and garlic in a food processor and process until finely chopped. Add oil, spice, salt and water and process into a smooth paste. Add gluten and process into a smooth dough.
2. Remove dough from food processor and roll into a cylinder about 14" long. Slice into 1" pieces and roll them into a smaller cylinders. Slice that in half if they are too long, then flatten slightly.
3. Mix together ground corn flakes, flour, paprika, salt, and pepper in a bowl. Combine soy milk and vinegar in a separate bowl.
4. Toss seitan in 2 tsp of oil. Toss seitan in corn flake mixture.
5. Dip seitan soy milk mixture, then toss in cornflake mixture again. Place on prepared cookie sheet.
6. Bake for 10 mins, turn over, then bake for another 10 mins.
7. Coat wingz with all but 1/4 cup of the sauce. Bake for 5 mins, then use a spoon to scoop up excess sauce and recoat the wingz. Bake for another 3-5 mins, until bubbling. Remove from oven and let cool 5 mins. Toss in remaining sauce and serve.

UPDATE: Some people have commented that their dough is too wet and the end product too soft. I made these again to make sure the measurements were right and they came out perfectly. So here is my advice: 1. Make sure you use a small onion so the liquid measurement is not thrown off (about 1/3 cup). 2. Save the water for the end. Process the onions, shrooms, spices, and oil, then add the gluten and process. Add enough water to get a soft but still durable dough.

Tofu Ceviche on Top Chef

Veganism makes its mark again on Top Chef with Hector winning high praise (but not the win) for his Tofu Ceviche. Here is a link to the recipe--it is really complicated (with methods I have never seen before) but I would like to give it a whirl some day. Anyone else want to give it a try?

Gourmet's Cold Cucumber and Cubanelle Soup with Cashews and Chives

Hey! I'm back and guess what? Matt is in Las Vegas. Know what that means? Vegetarian time? I'll do you one better. That's right, vegans. Suit up.

Gourmet's version:

my version:
Check out the bird! (Thanks, Evin and Keeley!)

I've gone a bit Gourmet crazy, haven't I? There is an explanation. When I first started this blog, I was such a novice that I didn't subscribe to any food magazines. I soon began subscribing to Gourmet and then, my mom, excited by my new interest in cooking, told me she would get me a subscription to Bon Appétit as a gift. But that was three months ago. I've almost given up and bought B.A. on a few occasions, but then I'm like: what if today is the day it finally arrives? And so I don't. And since my mom's not a computer person, she doesn't read my blog (which I've started to take personally) and thus, she doesn't realize what a Gourmet binge I've been on.

That being said, I still think Mom's going to pull through, and honestly, Gourmet has not left me wanting.

My one mess-up in this recipe was not more thoroughly researching what a cubanelle pepper looks like (even though it's pictured and explained in the back of the magazine--oops) because when I got to the store, there were no cubanelles. So, after asking a few nearby shoppers what they thought my best bet was, I decided on a yellow chili pepper, though there's not much yellow to it. Here it is below, trying to fit in with the peeled and seeded cucumbers.

Next, you just throw all those vegan ingredients (cucumber, pepper, garlic, unsalted roasted cashews, olive oil, red wine vinegar, salt and pepper) into the blender.

This picture makes the mixture look like pancake batter, but it really was much more beautiful. It was this super pale green color with flecks of black pepper throughout.

And I know that complaining about the heat is boring, but can I just say that the past two days have been insane? They have been, but this soup made for the perfect dinner, accompanied by brie and a baguette and Teddy: In His Own Words, which made me cry.

All in all, a great night? Oh, and being alone reminded me of all my Wilmington friends. That sounds weird, but you know what I mean--living without Matt. Anyway, hi, guys! I miss you.

RECIPE (via Gourmet/epicurious):

3 large cucumbers (2 1/2 pounds total), peeled, seeded, and cut into chunks
1 Cubanelle pepper (Italian green frying pepper), halved lengthwise and seeded
1/3 cup extra-virgin olive oil
1/2 cup unsalted roasted cashews
2 tablespoon red-wine vinegar
1 large garlic clove, chopped
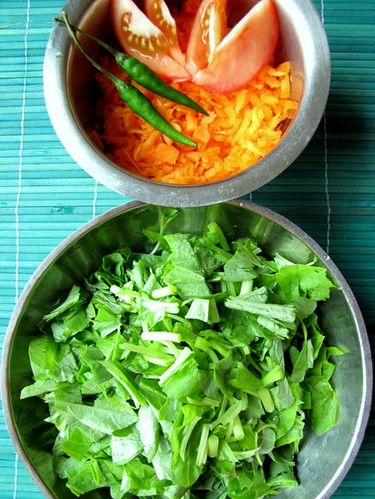
Garnish: diced tomato; chopped chives

Purée cucumbers and half of Cubanelle (finely chop remaining half for garnish) with water, oil, cashews, vinegar, garlic, 1 1/2 teaspoons salt, and 1/2 teaspoon pepper in a blender (in batches if necessary) until smooth. Transfer to a bowl and chill until cold, about 2 hours. Whisk before serving and season with salt and pepper.

Saturday, August 29, 2009

Millions of Peaches, Peaches for Me

Ontario peaches are ripe and ready for eating. I have made 20 jars of jam so far and thought I would try my hand at canning peaches as well this year. It's a bit time consuming but I think it will be worth it in the dead of winter when we enjoy fresh-like peaches. I am sure they will taste way better than canned peaches from the store, and the great thing about making your own is you can control how much sugar goes into the canning syrup. I will report back in the winter on how they taste.

Friday, August 28, 2009

Curried Potato Salad

Perhaps its my partial Irish ancestry but I love potatoes. I also love potato salad, but it can be a bit bland and boring after a few picnics. Curry powder and some peas spice up this version, and you can leave the mayo behind of you like. It tastes great both warm and cold.

INGREDIENTS
- 6-8 small potatoes
- 1/2 small onion, minced
- 1 garlic clove, minced
- 2 tbsp oil (or use some vegan mayo)
- 1 tsp curry powder (or to taste)
- 1/2 tsp chili powder
- 1/2 tsp cumin
- 1/4 tsp cinnamon
- 1 cup thawed frozen peas, or cooked fresh peas
- salt and pepper to taste
- 1/4 cup chopped cilantro

METHOD
1. Boil potatoes until tender. Rinse under cold water for a few mins, then cut into chunks. While still warm, toss in the rest of the ingredients. Serve warm or cold.

Thursday, August 27, 2009

Matt's Attempt Part 2: Figgy Piggy Cornish Hens and The Monk Painting

So if you've been reading, you know that the side dish for Amelia's return from Palm Springs was mini provolone popovers. But this post isn't about side dishes. This is about the main event. I'm talkin' about Figgy Piggy Cornish Hens (Gourmet magazine baby speak for Cornish Hens with Figs and Bacon.)

Also, in the spirit of finishing stories, I'm going to intertwine this post with the follow-up to The Vivianne: The Monk Painting. If you are into oil paintings, monks, and old ladies hawking antiques this should be right up your alley. If not, there's not much I can do for you on this one.

Gourmet's version:

our version:

Not the best picture. The birds weren't finished until late so flash had to be employed.

Back in Wilmington, NC with a few hours to kill and determined to right my previous wrong, I put on my best treasure hunting gear (Tommy Bahama shirt, stone-washed jeans, monocle) and went back to the antique warehouse from whence came The Vivianne.

Collecting the stuff needed for the Cornish Hens with Figs and Bacon was easy. Few ingredients. Nothing too fancy. And everything could be picked up at our local farmers market.

I don't know if you've ever spent any time in the huge antique warehouses of the south, but they're all the same - a cross between insane asylums and old-age homes masquerading as stores. Basically, you get a lot of really nice older ladies talking to you in non sequiturs. Seriously. Imagine your crazy aunt Gillian finding a tchotchke in her attic and trying to sell it to you for 30 bucks. This is essentially every conversation you'll have inside the antique warehouse. You end up doing a lot of smiling and head-tilting.

By now I knew a few of these characters by name because I was regularly traveling to Wilmington to visit Amelia in grad school, and I always ended up at this place. Per my routine, I chatted up Marcie, smiled, agreed with everything she said, scratched my head and went to the back of warehouse #2 where I proceeded to rifle through the new estate paintings that had come in over the past couple weeks.

The other thing that attracted me to this recipe was that it utilized bacon fat. I like that. You cook the bacon, then you cook the garlic in the pan with the bacon fat, but hang on to the pan because it's not over yet. Just wait.

I found The Monk Painting hiding behind a 300 lb. mirror. The painting was old and covered in generations of dirt, but it was a cool and relatively inexpensive. When I brought it to Marcie she looked shocked. Apparently when so-and-so's estate was consigned to the place, three different people had been in looking for The Monk Painting. I snatched it up.

Out came the cornies (cornish game hens). These suckers are SMALL (and bloody). Amelia wants her vegetarian readers to know that she had nothing to do with this, and that these birds were organic.

When I got home, the research began. A rusted bracket on the canvas read "PAT Feb 13 1883 ADS." And a faded name and 5 digit phone number written lightly in pencil on the back of the frame pointed to its previous owner and the last framer.

Bacon fat time. I cut the hens in half and cooked them skin-side down in the bacon fat for about 6 minutes. After that I threw the halves in the oven with the figs and thyme, but don't even think about discarding the bacon fat. Seriously. We're not done with it.

So, I find out that the previous owner was a wealthy patron of the arts in North Carolina and that it was probably painted in 1883. But as these things go, after a month of on and off research, I had taken it as far as I could. I needed to send it my friend/notorious Vivianne-hater at Sotheby's.

Here's where the recipe gave me problems. The second to last step has you putting the hens in the oven. It says, "preheat the oven to 500" and then "roast until hens are cooked through, about 15 minutes." Not true! I checked my hens after 15 minutes and they weren't close to be done. I kept them in for another 5 minutes. No dice. Another 10 minutes? Still not quite done.

To be fair to the recipe, I didn't have the oven pan that it called for so I had used a lasagna pan, but could that really throw off the time that much? Not to mention, I halved the recipe - two hens instead of four. Why was it taking so long? I started pacing. Another 10 minutes. Still pink in the middle?! It was really strange, and all in all it took about 50 minutes in the oven at 500 degrees to cook the hens through. As promised, this was followed up by turning up the heat on the pan of bacon fat and squeezing half a lemon over it, making a sauce to drizzle over the hens with the bacon and garlic.

(Picture taken before the 50-minute oven debacle.)

The long and short of The Monk Painting goes like this: My friend came back with the diagnosis that it is an unattributed painting from the late 1800s in the style of Eduard Von Grutzner.

According to my friend, at auction, the painting should fetch around 30 times what I paid for it. And despite her pleading, I won't let Amelia sell it. It's The Monk Painting!

Below is a horrible picture with flash from when I first bought it. It's dirty, and you can't really see the color and detail, but the painting is currently in Pittsburgh so this is the only picture we've got at the moment. What's with the wry grin, Monk?

Oh, and the hens were delicious and they somehow cooked through really well?


ingredients:
1/2 pound bacon slices, halved
4 garlic cloves, thinly sliced lengthwise
4 Cornish hens (about 1 1/4 pound each), halved lengthwise
12 thyme sprigs
12 fresh black and/or green figs, halved or quartered if large
3 tablespoons fresh lemon juice

Preheat oven to 500°F with rack in upper third.

Cook bacon in a 12-inch heavy skillet over medium-low heat until crisp. Transfer to paper towels to drain. Add garlic to skillet and cook, stirring, until golden, about 1 minute. Transfer to paper towels with bacon. Pat hens dry and season with 1 1/4 teaspoons salt and 3/4 teaspoon pepper.

Heat fat in skillet over medium-high heat until it begins to smoke. Brown 4 hen halves, skin side down, about 6 minutes. Transfer, skin side up, to a large 4-sided sheet pan. Brown remaining hens, transferring to sheet pan. Reserve skillet. Scatter thyme and figs over hens, then roast until hens are cooked through, about 15 minutes. Meanwhile, deglaze skillet with lemon juice by simmering, stirring and scraping up brown bits, 30 seconds. Pour over roast hens. Scatter bacon and garlic over hens.

Wednesday, August 26, 2009

Tomato and Tofu Salad

I wish I could come up with a more imaginative name for this dish because it is way tastier than the title suggests. We are finally getting ripe cherry tomatoes out of the garden and this simple salad is a perfect way to enjoy their sweet flavour.

INGREDIENTS
- 1/2 block extra firm tofu, cut into small cubes and dabbed dry
- 1 shallot, halved and thinly sliced
- 1 tbsp olive oil
- 1 tbsp lemon juice
- 2 tbsp white wine vinegar
- 15 cherry tomatoes (or so), halved or quartered
- 2 tbsp minced fresh parsley
- 1 tsp basil (or some chopped fresh basil)
- salt and pepper to taste

METHOD
1. Place tofu in a bowl with shallots, then add oil, lemon juice, and vinegar. Let marinate for 30 min or so. Add tomatoes and herbs, and season to taste. Mix well and serve.

Tuesday, August 25, 2009

Tomato Spinach Pulao - Step by Step Recipe

Whenever I post step-by-step recipes for baking, most of you love it, try it and give me your thoughts. I have been itching to do the same for normal recipes too, but the only reason stopping me was the poor lighting in my kitchen. After many months of giving myself this excuse, I decided to go ahead and do it anyway.

Because of this, you will see pictures with different lighting in this post, so bear with me. Hopefully you find it useful (not the lighting, the recipe!)

After all that talk, I'm hungry. Let's have a nice bowl of hot tomato spinach pulao, shall we? If you want to skip the pictures and yada-yada, scroll to the end of this post for the recipe in one place.

Ok. First, chop 4 cups of green spinach, 2 tomatoes and grate 1 carrot and set aside (ignore the green chillies, we don't need them, unless you want to use them and reduce the amount of red chilly powder in the recipe).


Heat 1 tbsp oil in a kadai.


Add 1 sliced onion and 3 cloves of chopped garlic to this.


Fry until the onions turn transparent and brown slightly.


Time to bring out the 2 chopped tomatoes. Add these to the fried onions.


Cook well until the tomatoes have wilted and turned soft.


To this, add 1 tbsp coriander powder and 1 tsp jeera. Mix well.

Time to spice things up a bit. Bring out your red chilly powder and add about 2 tsp of that. Go on, dare yourself and add another tsp if you wish ;)


We've already added 2 tomatoes but since this is tomato spinach pulao, we will need a more dense tomato flavour. Canned tomato paste works best.


Add 1 tbsp of that and mix well. If you don't want to use the paste, add 1 more large tomato in the first step.


To this, add the chopped spinach and..


.. grated carrot and mix well.


Close the kadai and let it cook on medium-low fire for about 10 mins. Don't add any water, the spinach will give out its own water while cooking making the mixture soft.


Open kadai carefully after 10 mins and add salt.


Add about 3 cups cooked rice to this mixture. I used basmati rice but any rice will do, even warmed leftover rice.


Gently fold from one side so that the rice isn't mashed up too much.


Garnish with some roasted cashwes and serve hot. I roasted the cashewnuts in the microwave on medium power for a minute. Saves time and oil.

Here's the pulao recipe again, all in one place.
Tomato Spinach Pulao
Serves: 3 to 4

What I Used:

3 cups cooked rice
4 cups chopped green spinach
1 grated carrot
2 chopped tomatoes
1 tbsp tomato paste (or add another tomato)
1 sliced onion
3 cloves chopped garlic
1 tbsp coriander powder / malli podi / dania powder
1 tsp jeera / jeerakam / cumin seeds
2 tsp red chilly powder
1 tbsb oil
Roasted cashewnuts to garnish (optional)
Salt to taste

How I Made It:

1. Heat oil and fry the onions and garlic for 3 mins. Add the tomatoes to this and cook well until soft and mashed.

2. Add the coriander powder, jeera and red chilly powder. Mix well and fry for 2 mins. Add tomato paste to this, if using, and mix well.

3. Add chopped spinach and grated carrot. Close and cook for 10 mins until soft.

4. Add salt and cooked rice to this. Fold gently and serve after 3o mins, garnished with roasted cashewnuts.

Monday, August 24, 2009

Grilled Oyster Mushrooms

When Isa posted about grilled oyster mushrooms from her trip to NYC I figured I would take a stab at them. Oyster mushrooms have a delicate texture but are still tough enough to stand up on the grill. At first I wasn't sure how to season the shrooms, but eventually settled on a garlic and herb infused oil. This was a good call. These are absolutely delicious with plenty of BBQ flavour with subtle flavours from the oil. I also like them because they can be enjoyed for what they are instead of trying to masquerade as a vegan version of a meat dish.

INGREDIENTS
Garlic and Herb Infused Oil
- 1/2 cup olive oil
- 6 large cloves of garlic, chopped
- 1 tbsp dried basil
- 6 sun dried tomatoes (in oil), chopped
- oyster mushrooms (get the large bunches, like you see here); as many as you want to grill
- salt and pepper to taste

METHOD
1. Heat oil in a small saucepan over medium heat. Add garlic and reduce heat to med-lo. Add basil and tomatoes and let simmer for 20 mins. Strain thought a fine sieve into a glass container. Obviously, this makes more than you will need here, so just keep the extra for another time.
2. Cut the mushroom bunched in half both vertically and horizontally (so the bunch is not too thick and as much of the mushroom can touch the grill as possible). Brush generously on all sides with the oil, then season with salt and pepper.
3. Heat grill on high. Grill mushrooms 4-5 mins per side. Resist the urge to flip over--just let them sit there and get some good grill marks.
4. Serve. You can trim off the tough end, or just cut off the more tender parts as you eat.

On Food Blogs and Photography

Several people have recently posted comments asking how I take my pictures, advice for a good food blog, etc. So, I thought I would write a wee post addressing just that. First off (you will be disappointed to know), I know absolutely nothing about photography. The only reason my pics are passable is because I invested in a 50mm f 1.4 macro lens for my Canon Digital Rebel camera. In fact, I bought it for a research trip to Philly so I could take snaps of historical documents in low light conditions (they don't allow flashes or tripods at the Historical Society). I like to think I have an eye for what is a good photo, but I have no idea about f-stops, apertures, etc. I try to take pics outdoors so I can get good light, but this gets tricky in the winter when it is dark by the time supper comes around. My style is to get as much food in the frame as possible and to worry less about the surroundings. Occasionally I will tinker with light and saturation in Photoshop, but more often than not I just crop the pic and post it. I have learned a lot over the past (almost) two years. Look back at my first posts--the pics are dreadful. If you want to actually learn about food photography, go to Bittersweet, or Vegan YumYum.

As for food blogging, I think good photos are essential. You may have the tastiest recipe but if it looks dingy and tan in the pic, then people are less likely to try your food. A good photo will draw people into your blog. After that, the content needs to be good as well. Food blogs are free, and sometimes you get what you pay for. Make sure to edit your posts and that the directions are easy to follow. Be honest about how good your food is. Lastly, make your blog personal. Although I have kept my kids' faces and names out of my blog, I do try to work in anecdotes and such into each post. Establish a rapport with your readers. Make sure your blog has a point.

OK, that's it from me. More food coming soon!

Sunday, August 23, 2009

Instant Sambar Powder Recipe

My mom-in-law has three sisters, each of them different and unique in their own ways. During this trip, TH and I stayed in Bombay with her elder sister, Geetha Perima. She is a cooking wiz, makes her own ghee in 10 mins flat, always has pickles, thokku and different kozhambu pastes in her fridge - all homemade, and makes ice-cream which makes one wonder why we ever buy ice cream! She makes all of this seem extremely simple too.

One recipe of hers that immediately caught my attention is the instant sambar powder recipe. Her son is studying in the US and recently, she sent him this powder. All you need to do is add it to boiling water with your choice of vegetable(s) and chopped onions if you like them. The powder has all other ingredients for a sambar, like toor dal, tamarind, chilly powder, hing, etc etc.

Here's how you can make this powder. Great for lazy people, working folks and of course, for you to pack it for your son/daughter who is moving abroad and needs a quick fix of homemade sambar in no time!

Geetha Perima's Instant Sambar Powder
Makes about 1.5kg powder

What She Used:

1kg toor dal
100 gm dhania / malli / coriander
25gm channa dal / bengal gram / kadala paruppu
50 gm dry red chillies
10gm fenugreek seeds / uluva / menthayam
A large lime-sized ball of tamarind
2 tbsp whole black pepper
2 tsp jeera
1 tsp hing / asafoetida / perungayam
1 tsp Kashmiri chilli powder (optional, added for the colour)

How She Made It:

1. Heat about 2 tsp oil in a pan and lightly fry the red chillies. When they start to brown, remove and set aside to cool.

2. Remove all strings and other stuff from the tamarind. Separate into pieces. Add these to the same oil and fry by pressing down, making sure all the sides are roasted. Keep fire on sim and continue to roast for about 5 mins. It will be very soft at this stage. Drain and set aside to cool. You will find that the tamarind has gone crisp and brittle to touch.

3. The other ingredients don't need to be roasted. Starting with the dal, powder each ingredient separately and keep adding to a big bowl. The tamarind will powder nicely once its cool.

4. Mix all ingredients well with salt. Store in an air tight container and use to make easy and quick sambar.

To Use:

To serve two, boil about 3 glasses water and add 2-3 tbsp of the instant sambar powder. Add chopped vegetables and onions. Let it boil on sim until the vegetables are cooked. Serve hot. This powder will make sambar that's a bit watery. If you want it thicker, also add some cooked toor dal while preparing it.

Matt's Attempt Part 1: Provolone Popovers and The Vivianne

So as you might know, I often help out with Amelia's attempts but I've yet to do one completely on my own. That part of my life is over now. Why? Because yesterday Amelia went down to Palm Springs and asked if I wanted to take the reigns on an attempt while she was gone. I begrudgingly accepted the challenge because a) I didn't have a choice and b) it would give me a forum to set the record straight about The Vivianne, which has resurfaced as a requested story due to the raspberry chocolate ice pops post.

As far as the food goes, I ended up making a huge meal for Amelia's return on Sunday that we've opted to break into two separate posts.

Welcome to part one: mini provolone popovers and The Vivianne. Follow me, if you dare.

Gourmet's version:
my version:
Note: Gourmet's are mini provolone popovers because they are baked in a mini muffin tin, but I'm a man and subsequently I don't own a mini muffin tin. I own a regular muffin tin.

I bought an old oil painting at an antique warehouse in Wilmington, North Carolina and became obsessed with it.

First there was the collection of ingredients. I picked this particular recipe because it is made of things that I like: butter, whole milk, eggs and lots and lots of cheese. These are also things that Amelia usually steers clear of whilst we try to eat healthy (sort of).

Post-purchase, I convinced myself that the painting was extremely valuable. The only thing that was holding it back was the signature, which read (in what looked to be some manner of sharpie) Vivianne. My research indicated that Renoir never painted under that particular nom de' plume.

I chopped up the provolone--remember, these are provolone popovers (aka provolone muffins?).
I hit a brick wall on putting a value on my newly acquired masterpiece, and after several healthy debates as to whether the figure depicted was male or female, I did the unthinkable. I sent her/him away to my friend who appraises oil paintings at Sotheby's. This was unthinkable because it meant I would have to spend time away from Viv. I waited (waited = I began spending money against future Vivianne-related earnings).

Remember all those ingredients from two pictures ago? This is what they look like all together.
After an hour of waiting for the batter to chill, I spooned them into the regular muffin tin. Then, right before you put the tin in the oven you're supposed to close your eyes, bend your knees, spin around and whisper the word popover three times.
Long story short: The Vivianne's estimated value was "whatever I paid for it." WTF kind of estimated value is that? Did you not check out that frame! Viva La Vivianne. Fortunately, I did NOT learn my lesson. I went treasure hunting at the same antique place a few months later and picked up "The Monk painting," which has a story with a decidedly happier ending. In fact, I'll tell ya all about it in part 2 of this post--it's awesome. Get excited.

The popovers ruled. The recipe says to serve immediately. Tell me something I don't know, recipe. You'd be a total fool not to serve these immediately. Besides, when hot, there are little pockets of molten provolone and parmesan cheese. Mix that with the chives, the super rich dough, and you got yourself one hell of a popover popover popover.

Stay tuned for Matt's attempt part 2!


RECIPE:
MAKES24 POPOVERS
  • ACTIVE TIME:10 MIN
  • START TO FINISH:1 3/4 HR (INCLUDES CHILLING)
  • 1 cup whole milk
  • 2 large eggs
  • 1 cup all-purpose flour
  • 2 tablespoons unsalted butter, melted, divided
  • 1/2 teaspoon salt
  • 1/8 teaspoon black pepper
  • 1/3 cup finely chopped provolone
  • 2 tablespoons grated parmesan
  • 1 1/2 tablespoons chopped chives
  • EQUIPMENT:

    a 24-cup mini-muffin pan
  • Whisk together milk, eggs, flour, 1 Tbsp butter, salt, and pepper until smooth, then stir in cheeses and chives. Chill 1 hour to allow batter to rest.
  • Preheat oven to 425°F with rack in upper third.
  • Butter muffin pan with remaining Tbsp butter, then heat in oven until butter sizzles, about 2 minutes.
  • Gently stir batter, then divide among muffin cups (they will be about two-thirds full). Bake until puffed and golden-brown, 18 to 20 minutes. Serve immediately.
COOKS’ NOTE: Batter can be made 1 day ahead and chilled.