Wednesday, August 31, 2011

What Do You Know About Peach Cobbler?

Photo (c) Flickr User: Neil Conway
I've never made a peach cobbler. I've made peach crumbles, peach crisps, peach tarts, peach pies, and peach parfaits, but not one single cobbler.

I've been doing some research for an upcoming video, and I'm leaning towards the classic southern style where the batter bakes up through a buttery layer of peaches and juice to form a beautifully browned crust over the top. I literally just made myself hungry typing that sentence! If you have any "to die for" peach cobbler recipes, please pass them along! Thanks and stay tuned!

Tuesday, August 30, 2011

This Blueberry Clafoutis Didn’t Get My Goat (Cheese that is)

I’ve had this wacky idea to try a berry-studded goat cheese clafoutis, so when I saw these gorgeous looking blueberries at the market, I figured the time was right.

I had a couple ounces of leftover chèvre in the fridge, and was very excited to see if this possibly odd, but fundamentally sounds idea would work. And, everything would have, if I had only skipped breakfast that morning.

That morning I woke up starving, and facing a pile of emails and other less fun computer-driven busywork. So without thinking (literally) I whipped a nice cheese omelet, using the aforementioned cheese. D’oh!

It was a delicious mistake, and one I forgave myself for very quickly, but it also presented me with a tough choice. Go back out to the store, or just make a good, old fashioned, plain blueberry clafoutis. Laziness prevailed, and here you have it.

So, while I’m very proud of this clafoutis, I can’t help but wonder how much better it would have been with that faint, but tangy accent from the cheese. Maybe you could give it a try and let me know? I was simply going to add it to the blender and mix it right into the blender.

Anyway, goat cheese or not, this recipe is a great way to enjoy fresh, summer fruit, and as I mention in the video, this technique really lets it play the starring roll. I hope you give it a try soon. Enjoy!


Ingredients:
butter as needed
pint of blueberries
1/2 cup flour
2/3 cup sugar
1 1/4 cup milk
3 large eggs
1 tbsp vanilla
pinch of salt

Sunday, August 28, 2011

Mahi Mahi Ceviche Ceviche

The last time I posted a ceviche recipe video, I almost had to hire a security detail to protect me from angry Peruvians. I'd done a bay scallop and mango ceviche, and within minutes of uploading, highly annoyed South Americans were demanding I change the name, since what I had made was NOT a ceviche.

It seems as though there are some very strict views on what may and may not go into a ceviche, which is too bad, since the technique begs for accessories. Thankfully, I'm no fundamentalist, so I was free to make this version.

One traditional ingredient I omitted was the sliced onions. Personally, I don't like the sharp bite of the raw onion in this recipe, so I decided to use chives instead. I'm pretty sure I'm in a very small minority, as most people consider the sliced onions an absolute necessity, so feel free to add those in.

This mahi mahi ceviche requires a little bit of knife work, but when you consider the seasonal advantage of not using the stove, and just how tasty this really is, I think it's all worthwhile. You can also use shrimp, scallops, swordfish, and snapper.

By the way, sorry about that extra "ceviche" up there, but it's not often you get the chance to publish a symmetrical post title. Enjoy!


Ingredients:
3/4 to 1 pound fresh mahi mahi
1 tablespoon minced jalapeño
1/2 teaspoon salt, or to taste
pinch of dried oregano
pinch of cayenne
2/3 cup equal parts fresh squeezed lime and lemon juice
1/2 cup diced cucumber
1/2 cup orange segments
1/2 cup thinly-sliced red or white onion (or chives instead)
2 tablespoons julienne radish
1 tablespoon chopped cilantro

Friday, August 26, 2011

Next Up: Molasses Brined Pork Chops

I finally edited the video recipe for the pork chop we used as the delivery system for our recent Carolina-style barbecue sauce post. Stay tuned!

Wednesday, August 24, 2011

Molasses-Brined Pork Chops – More Similar to "The Sopranos" Than You Think

I was so happy with how my Carolina barbecue sauce experiment went, I almost forgot I'd filmed the molasses brined pork chop I slathered all that sauce on. So, I figured I better get cracking and post this before grilling season turns into hockey season.

Brining pork chops is like upgrading to premium cable, once you do it, you can’t go back to basic. You hear people say HBO wins all those awards because they have the big advantage of using the profanity and casual nudity that the network competition can't.

When it comes to brining, the F-bombs and low-cut blouses are the flavor and extra moisture that the sweet, salty solution brings. When compared to your standard grilled pork chops, these brined beauties will surely get better reviews.

Other than having to wait a few hours for all that sexy, semipermeable membrane-on-membrane action to take place, this recipe is incredibly easy. Dissolve salt and molasses in water, toss in the chops, and wait. And what do you get from such little effort? A pork chop that's seasoned from the inside out, with a firm, but very moist texture.

I brined mine for about 6 hours, but according many osmotic experts, as little as one hour per pound of pork chop is adequate. For me, that would have been about 45 minutes, but since I learned this trick from a chef that used to leave these overnight, I can’t bring myself to brine them any less.

Whether you cover these with a Carolina barbecue sauce, or some other shiny glaze, I hope you decide to upgrade to premium pork chops soon. Enjoy!


Ingredients:
4 thick double-cut loin pork chops
For the brine:
1/2 cup kosher salt (only use 1/4 cup is using fine table salt)
1/2 cup molasses
4-5 whole cloves
1 cup boiling water to dissolve salt
7 cups cold water

Monday, August 22, 2011

BREAKING NEWS: Food Wishes Has Been Acquired by Allrecipes!

It is with tremendous pride and gratitude that I announce Food Wishes has been acquired by Allrecipes.com. Not only is this tremendously good news on a personal level, but it also means joining forces with the world's number one digital food brand.

While I’ve done a decent job of growing the brand, I’m very much looking forward to having our content in front of a new, significantly larger audience, and that’s exactly what this makes possible.

If you’re worried this move is going to result in fewer, or differently formatted videos, relax. If anything, this move allows me the freedom to produce more content than ever before, and this was one of the main reasons I decided to take the deal.

A million thanks for all your amazing support and generosity. This would not, could not, have happened without you. Stay tuned!

Saturday, August 20, 2011

This Peach Cobbler Not the Work of a Shoemaker

I’m afraid the expression is quickly dying out, but there was a time when being called a “shoemaker” was the ultimate kitchen insult. It meant that your cooking skills were so weak, the cobbler down the street could have taken a break from resoling wingtips, come into the kitchen, and done just as well.

That little culinary history lesson has absolutely nothing to do with this beautiful peach cobbler, but I’ve been trying to keep the saying alive, and it gave me an excuse to share. Ironically, this recipe is so easy any shoemaker could master it.

I have to thank everyone who chimed in last week when I asked for cobbler recipes and inspiration. I received so many great variations and techniques, and while I didn’t use any one single recipe, I definitely used parts of several.

I hope you don’t have much trouble finding fresh ripe peaches this time of year, but if you can’t, this will still be very nice using canned. Speaking of finding ingredients, one thing I learned from my research was that for whatever reason, self-rising flour was the way to go.

No one could quite explain it, but cook after southern cook report that the self-rising flour performs much better than plain with salt and baking powder added in (see ingr. below). Do you have a theory? Maybe most people’s baking powder is so old it’s not as strong as the leavening in a freshly purchased bag of SR flour? What I do know is how nicely this turned out.

Anyway, I’m going to kick off my shoes, put up my feet, and savor the last of this delicious cobbler. Enjoy!

UPDATE: Reports from people trying this are that the ones made with self-rising flour came out awesome, and the ones using regular flour didn't work well at all. Fair warning! Get some self-rising flour!


Ingredients:
For the peaches:
5-6 cups sliced peaches (if you use canned peaches, do not make the syrup)
1/8 tsp Chinese 5-spice
1 tsp freshly grated lemon zest
1 cup water
1 cups sugar
For the batter:
1 stick (1/2 cup) butter (real butter! Do NOT use margarine!)
1 cups sugar
1 1/2 cups self-rising flour (or 1 1/2 cup AP flour, plus 2 1/2 tsp baking powder and 3/4 tsp salt - NOTE: this does not work as well...get some self-rising flour!)
1 1/2 cups milk

Friday, August 19, 2011

Black Pepper Blackberry Slush – Relax, There's More Food Coming

Very early in my career, I remember being at a somewhat fancy banquet, and after the first course had been served, the waiters came to the table and placed down, what appeared to be a small bowl of sorbet.

I was told it was a "champagne intermezzo." Instead of being happy, I was more concerned that somehow they had forgotten about our main dish and skipped right to dessert. Not wanting to make a fuss, I ate, wondering what going to happen next.

What happened next was a very nice Veal Oscar. Relieved, I admitted to a tablemate the sorbet had caught me a bit off guard. After a few chuckles, it was explained that an intermezzo was a small, refreshing palate cleanser served in between courses.

So, while you are more than welcome to use this black pepper blackberry slush as a dessert, I'm hoping you give it as try as an intermezzo at your next dinner party. Some of you may call this a "granita," and it is very similar, but it's not quite as icy as that. This has a softer, slushier texture.

I made a very small batch, as I only had a half-pint of blackberries, but you can double or triple this easily for a bigger group. You can also make it the day before, "slush it," and keep it frozen until needed. I hope you give it a try soon, but do me a favor, and warn your guests, so they're not worried the meal is over. Enjoy!


Ingredients:
1 cup blackberries
2 1/2 tablespoons sugar
3 tablespoons water
pinch of black pepper
very small pinch of salt

Wednesday, August 17, 2011

#APieforMikey: Love and Loss in the Age of Twitter

Monday, my friend Jennifer Perillo lost her husband, Mikey. At age 51, he suddenly collapsed and died from a massive heart attack – with no warning, he was here one moment, gone the next. I heard about this on Twitter.

The initial shock and disbelief was quickly swept away by waves of profound anger. Not directed towards anyone or anything, I was simply mad at the universe for this cruelly random and incomprehensible event.

I’ve only met Jennifer once, spending a few carefree days with her at a food event in Sonoma a couple years ago, but through our blogs, and more so Twitter, we had become good friends. For all its superfluous minutia, the social network not only makes real friendships possible, it makes them inevitable.

Instead of withdrawing into the darkness, and shutting out the world, Jennifer used her social network to share her grief, and help her cope with this unimaginable loss. She did so with a courage, dignity, and grace far beyond anything I could have managed.

Inundated by online friends asking what they could do to help, she suggested making this Creamy Peanut Butter Pie, as it was a favorite of Mikey’s. If you search the hashtag, #APieforMikey, you’ll see a truly astonishing outpouring of love and support. As I tweeted yesterday, if there's a stronger, more generous and caring online community than food bloggers, I don't know what it would be.

As many of you know, this has been quite an amazing week for me personally, with the announced acquisition. I don’t think I’ve ever experienced such a crazy, hectic week of soaring highs, and gut-punch lows. So, for reasons too trivial to mention, I haven’t made the pie yet, which is okay, since the tribute really isn’t about the pie.

It’s about making something delicious for someone you love, sharing it with them, and then, in Jennifer’s words, “Hug them like there's no tomorrow because today is the only guarantee we can count on.” This is something Michele and I try and do on a regular basis.

Anyway, stay tuned for a future video recipe tribute to Jennifer and Mikey. In the meantime, I wanted to share this extraordinary video done by the incredibly talented White On Rice Couple, Todd and Diane. This has to be the most powerful, sincere, and touching food video I’ve ever seen. Enjoy.

Tuesday, August 16, 2011

What’s Cooking? Allrecipes.tv That’s What!

Even though it will be business as usual here on the blog and Foodwishes’ YouTube channel, one advantage of the new partnership with Allrecipes will be working with my friend, Michael Ketchum, the host and brains behind Allrecipes.tv.

A few years ago, I thought it would be a cool idea to travel around the country for a few months, filming favorite recipes in some of our viewers’ homes. I didn’t have any travel funds for such a trip, so when my sponsorship pitch to Amtrak was politely declined, the idea was shelved. Well, that concept is basically what Michael’s “What’s Cooking?” is all about.

In each webisode, an Allrecipes' home cook shares the tips, tricks, and stories behind their favorite dishes. Anyway, I wanted to introduce you to Michael and Allrecipes.tv, and hope you’ll head over to take a look at their collection of video recipes. Here, Michael joins Kerri in Hutto, Texas, to capture her making a batch of tender pork spare ribs. You can subscribe to the Allrecipes' YouTube channel here.

By the way, I’ll have a brand new video recipe up tomorrow for shrimp and ham gravy (see photo below). Enjoy!

"What's Cooking? How to Make Pork Spare Ribs


Tomorrow on Food Wishes: Shrimp and Ham Gravy!

Thursday, August 11, 2011

Wednesday, August 10, 2011

Review: Vegetarian Thaali at Rajdhani Restaurant, Chennai

I am not an expert in Rajasthani or Gujarathi cuisine. After this vegetarian thaali at the Rajdhani outlet in Express Avenue Mall in Chennai, I wish I was.

rajdhani restaurant vegetarian thaali
We saw this restaurant tucked in one corner of the food court with this amazing looking thaali in the display window. My growling stomach urged me on for a try and I am so glad I agreed.

We went pretty late on a Saturday for lunch at the food court in EA Mall but it was jam packed. Maybe 2pm is not that late by Indian standards but since coming to Singapore I've gotten used to lunch at noon and my stomach was crying bloody murder by then.

rajdhani restaurant vegetarian thaali

The waiters were all Rajasthani or Gujarathi. They bring around this jug and a basin for you to wash your hands at your table before and after eating. He managed to pour the water in a slow trickle and it all escaped into the bottom of that basin. Smart!

rajdhani restaurant vegetarian thaali

Once we are done with washing our hands, the steady barrage of dishes follow. Yummy things keep appearing on your plate at lightning speed.

rajdhani restaurant vegetarian thaali

It was tough to take pictures with a 50mm lens in a crowded restaurant but this thing on top of the rotis, that small flat disk, was mindblowing. It tasted like a much thicker version of puran poli. It was hot and oozing out ghee. I am getting hungry as I type this and I just had my lunch so you can imagine!

rajdhani restaurant vegetarian thaali

The food was amazing. It could be because I am a novice at this cuisines but it tasted very homemade, and very authentic. The only time I had a better Rajasthani meal was at Chowki Dhaani in Jaipur but that doesn't count. This was in the heart of Chennai!

rajdhani restaurant vegetarian thaali

Priced at Rs 375 per thaali, its not a cheap meal. Its an unlimited thaali (except for sweets) with almost 30 items I think, so one round of every item is all most people will be able to manage. TH thought it was too expensive but then we seldom agree on these things so I will let you decide for yourselves. Definitely worth a visit.

Rajdhani Restaurant - Official Website

We visited the branch in EA Mall, same floor as the food court. I hear they have outlets all over India and abroad too. 

Tuesday, August 9, 2011

Ciabatta

I am back with another video installment: a bread baking double feature! This time, ciabatta. The secret to a chewy ciabatta with those characteristic holes is a very wet dough that you handle and shape on a floured surface. As long as you keep things well-floured your bread making adventure won't devolve into a sticky mess. The video is rather long but I wanted to show the shaping in real time. It made me realize that I pat/fondle my dough a lot. You'll see what I mean. The recipes are, of course, from Peter Reinhart's The Bread Baker's Apprentice. Start the day before you want to make the bread with the poolish--I think it tastes better after being in the fridge overnight. I use a stand mixer to make the ciabatta dough, but Reinhart says you can do it with a spoon. I have yet to try that.


Poolish (a bread pre-ferment) from Vegan Dad on Vimeo.


Poolish

INGREDIENTS

- 11.25 oz (2.5 cups) bread flour

- 12 oz (1.5 cups) water, room temperature

- 1/4 tsp instant yeast


Ciabatta from Vegan Dad on Vimeo.


Ciabatta

INGREDIENTS

- poolish, from above

- 13.5 oz (3 cups) bread flour

- 1 3/4 tsp salt

- 1 1/2 tsp instant yeast

- 6 oz (3/4 cup) lukewarm water

Monday, August 8, 2011

Baby Brinjal and Peanut Masala Recipe

I love adding peanuts to stir-fried masala recipes like you would for variety rice recipes like lemon rice and puliogare. The usual suspect that always needs to share the limelight with peanuts is okra. Any time okra masala is made, in go a handful of peanuts.

baby brinjal peanut masala

The other day I got some gorgeous baby brinjals (new-born, even) and had to make something non-fussy and flavourful. Although vatha kozhambu was on the cards, that didn't end up happening so I adapted a quick dry masala recipe for the baby brinjal and peanuts to have a go at each other. I think they like each other. This is a no-onion, no-garlic recipe.

baby brinjal peanut masala

Baby Brinjal and Peanut Masala Recipe 
Serves: 2 

Ingredients:
8-10 baby brinjal
1/2 cup raw unsalted peanuts
1 tbsp coriander powder
1 tsp jeera / cumin seeds
1/4 tsp freshly cracked pepper
A generous pinch of hing / asafoetida
A pinch of turmeric powder
1/4 tsp red chilli powder
A few curry leaves
2 tbsp oil
1/4 tsp mustard seeds
A small piece of tamarind or 1/2 tsp tamarind paste
Salt to taste

How I Made It: 

1. Cut baby brinjal into thin long pieces. I cut each small brinjal into 8 long pieces, lengthwise.

2. Heat oil and add the mustard seeds. When they pop, add the jeera and curry leaves. Once the jeera sizzles and turns a darker share of brown, add the hing and fry for 5 seconds.

3. Now throw in the cut brinjal pieces and the peanuts. Mix well until well coated in the oil. Reduce flame and cook partially covered until the brinjal is soft yet cooked and the peanuts are sufficiently roasted. This should take about 12-15 mins. Sprinkle water if necessary but don't add too much.

4. Now add the turmeric, red chilli powder, coriander powder and the tamarind and mix well until well combined. Cook for another 3-4 mins, add salt, and remove from fire. Serve hot with steamed rice and any curry of choice.

baby brinjal peanut masala

Sunday, August 7, 2011

Guest Attempt: To Catch a Leprechaun

Dear Readers: Let it be known that I'm not solely interested in guest posts from friends making rainbow-centric cakes. I swear, it's just a coincidence! In fact, as you'll see, the impetus behind these various rainbow-themed cakes couldn't be more different. In short, I'm so very excited to bring you this guest attempt from my good friend Kara who happens to also be the author of one of my most favorite blogs.

***

The Envy
When I first saw the Leprechaun Trap Cake on Not Martha, I made brutal fun of it. Boy, does someone need to get laid! I thought. I joked in this way to Amelia, and thought more and more about the cake.

photos via Not Martha

And then it happened—that thing that always happens when I am making fun of someone else's creation: I realize that I am envious. I want to make Leprechaun Trap Cakes. I want a job where I can make anything I want. I want to play so abundantly, detailishly, and colorfully, especially in my kitchen.

The Humbling
It happened on a trip to Alaska with my husband. We were traveling with his parents for two weeks, joined by his brother and brother's wife for one of those. We stayed in exquisite summer cabins, zapped mosquitoes with electronic wands, goofed off with sea otters, and generally explored all you have heard about Alaska: its wild, pristine loveliness, its lack of supermarkets, its mountains-meet-the-sea, Holy Bananas, This Is Our Country?-ness. It was epic—in a quiet sort of way. The way you know when you've met someone you will love forever, but it will be months or years until you can tell him so.

I am not finished with Alaska. I just don't know when we will see each other again.

That is neither here nor there, except that, sometimes, you DON'T know when you've met someone you will love forever. They sneak up on you. Like a leprechaun.

On a particularly stormy-inside, drizzly grey-outside day in the middle of our trip, we drove through a valley called Hatcher's Pass. Hatcher's Pass made everyone think of Ireland, though none of us had been there before. It looked just like the Ireland we all carried in our souls, from a combination of National Geographic photos, mysterious Celtic lineage, or, perhaps more truthfully, Far and Away.

In any case, I was bored and cranky, crunched up in the backseat. I was typing on my laptop—in Alaska! I know, I know, but I can only ride in a car for so many hours without absolutely going out of my mind. It has to do with private head-space, I think. Or control. It's not totally attractive. But I have learned over the years, and dozens of road trips with my husband, to accept it, to plug in the headphones, and go to work. It is better to deal with looking like a workaholic, or to actually be a workaholic, than to throw a tantrum.

So there I was in the backseat, typing away. I was hoping to stay sane, and also, record different ways to develop my creative ideas when I got back home. (One of the biggest boons to vacation, which should be put into Amelia's commercial, is getting fresh ideas for stuck projects waiting back at home.) In the middle of all this brainstorming, I looked out the window at a rain-slick rock nestled into a bunker of moss. I knew then and there that I could not deny my fascination with the Leprechaun Trap Cake any longer. The message was clear, taunting me from a nook behind that glistening rock: I must heed the call and attempt to catch my own leprechaun. And I must do it swiftly, upon my return home, and I must do it with cake.

The Reality (Or, My Continued Struggle To Make Sense of My Desires, And Respect the Wisdom of Their Spontaneous Appearances)
Once I decided to make this cake, I had to confront two issues:

1. I radically cut sugar from my diet in July, after a three-week cleanse that eliminated indecision, depression, and melancholy from my life entirely. Was I really about to dedicate a day or more to crafting something invented to house sugar; voluntarily make electric green icing without the excuse of throwing a child’s birthday party; and serve this creation to myself and others I love, knowing how sugar sucker-punches the digestive system?

2. I did not own an Angel Food Cake pan, nor did I want to own one. But a Bundt Cake Pan was clearly not going to suffice—I had seen the wobbly rainbows produced by such a pan. And if catching a leprechaun is the goal, the integrity of the rainbow inside the cake could not be compromised. I was obsessed by its vibrancy in Not Martha's version. And rainbows always remind me of the chakra system—one color for each of the chakras, starting with red at the root.

With issue Number 1, I decided that anything themed around a vibrant rainbow could not be all bad. Besides, I didn't have to eat it. I could just make it and celebrate it—freaky icing and all—and go about my merry way, tra la la.

With issue Number 2, I had to confront the weird thing I do when I pit creative urges against practical reasoning, which in this case manifested itself in price-comparing the varieties of Angel Food Cake pans for a week, trolling thrift stores to find a cheap one (thus justifying my weird urge to make a cake I do not want to eat), and poll relatives and neighbors (who I don’t know) whether anyone has an AFC pan I could borrow.

What a surprise! They did not.

I knew they would not. I knew I needed to buy one, if I had a chance of making such a perfect rainbow cake as Not Martha’s. But first, I had to struggle. I think this relates to a perverted attachment to drama, at least, Home Economically-leaning, Kara versus The World drama, which plays itself out in unnecessary ways a hundred times a day. I also think I get confused by my husband's upbringing, which prized frugality. I grew up in a different way—a way I think is fair to say prized aesthetics as much as anything else. When I try to play by the Midwestern customs I married into, I get poor results, like the time I borrowed my best friend's sneakers to run the mile in fourth grade, because they were supposed to be more aerodynamic. If I had just stuck to my own ways, I might have been fine. But I like to experiment. And sometimes, that creates confusion and a little discomfort. And then sometimes, it makes me finish dead last.

If we could all call this habit to explode little details into paralyzing life decisions a facet of the novelist in me, that would be awesome. Thanks.

The Reckoning (Or, How I Discovered For the One Millionth Time That Recipes Are Cool, and, How I Discovered That Sugar Is A Hot Lover, Good For Occasional Romps, But I'm Looking For A Better Man)
When I purchased the food coloring for this cake, my mouth went dry and my palms itched. I was so close to the rainbow, my adrenaline started pumping. Next, I looked up recipes.

Because I had invited my vegan friend for dinner, I decided to bake a vegan version of the cake. How hard could it be? I had baked vegan things before. They were all edible. Some were even fantastic. So I plunged ahead with flippant confidence, forgetting one thing about vegan cakes.

Naively clearing just one afternoon for this cake, I began. The vegan recipes I pulled from the Internet were so mediocre that I hesitate to include them here. Instead, I say: pick your favorite vanilla cake recipe, and Magnolia Bakery’s frosting recipe, and go to town. Double the cake recipe for a taller, possibly more rewarding cake.

I sifted flour with the other dry ingredients, and combined liquid ingredients in a separate bowl. As I prepared to add the liquid ingredients to the dry ones, I realized with a sinking feeling why I should have dug further into the website for a proper cake recipe. That was, simply: vinegar. Vinegar, often the final ingredient to vegan baked goods, catalyses the rising agents in baking powder and soda, standing in for the job eggs normally perform in veganless baking. Ideally, one adds vinegar seconds before putting a cake in the oven. But I had to separate the batter before pouring it into the pan, in order to create the different rainbow colors. Shee-it.

Luckily, I have vague ambitions of having a home apothecary someday and snatch whatever eyedroppers cross my path. I added all the ingredients I could without the vinegar, then separated the batter and created my rainbow colors. (The cake recipe I used called for 1 tablespoon of vanilla extract, which I happily added, not thinking of how it would make my batter beige, and thus affect the coloring process. After all, what painters start with a beige canvas? I suggest keeping the extract at a strict teaspoon if your recipe calls for it, or substituting seeds from a vanilla bean, and amping up the food coloring until the colors of your various batters really pop.)

Finally, I added the vinegar by drops to whatever color I needed to pour in next, moments before I poured it. It was sort of tedious, but also sort of the most exciting part of the whole day. Excitement around eyedroppers bodes well for a future apothecary, no?
I baked the cake, took it out, and stared at the hot pink blob that should have been blood red. I was slightly disappointed but since Rome was not built in a day (something I sadly often forget), I moved on. I cooled the cake on a rack and made the icing. I was both mesmerized by the bright green possibilities for the icing, and certain I needed a way around using a pastry bag. I settled on the old coconut trick my mom used for our birthday cakes growing up and dyed a bowlful of shaved coconut by soaking it in tinted water. (This water leered at me from the corner of the counter, growing scarier and blobbier by the hour, by the way. I only had the courage to use it because of my husband's assurance that it would not, in fact, bite me.)
Making the icing proper, I lamented the gobs of powder sugar required for icing and felt how permanent—or grave—the changes in my diet had become. I was actually dreading eating this cake.

I set cake efforts aside and embraced making real food for my friend who was coming to dinner. I was beginning to regret spending so much time on something that was going to turn my mouth weird colors, and not even really feed me. I hesitate to write this on a food blog at all, because I believe in all food as nutrition, and am uncomfortable labeling anything as bad. But balance is the goal here, for me anyway. After many decades of being somewhat addicted to sugar, I am taking a step back. So that I can return to our relationship someday, with appreciation and see all the ways we were there for each other. Remember all those slushies? Fourth of July cakes with fresh blueberries? What about that night you went skinny dipping with friends? Surely that was a sugar-addled decision! Etc, etc. However, I am in my Please-Don't-Call-Me phase with sugar right now. I just need a break.

There is this incredible essay in a collection called (somewhat ludicrously) Roar Softly And Carry a Great Lipstick: 28 Women Writers on Life, Sex, and Survival. The essay, by Anne Lamott, is about drinking and getting sober. The essay's main action takes place on a day that the author was still drinking and follows her mind as she justifies all kinds of drinking as part of her plan to get sober.

I think that making this cake might have been my flirtation with that same kind of thinking: how far do I want to take this new resolve towards health? What are the ways I can tempt fate?

After a satisfying dinner (toasted walnut mushroom burgers, corn on the cob), my friend and husband and I assembled the rest of the cake. At this point, I needed serious reinforcements, because I was in a spiritual tailspin and our un-air-conditioned house hovered around ninety degrees. Our one box fan whirred behind us as I delegated every task I could, yelling out encouragements like, Come on, team! Almost there!
My friend wrapped gold foil around quarters that my husband had reluctantly lent for this project and only agreed to do so if I returned them upon completion. My husband took photographs of the finished cake, growing as obsessed with this task as I had been with recreating the vibrant rainbow. I carpeted the cake with coconut. The ladder was ready (built out of pretzels and—cheat alert!—craft glue). Finally, I drew the crucial sign, advertising the gold a leprechaun might find in the center of our cake.

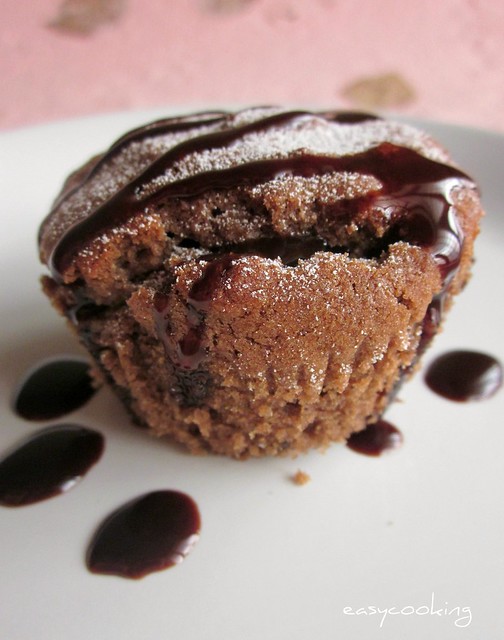
Presto! A Leprechaun Trap Cake. Nothing to it. I swear.
The Wrap-Up
In the end, I believe that all situations are neutral. It is our relationship to them that defines them and empowers our relationships to ourselves. I was once introduced in a lecture on Buddhism to the idea that everything we experience right now builds on what has come before it. I thought of this often, when I met my husband. I was in a draining relationship I desperately wanted to end at the time, and did not know how to do it. Whenever I am tempted to curse the days I spent in that dead-end, I am able to see the blessings of its occurrence: the ways that being unhappy prepared me for my recognition of profound love and the ways that I was still becoming the woman my husband was to meet in those times I felt unhappy.

Making this cake was a little like that. Over the past two years since finishing graduate school, I have simplified my ambitions in profound ways. Spending so much time on this cake, something I didn't really believe in—other than ironically, or competitively—was a gift of awakening, highlighting what activities I do care about and showing me that I don't enjoy messing around anymore in areas I don't care about. It was also a way to rediscover the happiness that I have built without loads of sugar in my diet. I missed the emotional equilibrium and mental clarity I had come to depend upon and recognized its departure as soon as I finished a solitary piece of the (somewhat oily, too-sweet, but very colorful) cake.

It feels a little weird to report on the experiment in this way. I feel a little traitorous, especially imagining all the beautiful treats that you, talented readers, are making. All the berries going into festive pies. All the birthdays celebrated with cake and skinny dipping. But I feel like I need to tell the truth, as soberly as possible, in order to come to terms with the social culture around certain foods and my own relationship to that culture, or those foods, and learn to accept that something beautiful in my mind may not feed my body as well. Sometimes a picture works as well as the real thing. Like in love, sometimes it is healing just to flirt for a night, or a season. (This is one of the miracles of fiction.) Other times, it is good to marry that love—to play games through its grace for as long as possible. The gift in this life is the chance to discover that knife's edge of difference, to navigate by our own gut reactions. Literally. Profoundly. And, ultimately, without remorse.

To your own awakening,
Kara

Thursday, August 4, 2011

Baked Garlic Potato Wedges Recipe

I have made this recipe many many times, each time with some variation or the other, and it has always come out super well. Its a pity these baked potato wedges took this long to show up here but the main reason is, this is a recipe I always use to show off how awesome I am (works each time like a charm) so its almost always made when I have someone visiting.

Baked Garlic Potato Wedges Recipe
Changed watermark to centre of picture because 2 hours after posting this recipe, the picture got copied to two different sites with no credit back to me. 

Finally, I decided enough is enough and managed two quick photos on the side table before I served them. I should say that my skills of cutting potato into wedges have greatly improved since the first time, purely out of practice. I had plans to make a video of how to get perfect potato wedges but that will have to wait for another time.

Meanwhile, make bake these! Its garlicky potato wedges that are tastier than the fried ones, uses minimum oil, is crunchy on the outside and super soft on the inside, its pure deliciousness!

There's a reason why they are the most popular recipe on Shaheen's blog.

Baked Garlic Potato Wedges
Serves 2
Adapted from Purple Foodie and Lottie + Doof

Ingredients:
2 large russet potatoes (or whatever type of potato you have locally)
8 small garlic cloves, freshly crushed
6 tbsp olive oil
3 tbsp cornstarch/cornflour
1 1/2 tsp sea salt (or regular salt)
1 1/2 tsp freshly ground black pepper
½ tsp paprika or Kashmiri red chilli powder
½ tsp garlic powder (optional)

How I Made It:

0. Warm the olive oil (either in a microwave or in a small pan over the stove) and add the crushed garlic pieces. Let the olive warm up and the yummy juices of the garlic seep into it. Dont heat the oil too much, just nicely warm it. Set this oil aside to infuse well until you need it. Pre-heat oven to 200C /  390F. 

1. Bring a saucepan with 4 cups water to a boil. Scrub the potatoes clean (don't peel) and insert into the boiling water. Simmer and let the potatoes par-boil. It usually takes me 10-12 mins. When a knife is inserted it should go in without effort but make sure the potatoes don't become cooked soft or mushy. Remove from water and let it cool on a plate.

2. Cut the cooled potatoes into wedges. I cut each lengthwise into half. Then each piece gets cut into further halves and each of that half into 3 more wedges. Sorry for making you do math when all you want is some baked garlic wedges but that makes 12 wedges in all, per potato.

3. Transfer the potato wedges into a large bowl. Pour in the infused olive oil (remove the crushed garlic pieces), and add all other ingredients into the bowl. Mix gently until well combines. Its important to make sure that the corn flour coats all the pieces well. I usually do this step by hand, rubbing all the ingredients gently into the potato pieces. Crack some pepper on top again if you'd like once you are done mixing.

4. Lay the pieces on a baking tray (you can either use a baking sheet like Silpat, parchment paper, or aluminum foil to line the baking tray) without overlapping. If your baking tray is small, bake in two batches but make sure that you line the potato wedges in a single layer.

5. Bake in the pre-heated oven for 30-40 mins until the wedges are golden brown and crisp on the outside. It may be a good idea to turn the baking tray around once during baking so that all the pieces get uniform heat, more or less. My oven has uneven heat in some corners and I am positive yours does too.

6. Once baked, serve hot with ketchup, mayonnaise, chilly sauce or Sriracha.

Note:

- I have tried many variations in this recipe like adding minced garlic directly into the potato wedges mixture, using regular oil instead of olive oil, cutting potatoes into wedges first and then par-boiling, etc. The quantities and ingredients above gave me the best result so I stick to that now. I have a small bottle of powdered garlic that I have bought specifically to make these baked garlic potato wedges. It really adds to the flavour. 

Cantaloupe Sorbet

I hated cantaloupe when I was a kid and can remember gagging it down a few times, repulsed by both its taste and texture. My kids (save the eldest) did not inherit my juvenile cantaloupe-hating gene and actually have to have their melon intake regulated so there are no ill effects at the other end. But even if you are not crazy about muskmelon, this is a wonderful sorbet with a mellow flavour and smooth texture. It's more or less a play on my Strawberry Daiquiri Sorbet. For those who wonder about the alcohol, it inhibits freezing and gives the sorbet a softer and smoother texture. You don't have to use it, but it is better if you do.

INGREDIENTS
Makes about 4 cups, or 1 quart
- 3.5 cups diced ripe cantaloupe
- 1 cup sugar
- juice of 1 lemon
- 2 tbsp tequila

METHOD
1. Place diced cantaloupe and sugar in a food processor and process until smooth. Add lemon juice and tequila and blend.
2. Place mixture in the fridge for an hour to chill, then process in an ice cream maker. Transfer to a container and freeze overnight before serving.

Tuesday, August 2, 2011

Summer Tomato Pasta with Fresh Basil


I am back home after over two weeks in Philadelphia and am glad to be back in my kitchen. Too bad its so hot I don't feel like cooking and/or baking. The garden fared fairly well after being more or less neglected, but some rodents had their way with my rutabagas. Alas! The first of the tomatoes are starting to ripen, so here is a nice simple pasta that does not heat up the kitchen too much. If you aren't feeding a family of six like I am, you might want to halve the recipe since refrigerated tomatoes taste terrible.

INGREDIENTS
- 1 lb pasta (something small. I used ditali.)
- 2 cups chopped tomato, plus slices for garnish
- 1/2 pkg extra firm tofu, crumbled
- 1 tsp lemon juice
- 1/4 cup nutritional yeast
- salt to taste
- 1/2 cup chopped fresh basil
- 2-3 tbsp olive oil
- salt and pepper to taste

METHOD
1. Cook pasta according to directions.
2. While pasta is cooking, gently mix lemon juice and nutritional yeast into the tofu. Let sit for a few minutes, then mix again and season to taste with salt.
3. When the pasta has cooked, drain and rinse with some cold water to cool down a bit. You want warm but not hot pasta. Mix in olive oil (enough to lightly coat the pasta) and basil. Gently stir in tomatoes and tofu, then season to taste with salt and pepper. Serve at room temperature garnished with tomato slices and some basil leaves.