I've always admired The Daring Bakers and the amazing stuff they whip up the beginning of each month. I have considered joining them many times but didn't want to unless I got a more reliable oven and was sure that I wouldn't miss too many challenges.
But when Ria, Maria and Divya announced A Sweet Punch on similar lines, I couldn't resist. So here goes, our first challenge - Tiramisu Cake from Dorie Greenspan's Baking From My Home To Yours .
.
I took step by step pictures but I am too exhausted to post them all here. There are many steps, this cake makes you work!
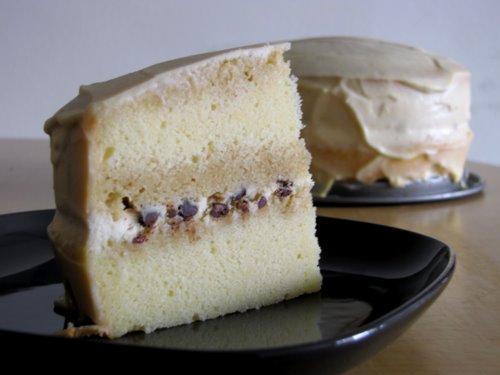
But I'll be damned if I don't show those pics the light of day so I will be posting step by steps as soon as I can spare some time and energy for that. For now, the final version(s).
Like everyone else, I wish I had used more syrup to soak the cake. Also, I made the mistake of refrigerating this too soon so the syrup only soaked through about 1cm of the cake.
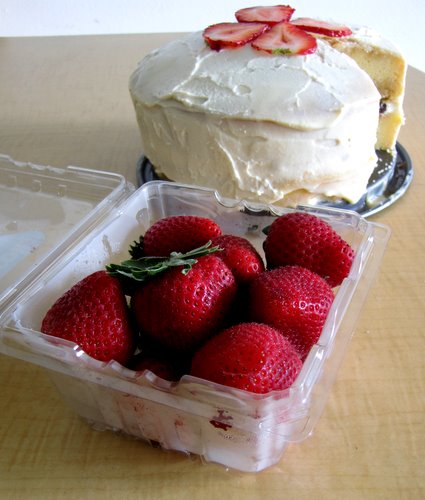
But trust me when I say it tasted great! I wish I had the patience to decorate it a bit but I was out of cocoa powder.
What I did have, were strawberries.
It was intense, filling, dense, and the kick the brandy gave was amazing! I would make this again but probably have the recipe and fill a glass with the layers. The mascarpone cheese is creamy and amazing for frosting so I am definitely buying more of that soon!
The Recipe for Dorie's Tiramisu Cake
For the cake layers:
2 cups cake flour (make your own cake flour)
2 teaspoons baking powder
1/8 teaspoon baking soda
1/4 teaspoon salt
1 1/4 sticks (10 tablespoons) unsalted butter, room temperature
1 cup sugar
3 large eggs
1 large egg yolk
1 1/2 teaspoons pure vanilla extract
3/4 cup buttermilk
For the espresso extract:
2 tablespoons instant espresso powder
2 tablespoons boiling water
For the espresso syrup:
1/2 cup water
1/3 cup sugar
1 tablespoon amaretto, Kahlua, or brandy
For the filling and frosting:
1 8-ounce container mascarpone (store-bought or homemade)
1/2 cup confectioners’ sugar, sifted
1 1/2 teaspoons pure vanilla extract
1 tablespoon amaretto, Kahlua, or brandy
1 cup cold heavy cream
2 1/2 ounces bittersweet or semisweet chocolate, finely chopped, or about 1/2 cup store-bought mini chocolate chips
Chocolate-covered espresso beans, for decoration (optional)
Cocoa powder, for dusting
Getting ready:
Center a rack in the oven and preheat the oven to 350 degrees F. Butter two 9×2 inch round cake pans, dust the insides with flour, tap out the excess, and line the bottoms of the pans with parchment or wax paper. Put the pans on a baking sheet.
To make the cake:
Sift together the cake flour, baking powder, baking soda, and salt.
Working with a stand mixer, preferably fitted with a paddle attachment, or with a hand mixer in a large bowl, beat the butter on medium speed until soft and creamy.
Add the sugar and beat for another 3 minutes. Add the eggs one by one, and then the yolk, beating for 1 minute after each addition. Beat in the vanilla; don’t be concerned if the mixture looks curdled. Reduce the mixer speed to low and add the dry ingredients alternately with the buttermilk, adding the dry ingredients in 3 additions and the milk in 2 (begin and end with the dry ingredients); scrape down the sides of the bowl as needed and mix only until the ingredients disappear into the batter. Divide the batter evenly between the two pans and smooth the tops with a rubber spatula.
Bake for 28 to 30 minutes, rotating the pans at the midway point. When fully baked, the cakes will be golden and springy to the touch and a thin knife inserted into the centers will come out clean. Transfer the cakes to a rack and cool for about 5 minutes, then run a knife around the sides of the cakes, unmold them, and peel off the paper liners. Invert and cool to room temperature right-side up.
To make the extract:
Stir the espresso powder and boiling water together in a small cup until blended. Set aside.
To make the syrup:
Stir the water and sugar together in a small saucepan and bring just to a boil. Pour the syrup into a small heatproof bowl and stir in 1 tablespoon of the espresso extract and the liqueur or brandy; set aside.
To make the filling and frosting:
Put the mascarpone, sugar, vanilla, and liqueur in a large bowl and whisk just until blended and smooth.
Working with the stand mixer with the whisk attachment or with a hand mixer, whip the heavy cream until it holds firm peaks. Switch to a rubber spatula and stir about one quarter of the whipped cream into the mascarpone. Fold in the rest of the whipped cream with a light touch.
To assemble the cake:
If the tops of the cake layers have crowned, use a long serrated knife and a gentle sawing motion to even them. Place one layer right-side up on a cardboard round or a cake plate protected with strips of wax or parchment paper. Using a pastry brush or a small spoon, soak the layer with about one third of the espresso syrup. Smooth some of the mascarpone cream over the layer – user about 1 1/4 cups – and gently press the chopped chocolate into the filling. Put the second cake layer on the counter and soak the top of it with half the remaining espresso syrup, then turn the layer over and position it, soaked side down, over the filling. Soak the top of the cake with the remaining syrup.
For the frosting, whisk 1 to 1 1/2 tablespoons of the remaining espresso extract into the remaining mascarpone filling. Taste the frosting as you go to decide how much extract you want to add. If the frosting looks as if it might be a little too soft to spread over the cake, press a piece of plastic wrap against its surface and refrigerate it for 15 minutes or so. Refrigerate the cake too.
With a long metal icing spatula, smooth the frosting around the sides of the cake and over the top. If you want to decorate the cake with chocolate-covered espresso beans, press them into the filling, making concentric circles of beans or just putting some beans in the center of the cake.
Refrigerate the cake for at least 3 hours (or for up to 1 day) before serving – the elements need time to meld.
Just before serving, dust the top of the cake with cocoa.
Check out the round up in the Sweet Punch website here.
Check out the round up in the Sweet Punch website here.


No comments:
Post a Comment